Your Essential Bolting Inspection Checklist Template
Published: 09/02/2025 Updated: 03/22/2026
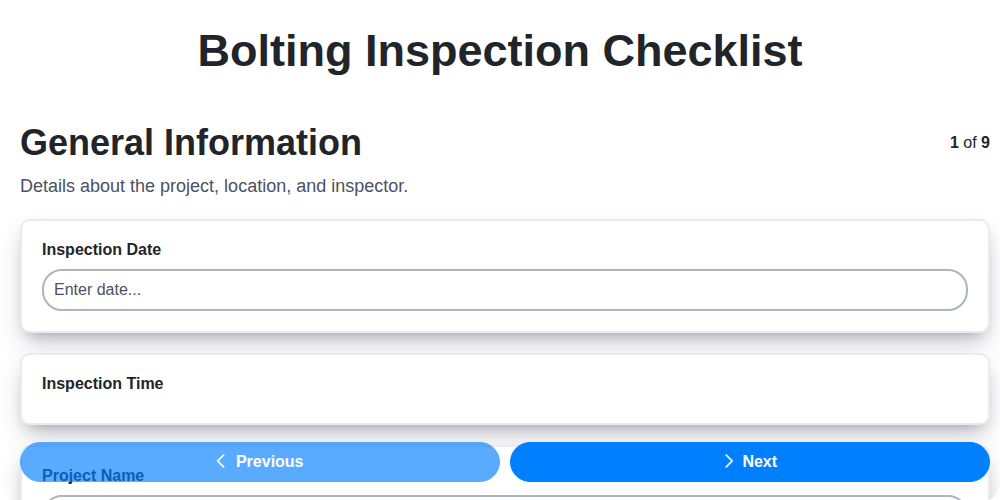
Table of Contents
- Introduction: Why Bolting Inspections Matter
- Understanding Bolting Inspection Standards
- Your Essential Bolting Inspection Checklist Template
- Step 1: General Information & Project Identification
- Step 2: Bolt Identification & Specification
- Step 3: Pre-Installation Bolt Condition Assessment
- Step 4: Torque Application - Procedure & Verification
- Step 5: Visual Inspection of Installed Bolts
- Step 6: Assessing Corrosion and Coating Integrity
- Step 7: Detecting and Evaluating Galling & Damage
- Step 8: Documentation & Sign-Off Protocol
- Step 9: Calibration and Equipment Management
- Step 10: Common Bolting Inspection Pitfalls to Avoid
- Step 11: Leveraging Technology for Efficient Inspections
- Conclusion: Maintaining Structural Integrity Through Consistent Bolting Inspections
- Resources & Links
TLDR: Ensure structural integrity with this free bolting inspection checklist template! It guides you through pre-installation checks, torque verification, corrosion assessment, and more, helping prevent failures and ensuring project safety. Download it, customize it for your project, and keep those bolts in top shape!
Introduction: Why Bolting Inspections Matter
Bolts: they're the unsung heroes holding our infrastructure together. From towering bridges to critical pipelines, bolts bear immense loads and play a vital role in structural integrity. But what happens when those bolts fail, or even degrade over time? The consequences can be catastrophic, ranging from costly repairs to, in the worst cases, structural collapse and potential loss of life.
That's why routine bolting inspections aren't just a good idea-they're a necessity. This isn't simply about tightening bolts; it's about a proactive, systematic process of assessment and verification. Regular inspections identify potential issues before they escalate into serious problems, ensuring the continued safety, reliability, and longevity of your projects. Ignoring this crucial step can leave you exposed to unacceptable risks - risks we aim to mitigate with a clear, actionable checklist.
Understanding Bolting Inspection Standards
Bolting inspections aren't conducted in a vacuum. They's governed by a complex web of industry standards and regulatory guidelines, all aimed at ensuring structural integrity and safety. Navigating these can be daunting, but understanding the basics is crucial for anyone involved in bolting inspections.
Several key organizations and standards frequently appear in bolting inspection procedures. ASTM International (American Society for Testing and Materials) develops standards for materials, products, systems, and services. Their specifications often dictate bolt material grades, dimensions, and testing requirements. For example, ASTM A325 and A490 cover high-strength structural bolts.
The American Institute of Steel Construction (AISC) publishes the Specification for the Design, Fabrication, and Erection of Structural Steel for Buildings, which includes detailed requirements for bolting procedures and inspections. This is often a primary reference for bridge and building projects.
API (American Petroleum Institute) standards are particularly important for the oil and gas industry. API standards, such as API 6A and API 20, outline specific bolting requirements for pipelines, pressure vessels, and other critical equipment.
Beyond these, local building codes and regulations can also dictate bolting inspection procedures. It's vital to be aware of the governing standards relevant to your specific project and ensure that inspections are conducted in full compliance with those requirements. Familiarity with these standards - and a commitment to adhering to them - is a cornerstone of a robust bolting inspection program.
Your Essential Bolting Inspection Checklist Template
While the detailed steps outlined above provide a strong foundation, having a readily accessible template can streamline your bolting inspection process and ensure consistency across projects. Here's a simplified checklist template you can adapt and incorporate into your quality control procedures. Consider this a working document - tailor it to your specific needs and project requirements.
Project Name: _________________________ Date: _________________________ Inspector: _________________________
Bolt Identification & Specification:
- Bolt Size: _________
- Bolt Type: _________
- Material Grade: _________
- Specification Reference: _________
Pre-Installation Inspection:
- Bolt Condition: ☐ Good ☐ Damaged (Describe: _________)
- Thread Condition: ☐ Good ☐ Damaged (Describe: _________)
Torque Application Verification:
- Torque Value: _________ ft-lbs / Nm
- Torque Method: ☐ Static ☐ Turn-of-Nut
- Torque Readings: (Record torque values for each bolt)
- Bolt 1: _________
- Bolt 2: _________
- Bolt 3: _________
- (Continue as needed)
Visual Inspection - Installed Bolts:
- Bolt Head Seating: ☐ Yes ☐ No (Describe if No: _________)
- Joint Separation: ☐ Yes ☐ No (Describe if Yes: _________)
- Coating Condition: ☐ Good ☐ Fair ☐ Poor (Describe: _________)
- Galling/Damage: ☐ Yes ☐ No (Describe if Yes: _________)
Notes/Observations: ____________________________________________________________________________________________________________________________________________________________________________________________________
Sign-Off:
Inspector: _________________________ Date: _________________________
Project Representative: _________________________ Date: _________________________
Step 1: General Information & Project Identification
Before any physical inspection commences, meticulous documentation is paramount. This initial phase, encompassing General Information and Project Identification, lays the foundation for traceability and accountability. Start by recording the date and precise time of the inspection. This seemingly small detail can be critical for resolving discrepancies or tracking trends over time. Equally important is clearly identifying the inspector's name and qualifications - demonstrating their competence to perform the assessment.
Next, thoroughly detail the project itself. Include the project's full name, its exact location, and specifically pinpoint the structure or component currently under scrutiny (e.g., "Bridge Girder 3, Connection Point B"). Cross-referencing this with relevant engineering drawings and plans is essential; note the drawing numbers and revision dates for complete clarity. This level of detail ensures everyone involved understands precisely what's being inspected and why. Don't underestimate the power of a well-documented starting point; it streamlines the entire inspection process and reduces the potential for miscommunication.
Step 2: Bolt Identification & Specification
Before you even think about torqueing a bolt, you must positively identify it and its specifications. This isn't just about knowing it's a bolt; it's about understanding its precise characteristics. Mismatched bolts can lead to catastrophic failures, so accuracy here is paramount.
Here's what you need to determine:
- Size: Diameter (e.g., ½", ¾", 1" ) and length. This often involves precise measurements.
- Type: Is it a hex head, flange head, square head, or another style? The head style impacts seating and load distribution.
- Material Grade: This is arguably the most critical piece of information. Grade 5, Grade 8, A325, A490 - each signifies a specific strength and mechanical property. Using the wrong grade can compromise the entire structure. Look for markings stamped on the bolt head - these are your clues. If markings are missing or illegible, further investigation and verification are essential.
- Specification Reference: What standard governs this bolt? API, ASTM, AISC - understanding the applicable standard ensures it meets the required performance criteria. Reference the project drawings and specifications for this information.
- Manufacturer & Lot Number: While not always readily available, knowing the manufacturer and lot number allows for traceability back to the original production run, which is invaluable if issues arise.
Proper bolt identification is the foundation of a successful inspection. Don't skip this step!
Step 3: Pre-Installation Bolt Condition Assessment
It's tempting to assume that if a bolt is new, it's good to go. However, even brand-new bolts can arrive with defects or damage from handling and storage. A thorough pre-installation assessment is a critical first line of defense against potential failure. This isn't just about visual inspection; it's about validating the bolt's integrity before it's placed in service.
What to Look For:
- Cracks: Examine the bolt shank and head meticulously for any visible cracks. Cracks, even hairline ones, significantly weaken the bolt's strength.
- Surface Imperfections: Look for laps, seams, or other irregularities in the bolt's surface. These can be indicators of manufacturing defects.
- Corrosion: Even new bolts can exhibit surface rust or corrosion, especially if stored in humid environments. Reject any bolts showing significant corrosion.
- Thread Damage: Check for damaged or distorted threads. Cross-threading or incomplete threads compromise the bolt's holding power. A thread gauge can be useful here.
- Head Defects: Inspect the bolt head for cracks, seams, or distortions that might interfere with proper seating and torque application.
- Material Inconsistencies: While difficult to detect visually, any suspicion of material inconsistencies should prompt further investigation, potentially involving material testing.
The Cost of Neglect: Remember, rejecting a substandard bolt before installation is significantly cheaper than dealing with a failed connection in the field. A proactive approach saves time, money, and potentially lives.
Step 4: Torque Application - Procedure & Verification
Proper torque application is arguably the most critical step in a bolting inspection. Simply tightening a bolt isn't enough; it needs to be tightened correctly to achieve the intended clamping force and ensure long-term joint integrity. This section outlines a robust procedure and vital verification steps.
The Turn-of-Nut Method: A Recommended Practice
While static torque application has its place, the turn-of-nut method is generally preferred, particularly for critical joints. This method involves tightening the bolt to the specified preload, then rotating it a prescribed number of degrees (e.g., 90 degrees, 180 degrees). This rotation compensates for friction variations and ensures a more consistent clamping force. Refer to your project specifications for the precise turn-of-nut angle.
Step-by-Step Torque Application Procedure:
- Clean Threads: Ensure the bolt and nut threads are clean and free of debris.
- Initial Snug Tightening: Apply an initial snug tightening, ensuring even pressure across the joint.
- Torque to Specified Preload: Using a calibrated torque wrench, tighten the bolt to the specified preload torque.
- Turn-of-Nut Rotation: Immediately after achieving the preload torque, rotate the nut the prescribed number of degrees, maintaining a consistent tension.
- Document Readings: Record the initial torque reading and the number of degrees rotated.
Verification is Key:
- Calibration Records: Verify the torque wrench is recently calibrated and that the calibration certificate is readily available.
- Torque Range: Ensure the torque wrench is operating within its recommended torque range.
- Consistent Technique: Maintain a consistent tightening technique to minimize variations in applied torque.
- Re-Torquing (If Required): For critical applications, a re-torqueing procedure may be specified after a short period (e.g., 72 hours) to account for any settling or elastic deformation.
- Multiple Readings (Best Practice): Taking multiple torque readings and averaging them can help identify outliers and ensure accuracy.
Step 5: Visual Inspection of Installed Bolts
A thorough visual inspection of installed bolts is more than just a glance - it's a critical assessment of how the bolting system is performing in place. This step isn't about determining torque values (that's covered in Step 4), but about identifying any visible signs of issues that could compromise the connection's integrity.
Begin by carefully examining the bolt head. Is it seated properly against the joint surface? A protruding or unevenly seated head can indicate improper installation or inadequate joint preparation. Look for any signs of distress around the bolt head - cracks, distortion, or discoloration. These could be early warning signs of fatigue or excessive stress.
Next, assess the surrounding joint area. Observe for any gaps or movement between the bolted components. Even slight separation can be a red flag. Look for signs of joint walking (movement during tightening) which might be visible as distorted or marked surfaces.
Finally, document everything you see. Take clear photographs of any anomalies - even seemingly minor imperfections. Detailed records, coupled with your observations, provide a baseline for future inspections and help track the overall health of the bolting system over time. Remember: See something, say something.
Step 6: Assessing Corrosion and Coating Integrity
Corrosion is a relentless enemy to bolted connections, gradually weakening them over time. A proactive assessment of corrosion and coating integrity is vital for long-term structural health. This isn't just about identifying rust; it's about understanding the potential for accelerated deterioration.
Begin by visually inspecting all exposed bolt threads and bearing surfaces for signs of surface rust, pitting, or discoloration. Note the severity and extent of any corrosion - is it light surface rust, or deep pitting that has penetrated the bolt material?
Next, evaluate the condition of any protective coatings. Galvanized coatings may show signs of blistering, cracking, or loss due to abrasion or chemical exposure. Painted coatings can be chipped, flaking, or have compromised adhesion. Document the percentage of coating loss.
Consider the environment. Structures exposed to saltwater, industrial pollutants, or de-icing salts are at higher risk of accelerated corrosion. Record any contributing environmental factors.
A thorough assessment should also include checking for signs of crevice corrosion - a localized form of corrosion that occurs in tight spaces where moisture can become trapped. Photographic documentation is essential for tracking the progression of corrosion over time and informing appropriate remediation strategies. Don't underestimate the impact of seemingly minor surface imperfections - they can be early indicators of more significant problems.
Step 7: Detecting and Evaluating Galling & Damage
Galling and other forms of damage can significantly compromise a bolted connection's strength and reliability. Galling, specifically, is a form of adhesive wear that occurs when two mating surfaces rub against each other under pressure, causing material to be torn away. It often presents as raised, torn, or smeared material on the bolt threads or bearing surfaces. The appearance can range from a slight roughening to severe material transfer.
What to Look For:
- Galling: Examine bolt threads and bearing surfaces closely for any signs of raised, torn, or smeared material. A shiny or metallic residue may also be present. The severity can vary from minor surface imperfections to significant material loss.
- Cracks: Inspect bolt heads, threads, and shank for any visible cracks. These can be hairline or more pronounced.
- Dents or Distortions: Look for any dents, bulges, or distortions in the bolt head or shank.
- Corrosion Pitting: While distinct from galling, corrosion pitting can weaken a bolt and should be noted.
- Thread Damage: Look for stripped or damaged threads.
Evaluation and Action:
- Minor Galling: Slight surface roughening may be acceptable depending on the application and project specifications. Document the finding and monitor during subsequent inspections.
- Significant Galling: Bolts exhibiting significant galling must be rejected and replaced. Galling indicates excessive friction and potential for failure.
- Any Crack or Distorted Bolt: Rejection is mandatory. These indicate structural compromise.
- Documentation: Always thoroughly document any signs of galling or damage, including photographs and detailed descriptions. This documentation should be included in the inspection report.
Proper identification and evaluation of galling and damage are crucial for maintaining the integrity of bolted connections. Early detection and corrective action can prevent costly repairs and, more importantly, ensure safety.
Step 8: Documentation & Sign-Off Protocol
Proper documentation isn't just about compliance; it's about demonstrating due diligence and establishing a clear audit trail. Every bolting inspection should generate a comprehensive report that captures all relevant information. This includes the general information (date, time, inspector), project details, bolt specifications, any deviations from expected results, photographic evidence (absolutely crucial!), and a summary of corrective actions taken.
The inspection report should be clear, concise, and easily understandable by all stakeholders. Utilize a standardized template to ensure consistency and completeness. Digital reporting systems are increasingly valuable, allowing for efficient data storage, analysis, and sharing.
Crucially, the report must be signed off by the inspector, confirming the inspection's completion and the accuracy of the findings. Further sign-off from a designated project representative (e.g., project engineer, quality control manager) formally acknowledges the review and acceptance of the inspection results. Retention of these records is essential, adhering to project requirements and applicable regulations-typically several years, but confirm specific durations. This demonstrates accountability and provides a valuable resource for future reference or potential investigations.
Step 9: Calibration and Equipment Management
A thorough bolting inspection is only as reliable as the tools used to perform it. Calibration isn't merely a formality; it's the bedrock of accurate torque application and reliable assessment. Here's a breakdown of what's involved:
Torque Wrench Calibration: Torque wrenches are prone to drift over time. Establish a strict calibration schedule - typically annually, or more frequently if used extensively. Calibration should be performed by a certified laboratory, and records must be meticulously maintained, including the date, calibration results, and the technician's credentials. Out-of-tolerance torque wrenches must be removed from service immediately.
Beyond Torque Wrenches: Don't overlook other inspection equipment. Calipers, micrometers, and other measuring devices used to assess bolt dimensions or joint clearances also require periodic calibration.
Equipment Inventory & Maintenance: Maintain a detailed inventory of all inspection equipment, including serial numbers, purchase dates, and calibration due dates. Implement a preventative maintenance program, addressing issues like battery replacement, lubrication, and cleaning.
Traceability: Ensure all equipment is clearly labeled with its serial number and calibration status. This facilitates traceability and accountability.
Documentation: Comprehensive records are essential. Keep copies of all calibration certificates, maintenance logs, and equipment usage records readily available for audits and inspections.
Step 10: Common Bolting Inspection Pitfalls to Avoid
Even with a robust checklist, overlooking certain common pitfalls can compromise bolting integrity. Here's what to watch out for:
- Ignoring Environmental Factors: Temperature fluctuations significantly affect bolt torque. A hot bolt will loosen as it cools. Factor in seasonal changes and extreme weather conditions during inspection and re-torque schedules.
- Relying Solely on Torque Values: While torque verification is crucial, it's not the only indicator of proper clamping force. Joint geometry, surface conditions, and bolt material can all influence the actual load. Visual inspection remains vital.
- Incorrect Torque Application Technique: Static vs. Turn-of-Nut methods require different procedures. Incorrect application can lead to over- or under-tightening, both detrimental. Ensure inspectors are properly trained in both methods and consistently follow the specified procedure.
- Neglecting Joint Surface Condition: Rust, debris, or irregular surfaces compromise clamping force. Clean and lubricate joint surfaces as specified in the project documentation before torque application.
- Calibration Lapses: A torque wrench's accuracy degrades over time. Regular calibration is non-negotiable. Document all calibration dates and results.
- Overlooking Subtle Visual Clues: Galling, stretched threads, or even slight discoloration can indicate underlying problems. Pay close attention and don't dismiss seemingly minor observations.
- Insufficient Documentation: Vague notes or missing data are useless. Thorough documentation allows for trend analysis, identifying potential problems before they escalate.
- Lack of Training: Properly trained inspectors are crucial for consistently accurate and reliable bolting inspections.
Step 11: Leveraging Technology for Efficient Inspections
While a paper-based checklist has its place, technology offers a significant boost to bolting inspection efficiency and accuracy. Digital checklists, accessible via tablets or smartphones, streamline the process by eliminating manual data entry and reducing the risk of errors. These platforms often include features like photo annotation, GPS tagging, and real-time data synchronization, allowing for immediate reporting and analysis.
Beyond simple digital forms, specialized bolting inspection software can integrate with torque wrenches and other equipment, automatically recording torque readings and generating detailed reports. This minimizes human intervention and improves data consistency. Some systems even incorporate predictive analytics, flagging potential issues based on historical data and environmental conditions. Cloud-based solutions facilitate collaboration and remote access, allowing project managers and stakeholders to monitor progress in real-time. Investing in these technologies not only saves time and reduces costs but also enhances the overall quality and reliability of the bolting inspection process.
Conclusion: Maintaining Structural Integrity Through Consistent Bolting Inspections
Consistent bolting inspections aren't merely a procedural formality; they represent a proactive investment in the long-term safety and reliability of your structures. By implementing a robust checklist like the one outlined, and diligently adhering to its steps, you've moved beyond reactive maintenance towards a framework of preventative care. Remember, the small details - a correctly torqued bolt, a well-documented inspection, a keen eye for corrosion - collectively contribute to the silent strength that underpins our infrastructure. Don't underestimate the power of consistent diligence. The integrity of your structures, and ultimately the safety of those who rely on them, depends on it.
Resources & Links
- American National Standards Institute (ANSI) : ANSI doesn't create bolting standards directly, but it accredits organizations that do, like ASME and ASTM. This is a central hub for understanding the broader standards ecosystem.
- American Society of Mechanical Engineers (ASME) : ASME publishes many key bolting standards, including those relating to flange connections and bolted joints in pressure vessels and piping. Explore their Boiler and Pressure Vessel Code (BPVC) Section VIII, Division 1 for critical bolting specifications.
- ASTM International : ASTM develops and publishes voluntary consensus standards for a wide range of materials and products, including bolt materials and testing methods. Look for relevant material specifications and testing procedures.
- International Organization for Standardization (ISO) : ISO publishes international standards that can be relevant, especially for global projects. ISO 9001 (Quality Management) can be used as a framework for bolting inspection procedures.
- Bolting Specialist : Provides information, articles, and resources related to bolted joint design, installation, and maintenance, including inspection guidance.
- Hexagon : Hexagon is a technology company specializing in measurement and sensor technology. Their solutions are often used in bolting inspection applications, particularly in torque verification and data logging. Review their case studies and product offerings.
- Ridge Tool Company (RTW) : RTW, known for brands like Klug-Technik and Sturte, provides specialized tools and equipment for bolting inspection, including torque wrenches and bolt tension meters. Explore their product information and technical resources.
- Rototest : Rototest is a leading provider of torque tightening solutions, including digital torque wrenches and tension monitoring systems. Their site offers technical resources and application examples.
- WIKA : WIKA is a global leader in pressure, temperature, force, and torque measurement. Their website features technical articles and product information related to bolting inspection and calibration.
- American Society for Nondestructive Testing (ASNT) : ASNT provides resources and certification programs for professionals involved in nondestructive testing (NDT), which often includes bolting inspection techniques. Great for understanding NDT methods used in bolting inspection.
- Corrosion-Doctors : Provides comprehensive information about corrosion, including the types of corrosion that affect bolting and strategies for prevention and mitigation.
- Qualitrol : Offers calibration services and equipment for torque tools, ensuring accurate and reliable bolting inspection results. Look for calibration best practices and regulatory compliance information.
Frequently Asked Questions
What is a bolting inspection checklist and why do I need one?
A bolting inspection checklist is a document that outlines the specific checks and tests needed to ensure the integrity and safety of bolted joints. It's crucial to prevent failures, downtime, and potential hazards by systematically verifying torque, joint condition, and other critical factors.
Who should use this checklist template?
This template is designed for maintenance personnel, inspectors, engineers, and anyone responsible for the upkeep and verification of bolted connections in various industries, including but not limited to oil & gas, manufacturing, and construction.
What information should be included in a comprehensive bolting inspection checklist?
A good checklist typically includes items like bolt torque verification, visual inspection for corrosion, cracks, or deformation, thread condition assessment, joint separation measurement, bolt material verification, and documentation of findings.
Can I customize this checklist template to fit my specific needs?
Absolutely! This template is a starting point. Feel free to add or remove items based on the criticality of the bolted joint, the equipment's operating conditions, and your company's specific requirements and safety procedures.
What is 'torque creep' and how does the checklist address it?
Torque creep is the gradual loosening of bolts over time due to factors like vibration and temperature fluctuations. The checklist provides a schedule for periodic re-torqueing to mitigate creep and maintain proper joint clamping force.
What's the difference between static and dynamic bolting inspections?
Static inspections are typically performed on equipment that's not in operation and focus on visual checks and torque verification. Dynamic inspections are conducted on running equipment and might involve more sophisticated methods like vibration analysis or thermal imaging to detect loosening or anomalies.
How do I document the inspection results accurately?
Documenting findings is essential. Record actual torque values, visual observations (photos are helpful!), any discrepancies found, corrective actions taken, and the inspector's signature and date. Ensure this information is easily accessible for future reference and analysis.
What safety precautions should be taken during a bolting inspection?
Always follow proper lockout/tagout procedures to ensure equipment is de-energized. Wear appropriate personal protective equipment (PPE), including gloves, eye protection, and hearing protection as needed. Be aware of potential hazards like high temperatures or confined spaces.
What are common signs of bolting failure that this checklist helps identify?
The checklist facilitates the identification of issues like corrosion, cracks, deformed bolt heads, stretched threads, joint separation, and signs of excessive torque or untorqueing, all of which can indicate bolting failure.
Where can I find more information about bolting best practices?
Refer to industry standards like those from ASME (American Society of Mechanical Engineers), API (American Petroleum Institute), and ISO (International Organization for Standardization) for detailed guidelines on bolting inspections and maintenance.
Found this Article helpful?
Construction Management Solution Demo
Build smarter, not harder! ChecklistGuro streamlines construction projects from planning to closeout. Manage tasks, inspections, safety protocols & more - all in one place. Reduce delays, improve communication, and deliver projects on time & on budget.
Related Articles

The Ultimate Concrete Vibration Checklist Template

Unlock Value: Your Free Value Engineering Checklist Template

The Ultimate HVAC Ductwork Installation Checklist Template

The Ultimate Rebar Placement Checklist Template

Your Concrete Mix Design Verification Checklist: A Step-by-Step Guide

Backfilling & Compaction Checklist: A Foundation's Best Friend

The Ultimate Concrete Delivery & Placement Checklist Template

Your Ultimate Stakeholder Communication Plan Checklist Template
We can do it Together
Need help with
Construction?
Have a question? We're here to help. Please submit your inquiry, and we'll respond promptly.