Construction Material Inventory Checklist Template
Published: 09/10/2025 Updated: 04/23/2026
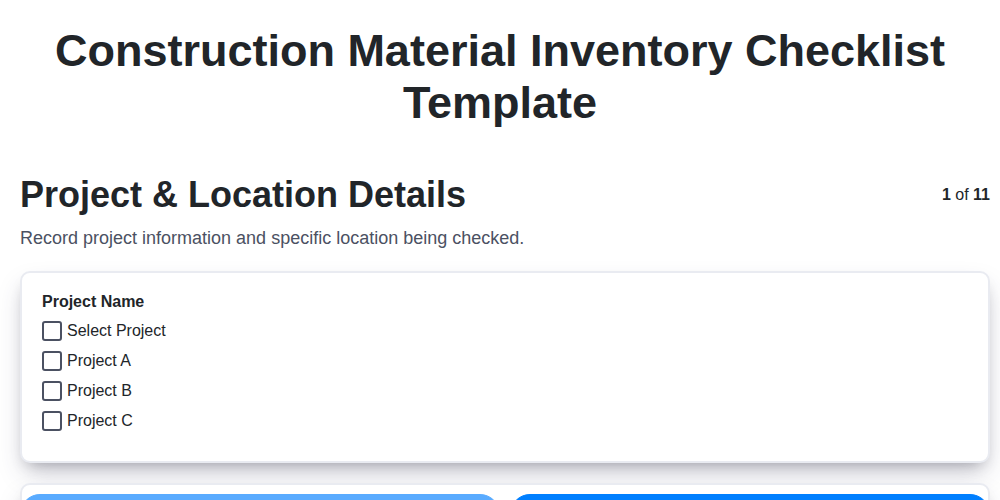
Table of Contents
- Why a Construction Material Inventory Checklist is Essential
- The Core Components of Your Checklist
- Project & Location Details: Setting the Stage
- Lumber Verification: Ensuring Structural Integrity
- Concrete & Aggregate Tracking: Foundation for Success
- Fastener Inventory: Small Parts, Big Impact
- Roofing Material Management: Protecting Your Investment
- Electrical Supply Inventory: Powering the Project
- Plumbing Supply Tracking: Flowing Efficiency
- Tools & Equipment: Maintaining Project Momentum
- Damage Reporting & Discrepancy Resolution
- Resources & Links
TLDR: Losing materials on a construction site hurts your budget and schedule. This checklist template helps you track everything-lumber, concrete, electrical supplies, and more-by walking you through detailed verification steps, damage reporting, and discrepancy resolution. Use it to prevent loss, control costs, and keep your project on track!
Why a Construction Material Inventory Checklist is Essential
Beyond simply knowing what you should have, a meticulous inventory checklist acts as a powerful preventative measure. It directly combats common pitfalls that plague construction projects: material theft and loss due to damage or misplacement. Regular checks, even brief ones, create a deterrent for potential theft and immediately highlight areas where materials are exposed to the elements and at risk. Furthermore, a well-maintained checklist fosters accountability within your team. When everyone understands their role in the process and knows that inventory levels are being monitored, it encourages responsible handling and storage practices, minimizing waste and loss. Ultimately, it's about proactively safeguarding your project's resources and protecting your bottom line - a small investment of time with a substantial return.
The Core Components of Your Checklist
Each effective construction material inventory checklist hinges on several core components, ensuring thoroughness and accuracy. Let's break down what these are, and why they matter.
1. Detailed Material Descriptions: Generic entries like lumber aren't sufficient. You need specifics: type (e.g., pressure-treated, kiln-dried), dimensions (e.g., 2x4x8'), grade, and manufacturer (if relevant). This level of detail minimizes ambiguity and simplifies reconciliation.
2. Quantity Tracking - Received vs. On Hand: Simply noting quantity on hand isn't enough. Your checklist must record the original quantity received and then compare it to the current quantity. This direct comparison immediately highlights discrepancies.
3. Condition Assessment: Materials aren't always delivered in perfect condition. Your checklist needs a designated space to note any damage - warping, cracks, rust, or water damage. Photos are incredibly valuable here.
4. Location Tracking: Where is the material stored? Clearly defining storage locations - "shed A, bay 2", or "staging area near foundation" - prevents lost materials and aids in efficient retrieval.
5. Responsibility Assignment: Identify who is responsible for maintaining the inventory of each material type. This accountability promotes diligence and encourages proactive management.
6. Date and Time Stamps: Every entry should be accurately timestamped. This creates a clear audit trail and helps pinpoint when discrepancies arose.
7. Notes & Comments Section: A free-form notes section allows for contextual information - reasons for adjustments, special instructions, or observations that might not fit neatly into other categories.
Project & Location Details: Setting the Stage
Accurate and complete project details are the bedrock of any successful inventory. This section isn't just about formality; it's about ensuring everyone is on the same page and that the inventory data can be easily referenced and analyzed later. Start by clearly stating the Project Name - the official identifier for the construction effort. Following that, meticulously record the Project Address/Location, including specific details like site number or building designation. The Date & Time of Inventory are crucial for tracking inventory history and identifying trends over time. Finally, document the Inventory Team - listing the names and roles of the individuals conducting the inventory provides accountability and allows for easy follow-up if discrepancies arise. Don't underestimate the importance of this foundational information; it's the key to keeping your inventory organized and useful.
Lumber Verification: Ensuring Structural Integrity
Lumber is the backbone of many construction projects, and its integrity is paramount for structural stability and safety. Thorough verification during inventory isn't just about knowing how much you have; it's about confirming its quality and suitability for its intended purpose.
Begin by meticulously noting the type of lumber: is it framing lumber, decking, or plywood? Record the dimensions (e.g., 2x4x8, 4x6x10). Pay close attention to the grade stamped on the lumber - this indicates its quality and load-bearing capacity. A visual inspection is critical: look for signs of warping, twisting, splitting, knots, and insect damage. Warped or twisted lumber can compromise the structural integrity of a frame, while splitting or excessive knots can weaken connections. Any signs of insect infestation should trigger immediate action and investigation. Don't hesitate to reject lumber that doesn't meet specified quality standards - it's better to delay a delivery than risk a structural failure later on. Accurate documentation of any defects found is essential for communication with suppliers and for future reference. Finally, ensure proper storage to prevent further damage from the elements. Keep lumber dry and protected from direct sunlight.
Concrete & Aggregate Tracking: Foundation for Success
Concrete and aggregates form the bedrock of almost any construction project. Losing track of these materials isn't just inconvenient; it can lead to costly delays and structural compromises. Effective tracking requires more than just a simple count. Here's a breakdown of what you need to monitor:
- Concrete Type: Distinguish between ready-mix, precast, and sack mixes. Ready-mix requires careful scheduling to avoid waste.
- Aggregate Breakdown: Specify the type - gravel, crushed stone, sand - and their grading (size distribution). This impacts mix design and structural integrity.
- Delivery Records: Maintain precise records of delivery dates, quantities, and supplier information. Cross-reference this with site receipts.
- Storage Conditions: Concrete and aggregates are susceptible to weather damage. Protect them from rain, freezing temperatures, and direct sunlight. Document storage location and protection measures.
- Waste Management: Concrete waste is a significant environmental concern. Track waste generation and disposal methods in accordance with local regulations. Consider strategies to minimize waste, like careful ordering and optimized mixing ratios.
- Quality Control: Maintain records of concrete testing results (slump, air content, compressive strength) to ensure compliance with project specifications. A discrepancy here can jeopardize the entire project.
- Re-ordering Protocols: Establish clear re-ordering points based on consumption rates and anticipated project needs to prevent shortages and avoid emergency deliveries.
Fastener Inventory: Small Parts, Big Impact
Fasterners - nails, screws, bolts, anchors - often get overlooked in the grand scheme of construction materials. They're small, seemingly insignificant, and easy to assume are readily available. However, a shortage of these crucial components can bring projects to a screeching halt, leading to costly delays and frustrated crews.
Think about it: a lack of the right screws can stall framing, inadequate bolts can compromise structural integrity, and a shortage of anchors can delay drywall installation. These aren't minor setbacks; they represent wasted time, increased labor costs, and potential safety concerns.
Effective fastener inventory goes beyond just counting boxes. It requires a detailed understanding of project requirements, anticipating needs based on the project's scope, and accurately tracking consumption. Consider these points when managing your fastener inventory:
- Project-Specific Needs: Different projects demand different fasteners. A deck build needs different hardware than a concrete foundation.
- Size and Type Variety: Maintaining a range of sizes and types is crucial to avoid constant reordering.
- Corrosion Resistance: Outdoor projects require fasteners with appropriate corrosion protection.
- Packaging Condition: Damaged packaging can lead to rust, contamination, and wasted materials. Regularly inspect containers.
- Consumption Rate: Track how quickly fasteners are being used to proactively reorder before running out.
- Secure Storage: Protect fasteners from the elements and theft by storing them in a secure, dry location.
Don't underestimate the power of meticulously managing your fasteners - it's a small investment that yields significant returns in efficiency and cost savings.
Roofing Material Management: Protecting Your Investment
Roofing materials are a significant expense on any construction project, and improper management can lead to substantial losses due to theft, damage from weather, or simply misplacement. Protecting your investment begins with careful planning and consistent tracking. Here's how to prioritize roofing material management:
Secure Storage is Key: Roofing materials are often stored on-site, making them vulnerable. Ensure storage areas are well-lit, preferably under cover (tarps or temporary structures), and secured with robust locks. Regularly inspect storage for signs of tampering or damage.
Detailed Labeling & Segregation: Clearly label each bundle or pallet with specifics like type (shingles, metal, membrane), color, style, and date of delivery. Segregate different roofing material types to prevent mixing and ensure the correct materials are used in the right locations. This reduces costly errors during installation.
Inventory Accuracy is Paramount: Implement a meticulous inventory system, documented within your overall construction material checklist. Frequent spot checks and reconciliations between received quantities and on-hand quantities will quickly highlight any discrepancies.
Weather Protection Protocols: Roofing materials are susceptible to weather damage. Strong winds can blow off shingles, rain can saturate insulation, and sun exposure can degrade certain materials. Develop a protocol for securing materials during inclement weather - this might involve tarping, weighting down pallets, or moving materials indoors.
First In, First Out (FIFO): Rotate your roofing stock using the FIFO principle. Install the oldest materials first to minimize the risk of degradation and ensure consistent performance.
Loss Prevention Strategies: Consider security measures like perimeter fencing, security cameras, and employee training to deter theft and promote responsible handling of roofing materials. A documented loss prevention policy is a worthwhile investment.
Electrical Supply Inventory: Powering the Project
Electrical supplies are the lifeblood of any modern construction project. A shortage or mismanaged inventory can lead to frustrating delays and costly rework. This section of your inventory checklist demands particular attention to detail.
Begin by meticulously listing all electrical components, categorizing them by type and size. This includes:
- Wire: Specify gauge (e.g., 12/2, 10/3), type (Romex, THHN, XHHW), and length.
- Conduit: Note size (e.g., 1/2, 3/4, 1) and material (PVC, EMT, Rigid).
- Boxes: Detail size, type (metal, plastic), and depth.
- Receptacles & Switches: Specify amperage and voltage ratings.
- Breakers: Document amperage and type (standard, GFCI, AFCI).
- Connectors & Fittings: Categorize by size and type.
- Lighting Fixtures: Record manufacturer, model number, and wattage.
Beyond simply listing items, track key information for each:
- Quantity Received: Record delivery quantities.
- Quantity On Hand: Conduct a thorough physical count.
- Location: Note the precise storage location of each item.
- Condition: Check for any signs of damage or corrosion, especially for items stored outdoors.
- Voltage & Amperage Ratings: Crucial for preventing errors during installation.
Don't underestimate the value of a well-organized electrical supply inventory. It's your power source for keeping the project flowing smoothly and safely.
Plumbing Supply Tracking: Flowing Efficiency
Plumbing supplies often present unique tracking challenges due to their variety of sizes, fittings, and potential for damage from exposure. Unlike lumber, which is often visibly stacked, plumbing components can easily get lost within storage areas. To ensure smooth project flow and avoid costly delays, meticulous tracking is paramount.
Here's a breakdown of key considerations for plumbing supply inventory:
- Detailed Categorization: Go beyond pipes and fittings. Specify pipe material (PVC, CPVC, PEX, Copper), size (1/2", 3/4", 2"), and schedule (e.g., PVC Schedule 40). Categorize fittings by type (elbows, tees, couplings, valves) and size to match pipe dimensions.
- Storage Conditions: Plumbing materials are susceptible to damage from sunlight, moisture, and physical impact. Regularly inspect storage areas to ensure proper protection. Document any conditions like cracked pipes or damaged fittings in your inventory.
- Traceability: For larger projects, maintain traceability of specific batches or manufacturers. This is crucial for warranty claims or identifying potential defects.
- Fixture Management: Track received and installed fixtures (toilets, sinks, faucets) individually, noting model numbers and installation dates.
- Specialty Items: Don't forget about less common but essential items like specialty valves, drain snakes, and leak detection equipment.
- Regular Cycle Counts: Implement frequent, small-scale inventory checks to proactively identify discrepancies and correct errors before they escalate.
Tools & Equipment: Maintaining Project Momentum
Construction projects thrive on efficiency, and that efficiency is largely driven by the availability and proper functioning of your tools and equipment. Simply having the right tools isn't enough; they need to be readily accessible, well-maintained, and accounted for. A robust inventory system directly supports this.
Your checklist should detail not only what tools and equipment are on site but also their condition. A simple rating system (e.g., Excellent, Good, Fair, Needs Repair) can quickly highlight items requiring maintenance. Beyond the initial assessment, track maintenance schedules. When was the last time the generator was serviced? When are the power tools due for blade replacements?
Loss or damage to equipment can bring work to a standstill. Clearly identifying who is responsible for each piece of equipment promotes accountability and reduces the likelihood of misplaced or damaged items. Include the location of each stored item in your inventory; a designated tool crib or storage area simplifies retrieval and minimizes searching time. Regularly rotating equipment for preventative maintenance (checking fluids, sharpening blades, etc.) also extends its lifespan and reduces downtime. Finally, consider adding a tracking system-barcodes or RFID tags-for higher-value equipment to enable real-time location tracking and deter theft. Remember, a well-maintained tool is a productive tool, and a productive team keeps your project moving forward.
Damage Reporting & Discrepancy Resolution
Discovering damaged or missing materials can be frustrating, but a clear, documented process is crucial for resolution. This section isn't about assigning blame; it's about identifying the problem, preventing recurrence, and getting your project back on track.
Detailed Documentation is Key: When damage or loss is discovered, don't just make a mental note. A comprehensive report should include:
- Description of Damage/Loss: Be specific. "Lumber damaged" isn't enough. Instead, write "Three 2x4x8' pressure-treated lumber pieces - warping and splitting observed on two, one piece with significant insect damage."
- Location: Where was the damaged material found? This helps pinpoint storage or handling issues.
- Potential Cause: While not always immediately apparent, try to identify what might have caused the damage. Was it exposure to the elements, improper handling, or theft? Even a tentative guess can be valuable.
- Photographic Evidence: Photos are invaluable. Capture the damage clearly and from multiple angles. Include a reference point in the photos (e.g., a ruler or measuring tape) to indicate the extent of the damage.
- Initial Assessment of Impact: Briefly note how this damage affects the project schedule or budget.
Resolving Discrepancies: A Step-by-Step Approach:
- Verify the Data: Double-check the original delivery records and existing inventory data to confirm the discrepancy. A simple clerical error can often be the culprit.
- Investigate the Cause: If the discrepancy persists, investigate further. Speak to delivery personnel, warehouse staff, and anyone else involved in handling the materials.
- Determine Corrective Actions: Based on the investigation, outline specific actions to address the discrepancy. This might involve reordering materials, adjusting project plans, or implementing new storage procedures.
- Implement and Monitor: Put the corrective actions into effect and monitor their effectiveness. Regular follow-up checks are essential to ensure the problem doesn't recur.
- Update Documentation: Record all findings and corrective actions in the inventory records for future reference.
Resources & Links
- Construct-A-Checklist : Offers customizable construction checklists, including material inventory templates and other project management tools, valuable for establishing a baseline checklist and understanding industry best practices.
- Procore : A leading construction management software platform. Their site offers articles and resources on inventory management, materials tracking, and overall project efficiency which can inform your checklist development and implementation.
- PlanRoom : Provides construction document management and collaboration tools. Their blog and resources often address materials tracking and inventory, relevant for maintaining a detailed checklist.
- CoConstruct : Construction management software focused on residential construction. Their resources address material ordering, delivery tracking, and inventory control - all crucial elements of a construction material inventory checklist.
- BuilderTrend : Construction management software that incorporates material tracking and ordering features. Their help center and blog offer insights into efficient inventory practices and can help refine your checklist.
- APICS (now ASCM) : The Association for Supply Chain Management. Although broader than just construction, their resources on inventory management and supply chain principles are valuable for understanding best practices in material control. Useful for the 'Core Components' section.
- OSHA (Occupational Safety and Health Administration) : While not directly about inventory, OSHA regulations related to material storage and handling are essential for safety and compliance, a crucial consideration when creating your checklist. Relevant for overall project safety.
- NIST (National Institute of Standards and Technology) : NIST provides standards and guidelines related to construction and materials, ensuring quality and traceability. Relevant to 'Lumber Verification' and 'Concrete & Aggregate Tracking'.
- Portland Cement Association : Provides technical information, guidelines, and best practices related to concrete and cement usage. Informative for the 'Concrete & Aggregate Tracking' section.
- American Iron and Steel Institute : Provides information and resources about steel, its properties, and handling. Particularly useful if your project involves significant steel components.
- Roofing Materials : An industry resource covering roofing materials, installation, and maintenance. Valuable for the 'Roofing Material Management' section.
- IMARC Group : Provides market research and industry reports on construction materials. Might offer insights into material pricing and supply chain considerations.
Frequently Asked Questions
What is a construction material inventory checklist template?
A construction material inventory checklist template is a structured document, often in spreadsheet or PDF format, that helps contractors and construction managers systematically track and manage all materials needed for a project, ensuring nothing is forgotten or lost. It includes columns for material name, quantity, supplier, cost, location, and other relevant details.
Why do I need a construction material inventory checklist template?
Using a template helps prevent overspending on materials, avoids project delays due to shortages, minimizes material waste, improves budget accuracy, ensures materials are readily available when needed, and provides better oversight of project costs.
What information should be included in a construction material inventory checklist template?
Typical information includes: Material Name, Quantity Required, Units of Measurement, Supplier, Cost per Unit, Total Cost, Delivery Date, Location on Site, Received Date, Notes (for specific instructions or concerns), and potentially a Purchase Order Number.
Can I customize the template to fit my specific project needs?
Absolutely! The template is designed to be flexible. You can add, remove, or modify columns to include information specific to your project's materials, suppliers, or tracking requirements. Consider adding columns for material codes, project phases, or inspection details.
What file formats are available for the checklist template?
Most templates are available in common formats like Microsoft Excel (.xlsx), Google Sheets, and PDF. The best format depends on your preferred software and how you want to collaborate with your team. Excel and Google Sheets allow for easy editing and calculations, while PDFs are good for static records.
How can I best utilize the checklist during the project lifecycle?
Use the checklist from the planning phase to estimate materials. Update it as materials are ordered, delivered, and used. Regularly compare the checklist to actual usage to identify discrepancies and prevent shortages. It's also valuable for final project reconciliation and cost analysis.
What's the difference between a material inventory and a bill of materials?
A bill of materials (BOM) lists *all* materials required for a project, like a recipe. A material inventory checklist *tracks* those materials - where they are, how many are on hand, and their status (ordered, received, used). The BOM feeds into the inventory checklist.
How do I handle material waste or damaged materials?
The checklist should include a section for adjustments. When waste or damage occurs, note the adjusted quantity and add a comment explaining the reason for the reduction. This helps accurately track project costs and avoid future ordering errors.
Is there a recommended frequency for updating the inventory checklist?
Ideally, update the checklist daily or as materials are received, used, or if there are any significant changes. More frequent updates lead to more accurate tracking and prevent unexpected shortages or overages.
Found this Article helpful?
Construction Management Solution Demo
Build smarter, not harder! ChecklistGuro streamlines construction projects from planning to closeout. Manage tasks, inspections, safety protocols & more - all in one place. Reduce delays, improve communication, and deliver projects on time & on budget.
Related Articles

The Ultimate Concrete Vibration Checklist Template

Unlock Value: Your Free Value Engineering Checklist Template

The Ultimate HVAC Ductwork Installation Checklist Template

The Ultimate Rebar Placement Checklist Template

Your Concrete Mix Design Verification Checklist: A Step-by-Step Guide

Backfilling & Compaction Checklist: A Foundation's Best Friend

The Ultimate Concrete Delivery & Placement Checklist Template

Your Ultimate Stakeholder Communication Plan Checklist Template
We can do it Together
Need help with
Construction?
Have a question? We're here to help. Please submit your inquiry, and we'll respond promptly.