Building a Solid Base: Your Foundation Curing Checklist Template
Published: 09/02/2025 Updated: 12/13/2025
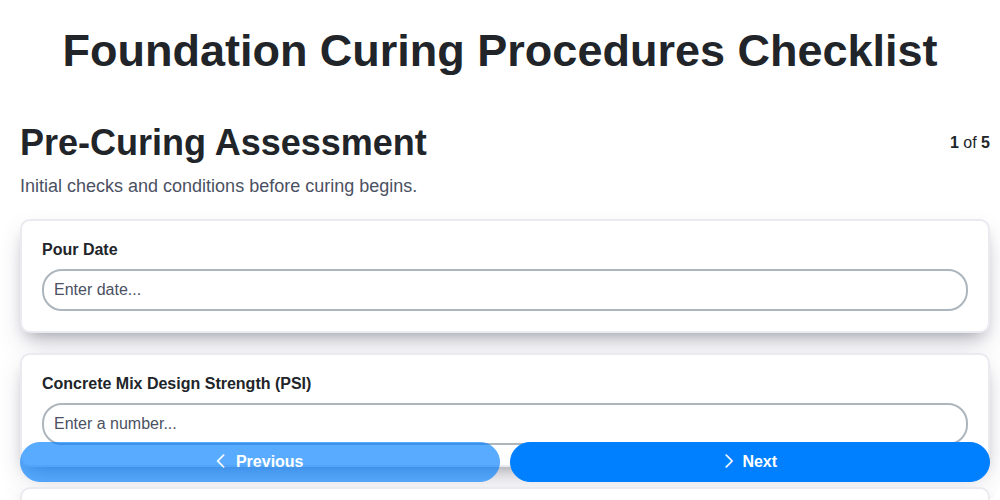
Table of Contents
- Why Foundation Curing Matters
- Understanding Your Concrete Mix
- Choosing the Right Curing Method
- Step-by-Step: Your Foundation Curing Checklist
- Environmental Factors & Adjustments
- Documentation: Tracking Your Progress
- Common Curing Mistakes to Avoid
- Ensuring Long-Term Foundation Health
- Resources & Links
TLDR: This free checklist template ensures your foundations cure properly, preventing cracking and weakness. It guides you through assessment, method selection, application, monitoring, and documentation-saving time, reducing errors, and guaranteeing a durable base for your construction project.
Why Foundation Curing Matters
A foundation's job isn't just to support a structure; it's to provide a stable base for years to come. Concrete, while strong in compression, is inherently susceptible to cracking as it hydrates and shrinks. This process, if left unchecked, can compromise the foundation's integrity, leading to a cascade of problems.
Think of it this way: concrete is like baking bread. You mix the ingredients, but it needs time and the right environment to "bake" - to fully hydrate, gain strength, and achieve its final form. Without proper curing, that concrete remains "underbaked," weak, and prone to issues.
Here's why prioritizing foundation curing is non-negotiable:
- Reduced Cracking: Curing controls the rate of moisture evaporation, minimizing shrinkage and the resulting cracks.
- Increased Strength: Proper hydration leads to a denser, stronger concrete matrix.
- Water Tightness: A well-cured foundation acts as a barrier against groundwater infiltration, protecting your building from moisture damage and potential structural issues.
- Longevity: A durable, well-cured foundation extends the lifespan of your entire structure, reducing long-term maintenance and repair costs.
- Code Compliance: Many building codes mandate specific curing practices to ensure structural safety and longevity. Failing to comply can lead to delays and penalties.
Understanding Your Concrete Mix
Concrete isn't a one-size-fits-all solution. The specific mix design - the carefully proportioned blend of cement, aggregates (sand and gravel), water, and potentially admixtures - significantly impacts its performance, strength, and curing requirements. Ignoring the nuances of your mix can lead to substandard results and costly repairs.
Let's break down the key components and why they matter for effective curing:
1. Cement Type: Different cement types hydrate at varying rates. For example, Type I cement (ordinary Portland cement) hydrates relatively quickly, while Type III (high-early strength) hydrates much faster. Faster hydration can affect the ideal curing timeline and methods.
2. Water-Cement Ratio (w/c): This is arguably the most critical factor. A lower w/c ratio generally leads to stronger, more durable concrete. However, it also makes the concrete more difficult to work with and can affect curing. Excess water can lead to shrinkage and cracking. Always adhere to the specified w/c ratio in your project's mix design.
3. Aggregates: The type and grading of aggregates influence workability, shrinkage, and long-term durability. Well-graded aggregates minimize voids, reducing the amount of cement paste needed and contributing to a more stable and less prone to cracking concrete.
4. Admixtures: These are ingredients added to the concrete mix to modify its properties. Common admixtures include:
- Shrinkage-Reducing Admixtures (SRA): Minimize shrinkage cracking, particularly important in structures subjected to temperature changes.
- Retarders: Slow down the hydration process, providing more time for placement and finishing, crucial in hot weather.
- Water-Reducing Admixtures (WRA): Allows for a lower w/c ratio while maintaining workability, improving strength and durability.
5. Mix Design Documentation: Critically, always consult and adhere strictly to the approved mix design for your project. This document outlines the precise proportions of each ingredient and any specific curing recommendations from the mix designer. Ignoring these recommendations is a recipe for disaster.
Choosing the Right Curing Method
Selecting the optimal curing method isn't a one-size-fits-all decision. It hinges on several interconnected factors, and understanding these nuances is critical for achieving reliable results. Let's break down some common options and their ideal applications.
Water Curing: This traditional method, employing ponding, spraying, or wet burlap, is exceptionally effective but often impractical for large or sloped areas. It provides continuous moisture, promoting deep hydration and minimizing shrinkage cracking. Think of flat slabs or areas easily accessible for flooding. The primary drawback is labor intensity and potential for water waste.
Membrane-Forming Curing Compounds: These liquid compounds, sprayed onto the concrete surface, create a temporary waterproof barrier. They's convenient, cost-effective, and work well on horizontal and vertical surfaces. However, proper application is vital; uneven coverage can lead to inconsistent curing. Consider the type of compound (wax-based, acrylic, etc.) as each has different permeation rates and durability. Temperature and humidity conditions during application directly impact effectiveness.
Curing Mats and Blankets: These provide insulation and retain moisture, particularly useful in colder climates where rapid evaporation is a concern. They are excellent for maintaining consistent temperature and humidity levels, minimizing thermal stress. They are relatively easy to handle, but require careful placement and may not be suitable for all surfaces.
Chemical Admixtures (Shrinkage-Reducing Agents): While not a standalone curing method, incorporating shrinkage-reducing admixtures into the concrete mix can significantly impact the curing process. These agents reduce early-age shrinkage, minimizing cracking and improving overall durability, often used in conjunction with other curing techniques.
A Quick Comparison Table:
| Method | Pros | Cons | Ideal Application |
|---|---|---|---|
| Water Curing | Excellent hydration, minimizes cracking | Labor-intensive, water waste, limited to accessible areas | Flat slabs, easily flooded areas |
| Membrane Curing Compounds | Convenient, cost-effective, suitable for vertical/horizontal | Requires even application, potential for uneven curing | Wide range of applications |
| Curing Mats/Blankets | Effective in cold weather, retains moisture | Requires careful placement | Areas with temperature concerns |
| Chemical Admixtures | Reduces shrinkage, improves durability | Not a standalone cure, requires other methods | Used in conjunction with other curing techniques |
Step-by-Step: Your Foundation Curing Checklist
Let's break down the foundation curing process into actionable steps. This checklist isn't just a formality; it's a roadmap to a durable and structurally sound foundation. Each item is critical and should be documented thoroughly.
1. Pre-Curing Assessment: Laying the Groundwork
Before you even think about applying a curing method, understanding your concrete is essential. This isn't just about verifying the mix design; it's about anticipating potential challenges.
- Confirm the Mix Design: Don't skip this! A concrete mix designed for rapid strength gain might require a different curing approach than one designed for extended workability. Obtain and review the approved mix design, noting the cement type, water-cement ratio, and any specified admixtures.
- Evaluate the Surface: Freshly placed concrete isn't perfect. Look for surface irregularities, voids, or inconsistencies in consolidation. Minor imperfections can often be addressed during the finishing process, but significant issues warrant further investigation.
- Assess Initial Moisture: While difficult to measure precisely in the field, a visual assessment of surface moisture provides a baseline. Is the surface damp, moderately moist, or relatively dry? Record your observations - this impacts method selection.
2. Curing Method Selection & Preparation: Choosing Wisely
The choice of curing method dictates the subsequent steps. Consider factors like climate, budget, and surface geometry.
- Method Justification: Document why a specific method was selected. Was water curing deemed unsuitable due to drainage issues? Was a curing compound chosen for its convenience and cost-effectiveness? A clear justification protects against future disputes.
- Material Inventory: Ensure you have everything needed - enough curing compound, burlap, or water. Shortages lead to delays and inconsistent results.
- Equipment Check: Spray equipment, pumps, and moisture meters need to be tested and calibrated before use. Malfunctioning equipment compromises the curing process.
- Team Training: Everyone involved in applying the curing method needs to understand the correct procedures and safety precautions.
3. Curing Application & Monitoring: Consistency is Key
This is where the plan turns into action.
- Timing is Everything: Most curing methods have a critical window for application after concrete placement. Follow manufacturer's recommendations precisely. Delaying application can compromise effectiveness.
- Even Coverage: Whether you're spraying a curing compound or laying burlap, ensure uniform coverage. Uneven application creates areas of differing moisture levels, potentially leading to differential shrinkage.
- Regular Monitoring: Don't just apply the method and walk away. Check moisture levels, temperature, and humidity regularly. Adjust the curing process as needed. Document all observations.
- Addressing Issues: If you notice inconsistencies or problems during the curing process (e.g., uneven application, premature drying), take immediate corrective action and document the steps taken.
4. Documentation & Sign-Off: Building a Record
This isn't just paperwork; it's your protection and proof of a job well done. A complete and accurate record provides a clear audit trail of the curing process, minimizing potential liability.
Remember, this checklist is a guide. Adapt it to your specific project's needs, and always prioritize quality and adherence to best practices.
Environmental Factors & Adjustments
The success of your foundation curing isn't solely dependent on the method you choose; it's inextricably linked to the surrounding environment. Fluctuations in temperature, humidity, and wind can dramatically impact the rate of moisture loss from the concrete and, consequently, its strength and durability. Understanding these factors and being prepared to make adjustments is crucial.
Temperature's Influence: High temperatures accelerate the hydration process, leading to rapid water evaporation and potentially surface cracking. Conversely, low temperatures slow hydration, hindering strength development and increasing the risk of freeze-thaw damage. When temperatures exceed 85°F (29°C), consider applying a curing compound or increasing the frequency of water curing to compensate for increased evaporation. In colder conditions below 50°F (10°C), protective measures like insulated blankets or enclosures are vital to maintain adequate hydration temperatures.
Humidity: The Moisture Balance: Relative humidity dictates the air's ability to hold moisture. Low humidity (below 40%) significantly increases the rate of evaporation, necessitating more aggressive curing methods. Employ fogging systems, tarping, or applying a curing compound to retain moisture. Higher humidity levels, while generally beneficial, can also lead to problems if they create a saturated surface, potentially hindering proper hydration.
Wind's Evaporative Impact: Wind accelerates the loss of moisture from the concrete surface. Even a gentle breeze can double or triple the rate of evaporation, especially in hot and dry conditions. Shielding the concrete from wind using temporary barriers or windbreaks is often a simple but effective solution.
Real-Time Adjustments: The key is to monitor these environmental conditions throughout the curing process and be ready to adapt your approach. Regular temperature and humidity readings, combined with visual observation of the concrete surface, will allow you to identify potential issues early and make necessary adjustments to ensure optimal curing. Don't hesitate to increase curing frequency, alter application techniques, or implement additional protective measures based on the prevailing conditions.
Documentation: Tracking Your Progress
Documenting your foundation curing progress isn't just about ticking boxes on a checklist; it's about building a robust record that provides assurance, facilitates communication, and offers a valuable audit trail. A well-maintained curing log demonstrates due diligence and provides critical information if any issues arise later.
What should you include in your documentation? It goes beyond just recording that a method was applied. Consider these key elements:
- Date and Time Stamps: Every curing step - from initial application to subsequent monitoring - needs a clear timestamp. This establishes a precise timeline.
- Method Details: Specify exactly which curing method was used (e.g., "Membrane curing compound - CureSeal 700"). Include manufacturer and product details.
- Application Rates & Quantities: Record the amount of curing compound applied per square foot or the volume of water used in ponding. This helps ensure consistency and allows for adjustments if needed.
- Environmental Conditions: Document air temperature, humidity, and wind speed at the time of application and during monitoring periods. This provides context for the curing process.
- Personnel Involved: Identify who performed the curing application and monitoring. This provides accountability and allows for targeted training if needed.
- Visual Records: Photographs or short videos are incredibly valuable. They offer a visual confirmation of the curing process and can be particularly useful in identifying any irregularities.
- Observations & Adjustments: Note any observations about the concrete's surface, moisture levels, or potential problems. Also, record any adjustments made to the curing process based on these observations.
Digital records are increasingly preferred for their ease of storage, sharing, and analysis. However, a hard copy, properly maintained, is also perfectly acceptable. The key is consistency and clarity.
Common Curing Mistakes to Avoid
Even with a solid checklist in place, mistakes happen. Recognizing and avoiding these common pitfalls can significantly improve the effectiveness of your curing process and the long-term health of your foundation.
1. Delaying the Start: Time is of the essence. Waiting too long to begin curing allows critical moisture to evaporate, hindering hydration and leading to cracking. Aim to start curing within 30-60 minutes of concrete placement whenever possible, especially in hot or windy conditions.
2. Insufficient Moisture: Simply spraying the surface isn't always enough. Many curing methods require consistent moisture. Ponding needs to be maintained, burlap needs to stay wet, and membranes must be applied evenly to create a complete barrier. Regularly check and replenish moisture as needed.
3. Ignoring Environmental Factors: A beautiful, sunny day can quickly become a curing disaster. Direct sunlight accelerates evaporation, while freezing temperatures halt hydration. Plan accordingly, providing shade, windbreaks, or insulation as needed.
4. Improper Membrane Application: Applying curing compounds too thinly or unevenly results in inconsistent protection. Follow manufacturer instructions precisely, ensuring complete coverage and avoiding overlaps or missed areas. Surface preparation (cleaning) is also crucial for proper adhesion.
5. Neglecting Edges and Corners: These areas are often overlooked, yet are just as vulnerable to moisture loss. Be diligent in applying curing methods to all exposed edges and corners of the foundation.
6. Using the Wrong Curing Method: Not all methods are created equal. Choose a method appropriate for the concrete mix design, environmental conditions, and project constraints. A one-size-fits-all approach rarely works.
7. Assuming Curing is Set and Forget: Curing isn't a one-time event. Consistent monitoring and adjustments are necessary to ensure optimal results throughout the curing period. Regular inspections are key to catching and correcting potential problems early on.
Ensuring Long-Term Foundation Health
While meticulous curing establishes a strong foundation, the journey doesn't end there. Long-term foundation health demands ongoing vigilance and proactive measures. Think of curing as the critical 'startup' phase; consistent maintenance keeps the system running smoothly for decades.
Several factors can impact a foundation's condition years after initial construction. Soil settlement, changes in groundwater levels, tree root intrusion, and even the subtle shifts caused by freeze-thaw cycles can all contribute to issues. Ignoring these potential threats can lead to cracks, uneven settling, and ultimately, costly repairs.
Here's what you can do to safeguard your foundation's health long after the curing process:
- Regular Inspections: Schedule periodic visual inspections (at least every 6 months, more frequently in areas with known soil or water concerns). Look for cracks, settlement, bulging, or any unusual signs. Document findings with photos and notes.
- Manage Vegetation: Keep trees and shrubs a safe distance (at least twice the mature height of the plant) from the foundation to prevent root intrusion.
- Maintain Proper Drainage: Ensure gutters and downspouts are functioning correctly, directing water away from the foundation. Regularly clear debris from around the foundation perimeter. Consider installing a French drain system if water pooling is a persistent problem.
- Monitor Groundwater Levels: If your property is susceptible to groundwater fluctuations, track water table levels. This information can help predict potential settlement issues.
- Address Minor Cracks Promptly: Even hairline cracks should be monitored and addressed promptly. Ignoring them can allow water and soil to penetrate, exacerbating the problem. Consult with a structural engineer for appropriate repair methods.
- Protect from Freeze-Thaw Cycles: In colder climates, protect the foundation from freeze-thaw cycles by ensuring proper insulation and grading to prevent water accumulation around the foundation.
By incorporating these preventative measures into your maintenance routine, you can significantly extend the life of your foundation and minimize the risk of costly repairs down the line. Remember, a little effort today can save you a lot of headaches - and expense - tomorrow.
Resources & Links
- Portland Cement Association (PCA) : The PCA is a leading authority on cement and concrete technology. Their website offers extensive information on concrete curing methods, best practices, technical guides, and research papers covering virtually every aspect of foundation curing, including humidity control, temperature effects, and proper material selection. A must-have for technical details.
- Concrete Construction Magazine : This website and magazine provide practical advice, case studies, and articles for concrete contractors. Look for articles related to curing, moisture control, and best practices for foundation work. Offers a good balance of theory and real-world application.
- ASHI (American Society of Home Inspectors) : While focused on inspections, ASHI provides information on common construction defects, including issues related to improper concrete curing. Useful for understanding potential long-term consequences of poor curing practices and how to identify them during inspections. Check their technical resources section.
- National Ready Mixed Concrete Association (NRMCA) : The NRMCA focuses on the ready-mixed concrete industry. They offer resources related to mix design, quality control, and best practices for concrete placement and curing. Great for understanding the role of the concrete supplier and proper mix proportions.
- Florida Concrete & Products : This organization offers extensive resources and guides on concrete construction, including curing techniques, and often have localized considerations for curing in different climates. It can be a good reference for regional adjustments to curing methods.
- Master Builders Solutions : A global supplier of construction chemicals, their website contains technical data sheets and application guides for various curing compounds and related products. Useful for understanding the properties and application methods of different curing agents.
- Wacker Neuson : While a manufacturer of construction equipment, Wacker Neuson's website provides information and resources about concrete curing techniques and tools, including moisture control systems and related technologies. Useful for understanding different equipment options for achieving proper curing conditions.
- Thermamet : Specializes in temperature monitoring systems for concrete. Useful for understanding and implementing robust temperature control strategies during curing, an essential part of achieving optimal strength development. Their site provides information on temperature sensors and data logging.
- Sika USA : Another leading supplier of construction chemicals and materials. Their website includes technical documentation and product information on curing compounds and related products, along with application advice and best practices. Provides a comprehensive look at different curing material options.
- Build With Certainty : Offers a wealth of resources relating to concrete construction practices, including curing. It focuses on a holistic approach to quality control and includes checklists and guidelines to ensure consistent results. Good for seeing a larger picture of construction processes.
Frequently Asked Questions
What is foundation curing and why is it important?
Foundation curing refers to the process where freshly poured concrete gains strength and durability over time. It's crucial because it ensures the foundation's ability to support the structure above, preventing cracking, settling, and other structural issues. Proper curing impacts the long-term stability and lifespan of your building.
What is this checklist template designed to do?
This checklist template is a guide to ensure that all essential steps for proper foundation curing are followed. It's designed for builders, contractors, and homeowners who want to ensure their foundation cures correctly, reducing the risk of future problems.
Who should use this checklist?
This checklist is beneficial for anyone involved in a construction project, including general contractors, foundation crews, concrete finishers, and homeowners overseeing the building process. It's especially useful for those who aren't experts in concrete curing.
What types of curing methods are covered in the checklist?
The checklist covers various common curing methods, including water curing (ponding, spraying), membrane curing, and covering with plastic sheeting. It allows you to select and track the methods best suited for your specific project and climate.
How often should I be checking items on the checklist?
The frequency of checking depends on the specific task. Some items, like moisture levels, require daily monitoring, especially in hot or dry conditions. Others, such as initial covering, are one-time tasks. The checklist provides suggested timelines.
Can I modify the checklist to fit my specific project?
Yes! The checklist is intended as a guide, and you should feel free to adjust it based on your project's specific requirements, climate conditions, and local building codes. Add or remove items as needed.
What does 'relative humidity' mean in the checklist and why is it important?
Relative humidity refers to the amount of moisture in the air compared to the maximum amount of moisture the air can hold at a given temperature. It's important for concrete curing because it directly affects how quickly the concrete dries and hardens. Higher humidity generally leads to slower drying.
What's the difference between 'ponding' and 'spraying' for water curing?
Ponding involves creating pools of water directly on the concrete surface. Spraying involves repeatedly applying water to the surface. Both methods keep the concrete moist, but ponding is generally more effective in preventing moisture loss in hotter, windier conditions.
What are some signs that my foundation is *not* curing properly?
Signs of improper curing can include excessive cracking, dusting (a powdery surface), rapid drying, and significant shrinkage. If you notice any of these signs, consult with a concrete specialist immediately.
Where can I find more information about concrete curing best practices?
Several resources are available, including the American Concrete Institute (ACI), local building code departments, and concrete supply companies. A quick online search for 'concrete curing best practices' will yield a wealth of information.
Found this Article helpful?
Construction Management Solution Demo
Build smarter, not harder! ChecklistGuro streamlines construction projects from planning to closeout. Manage tasks, inspections, safety protocols & more - all in one place. Reduce delays, improve communication, and deliver projects on time & on budget.
Related Articles

The Ultimate Concrete Vibration Checklist Template

Unlock Value: Your Free Value Engineering Checklist Template

The Ultimate HVAC Ductwork Installation Checklist Template

The Ultimate Rebar Placement Checklist Template

Your Concrete Mix Design Verification Checklist: A Step-by-Step Guide

Backfilling & Compaction Checklist: A Foundation's Best Friend

The Ultimate Concrete Delivery & Placement Checklist Template

Your Ultimate Stakeholder Communication Plan Checklist Template
We can do it Together
Need help with
Construction?
Have a question? We're here to help. Please submit your inquiry, and we'll respond promptly.