The Ultimate Foundation Waterproofing Installation Checklist Template
Published: 09/02/2025 Updated: 12/13/2025
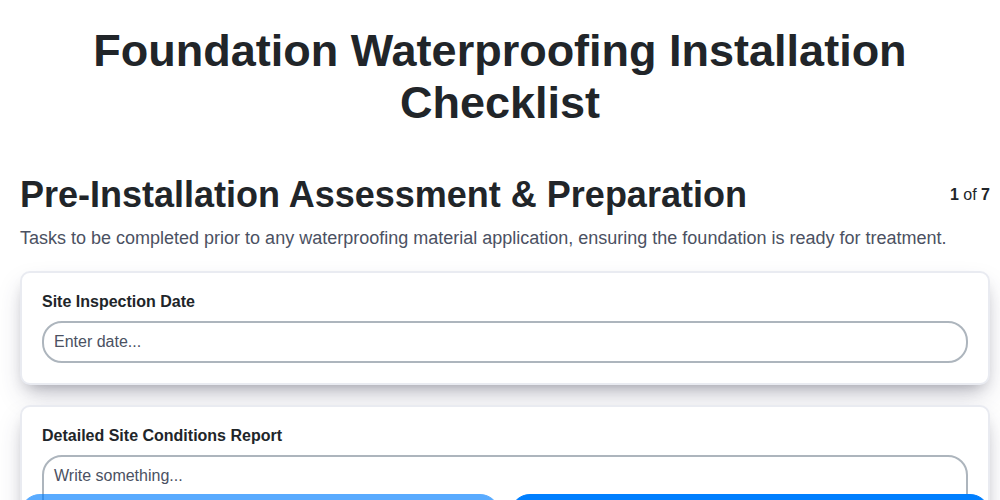
Table of Contents
- Why a Foundation Waterproofing Checklist is Essential
- Pre-Installation Assessment: Laying the Foundation for Success
- Surface Preparation: Creating an Ideal Bonding Surface
- Waterproofing Membrane Application: The Shield Against Water
- Joint and Crack Treatment: Sealing Potential Entry Points
- Drainage System Installation: Guiding Water Away
- Protection and Backfilling: Safeguarding Your Investment
- Quality Control and Documentation: Ensuring a Lasting Solution
- Maintaining Your Waterproofed Foundation
- Resources & Links
TLDR: This template is your one-stop guide for a watertight foundation! It breaks down the entire waterproofing process - from assessment to documentation - so you can avoid costly mistakes, ensure quality work, and protect your home from water damage. Download the template and use it to guide every step, whether you've hired a contractor or are doing it yourself!
Why a Foundation Waterproofing Checklist is Essential
A foundation waterproofing project isn't just about applying a product; it's a complex process with many potential pitfalls. Skipping steps or using incorrect techniques can lead to recurring water intrusion, costly repairs, and a compromised home. A detailed checklist acts as your roadmap, ensuring every critical action is completed correctly and consistently. Think of it as insurance against future headaches - it provides a documented record of the work performed, protects your investment, and facilitates warranty claims if issues arise. Beyond that, it promotes clear communication between homeowners and contractors, minimizing misunderstandings and fostering a collaborative approach to a critical home improvement project. Simply put, a checklist transforms a potentially risky endeavor into a well-managed, reliable solution.
Pre-Installation Assessment: Laying the Foundation for Success
Before a single gallon of waterproofing membrane touches your foundation, a thorough assessment is absolutely crucial. Skipping this step is like building a house on sand - it might seem fine for a while, but eventually, problems will arise. This isn't just about looking for obvious cracks; it's about understanding why water is intruding and identifying potential weaknesses.
What to Look For:
- Visual Inspection: Walk the entire perimeter of your foundation, both inside and out. Document any cracks (size, depth, pattern), efflorescence (white, powdery deposits indicating moisture), staining, or signs of mold or mildew. Take detailed photographs - these will be invaluable for reference later.
- Moisture Mapping: While a simple visual inspection is important, it doesn't tell the whole story. Consider a more in-depth moisture assessment. This can involve:
- Calcium Chloride Test: This test measures the moisture content in the concrete. Higher readings indicate areas with more moisture intrusion.
- Relative Humidity (RH) Probes: These probes measure the relative humidity within the concrete walls over time, providing a better picture of long-term moisture levels.
- Grading Assessment: Observe how the ground slopes around your foundation. Positive grading (sloping away from the house) is essential for diverting surface water. Negative grading (sloping toward the house) creates a prime pathway for water to seep into your foundation.
- Gutters and Downspouts: Ensure your gutters are clean, properly sized, and directing water away from the foundation. Downspouts should extend far enough to prevent water from pooling near the foundation walls.
- Soil Conditions: The type of soil around your foundation can impact drainage. Clay soils, for example, tend to retain more water than sandy soils. Understanding your soil type can help you anticipate potential drainage issues.
By taking the time to conduct a comprehensive pre-installation assessment, you're laying the groundwork for a long-lasting and effective waterproofing solution.
Surface Preparation: Creating an Ideal Bonding Surface
A flawless waterproofing job hinges on a meticulously prepared surface. Think of it like painting: a smooth, clean canvas ensures the paint adheres beautifully and lasts. With foundation waterproofing, the canvas is your concrete foundation wall.
Before a single drop of membrane is applied, it's critical to remove any contaminants that could compromise adhesion. This means blasting away loose concrete, old coatings, dirt, oil, grease, and any previous failing waterproofing materials. Pressure washing is usually the go-to method for thorough cleaning.
Beyond cleaning, addressing existing cracks is essential. Minor cracks (less than 1/8) can often be sealed after the membrane application with a compatible sealant. However, larger cracks require repair before waterproofing. Use a suitable concrete repair compound, following manufacturer's instructions, to fill and level the cracks, creating a stable and even base for the membrane to bond to.
Finally, remember that new concrete needs to be properly cured before waterproofing - typically a minimum of 28 days. This curing process ensures the concrete reaches its maximum strength and stability, preventing future issues with adhesion. Skipping this step can lead to premature failure of the waterproofing system.
Waterproofing Membrane Application: The Shield Against Water
Choosing the right waterproofing membrane and applying it correctly is arguably the most critical step in protecting your foundation. There's no room for shortcuts here. Several options exist, each with its own advantages and drawbacks, so careful consideration of your soil conditions, water pressure, and budget is essential.
Common Membrane Types:
- Rubberized Asphalt: A tried-and-true option, offering excellent adhesion and waterproofing properties. It's often applied as a multi-layer system with a torch-on method. Requires experienced applicators.
- Polymer-Modified Bitumen (PMB): An upgraded version of asphalt, offering increased flexibility and durability. Often applied with a hot mop or torch-on method.
- Liquid-Applied Membranes: These are typically acrylic or polyurethane-based coatings that are sprayed or rolled onto the foundation walls. They offer seamless coverage and are easier to apply than sheet membranes, but may require multiple coats for adequate protection.
- Bentonite Clay Membranes: These consist of clay layers sandwiched between fabric. They swell when exposed to water, creating a waterproof barrier. Commonly used in large-scale projects but can be more expensive.
Application Best Practices:
- Surface Preparation is Key: Remember - a clean, well-prepared surface is paramount for proper adhesion. Any contaminants will compromise the membrane's effectiveness.
- Manufacturer's Instructions: Always adhere to the manufacturer's specific instructions regarding application rates, drying times, and temperature requirements.
- Overlap and Seams: Ensure adequate overlap of membrane sheets, and properly seal all seams to prevent water penetration.
- Corners and Details: Pay special attention to corners, joints, and other critical details. These are often vulnerable points.
- Multiple Coats (if required): Some membranes, particularly liquid-applied systems, require multiple coats to achieve the specified thickness and waterproofing performance. Allow each coat to dry completely before applying the next.
- Quality Control: Regularly inspect the application to ensure uniformity and identify any defects.
Joint and Crack Treatment: Sealing Potential Entry Points
Joints and cracks in foundation walls, even seemingly minor ones, can become significant pathways for water intrusion. While the waterproofing membrane provides a primary barrier, proper treatment of these weak points is crucial for a truly watertight foundation. This isn't simply about slathering on sealant; it's about addressing them strategically.
Expansion Joints: Flexibility is Key
Expansion joints are designed to accommodate movement within the foundation. These areas must be sealed with a flexible sealant specifically formulated for concrete and compatible with the waterproofing membrane you're using. Rigid sealants will crack and fail as the foundation shifts. Pay close attention to the manufacturer's instructions regarding application thickness and curing time.
Minor Cracks (Up to 1/8): A Two-Step Approach
Smaller cracks, less than 1/8 inch wide, are typically addressed after the primary waterproofing membrane application. While the membrane ideally covers these, a secondary sealing provides an extra layer of protection. Use a high-quality concrete crack filler or a flexible sealant designed for concrete repair. Clean the crack thoroughly before applying the sealant, ensuring proper adhesion.
Addressing Larger Cracks:
Cracks exceeding 1/8 inch may require more extensive repair before waterproofing. This might involve using a concrete patching compound to fill the void and create a stable surface for the membrane to adhere to. Again, proper surface preparation and compatibility with the waterproofing material are essential.
Overlap Matters:
When applying the waterproofing membrane, pay meticulous attention to how the sheets or layers overlap at joints. Follow the manufacturer's specific recommendations regarding overlap width and sealing techniques. This overlap area is a common point of failure if not properly addressed. Regularly inspect these areas during and after installation to ensure the integrity of the seal.
Drainage System Installation: Guiding Water Away
While a robust waterproofing membrane is your primary defense, it's only half the battle. Without a properly installed drainage system, groundwater and surface water will still find their way to your foundation, potentially compromising the membrane's integrity over time. Think of the membrane as a shield, and the drainage system as the river diverting the water before it hits the shield.
The core of a successful foundation drainage system is typically a perforated drain pipe, strategically positioned at the footing level. This pipe, often wrapped in a filter fabric (geotextile), acts as a collection point for groundwater seeping through the soil. The filter fabric prevents soil particles from clogging the pipe's perforations, maintaining its flow capacity.
Surrounding this pipe is a bed of clean, washed gravel. This gravel layer serves two vital functions: it further facilitates water collection and provides stability for the drain pipe. It's absolutely critical to use washed gravel - dirty or silty gravel will quickly clog the system.
The entire drainage system must be sloped to ensure water flows away from the foundation. This slope directs the collected water to a suitable discharge point, which could be daylight (a natural outlet), a dry well, or a sump pit that houses a backup sump pump - particularly important in areas with a high water table. Improper sloping can lead to standing water and eventual drainage failure, negating all the effort and investment in the waterproofing membrane. Regular inspection and maintenance of the drainage system are also essential for long-term performance.
Protection and Backfilling: Safeguarding Your Investment
The waterproofing membrane represents a significant investment in your home's structural integrity, and improper protection during backfilling can negate its effectiveness. This phase isn't just about filling in the excavated area; it's about safeguarding that newly applied shield.
First and foremost, a protective board - typically a dimple board or concrete backer board - must be installed directly over the waterproofing membrane. This board acts as a crucial barrier, preventing damage from falling soil and heavy compaction equipment. Without it, even seemingly minor impacts can puncture or tear the membrane, creating pathways for water to re-enter.
Backfilling should be performed in lifts (layers) no thicker than 12-18 inches, ensuring each layer is thoroughly compacted. Avoid using large rocks or debris which could compromise the membrane's integrity. Use clean, well-draining soil; heavy clay can increase hydrostatic pressure against the foundation.
Grading the soil away from the foundation is equally vital. A slope of at least 6 inches over 10 feet is generally recommended to direct surface water away from the foundation walls and prevent it from pooling against the waterproofing. This simple measure significantly reduces the risk of future water intrusion. Regular inspection of the grading after heavy rainfall is a good practice to ensure it remains effective.
Quality Control and Documentation: Ensuring a Lasting Solution
Quality control isn't just about a final inspection; it's woven into every step of the waterproofing process. Thorough documentation provides a crucial record of the work performed, safeguarding your investment and simplifying future maintenance or warranty claims. Here's what meticulous quality control and documentation entail:
Visual Inspection and Testing: After the backfilling and grading, conduct a final, comprehensive visual inspection of the entire waterproofing system. Look for any signs of damage to the membrane, inadequate drainage, or improper grading. If possible, consider a limited-scope moisture test (as performed initially) to verify the system's effectiveness.
Photographic Evidence: Photographs are your best friend! Take detailed pictures throughout the entire project - from the initial assessment to the completed installation. Document everything, including surface preparation, membrane application, drainage pipe placement, and backfilling. These photos provide irrefutable proof of the work completed and the condition of the foundation.
Material Tracking: Maintain a detailed log of all materials used, including manufacturer names, product types, lot numbers, and quantities. This information is critical for warranty validation and troubleshooting any issues that may arise.
Daily Logs and Observations: Keep a daily log that records the date, weather conditions, tasks completed, and any observations or challenges encountered. This provides a comprehensive timeline of the project and serves as a valuable resource for future reference.
Warranty Documentation: Clearly document all warranty information, including the warranty provider, coverage details, and claim procedures. Provide a copy of this documentation to the homeowner and retain a copy for your records.
As-Built Drawings (Recommended): For larger projects or those requiring more complex waterproofing solutions, consider creating as-built drawings that accurately reflect the installed system. These drawings provide a permanent record of the system's layout and location of key components, simplifying future maintenance and repairs.
Effective quality control and thorough documentation aren't just good practices-they're essential for delivering a lasting waterproofing solution and providing peace of mind to your clients.
Maintaining Your Waterproofed Foundation
A well-installed foundation waterproofing system is a significant investment, but its effectiveness relies on ongoing maintenance and vigilance. Don't let years of protection erode due to neglect. Here's what you can do to keep your foundation dry and stable for years to come.
1. Regular Visual Inspections: Make it a habit to walk around your foundation's exterior at least twice a year - ideally in spring and fall. Look for any signs of cracking, settling, or dampness. Pay close attention to areas where pipes or utility lines enter the foundation.
2. Gutter and Downspout Management: Ensure your gutters are clean and free of debris, and that downspouts are directing water well away from the foundation. Consider extending downspouts if necessary. Clogged gutters can lead to water pooling near the foundation, defeating the purpose of your waterproofing.
3. Landscape Grading: Maintain positive grading away from your foundation. Add soil to correct any areas where water is pooling. Avoid planting shrubs or trees too close to the foundation, as their roots can potentially damage the waterproofing.
4. Sump Pump Monitoring (if applicable): If you have a sump pump, test it regularly (at least quarterly) by pouring water into the sump pit to ensure it's operating correctly. Consider a battery backup system in case of power outages.
5. Addressing Minor Issues Promptly: Don't ignore small cracks or damp spots. Catching problems early can prevent them from escalating into larger, more costly repairs. Consult a professional if you're unsure how to handle a specific issue.
6. Periodic Professional Check-ups: While routine maintenance is crucial, consider having a professional foundation specialist inspect your waterproofing system every 3-5 years. They can identify potential problems that you might miss and recommend preventative measures.
By taking these proactive steps, you can maximize the lifespan and effectiveness of your foundation waterproofing system, safeguarding your home from water damage and preserving its structural integrity.
Resources & Links
- Basement Systems: A leading provider of basement waterproofing solutions. Their website offers a wealth of information on waterproofing techniques, products, and common basement problems. Good for understanding industry best practices and available product options.
- National Waterproofing Contractors: Offers a network of certified waterproofing contractors and resources, providing insights into different waterproofing methods and the importance of proper installation.
- Insulated Concrete Forms Association: While focused on ICF construction, their site has useful information on concrete foundation integrity, which is crucial for effective waterproofing. Understanding concrete's behavior is key to preventing future issues.
- Osmosis: Manufacturer of unique, self-healing clay waterproofing membranes. Their site details membrane application techniques and showcases their product's advantages, useful for exploring alternative waterproofing materials.
- Tremco: Tremco is a major construction materials supplier, offering a wide range of waterproofing solutions, including membranes, sealants, and coatings. Their technical data sheets and application guides can be a valuable reference.
- W. R. Meadows: Similar to Tremco, W. R. Meadows offers a comprehensive range of waterproofing products and related construction materials. Check their product guides for application tips and compatibility information.
- DuPont: DuPont offers several waterproofing materials including membranes and coatings. Their website offers technical information and application guides for various solutions.
- U.S. Green Building Council (USGBC): Focuses on sustainable building practices. Understanding green building standards (like LEED) might be relevant for eco-conscious waterproofing choices and material selection.
- American National Standards Institute (ANSI): ANSI develops standards related to construction and waterproofing. While the full standards documents may require purchase, their site provides context on the importance of adhering to industry standards.
- Home Repair Referrals: This site provides a directory of contractors and helpful guides on home repair, including foundation waterproofing. Helpful for finding local professionals and understanding homeowner perspectives.
Frequently Asked Questions
What is foundation waterproofing and why is it important?
Foundation waterproofing is a system applied to the exterior of a foundation wall to prevent water from entering. It's crucial because water intrusion can lead to structural damage, mold growth, unhealthy indoor air quality, and costly repairs. This checklist helps ensure proper installation to prevent those issues.
Who should use this checklist?
This checklist is designed for waterproofing contractors, installers, and inspectors involved in foundation waterproofing projects. It can also be used by homeowners who want to oversee the work being done and ensure quality.
Is this checklist a substitute for manufacturer's instructions?
No. This checklist is a supplementary guide. Always refer to the specific manufacturer's instructions for the waterproofing system being used. Manufacturer instructions always take precedence.
What types of waterproofing systems does this checklist cover?
The checklist is designed to be adaptable to most common exterior foundation waterproofing systems, including membrane applications, surface coatings, and drainage boards. Specific details may need to be adjusted based on the chosen system.
What is a 'dimple board' and why is it mentioned in the checklist?
Dimple boards (also known as drainage boards) are plastic sheets with bumps or dimples that create a channel for water to flow away from the foundation wall. They are commonly used in conjunction with waterproofing membranes to ensure proper drainage.
What does 'PSI' refer to in the checklist (regarding concrete)?
PSI stands for pounds per square inch, a measurement of concrete compressive strength. The checklist ensures the concrete has sufficient strength to properly adhere to the waterproofing system. The specific PSI required will be detailed in the manufacturer's specifications.
What is the importance of proper surface preparation before waterproofing?
Surface preparation is critical. A clean, sound, and properly prepared surface ensures the waterproofing system adheres correctly and provides a watertight seal. The checklist highlights key preparation steps like concrete cleaning, crack repair, and profiling.
What is the significance of checking the drainage plane?
The drainage plane refers to the area surrounding the foundation that allows water to flow away from the house. Ensuring proper grading and functional downspouts are vital for preventing water from pooling around the foundation and potentially penetrating the waterproofing system.
Can this checklist be customized?
Yes, the checklist is designed to be a template. You can add, remove, or modify items to suit the specific project requirements and the waterproofing system being used. Always prioritize manufacturer's specifications.
Where can I find more information about foundation waterproofing?
Consult with a qualified waterproofing contractor, review manufacturer's documentation, and research resources from reputable organizations like the Waterproofing Contractors Association (WCA).
Found this Article helpful?
Construction Management Solution Demo
Build smarter, not harder! ChecklistGuro streamlines construction projects from planning to closeout. Manage tasks, inspections, safety protocols & more - all in one place. Reduce delays, improve communication, and deliver projects on time & on budget.
Related Articles

The Ultimate Concrete Vibration Checklist Template

Unlock Value: Your Free Value Engineering Checklist Template

The Ultimate HVAC Ductwork Installation Checklist Template

The Ultimate Rebar Placement Checklist Template

Your Concrete Mix Design Verification Checklist: A Step-by-Step Guide

Backfilling & Compaction Checklist: A Foundation's Best Friend

The Ultimate Concrete Delivery & Placement Checklist Template

Your Ultimate Stakeholder Communication Plan Checklist Template
We can do it Together
Need help with
Construction?
Have a question? We're here to help. Please submit your inquiry, and we'll respond promptly.