Mastering Harvest Loss: Your Complete Measurement Checklist Template
Published: 09/02/2025 Updated: 12/13/2025
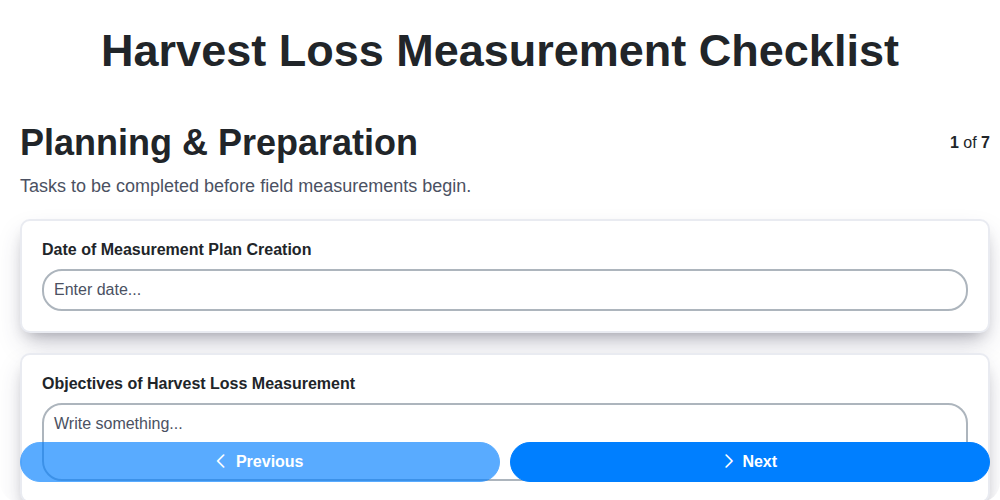
Table of Contents
- Why Measure Harvest Loss? The ROI of Precision
- Setting the Stage: Planning & Preparation for Accurate Measurement
- Field Selection & Stratification: Creating Representative Samples
- Essential Equipment & Materials: Your Harvest Loss Toolkit
- Step-by-Step Measurement Techniques: Choosing the Right Approach
- Data Recording & Analysis: Turning Numbers into Insights
- Reporting Your Findings: Communicating the Results
- Quality Control & Validation: Ensuring Data Integrity
- Common Pitfalls & How to Avoid Them
- Advanced Techniques for Experienced Users
- Harvest Loss Measurement for Different Crop Types
- Interpreting Your Results: What the Data Tells You
- Long-Term Monitoring: Tracking Progress & Identifying Trends
- Resources & Links
TLDR: Tired of losing grain in the field? This checklist template breaks down harvest loss measurement into manageable steps - from planning and equipment to data analysis and reporting. Download it to identify loss hotspots, optimize combine settings, boost yields, and minimize waste, all while ensuring accurate and repeatable results.
Why Measure Harvest Loss? The ROI of Precision
Beyond simply knowing if you're losing grain, understanding the financial implications - the Return on Investment (ROI) - is what truly motivates precision agriculture. Let's break down the tangible benefits. A seemingly small percentage reduction in harvest loss - say, 1% - can translate into a significant boost in profitability, especially for high-value crops. Consider a 2000-acre wheat field yielding 60 bushels per acre. A 1% loss equates to 1200 bushels - potentially worth thousands of dollars, depending on current market prices.
But the ROI extends beyond the immediate grain recovered. Reduced grain loss directly impacts your input costs. Less grain left in the field means you're not wasting fertilizer, herbicides, or other inputs next season. This translates into lower expenses and a more efficient use of resources. Furthermore, minimizing grain loss contributes to a more sustainable farming operation, reducing waste and environmental impact - a growing concern for consumers and a valuable marketing advantage. Finally, a precise understanding of loss patterns allows for informed decisions regarding equipment maintenance and upgrades, ultimately extending the life of your machinery and maximizing its overall performance. It's not just about recovering grain; it's about optimizing your entire farming system.
Setting the Stage: Planning & Preparation for Accurate Measurement
Before you even step foot in the field with your loss plates, a robust planning phase is absolutely critical. Rushing into measurements without proper preparation can lead to skewed data and wasted time. Let's break down the key steps to ensure your efforts are focused and your results are reliable.
1. Define Your Objectives - What Are You Trying to Learn?
Simply saying I want to measure harvest loss isn't enough. Be specific. Are you troubleshooting a specific problem - like excessive grain dropping from the return conveyor? Or are you comparing the performance of different combine settings? Your objective will directly influence where and how you take measurements. For example, if you're focused on the boot area, you'll concentrate your plate placement there.
2. Choose Representative Fields and Crop Stages
Don't just pick any field! Select areas that are characteristic of your overall farming operation. Consider variations in soil type, topography, and crop maturity. If you have significant yield differences between fields, it's wise to test in both high-yielding and lower-yielding areas to get a complete picture. Similarly, if you're dealing with different crop stages (early, mid, late maturity), plan to measure at each stage to account for any differences.
3. Time is of the Essence - Schedule Wisely
Harvest loss measurement requires dedicated time. Factor in the time for equipment setup, the measurement process itself, and data recording. Consider weather conditions-avoid windy days (grain scatter) and overly damp conditions (grain sticking). Scheduling during optimal combine operating conditions (daytime, clear visibility) is also ideal.
4. Safety First - A Non-Negotiable Priority
Combine operation involves inherent risks. Ensure all personnel are properly trained on combine safety procedures. Clearly define roles and responsibilities. Establish communication protocols and emergency plans. Never compromise safety for the sake of collecting data. A minor injury can set you back far more than a few lost minutes.
Field Selection & Stratification: Creating Representative Samples
Choosing the right fields and stratifying them effectively is paramount to obtaining reliable harvest loss data. A biased sample - one that doesn't accurately represent the overall field - can lead to misleading conclusions and wasted effort. Here's how to approach it:
Start with an Assessment: Before you even begin measurements, walk the field. Note variations in crop stand, yield potential (based on plant density and health), soil type, topography (slopes, depressions), and any visible signs of pest or disease pressure. These factors significantly influence grain loss.
Defining Strata: Group areas with similar characteristics into strata. For example:
- Yield Zones: High-yielding areas, medium-yielding areas, and lower-yielding areas.
- Slope: Top of slope, middle of slope, bottom of slope.
- Soil Type: Sandy, loamy, clayey areas (if noticeable differences exist).
- Headlands & Corners: These often have different combine settings or operator techniques applied, so treat them as separate strata.
Random Point Selection: Once strata are defined, use a random number generator (easily found online) or a similar method to select measurement points within each stratum. This ensures every location within that category has an equal chance of being sampled. Don't simply pick what looks representative - randomness minimizes bias.
Edge Considerations: The edge of the field (headlands, corners) often experiences different combine operation compared to the center. Create a separate stratum for the first few passes around the field perimeter to account for this. Document your strategy for selecting points in these areas.
Minimum Sample Size: Aim for a minimum of 3-5 random points per stratum. Larger, more variable fields may require more points for accurate representation. The more complex the field, the more samples you're likely to need.
Essential Equipment & Materials: Your Harvest Loss Toolkit
Accurate harvest loss measurement hinges on having the right tools at hand. While sophisticated technologies exist, a practical and effective toolkit doesn't need to break the bank. Here's a breakdown of essential equipment, categorized by importance:
Core Essentials - You Need These:
- Grain Loss Plates: These are the workhorses of harvest loss measurement. Opt for durable, calibrated plates - ideally, three for placement at the front, middle, and rear of the combine.
- Accurate Weighing Scale: A digital scale with a resolution of at least 1 gram (0.01 lbs) is crucial for precise grain quantification. Portable scales are preferred for field use.
- Measuring Tape: For consistent and repeatable distance measurements, especially when using distance-based loss plate protocols.
- Data Recording Sheets/Tablet: A system for organized data collection is vital. Pre-printed sheets streamline the process, while tablets with data entry apps offer real-time data management.
- Gloves & Safety Glasses: Prioritize safety! Protect your hands and eyes from grain dust and debris.
Highly Recommended - Taking Your Measurements to the Next Level:
- GPS or Mapping Device: Precisely locate measurement points, enabling you to create loss maps and track changes over time.
- Tarps or Collection Containers: For collecting grain from specific areas like the boot or return conveyor.
- Soil Moisture Meter: Changes in soil moisture can impact grain behavior and loss patterns.
- Camera: Documenting field conditions, combine settings, and measurement locations provides valuable context for analysis.
Optional but Useful - For Enhanced Precision & Efficiency:
- Calipers: For precise measurement of grain kernel size (can be relevant in certain research contexts).
- Grain Moisture Meter: Relates to grain weight and can be a factor when interpreting loss measurements.
- Wind Speed Meter: Wind can influence grain dispersal and should be considered in windy conditions.
Remember to maintain your equipment properly to ensure accurate and reliable results. Regularly calibrate your scales and inspect your plates for damage.
Step-by-Step Measurement Techniques: Choosing the Right Approach
Several techniques exist for quantifying harvest loss, each with its strengths and weaknesses. Selecting the right approach depends on your resources, desired level of detail, and the specific questions you're trying to answer. Here's a breakdown of the most common methods:
1. Grain Loss Plates: The Workhorse of Loss Measurement
Grain loss plates are the most widely used method due to their relative simplicity and effectiveness. These square or rectangular plates are placed at strategic locations behind the combine - typically at the front, middle, and rear of the header - and remain in place for a predetermined distance (e.g., 100 feet) or a set amount of time (e.g., 5 minutes). Afterward, the accumulated grain on the plates is carefully collected and weighed. This provides a snapshot of the grain escaping the combine at those specific points. The number of plates used and their placement should be determined by the field variability and the intended analysis. They're great for a general assessment and comparing different combine settings.
2. Auger/Scoop Collection: Targeting Specific Areas
This technique involves using an auger or scoop to collect grain from specific areas of concern, such as the boot area (where grain falls from the threshing cylinder) or the return conveyor. It's particularly useful for investigating localized loss patterns or assessing the performance of a particular component. While more time-consuming than grain loss plates, it offers a more granular understanding of loss sources. Ensure consistent scooping/augering techniques to maintain accuracy and comparability.
3. Tarp/Container Collection: A Comprehensive View
Positioning a large tarp or container directly behind the combine captures all grain falling from the header over a set distance. This provides a 'total loss' measurement, which can be useful for benchmarking and tracking progress over time. However, it can be challenging to accurately weigh and account for all the collected grain, especially in uneven terrain. It's best suited for relatively flat, uniform fields.
4. Seed Loss Collection System (SLCS): Advanced Precision
For more detailed research and precise measurements, Seed Loss Collection Systems (SLCS) are available. These systems are typically more sophisticated and involve specialized equipment for collecting and weighing grain. SLCS systems offer the highest level of accuracy but require significant investment and expertise.
Choosing the Right Combination
Often, a combination of these techniques provides the most comprehensive understanding of harvest loss. For example, you might use grain loss plates for a general assessment and then supplement that with auger collection to investigate a particular area of concern.
Data Recording & Analysis: Turning Numbers into Insights
Collecting data is only half the battle. The real power comes from analyzing it effectively and translating those numbers into concrete actions. A well-organized spreadsheet is your best friend here. We recommend using software like Microsoft Excel or Google Sheets.
Structuring Your Spreadsheet:
- Column Headers: Clearly label each column: Date, Location (Stratum), Combine Operator, Ground Speed, Header Height, Fan Speed, Grain Loss (front plate), Grain Loss (middle plate), Grain Loss (rear plate), Total Loss (g/m² or lbs/acre), Notes (any unusual conditions).
- Consistent Units: Ensure all measurements are recorded using consistent units to avoid errors.
- Formulas are Your Friend: Use spreadsheet formulas to automatically calculate:
- Total Loss: Sum the losses from each plate to get a total loss per area.
- Loss Rate: Convert absolute losses to a loss rate per area (e.g., g/m² or lbs/acre).
- Averages: Calculate average loss rates for each stratum or combine setting.
- Data Validation: Utilize data validation features to limit entries to specific ranges or options, minimizing input errors.
Beyond the Basics: Visualizing Your Data
Spreadsheets aren't just for calculating numbers; they're also excellent tools for creating visualizations.
- Scatter Plots: Explore relationships between combine settings (header height, ground speed) and loss rates.
- Bar Charts: Compare loss rates between different strata or combine operators.
- Line Graphs: Track loss rates over time to identify trends.
Interpreting the Results:
Look for patterns. Are there certain strata or settings consistently associated with higher loss rates? Are there differences in loss rates between operators? Use these insights to develop targeted strategies for minimizing harvest loss. Don't be afraid to experiment and refine your approach.
Reporting Your Findings: Communicating the Results
Your harvest loss measurement isn't just about collecting numbers; it's about driving change and optimizing your operation. A well-crafted report is the key to translating that data into actionable insights. Here's how to effectively communicate your findings:
1. The Executive Summary: The Big Picture
Start with a concise executive summary highlighting the most significant findings - the overall loss rate, areas of greatest concern, and key recommendations. This allows busy readers to quickly grasp the essential takeaways.
2. Visual Communication is Key:
Data tables are necessary, but they can be overwhelming. Use visuals to tell the story:
- Maps: Overlay loss rates on a field map to easily identify spatial patterns and problem areas. Color-coded maps are particularly effective.
- Graphs and Charts: Bar graphs are excellent for comparing loss rates between different areas or combine settings. Pie charts can illustrate the proportion of loss attributed to different sources. Trend lines can show how loss changes over time.
- Photographs: Include photos illustrating areas of heavy loss, such as lodged crop or areas with uneven feeding.
3. Clear and Concise Language:
Avoid technical jargon whenever possible. Explain the findings in plain language that everyone can understand. Focus on the so what? - why these findings matter.
4. Focus on Recommendations:
Don't just present the problem; offer solutions. Clearly outline the recommended actions to reduce harvest loss, including specific adjustments to combine settings, changes to crop management practices, or equipment upgrades. Prioritize these recommendations based on their potential impact and feasibility.
5. Tailor Your Report:
Consider your audience. A report for a farm manager might focus on practical adjustments, while a report for a consultant might include more detailed technical analysis.
6. Interactive Dashboards (Optional):
For larger operations or ongoing monitoring, consider creating an interactive dashboard that allows stakeholders to explore the data in more detail.
Example Reporting Statements:
- Overall harvest loss averaged 3.2% across the field, exceeding our target of 2%.
- Headlands showed consistently higher loss rates, averaging 5.8%, likely due to uneven feeding during turning.
- Adjusting the rotor speed from 800 RPM to 750 RPM reduced loss in the middle section of the field by 0.5%.
Quality Control & Validation: Ensuring Data Integrity
Accurate harvest loss measurement hinges not only on the methods employed, but also on the rigorousness of the quality control measures put in place. Even the most carefully planned experiment can be undermined by undetected errors. Here's how to ensure your data is reliable and your conclusions are valid.
Peer Review and Independent Verification: Having a second person independently observe and record measurements significantly reduces the risk of personal bias or oversight. Ideally, this person should be familiar with the process but not directly involved in the initial data collection. Compare your results - any significant discrepancies should be investigated and resolved through re-measurement.
Standardized Procedures & Training: Ensure all individuals involved in data collection are thoroughly trained on the standardized procedures. Regular refresher training helps maintain consistency and minimize procedural errors. A documented protocol that everyone follows is crucial.
Equipment Calibration & Maintenance: Regularly calibrate your weighing scales and any other measuring instruments. A small error in calibration can compound across multiple measurements, leading to a significant overall error. Keep equipment clean and well-maintained.
Replication & Repeat Measurements: Don't rely on a single pass or a small number of measurements. Multiple passes over the same area, under similar conditions, provide a more robust dataset and allow for the calculation of statistical measures like standard deviation, indicating the variability of your results.
Visual Checks & Reasonableness Assessments: During and after data collection, visually inspect the loss plates and other collection devices. Does the amount of grain collected seem reasonable, given the field conditions and combine settings? If something looks off, it warrants further investigation.
Comparison with Historical Data (if available): If you have historical harvest loss data from previous years, compare your current results. Large deviations from historical trends should be explored and potentially corrected for.
Documentation of Anomalies: Any unexpected observations or deviations from the standard procedure should be meticulously documented, along with the potential cause and corrective action taken. This provides a valuable record for future reference and helps refine the measurement process.
Common Pitfalls & How to Avoid Them
Even with a meticulous plan, harvest loss measurement can be tripped up by unforeseen challenges. Here's a breakdown of common pitfalls and actionable steps to steer clear of them:
1. Inconsistent Combine Settings: This is the biggest culprit for skewed results. Changing ground speed, header height, or fan speed mid-measurement renders comparisons useless. Solution: Establish a clear protocol before you begin and stick to it religiously. Document every setting change, even minor adjustments.
2. Ignoring Edge Effects: Headlands and corners often exhibit different loss patterns due to changes in crop density and terrain. Solution: Recognize that edge losses may differ. Either exclude them from calculations or specifically note and account for them during analysis.
3. Improper Plate Placement: Grain loss plates must be placed in consistent locations - front, middle, and rear - relative to the combine's travel path. Misplaced plates won't provide representative data. Solution: Use visual markers or GPS coordinates to ensure consistent placement across all measurement runs.
4. Weather Interference: Wind and moisture can significantly impact grain collection and weighing accuracy. Solution: Choose days with minimal wind and avoid measurements when crops are excessively wet. Document weather conditions alongside your data.
5. Operator Variability: Different operators have different techniques. One might be more aggressive with the header, leading to different loss patterns. Solution: Ideally, use the same operator for all measurements. If this isn't possible, standardize operating procedures and account for operator differences in your analysis.
6. Neglecting Cleanliness: Ensure your grain loss plates and weighing scales are clean and free of debris. Contaminants can skew results. Solution: Clean equipment thoroughly before each measurement run.
7. Rushing the Process: Accurate measurement takes time. Hasty measurements are prone to errors. Solution: Allocate sufficient time for each measurement run and prioritize accuracy over speed.
8. Failing to Document Everything: Lack of detailed records makes it difficult to troubleshoot issues or compare results over time. Solution: Maintain a comprehensive logbook, including date, time, location, combine settings, weather conditions, and any observations.
Advanced Techniques for Experienced Users
For those already familiar with the fundamentals of harvest loss measurement, a few advanced techniques can dramatically improve accuracy and unlock deeper insights. These strategies require careful attention to detail and a good understanding of combine operation.
1. Temporal Loss Assessment: Rather than just measuring loss over a fixed distance, consider temporal loss - measuring it over a specific time period. This accounts for variations in ground speed and crop density. Record loss separately for each minute or predetermined time interval, especially when traveling across varied terrain or through patchy crop stands. This provides a more granular view of loss patterns.
2. Boot Loss Analysis with Visual Sorting: While grain loss plates quantify overall loss, a more detailed analysis of the type of grain being lost can be incredibly valuable. After collecting grain from the boot area, spend time visually sorting it. Categorize the loss into: mature grain, immature/shriveled grain, weed seeds, and foreign material. This can highlight issues with grain selection or combine head performance. The ratio of immature grain to mature grain can indicate head separation issues.
3. Utilizing Drone Imagery & Precision Mapping: Integrating drone imagery provides a bird's-eye view of loss patterns across the entire field. After combining, fly a drone over the area and use NDVI (Normalized Difference Vegetation Index) or similar indices to identify areas where crop residue is visibly higher - these are likely zones of greater loss. Combine this with GPS data from your combine to create precise loss maps, allowing for targeted adjustments next season.
4. Instrumented Combine Head (for Researchers/Early Adopters): Some research institutions and select manufacturers are developing combine heads equipped with sensors that provide real-time loss data. These advanced systems can provide continuous feedback on head performance and allow for dynamic adjustments to optimize grain recovery. While not readily available to all farmers, this technology represents the future of precision harvest loss management.
5. Analyzing Spread Loss Across Header Width: Variations in crop density and terrain often lead to differences in loss along the width of the header. Divide the header into segments and conduct loss plate measurements at multiple points across the width. This reveals whether one side of the header is consistently losing more grain than the other, pointing to potential problems with reel speed, draper belt alignment, or header angling.
Harvest Loss Measurement for Different Crop Types
While the core principles of harvest loss measurement remain consistent, adapting your approach based on crop type is crucial for accurate and actionable results. Different crops present unique challenges due to variations in grain size, shape, lodging potential, and threshing difficulty.
Cereals (Wheat, Barley, Oats, Rye): These crops often suffer from head-on losses due to shattering and improper header settings. Focus on precise header height adjustments and careful monitoring of the return conveyor. Consider using grain loss plates at frequent intervals across the field to capture variability. Lodging, particularly in wet years, significantly increases head-on losses, requiring lower header heights and potentially a wider cutting width.
Corn (Maize): Corn presents a different set of challenges. Ear lodging is a primary concern, demanding careful adjustment of stalk cutter height. Kernel losses on the ear, particularly with hybrids prone to kernel drop, need to be assessed. Consider using a kernel loss collector to quantify this specific loss component. Proper synchronization of the snapping rolls is essential to minimize cob and kernel losses.
Soybeans: Soybean harvest is notoriously prone to pod shatter. Harvest timing is critical to minimize pre-harvest losses. Use grain loss plates, paying close attention to the cleaning shoe performance. Pods lodged against the ground are difficult to harvest cleanly, leading to increased losses. Header speed and fan speed settings need careful adjustment to prevent bean losses.
Canola (Rapeseed): Canola's small seed size makes it particularly susceptible to losses. Careful calibration of the cleaning shoe is paramount to prevent seed losses. Pay special attention to the cutter bar and reel settings to minimize pod losses. Wind conditions can dramatically increase losses in canola, making it essential to monitor conditions carefully during harvest.
Pulses (Peas, Beans, Lentils): Pulse crops often require more aggressive threshing settings, which increases the risk of seed damage and loss. Monitoring the threshing cylinder speed is crucial to prevent seed cracking and subsequent losses through the cleaning shoe. Pre-harvest desiccation, if used, must be timed effectively to avoid seed shattering.
Special Considerations: Always consult with local agricultural experts or extension services for crop-specific recommendations and best practices. Crop variety and growing conditions significantly influence harvest loss patterns, so adaptation is key.
Interpreting Your Results: What the Data Tells You
Understanding the numbers you're collecting is just as important as the act of measuring itself. Raw data alone doesn't offer insights; it's the interpretation that drives action. Here's a breakdown of what to look for and how to translate your findings into practical improvements.
Acceptable Loss Rates: A Baseline
While zero loss is the ideal, it's rarely achievable. Acceptable loss rates vary depending on crop type, maturity, field conditions, and combine model. However, as a general guideline:
- Excellent: Less than 1-2%
- Good: 2-3%
- Fair: 3-4%
- Poor: Above 4% - Requires immediate investigation
Analyzing Spatial Patterns: Identifying Hotspots
Don't just focus on the overall loss rate. Analyze where the losses are occurring. Maps generated from your GPS-linked measurements can reveal critical spatial patterns:
- Headlands & Corners: Increased loss in these areas is common due to turning and uneven terrain. Adjust header height or speed in these zones.
- Downwind Sides: Wind can push grain out of the combine. Consider adjusting fan speed or ensuring proper sealing.
- Variable Yield Zones: Higher loss rates in areas of lower yield might indicate uneven crop stand or maturity issues that need addressing in future seasons.
- Uneven Terrain: Consistent losses along slopes suggest the need for careful header height adjustment or consider using a leveling system if available.
Comparing Front, Middle & Rear Loss Plates
Grain loss plates placed at the front, middle, and rear of the combine offer valuable insights into the loss process:
- High Front Plate Losses: Could indicate issues with header performance, uneven crop feeding, or incorrect ground speed.
- High Middle Plate Losses: Suggests problems with the threshing system or rotor speed.
- High Rear Plate Losses: May indicate inefficiencies in the cleaning system or excessive grain carryover.
Linking Loss Rates to Combine Settings
Carefully document your combine settings during each measurement. Analyze how changes in settings (e.g., ground speed, fan speed, header height) correlate with loss rates. This helps pinpoint the most effective adjustments. For example, do lower ground speeds consistently reduce losses, or does a slight adjustment to the fan speed yield a more significant improvement?
Considering Crop Factors
Remember that crop characteristics significantly influence loss rates. Drought-stressed crops, crops with shriveled kernels, or crops with uneven maturity are more prone to increased losses. Account for these factors when interpreting your data.
Don't Be Afraid to Experiment & Iterate
Interpreting harvest loss data is an ongoing process. Don't be afraid to experiment with different settings and techniques, meticulously tracking the results. Continuous improvement, driven by data, is key to maximizing your harvest and optimizing your farming practices.
Long-Term Monitoring: Tracking Progress & Identifying Trends
Once you're armed with initial harvest loss measurements, the real power lies in establishing a long-term monitoring program. This isn's a one-and-done exercise; it's about building a historical baseline and tracking progress over multiple seasons. Why is this so vital? Because harvest loss isn't static. It's influenced by factors like changing weather patterns, evolving crop varieties, advancements in combine technology, and shifts in farming practices.
A consistent monitoring program allows you to:
- Detect Subtle Changes: Spot early warning signs of increased loss that might be missed with infrequent assessments. For example, a gradual increase in boot area loss could indicate a problem with reel performance or crop lodging.
- Evaluate Intervention Effectiveness: Quantify the impact of changes you implement to reduce loss. Did adjusting header height significantly lower grain loss? Did switching to a new variety with improved standability make a difference?
- Identify Seasonal Trends: Recognize if loss rates vary significantly depending on the harvest date or prevailing weather conditions. This can inform future harvest planning.
- Account for Technology Updates: As your machinery evolves, ongoing monitoring allows you to assess the true benefit of new features and upgrades.
- Establish a Historical Perspective: Build a valuable dataset that provides context for future decision-making and helps you understand the long-term trends impacting your harvest.
To maximize the value of your long-term monitoring, maintain consistent methodologies-same measurement techniques, same locations, same record-keeping practices-year after year. Even seemingly small changes in procedure can introduce bias and distort the trends you're trying to uncover. Consider creating a simple spreadsheet or database to organize your data and generate visual representations of your progress over time. This ongoing commitment will pay dividends in improved yields and a deeper understanding of your cropping system.
Resources & Links
- AgProfessional : Provides industry news, insights, and resources on precision agriculture, including articles and case studies relevant to grain handling, harvesting, and loss assessment. Useful for understanding the broader context of harvest loss management.
- PrecisionAg : A leading online resource for precision agriculture information. Look for articles and webinars focusing on yield monitoring, grain quality, and technologies that can indirectly assist in harvest loss measurement. Covers a wide range of topics relevant to optimizing farm practices.
- Snyder's Farm Supply : While primarily a supplier, they often have informational content (blog posts, product guides) on harvest equipment and technologies, potentially offering practical advice related to minimizing harvest loss. Check their resources section for relevant content.
- Farmingsolutions.ca : Canadian resource for agricultural information. May contain regional insights and practices related to harvest loss and grain handling.
- University of Illinois Agricultural Engineering : The University of Illinois Agricultural Engineering department often publishes research and extension materials related to post-harvest handling and loss prevention. Search their website for relevant reports or guides. Focus on grain handling and post-harvest losses.
- Noble Research Institute : Noble provides research and educational resources for farmers. Search their website for articles on crop management, harvest practices, and soil health, which indirectly impact harvest efficiency and loss.
- Crop Science Society of America : CSSA is a scientific society dedicated to advancing crop science. Their website provides access to research papers and publications that may touch on aspects related to harvest efficiency and loss assessment. May require subscription or institutional access for some content.
- University of Wisconsin-Madison Agricultural and Biological Engineering : Similar to UI, the UW-Madison department often publishes research related to grain handling and storage which can inform strategies to reduce harvest losses.
- Missouri Extension : Missouri's extension services offer resources geared towards practical farm management, which may include information or recommendations on minimizing harvest loss. Check for publications and guides.
- Pentec - Harvest Loss Measurement : Pentec specializes in harvest loss measurement equipment and services. Their website may contain informative content and case studies related to the topic. Excellent for understanding equipment options and methodology.
- John Deere : As a major agricultural equipment manufacturer, John Deere often has informational resources on their equipment and related technologies, some of which might indirectly address harvest loss reduction. Look for case studies or product information related to yield monitors and combine technologies.
- Case Construction : Similar to John Deere, Case provides combine technology and equipment that can help monitor and reduce harvest loss. Check their product sections and support resources.
Frequently Asked Questions
What is harvest loss and why is it important to measure it?
Harvest loss refers to the grain or other crop that is lost between the point of harvest and when it's stored. Measuring it is crucial for understanding efficiency, maximizing yield, minimizing waste, and improving overall profitability. Identifying sources of loss allows for targeted interventions and improvements in your harvesting process.
Who is this checklist template for?
This checklist is designed for farmers, agricultural professionals, and anyone involved in the post-harvest handling of crops. It's useful for both small-scale and large-scale operations who want to accurately quantify and reduce harvest losses.
What types of harvest loss are covered by this checklist?
The checklist covers several categories of harvest loss including pre-harvest lodging, during-harvest losses (header losses, ground losses), during-threshing losses, conveying losses, cleaning losses, and post-harvest storage losses. It breaks down these categories into specific measurable factors.
How do I use the measurement checklist template?
The checklist provides specific points to measure and record at each stage of the harvest process. Follow the instructions for each section, using the recommended tools and techniques. Record your findings diligently and analyze the data to pinpoint areas of significant loss.
What tools are required to use this checklist effectively?
The checklist references tools like combine loss calculators, grain moisture meters, weighing scales, measuring tapes, and visual assessment techniques. Specific tools may vary depending on your crop and equipment. The article will provide more detail about recommended tools for accurate measurement.
Can I customize the checklist template?
Yes, the checklist is designed to be a starting point. You can modify it to reflect your specific crop, equipment, and operational practices. Add or remove sections as needed to tailor it to your unique situation.
How often should I use this checklist?
We recommend using the checklist during each harvest season, and ideally, multiple times during a harvest to account for potential variations in conditions. You can also use it periodically for quality control and process improvement.
What do I do with the data I collect using the checklist?
Analyze the collected data to identify the biggest contributors to harvest loss. Compare results over time to assess the effectiveness of changes you implement. Use the data to target areas for improvement in your harvesting and handling techniques.
Where can I find the actual checklist template?
The downloadable checklist template is available within the article. Look for the 'Download Checklist' button or link after reading through the overview and explanation of each section.
Found this Article helpful?
Agriculture Management Solution Demo
Running a farm or agricultural business is complex. ChecklistGuro's Work OS platform simplifies your operations, from crop planning and irrigation management to livestock tracking and harvest scheduling. Increase efficiency, reduce waste, and boost yields! See how ChecklistGuro can revolutionize your agriculture business.
Related Articles

10 Simple Steps to a Healthy Drainage System: Your Checklist Template

Mastering the Daily Crop Scouting Report: Your [Specific Crop] Checklist Template

Irrigation System Checklist: Farm Water Management & Crop Yield Optimization

Unlock Your Garden's Potential: A Soil pH Verification Checklist

PPE Usage Checklist Template: Your Guide to Safety

Water Discharge Permit Compliance Checklist Template

The Ultimate GPS & Precision Farming Calibration Checklist Template

Water Runoff Analysis Checklist Template
We can do it Together
Need help with
Agriculture?
Have a question? We're here to help. Please submit your inquiry, and we'll respond promptly.