Your Ultimate Irrigation System Installation Checklist Template
Published: 08/31/2025 Updated: 04/23/2026
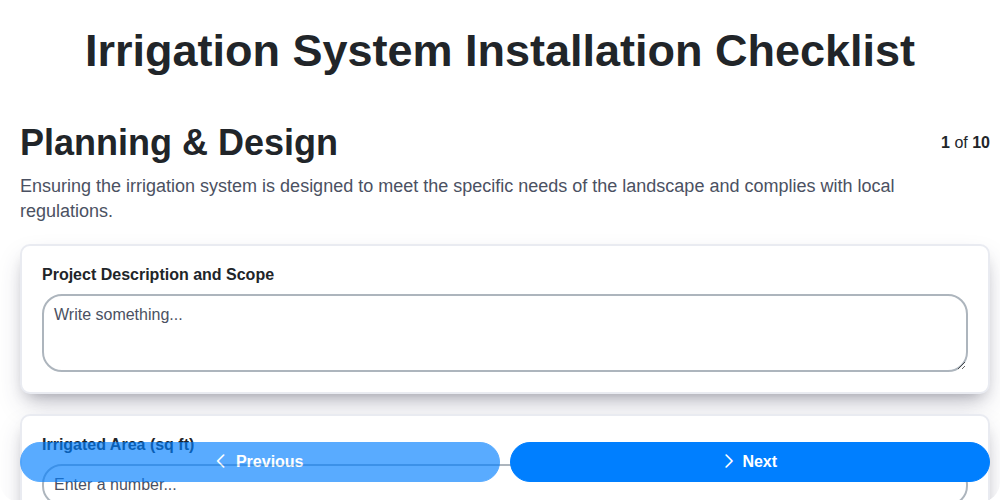
Table of Contents
- Planning & Design: Laying the Groundwork
- Gathering Your Tools and Materials
- Site Preparation: Clearing the Path
- Locating Underground Utilities
- Mainline Installation: The System's Backbone
- Zone Valve Placement and Connection
- Sprinkler Head/Emitter Selection & Installation
- Wiring the Controller and Setting Schedules
- Backflow Prevention: Ensuring Safety and Compliance
- Initial System Testing and Adjustments
- Backfilling Trenches and Landscape Restoration
- Final Inspection & Documentation
- Running into Roadblocks? Common Irrigation Installation Hiccups & How to Fix Them
- Long-Term System Maintenance Tips
- Resources & Links
TLDR: This free checklist template simplifies irrigation system installation! It guides you through planning, setup, testing, and final inspection, ensuring a properly installed system that saves water and keeps your lawn healthy. Download it to avoid common mistakes and enjoy a beautiful, efficiently watered landscape.
Planning & Design: Laying the Groundwork
Before you even think about digging a single trench, a solid plan is your most valuable asset. Rushing into irrigation system installation without careful planning can lead to wasted money, uneven watering, and a whole lot of frustration.
Start by meticulously assessing your landscape. Consider the size of your lawn and garden beds, the types of plants you have (turfgrass needs different coverage than delicate flowers), the amount of sun exposure each area receives, and the slope of your yard (which can impact drainage and sprinkler placement). Create a rough sketch of your property, marking these key features.
Next, determine the water needs of each zone. Different plants require varying amounts of water. Research the specific needs of your plants - a drought-tolerant shrub won't need the same watering as a thirsty vegetable garden. Use this information to divide your yard into distinct zones - grouping plants with similar watering requirements together. This allows for targeted watering, conserving water and promoting healthy plant growth.
Finally, create a detailed system design. This should include the type and placement of sprinkler heads or emitters, the size of the mainline and lateral pipes needed, and the location of valves and the controller. While you can certainly sketch this out by hand, consider using irrigation design software - it can simplify the process and ensure accurate calculations. Remember to factor in local building codes and permit requirements - checking these early on can prevent costly delays later.
Gathering Your Tools and Materials
Before you even think about digging a single trench, make sure you have everything you need on hand. A half-finished project due to a missing wrench is incredibly frustrating! Here's a comprehensive list to get you started. Remember to check local building codes for any specific requirements regarding materials.
Essential Tools:
- Shovels & Trenching Tools: Round-point shovel, trenching shovel (or a trencher if you're tackling a large area), hand tamper.
- Cutting & Joining Tools: PVC pipe cutter or saw, solvent cement and applicator (for PVC), pipe wrenches.
- Measuring & Marking: Measuring tape, marking paint or flags, level.
- Electrical Tools: Wire strippers, wire connectors, voltage tester (crucial for safety!).
- General Tools: Adjustable wrench, pliers, screwdriver set, safety glasses, work gloves.
- Pressure Testing Equipment: Pressure gauge, quick-acting test plug.
Materials Checklist:
- Pipe: PVC or polyethylene pipe (correct diameter for your system design)
- Fittings: Elbows, tees, couplings, adapters (matching pipe material)
- Sprinkler Heads/Emitters: Spray heads, rotor heads, bubblers, drip emitters (appropriate for each zone)
- Zone Valves: Electric zone valves (correct voltage for your controller)
- Controller: Irrigation controller (compatible with your system size and features)
- Wiring: Low-voltage wiring (for connecting controller to valves and rain sensor)
- Backfill Material: Sand or pea gravel (for bedding pipes)
- Mulch/Topsoil: For landscaping restoration
- Optional but Recommended: Rain sensor, pressure regulator, quick couplers
Site Preparation: Clearing the Path
Before you even think about digging a single trench, a little groundwork is essential. This isn't just about moving dirt; it's about laying the foundation for a reliable and long-lasting irrigation system.
1. Call Before You Dig: 811 is Your Friend
Seriously. Don't skip this step. Utility lines-gas, electricity, cable-run beneath the surface, and hitting one can be dangerous, costly, and disruptive. Dial 811 (in the US and Canada) a few days before you plan to dig. They will mark the approximate location of underground utilities free of charge. This service is critical for safety and compliance.
2. Removing Obstacles: A Clean Slate
Once the utility lines are marked, it's time to clear the area. Remove any rocks, roots, debris, or other obstructions that lie along your planned trench lines. Large rocks might require specialized tools, while smaller roots can often be cut with a hand saw or loppers. A clear path makes trenching significantly easier and prevents damage to pipes later on.
3. Marking the Trenches: Precision is Key
Using spray paint, flags, or marking tape, precisely mark the locations of your trenches. Double-check these markings against your irrigation design plan to ensure accuracy. Accurate marking minimizes wasted effort and prevents costly errors during the digging process. Consider using a string line to create straight lines for trenches, guaranteeing uniformity.
4. Assessing Soil Conditions (Optional but Recommended):
Take a moment to observe your soil. Is it sandy, clay-like, or loamy? Understanding your soil type can help you anticipate potential challenges during digging. For example, clay-rich soil will be more compact and require more effort to trench than sandy soil. This knowledge can inform your choice of digging tools and techniques.
Locating Underground Utilities
Before you even think about digging, you absolutely must know what's lurking beneath the surface. Damaging underground utilities - gas lines, electrical cables, water pipes, fiber optic cables - is incredibly dangerous, illegal, and expensive.
Call 811 (in the US) - It's Free and Essential!
This isn't a suggestion; it's a mandatory first step. Calling 811 connects you to your local "One-Call" center, which will notify the utility companies in your area. They will then mark the approximate location of their underground lines free of charge.
What to Expect After Calling:
- Response Time: Allow several business days for the utility companies to respond.
- Markings: They will use colored paints or flags to indicate the location of their utilities. Understand what each color means (e.g., yellow = gas, red = electric).
- Verification: While the markings are helpful, they are approximate. If you're unsure about the location of a utility, contact the utility company directly for clarification before digging.
- Small Projects: Even for small projects like planting a tree, calling 811 is vital. Don't take shortcuts - safety first!
Alternatives (Use with Caution):
While calling 811 is always the best option, some areas may offer online utility locating services. However, always verify the information obtained online by contacting the utility companies directly. Never rely solely on online data.
Mainline Installation: The System's Backbone
The mainline is the circulatory system of your irrigation setup - it's what carries the water to all your zones. Proper installation here is absolutely critical for a reliable and efficient system. We're typically talking about using either PVC (polyvinyl chloride) or polyethylene (poly pipe) for your mainline. PVC is a rigid pipe, commonly used and glued together, while poly pipe is flexible and often connected with clamps or fittings.
Choosing the Right Material:
- PVC: Excellent for stability and long-term durability, particularly in areas with consistent soil conditions. It's a great choice for shallower trenches.
- Polyethylene (Poly Pipe): Its flexibility makes it easier to maneuver around obstacles and ideal for uneven terrain or deeper trenches. It's also less susceptible to cracking in freezing conditions, making it a better option in colder climates.
Installation Steps - Keep it Straight and Secure:
- Trenching Precision: Ensure your trenches are consistently deep and straight, maintaining the necessary slope for adequate drainage (if required by your design).
- Pipe Joining - PVC: When using PVC, meticulous cutting and proper gluing with PVC primer and cement are vital. Follow the manufacturer's instructions exactly. Let the joints cure completely before proceeding.
- Pipe Joining - Poly Pipe: For poly pipe, use appropriate clamps or compression fittings to secure connections. Over-tightening can damage the pipe, so be careful!
- Flushing is Key: After connecting all sections of the mainline, thoroughly flush the entire system to remove any debris or sediment that might have entered during installation. This protects your sprinkler heads and other components.
- Pressure Testing: Once flushed, conduct a brief pressure test to confirm that all joints are watertight. Apply pressure and visually inspect for any leaks. Repair any leaks immediately.
Zone Valve Placement and Connection
Zone valves are the gatekeepers of your irrigation zones, dictating when each section of your system receives water. Strategic placement is key to both efficient operation and ease of maintenance.
Where to Place Zone Valves:
- Accessibility: Choose locations that are easy to reach for adjustments and repairs. Valve boxes are your best friend here! Avoid burying them too deep or in areas obstructed by landscaping.
- Proximity to Mainline: Ideally, place zone valves as close as possible to the mainline connection to minimize pipe runs and pressure loss.
- Grouping by Plant Type: Consider grouping valves based on the plants they serve. Zones requiring significantly different watering durations or pressures should be kept separate.
- Slope Considerations: If your yard has a significant slope, locate valves at the higher elevation of the zone to ensure even water distribution.
Connecting Zone Valves: A Step-by-Step Guide
- Prepare the Connections: Ensure all pipe ends are clean and free of debris. Use appropriate pipe sealant or Teflon tape on threaded connections.
- Connect to Mainline: Carefully attach the zone valve to the mainline using appropriate fittings, typically threaded or compression. Tighten securely, but avoid over-tightening.
- Wiring: Zone valves require low-voltage wiring to connect to your irrigation controller. Follow the controller's wiring diagram exactly. Generally, you'll have common, valve, and sometimes a signal wire. Always disconnect power before making any wiring connections.
- Secure the Valve: Secure the valve in its box or mounting location to prevent movement and stress on the connections.
- Test the Connection: Briefly energize the controller to test the valve operation. Listen for the valve opening and closing, and check for any leaks at the connections. Address any leaks immediately.
Remember to always consult your zone valve and controller manuals for specific installation instructions. Improper installation can lead to leaks, malfunctions, and shortened lifespan of your irrigation system.
Sprinkler Head/Emitter Selection & Installation
Choosing the right sprinkler head or emitter isn't just about aesthetics; it's critical for efficient watering and healthy plant growth. The ideal choice depends on factors like plant type, soil conditions, coverage area, and water pressure. Let's break down the options and how to install them correctly.
Sprinkler Head Types:
- Spray Heads: Ideal for smaller turf areas and flowerbeds, spray heads deliver a fine mist over a relatively small radius (typically 5-10 feet). They're great for even coverage but can be prone to wind drift.
- Rotor Heads: Designed for larger areas, rotor heads rotate to distribute water over a greater distance (up to 25 feet or more). They're more efficient than spray heads in covering large spaces and are less affected by wind. Look for low-precipitation rotors for even distribution.
- Rotary Nozzles: A hybrid option, rotary nozzles offer the coverage of rotors with the efficiency of spray heads. They rotate slower than rotors, delivering a more even application.
- Impact Sprinklers: While older technology, impact sprinklers are durable and self-adjusting, but often less water efficient.
Emitter Options (For Drip Irrigation):
- Pressure-Compensating Emitters: These provide a consistent flow rate regardless of pressure fluctuations, ensuring all plants receive the intended amount of water.
- Adjustable Flow Emitters: Allow you to customize the water output for different plant needs.
- Bubblers: Deliver a slow, steady stream of water directly to the base of plants, ideal for trees and shrubs.
Installation Tips:
- Planning: Map out your watering zones and determine the appropriate sprinkler head or emitter type for each. Consider overlap - sprinkler heads should overlap slightly to ensure even coverage.
- Connection: Securely connect sprinkler heads or emitters to the irrigation line using appropriate fittings. Teflon tape is your friend for leak prevention.
- Riser Height: Install sprinkler heads at the correct riser height to achieve the desired spray pattern and prevent obstruction.
- Nozzle Adjustment: After installation, adjust the spray pattern and distance of each sprinkler head to optimize coverage and minimize water waste.
- Emitter Placement: For drip irrigation, place emitters near the root zone of each plant, ensuring good soil contact.
- Flush the System: After installation, flush the irrigation line to remove any debris.
Wiring the Controller and Setting Schedules
The brains of your irrigation system - the controller - connects all the zones and dictates when and how long they water. This section covers the wiring and initial programming to get your system running.
Wiring Connections: Safety First!
Before you even think about touching any wires, turn off the power to the controller circuit breaker. Seriously, do it. Miswiring can damage the controller and pose a safety hazard.
Refer to your controller's wiring diagram - it's your roadmap. Typically, you'll have common wires, zone wires, and potentially wires for a rain sensor. Connect each zone wire to the corresponding terminal on the controller. Double-check your connections against the diagram, ensuring proper polarity (if applicable). A multimeter can be invaluable for verifying continuity and identifying shorts. If you're unsure about any connection, consult a qualified electrician.
Wiring for a rain sensor (highly recommended!) usually involves connecting it to specific terminals on the controller. This interrupts the watering cycle when rainfall is detected, conserving water and preventing overwatering.
Initial Programming: Setting the Foundation
Once the wiring is complete and power is restored, it's time to program the controller. This is where you define the watering schedules for each zone, taking into account plant types, sun exposure, and soil conditions.
Most modern controllers offer a user-friendly interface, often with LCD screens and intuitive menus. Here's a basic rundown:
- Zone Definition: Name each zone (e.g., Front Lawn, Rose Garden) for easy identification.
- Watering Days: Select the days of the week you want each zone to water.
- Start Time: Set the start time for each zone's watering cycle. Staggering start times can help prevent pressure drops in your water supply.
- Watering Duration: Determine the watering duration for each zone, typically measured in minutes. This is crucial for delivering the right amount of water to your plants.
- Cycle and Soak: Consider using the cycle and soak feature, especially for clay soils. This involves dividing the watering duration into shorter cycles separated by a soak period, allowing water to penetrate deeper into the soil.
Fine-Tuning Your Schedules
Your initial schedules are just a starting point. Observe your plants and adjust watering durations accordingly. Factors like temperature, rainfall, and plant growth can all impact water needs. Consider seasonal adjustments - reduce watering during cooler months and increase it during hotter periods. Regular monitoring and tweaking will ensure your irrigation system provides optimal hydration for a thriving landscape.
Backflow Prevention: Ensuring Safety and Compliance
Backflow prevention isn't just a technical requirement; it's a vital safety measure. It safeguards your community's potable water supply from contamination, preventing irrigation system water - which can contain fertilizers, pesticides, and other chemicals - from flowing back into the public water mains.
What is Backflow and Why is it a Problem?
Backflow occurs when a pressure drop in the public water system creates a vacuum, potentially drawing contaminated water from your irrigation system back into the drinking water supply. This can pose a significant health risk.
The Role of Backflow Prevention Assemblies
To prevent this, a backflow prevention assembly is required. These devices create a barrier, ensuring water only flows in one direction. The most common type for residential irrigation systems is a Reduced Pressure Zone (RPZ) valve.
Compliance and Professional Installation
- Local Codes: Backflow prevention requirements are dictated by local plumbing codes and regulations. Familiarize yourself with these requirements.
- Licensed Professionals: Installation and regular testing of backflow prevention assemblies must be performed by a licensed plumbing professional. Improper installation or lack of maintenance can render the assembly ineffective.
- Testing Requirements: Most jurisdictions mandate annual testing of backflow prevention assemblies to ensure they're functioning correctly. Records of these tests must be maintained.
- Consequences of Non-Compliance: Failure to comply with backflow prevention regulations can result in fines and potential liability.
Don't compromise on safety. Backflow prevention is a non-negotiable aspect of any irrigation system installation.
Initial System Testing and Adjustments
The initial testing phase is absolutely critical. Don't skip this! It's far easier to correct minor issues now than to deal with a malfunctioning system later. This isn't just about turning the water on and seeing if the sprinklers pop up; it's about fine-tuning for even coverage and efficiency.
1. Zone-by-Zone Evaluation: Start by running each zone individually. Observe the spray patterns of your sprinkler heads - are they uniform? Are there any dry spots or areas receiving excessive water? With drip irrigation, check that emitters are delivering water consistently.
2. Nozzle Adjustment is Key: Most sprinkler heads have adjustable nozzles. Take the time to tweak them. Adjust the arc of spray to match the area being watered. Fine-tune the distance, ensuring even coverage across the zone. Rotate the head slightly to compensate for wind conditions. Many manufacturers provide specific adjustment guidelines - consult their documentation.
3. Leak Detection - The Silent Threat: As each zone runs, carefully inspect all connections and piping for any signs of leaks. Even a tiny drip can waste significant water and damage the system over time. Pay particular attention to threaded fittings and valve boxes.
4. Pressure Checks for Healthy Heads: Low water pressure can result in weak spray patterns and uneven coverage. Use a pressure gauge at the sprinkler head to ensure it's within the manufacturer's recommended range. If pressure is consistently low, investigate the mainline pressure and consider a pressure regulator.
5. Drip Emitter Verification: For drip systems, verify that each emitter is delivering the intended flow rate. Clogs and reduced pressure can impair performance. Flush the system periodically to remove debris.
6. Document Your Findings: Keep a record of any adjustments made to each zone. This will be invaluable for future maintenance and troubleshooting. A simple spreadsheet or notepad will do.
Don't be afraid to experiment and make adjustments until you achieve the desired performance. A well-tested system is a water-efficient and beautiful addition to your landscape!
Backfilling Trenches and Landscape Restoration
Once all pipes and wiring are securely in place, the next crucial step is backfilling the trenches and restoring the landscape. This isn't just about filling in the holes; it's about protecting your newly installed irrigation system and creating a visually appealing result.
Careful Backfilling: Protecting Your Investment
Avoid using large rocks or debris when backfilling, as these can damage pipes and wiring. Use a mixture of the original soil, topsoil, and a small amount of sand to ensure proper compaction and drainage. Backfill in layers, typically 6-8 inches at a time, and compact each layer thoroughly using a hand tamper or plate compactor. This prevents settling later and helps prevent pipe movement. Be careful not to over-compact, which can restrict water infiltration and potentially damage pipes.
Landscape Restoration: Bringing Back the Beauty
The specific restoration methods will depend on your existing landscaping. Here are a few common approaches:
- Grass Seeding: Spread grass seed evenly over the area and lightly rake it in. Keep the area consistently moist until the seeds germinate and the grass establishes.
- Sod Installation: Sod provides an instant lawn, but requires careful preparation of the soil and proper watering to encourage root establishment.
- Mulching: For areas around flower beds or shrubs, apply a layer of mulch to suppress weeds, retain moisture, and improve the overall appearance.
- Planting: Replace any plants that were temporarily removed during the installation process. Ensure proper spacing and watering to promote healthy growth.
Considerations:
- Erosion Control: On sloped areas, consider using erosion control blankets or other methods to prevent soil erosion until vegetation is established.
- Watering: Consistent and gentle watering is essential during the restoration phase to encourage root growth and establish healthy plants.
- Aesthetics: Take the time to create a visually appealing landscape that complements your home and garden.
Final Inspection & Documentation
The final inspection isn't just a formality; it's your last chance to catch any issues before the system is fully operational and the landscaping is completely restored. Thoroughness at this stage minimizes headaches later.
What to Look For:
- Even Coverage: Walk the entire lawn and garden during a full cycle, observing sprinkler patterns and emitter distribution. Are there dry spots or areas with excessive runoff? Adjust nozzles and emitters as needed.
- Leak Check (Again!): Carefully inspect all connections, valves, and pipes for any signs of leaks, even minor ones. A small drip now can become a significant problem later.
- Controller Accuracy: Verify that each zone runs for the programmed duration and in the correct sequence.
- Rain Sensor Functionality: If installed, confirm the rain sensor correctly suspends watering during simulated rainfall.
- Backflow Preventer Test: If required by code and performed by a professional, obtain and document the backflow prevention assembly test report.
Documentation is Key:
Create a comprehensive record of your irrigation system installation. This documentation should include:
- System Design Drawings: A clear layout of the system, showing pipe routes, valve box locations, sprinkler head/emitter placement, and controller wiring.
- Component List: A detailed list of all components used, including brand names, model numbers, and sizes.
- Controller Programming: Record the programmed watering schedules for each zone.
- Adjustments Made: Note any adjustments made to nozzles, emitters, or controller settings.
- As-Built Drawings (Recommended): If significant changes were made during installation, create as-built drawings to reflect the final layout.
- User Manuals: Keep all user manuals for the controller and other components in a readily accessible location.
- Warranty Information: Store all warranty information for future reference.
This documentation will be invaluable for troubleshooting issues, performing maintenance, and making future upgrades to your irrigation system. It's also helpful to share this information with anyone who may operate or maintain the system in your absence.
Running into Roadblocks? Common Irrigation Installation Hiccups & How to Fix Them
Even with meticulous planning, irrigation installations don't always go perfectly. Here's a rundown of frequent problems and their solutions to keep your project on track.
1. Low Water Pressure: This is a common culprit behind weak sprinkler heads or uneven watering.
- Possible Causes: Partially closed valves upstream, pipe restrictions, undersized main line.
- Solutions: Verify all upstream valves are fully open. Inspect the main line for kinks or obstructions. Consult a professional to assess pipe sizing.
2. Leaks at Fittings: Drips and sprays indicate a problem at a fitting.
- Possible Causes: Improper gluing, cracked fittings, loose connections.
- Solutions: Disassemble the fitting, inspect for damage, re-glue with fresh primer and cement, ensuring proper curing time. Tighten connections carefully, avoiding overtightening.
3. Sprinkler Heads Not Popping Up or Rotating: This can be due to debris, pressure issues, or mechanical failure.
- Possible Causes: Debris in the sprinkler head, low water pressure, broken gear drive (rotors).
- Solutions: Flush the system to remove debris. Check water pressure. Replace faulty sprinkler heads.
4. Uneven Watering Patterns: Dry spots and overwatered areas suggest misaligned or clogged nozzles.
- Possible Causes: Misaligned nozzles, clogged nozzles, incorrect sprinkler head type.
- Solutions: Adjust nozzle patterns for uniform coverage. Clean or replace clogged nozzles. Ensure correct sprinkler head type is used for the specific zone.
5. Controller Issues - Zones Not Running: Electrical problems or programming errors can prevent zones from operating.
- Possible Causes: Wiring errors, programming mistakes, faulty controller.
- Solutions: Double-check wiring connections. Verify programming schedule. Consult the controller's manual or contact a professional for assistance.
6. Clogged Drip Lines (for drip irrigation): Mineral buildup and debris can restrict water flow in drip lines.
- Possible Causes: Hard water, sediment in the water source.
- Solutions: Install a filter on the water source. Flush drip lines regularly. Consider using a fertilizer injector with a built-in filter.
Important Note: If you're not comfortable tackling these issues yourself, don't hesitate to call a qualified irrigation professional. Improper repairs can lead to further damage and water waste.
Long-Term System Maintenance Tips
Your new irrigation system is a fantastic investment, but its longevity and efficiency depend on consistent maintenance. Neglecting upkeep can lead to costly repairs, uneven watering, and wasted water. Here's a rundown of essential long-term maintenance tasks:
Seasonal Checks (Spring & Fall):
- Inspect Sprinkler Heads: Look for clogs, damage, or misalignment. Clean out debris and adjust heads to ensure even coverage.
- Check for Leaks: A thorough visual inspection of all connections, pipes, and sprinkler heads is critical. Address any leaks immediately.
- Backflow Prevention Assembly: Have a certified professional inspect and test your backflow prevention assembly annually. This is crucial for safety and compliance.
- Winterization (in cold climates): Blow out the system with compressed air to remove water and prevent freezing. This is essential to prevent burst pipes. Consider hiring a professional for this critical step.
Ongoing Tasks (Monthly/Quarterly):
- Monitor Controller Settings: Double-check your watering schedules and adjust them as needed based on weather conditions and plant growth.
- Inspect Valve Boxes: Keep valve boxes clear of debris and ensure valve operation is smooth.
- Filter Cleaning (if applicable): Clean or replace filters regularly to prevent clogging and maintain water pressure.
- Run Diagnostic Tests: Utilize your controller's diagnostic features (if available) to identify potential issues early on.
Every Few Years:
- Professional Inspection: Consider a comprehensive inspection by a qualified irrigation specialist every 3-5 years. They can identify potential problems you might miss and ensure optimal performance.
- Component Replacement: Be prepared to replace worn-out components like valves, controllers, or sprinkler heads as needed. Preventative replacement is more cost-effective than dealing with system failures.
Regular maintenance isn't just about preventing breakdowns; it's about maximizing the efficiency and lifespan of your irrigation system, saving you water and money in the long run.
Resources & Links
- United States Environmental Protection Agency (EPA) : Provides information on water conservation, irrigation efficiency, and regulations related to water use. Useful for understanding the environmental context of irrigation systems.
- Irrigation Association : The leading professional organization for irrigation professionals. Offers educational resources, certifications, and industry standards. A great source for best practices.
- Hunter Industries : A major manufacturer of irrigation equipment. Their website has technical documents, product guides, and troubleshooting tips, particularly helpful for sprinkler head selection and controller programming.
- Rain Bird : Another leading manufacturer of irrigation systems. Similar to Hunter, they offer extensive product information, installation guides, and design tools. Good for emitter and valve selection.
- Thorne Bros. : A supplier of irrigation products and resources. They have detailed guides and information on various aspects of irrigation system design and installation.
- Ferguson : A large plumbing and irrigation supply company. Their website offers product information, technical specs, and potentially local supplier contacts. Helpful for gathering materials.
- Home Depot : A major retailer of irrigation supplies. Provides a broad selection of equipment and some basic DIY resources; useful for cost comparisons and general overviews.
- Lowe's : Similar to Home Depot, Lowe's offers a wide range of irrigation products and general project guidance. Good for comparing costs and options.
- Occupational Safety and Health Administration (OSHA) : Provides safety guidelines for excavation, trenching, and working with utilities. Critical for the 'Site Preparation' and 'Locating Underground Utilities' sections.
- 811 - Call Before You Dig : Essential for the 'Locating Underground Utilities' section. Provides information on how to request utility locates before digging.
- Backflow-USA : Specializes in backflow prevention devices and information. Useful for 'Backflow Prevention' section, providing compliance and product information.
- Conduit Pro : Provides information and guides on electrical conduit, relevant for the 'Wiring the Controller' section. Focuses on proper wiring and protection.
- Valve Rite : Provides information on Zone Valves and their correct placement. Good for the 'Zone Valve Placement and Connection' section.
Frequently Asked Questions
What is an irrigation system installation checklist and why do I need one?
An irrigation system installation checklist is a step-by-step guide to ensure all aspects of your irrigation system installation are completed correctly, safely, and according to best practices. It helps prevent costly mistakes, ensures code compliance, and helps the system function optimally.
Who is this checklist template for?
This template is designed for anyone installing an irrigation system, whether you're a professional landscaper, a contractor, or a homeowner tackling a DIY project. It's adaptable for various system types and complexities.
What kind of irrigation systems does this checklist cover?
The checklist is versatile and can be used for various systems including sprinkler systems (rotary, spray, drip), subsurface irrigation, and simple lawn watering systems. You may need to customize it based on your specific system design and components.
Can I edit the checklist template?
Absolutely! The template is meant to be a starting point. Feel free to add, remove, or modify items to match your specific project's needs and local regulations. Add details such as permit numbers or specific product models.
What permits might I need before installing an irrigation system?
Permit requirements vary significantly by location. Check with your local municipality or homeowner's association *before* starting any work. Common permits might include plumbing permits, grading permits, or landscaping permits.
What safety precautions should I take during irrigation system installation?
Always call 811 (in the US) before digging to locate underground utilities. Wear appropriate safety gear like gloves, eye protection, and sturdy shoes. Be aware of potential hazards like electrical lines and sharp objects.
The checklist mentions 'site survey' - what exactly does that involve?
A site survey is a thorough assessment of the area where the irrigation system will be installed. It includes measuring the space, identifying slopes, noting existing landscape features, locating utilities, and determining water pressure and flow rate.
What does 'backflow prevention' mean and why is it important?
Backflow prevention devices prevent contaminated water from flowing back into the public water supply. They are often required by code and are crucial for public health. Proper installation and testing are essential.
How do I test my irrigation system after installation?
Testing involves checking for leaks, verifying proper sprinkler head coverage, adjusting sprinkler heads for even distribution, and checking the backflow preventer. Monitoring water pressure and flow rate is also important.
Where can I find more information about irrigation codes and regulations?
Your local municipality, water district, and state landscaping or irrigation board are excellent resources. The Irrigation Association (irrigation.org) also provides valuable information and resources.
Found this Article helpful?
Construction Management Solution Demo
Build smarter, not harder! ChecklistGuro streamlines construction projects from planning to closeout. Manage tasks, inspections, safety protocols & more - all in one place. Reduce delays, improve communication, and deliver projects on time & on budget.
Related Articles

The Ultimate Concrete Vibration Checklist Template

Unlock Value: Your Free Value Engineering Checklist Template

The Ultimate HVAC Ductwork Installation Checklist Template

The Ultimate Rebar Placement Checklist Template

Your Concrete Mix Design Verification Checklist: A Step-by-Step Guide

Backfilling & Compaction Checklist: A Foundation's Best Friend

The Ultimate Concrete Delivery & Placement Checklist Template

Your Ultimate Stakeholder Communication Plan Checklist Template
We can do it Together
Need help with
Construction?
Have a question? We're here to help. Please submit your inquiry, and we'll respond promptly.