The Ultimate Masonry Joint Inspection Checklist Template
Published: 09/01/2025 Updated: 12/13/2025
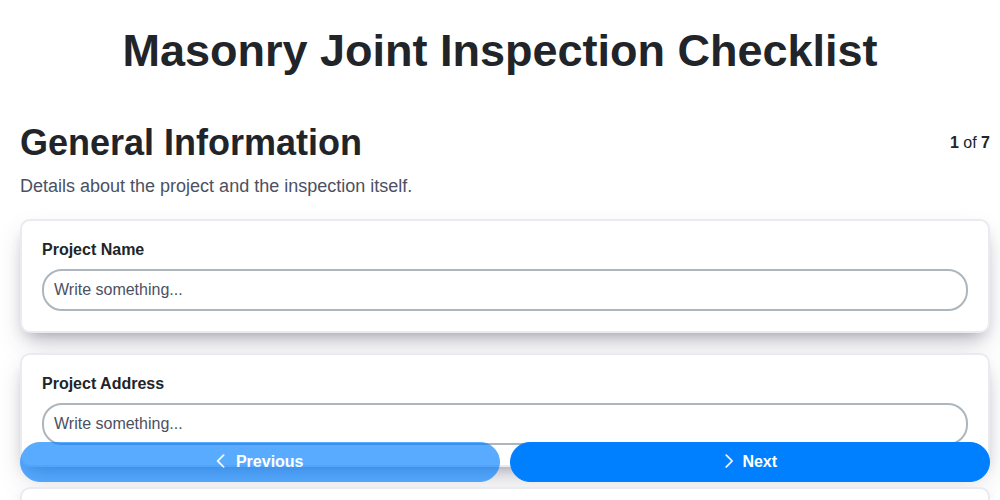
Table of Contents
- Introduction: Why Masonry Joint Inspections Matter
- Essential Tools for Your Masonry Joint Inspection
- Step 1: Gathering Building History & Context
- Step 2: Visual Inspection - Identifying Key Deterioration Signs
- Step 3: Joint Type & Material Assessment - Compatibility is Key
- Step 4: Crack Mapping & Categorization - Size, Pattern & Significance
- Step 5: Water Intrusion Detection - Interior & Exterior Clues
- Step 6: Structural Integrity Evaluation - Signs of Wall Movement
- Step 7: Documenting Your Findings - Photography & Detailed Notes
- Step 8: Prioritizing Repairs - A Risk-Based Approach
- Step 9: Recommended Remediation Techniques - From Repointing to Replacement
- Step 10: Creating a Maintenance Schedule - Ongoing Protection
- Step 11: Checklist Template Download - Your Ready-to-Use Guide
- Resources & Links
TLDR: This checklist template helps you systematically assess the condition of your masonry joints (mortar lines) to prevent water damage, structural issues, and expensive repairs. It covers everything from visual inspection and mortar type verification to assessing water penetration and documenting findings. Download the template and keep your masonry in top shape!
Introduction: Why Masonry Joint Inspections Matter
Your building's masonry - the brick, block, or stone that forms its walls - represents a significant investment in durability and aesthetics. However, the very elements that contribute to masonry's longevity - its ability to withstand weather and time - can also lead to gradual deterioration, particularly within the mortar joints that bind the units together. These joints are more than just "glue"; they's a critical component of the wall's weather barrier, structural integrity, and overall beauty. Neglecting them can lead to a cascade of problems: water intrusion, accelerated deterioration of the masonry itself, weakened structural support, and eventually, expensive and disruptive repairs. Regular, proactive masonry joint inspections are the key to identifying and addressing these issues before they become major headaches. This article provides a detailed checklist to help you understand what to look for and why a little preventative care can go a long way in preserving your building's value and longevity.
Essential Tools for Your Masonry Joint Inspection
While a keen eye and a methodical approach are paramount, having the right tools can significantly enhance the accuracy and efficiency of your masonry joint inspection. Here's a breakdown of what you're going to need, ranging from the basics to helpful additions:
- Bright Flashlight/Headlamp: Essential for illuminating dark corners and crevices where deterioration might be hidden. A headlamp frees your hands for closer examination.
- Magnifying Glass: A handheld or pocket-sized magnifying glass (5x - 10x magnification) allows you to closely examine mortar joints for hairline cracks, efflorescence, and other subtle signs of damage.
- Measuring Tape: To accurately record the size of cracks and assess the extent of deterioration.
- Ladder or Scaffold (with Safety Harness): For reaching higher areas of the masonry. Safety is paramount - always use appropriate safety equipment and ensure the ladder/scaffold is stable.
- Camera (Smartphone or Digital Camera): Critical for documenting the condition of the masonry. Take photos of every area of concern, with and without flash, for comparison and reporting.
- Notepad & Pen/Digital Device: To record observations, measurements, and sketch diagrams of areas needing repair.
- Moisture Meter (Optional): A non-destructive moisture meter can help assess moisture levels within the masonry, providing insights into potential water intrusion. (Requires some training to interpret results).
- Crack Width Gauge (Optional): A specialized tool for accurately measuring crack widths. Can be helpful for tracking crack growth over time.
- Small Chisel & Hammer (Optional - For Limited Testing): Use with extreme caution and only by experienced individuals. A small chisel and hammer can be used to carefully test the integrity of the mortar, but improper use can cause further damage.
Step 1: Gathering Building History & Context
Before you even glance at the masonry itself, take the time to understand the building's story. This crucial step provides invaluable context that informs your inspection and helps you anticipate potential problems. Start by collecting as much information as possible. This includes:
- Original Construction Documents: If available, blueprints, specifications, and the original construction contract offer vital insights into the materials used and the intended construction methods.
- Previous Inspection Reports: Review any past masonry inspections, repair records, and maintenance logs. These documents may reveal recurring issues or previous attempts to address deterioration.
- Building Age & Architectural Style: The age of the building and its architectural style strongly influence the types of materials used and the expected lifespan of the masonry. Older buildings often utilized different (and sometimes less durable) mortars.
- Environmental Factors: Consider the building's exposure to elements like freeze-thaw cycles, rainfall, sunlight, and pollution. These factors accelerate deterioration. Buildings in coastal areas, for instance, face challenges from salt spray.
- Previous Use & Occupancy: Understanding how the building was used previously can reveal potential sources of moisture or chemical exposure that might have affected the masonry.
- Any Known Modifications: Identify any past renovations or alterations to the building's exterior, as these may have impacted the original masonry system.
Step 2: Visual Inspection - Identifying Key Deterioration Signs
A keen eye is your greatest tool in this stage. Start by systematically working your way around the masonry, examining each joint closely. Don't rush; take your time to observe subtle changes. Here's what to look for:
- Cracking: Note the type and extent of any cracks. Hairline cracks are common, but wider cracks (over 1/8 inch) or map-like cracking (a network of cracks resembling a map) are cause for concern. Record crack direction (horizontal, vertical, diagonal) and length.
- Crumbling & Spalling: This is where the mortar is breaking down and flaking off. Even small areas of crumbling indicate moisture intrusion and potential weakness.
- Missing Mortar: Gaps or voids where the mortar has completely fallen out are a significant vulnerability that must be addressed promptly.
- Efflorescence: The tell-tale white, powdery deposit on the masonry surface. While not always directly damaging, it's a clear sign of water migration through the mortar. Its presence warrants further investigation.
- Discoloration/Staining: Look for dark or light stains on the masonry, which may indicate water penetration or algae growth.
- Vegetation: Moss or algae growth on the surface signals persistent moisture retention.
- Bulging/Recession: Any noticeable bulging or recession of the joint line suggests underlying structural movement and requires immediate professional assessment.
- Rounded Joints: Properly compacted mortar joints should be crisp and defined. Rounded or softened joint lines indicate deterioration and erosion.
Photographic documentation is absolutely crucial at this stage. Take clear, well-lit photos of every area exhibiting any of these signs. These photos will be invaluable for tracking the condition of the masonry over time and for communicating concerns to contractors.
Step 3: Joint Type & Material Assessment - Compatibility is Key
Understanding the original mortar type and ensuring its compatibility with the masonry units is absolutely critical for long-term stability. Using the wrong mortar can be more damaging than doing nothing at all! Here's why:
Why Does Mortar Type Matter?
Mortar isn't just a binder; it's part of the wall's weather barrier and structural integrity. Different mortar types (designated by letters like N, S, M, O) have varying strengths, flexibility, and permeability. The ideal mortar type depends on several factors, including:
- Masonry Unit Type: Softer, older brick requires softer mortar (like Type N or O) to accommodate expansion and contraction. Harder units like dense concrete block can handle stronger mortars (like Type S or M).
- Climate: Areas with freeze-thaw cycles demand more flexible mortars to resist cracking and spalling.
- Building Age: Historic buildings often used softer mortars appropriate for the materials and construction practices of the time. Replicating this original mortar is crucial to avoid damage.
What to Look For:
- Original Mortar Identification: If possible, try to determine the original mortar type used during construction. Historic building records or a consultation with a knowledgeable masonry expert can be helpful.
- Visual Clues: While not definitive, visual clues can provide hints. Older, softer mortars tend to be more granular and less uniform in appearance.
- Mortar Strength Testing (Professional): A qualified professional can perform a mortar strength test to determine the existing mortar type accurately.
- Inconsistencies: Be wary of areas where different mortar types are visibly present. This often indicates previous repairs using an incompatible material. This is a red flag and warrants further investigation.
The Danger of Incompatibility:
- Too Strong Mortar: A stronger mortar can be too rigid for softer bricks, causing them to crack and spall as the wall expands and contracts.
- Too Weak Mortar: A weaker mortar won't provide sufficient adhesion or weather resistance, leading to joint failure.
- Modern vs. Historic Mortar: Modern mortars often contain Portland cement, which can be too strong and impermeable for historic brickwork, trapping moisture and accelerating deterioration.
Always consult with a qualified masonry professional to determine the appropriate mortar type for your building. Don't risk damaging your investment with an ill-informed repair.
Step 4: Crack Mapping & Categorization - Size, Pattern & Significance
Cracks in masonry joints aren't always a cause for immediate panic, but understanding their characteristics is crucial for proper assessment and prioritization of repairs. Crack mapping involves systematically documenting the size, pattern, and location of each crack, which helps determine its significance and potential impact on the building's integrity.
Size Matters:
- Hairline Cracks (less than 1/16 inch or 1.6 mm): Often cosmetic and may be caused by normal shrinkage during mortar curing or minor temperature fluctuations. While not immediately critical, monitoring these is recommended.
- Small Cracks (1/16 to 1/8 inch or 1.6 to 3.2 mm): Indicate localized stress or settling. Monitoring and potential sealant application may be appropriate.
- Moderate Cracks (1/8 to 1/4 inch or 3.2 to 6.4 mm): Require further investigation. These often signal underlying issues like foundation settlement, soil pressure, or improper construction. Repointing or patching may be needed.
- Large Cracks (greater than 1/4 inch or 6.4 mm): Indicate significant structural problems and necessitate immediate professional evaluation by a structural engineer.
Pattern Recognition:
- Vertical Cracks: Often related to settling or differential movement.
- Horizontal Cracks: Can be caused by lateral pressure (e.g., soil pushing against the wall) or thermal expansion/contraction.
- Diagonal Cracks: Suggest movement or stress from a specific direction.
- Stepped Cracks: Follow the joint lines of the masonry units, often indicating movement along a mortar joint.
- Map Cracking: A network of interconnected cracks that resemble a map - a serious indicator of widespread structural distress.
- Stair-Step Cracks: Follow the joint pattern, often related to foundation issues or settlement.
Significance & Next Steps:
The combination of crack size and pattern helps determine its significance. For example, a single, narrow vertical crack might be less concerning than a series of wide, diagonal cracks. Document each crack's location and dimensions on a sketch or photograph. Share this information with a qualified professional for accurate diagnosis and appropriate remediation. Remember, early detection and proper repair can prevent minor issues from escalating into major structural problems.
Step 5: Water Intrusion Detection - Interior & Exterior Clues
Water is the biggest enemy of masonry. Detecting its presence early is crucial to preventing extensive damage. Here's what to look for, both inside and outside the building:
Inside the Building: Warning Signs
- Staining on Walls & Ceilings: Look for discolored patches, streaks, or rings on interior walls and ceilings. These are often the most obvious sign of water intrusion. Note the color - darker stains might indicate prolonged exposure.
- Peeling Paint or Wallpaper: Water can lift paint and wallpaper, causing them to bubble or peel. This is a clear indication of moisture behind the surface.
- Efflorescence on Interior Surfaces: While typically an exterior problem, efflorescence (that white, powdery deposit) can also appear on interior walls if moisture is migrating through the masonry.
- Musty Odors: A persistent musty smell often indicates mold or mildew growth, fueled by moisture intrusion.
- Dampness & Condensation: Feel the walls near the masonry. Dampness to the touch is a direct indication of moisture.
Outside the Building: External Indicators
- Efflorescence on the Masonry: The presence of white, powdery deposits on the exterior masonry is a strong indicator of water penetration.
- Moss & Algae Growth: Consistent moisture encourages the growth of moss, algae, and lichen on the masonry surface.
- Discolored or Spalling Brick/Stone: Prolonged exposure to water can cause bricks or stones to discolor or spall (flake).
- Vegetation Around the Base: Plants growing close to the base of the building might be drawing moisture from the masonry, suggesting a persistent water source.
- Cracked or Deteriorated Sealants: Check around windows, doors, and other penetrations in the masonry for cracked or missing sealant - these are common entry points for water.
Step 6: Structural Integrity Evaluation - Signs of Wall Movement
Significant wall movement isn't just an aesthetic issue; it's a serious indicator of underlying structural problems that demand immediate attention. While minor settling is common in older buildings, dramatic or ongoing movement warrants a professional assessment. Here's what to look for:
- Visible Bowing or Tilting: A noticeable outward curve or lean in a wall is a clear sign of stress. Use a level or plumb bob to confirm, and document the degree of deviation.
- Cracks Extending Beyond Mortar Joints: While cracks within the mortar are often manageable, cracks that run through the bricks or blocks themselves indicate more substantial structural issues. These cracks may be wide, jagged, or stair-step in appearance.
- Uneven Floor or Ceiling Heights: Significant discrepancies in floor or ceiling heights on different sides of a wall can suggest uneven settlement.
- Doors and Windows Sticking or Difficult to Operate: If doors and windows are suddenly sticking or have become difficult to open or close, it could be due to wall movement.
- Wall Separation from Frame: In wood-framed buildings, gaps appearing between the masonry wall and the underlying wood framing are a serious concern.
- Audible Creaking or Groaning: Listen for any unusual noises emanating from the wall, especially during changes in weather or when the building settles.
Important: If you observe any of these signs, do not attempt to repair the wall yourself. Contact a qualified structural engineer to perform a thorough assessment and provide recommendations for remediation. Ignoring these signs can lead to further structural damage and potentially compromise the safety of the building.
Step 7: Documenting Your Findings - Photography & Detailed Notes
Documentation is the cornerstone of effective masonry maintenance. It's not enough to see a problem; you need to prove it exists and provide a clear record for future reference, repairs, and potential insurance claims.
Photography: Your Visual Record
- Be Systematic: Take photos of every area inspected, even if it appears perfectly sound. This creates a baseline for future comparisons.
- Close-Ups & Context: Capture both close-up details of cracks, crumbling mortar, or efflorescence, and wider shots showing the overall condition of the wall section.
- Include a Scale: Place a ruler or coin in the photo to provide a sense of size and dimension.
- Label Photos: Immediately label each photo with a description of the location (e.g., "North wall, ground level, joint #3") and date. Consider using a digital tagging system for easy organization.
- Back Up Your Photos: Store your photos securely in multiple locations (e.g., cloud storage, external hard drive).
Detailed Notes: Beyond the Pictures
While photos provide the visual evidence, detailed notes add the critical context. For each observation, record:
- Location: Be precise - use landmarks or joint numbers to pinpoint the area.
- Description: Clearly describe the defect - type of crack, extent of crumbling, color of efflorescence.
- Measurements: Record the width, depth, or length of cracks or damaged areas.
- Potential Causes (Speculative): While a definitive diagnosis requires a professional, note any potential contributing factors (e.g., settlement, freeze-thaw cycles, poor drainage).
- Severity Assessment: Assign a subjective severity rating (e.g., low, moderate, high) to prioritize repair efforts.
- Date & Inspector: Always include the date of the observation and the name of the inspector.
Step 8: Prioritizing Repairs - A Risk-Based Approach
Not all masonry joint issues are created equal. Simply listing problems isn't enough - you need a system for prioritizing repairs to maximize your maintenance budget and address the most critical risks first. We advocate for a risk-based approach, considering both the severity of the issue and its potential impact.
Here's a breakdown of how to categorize repairs:
Critical (Immediate Action Needed):
- Structural Compromise: Walls bowing, tilting, or significant settlement. Displaced or loose bricks on load-bearing walls. Extensive cracking with visible movement.
- Active Water Intrusion: Persistent leaks, significant interior water stains, mold growth. These situations require immediate attention to prevent further damage to the building's interior and its contents.
- Safety Hazards: Loose bricks or mortar posing a risk of falling.
High (Within 3-6 Months):
- Extensive Map Cracking: Indicates underlying stress and potential for further deterioration.
- Significant Mortar Loss: Large areas of missing mortar exposing brick/block.
- Widespread Spalling: Mortar crumbling over a large surface area.
- Rapidly Expanding Cracks: Cracks visibly growing over time.
Moderate (Within 6-12 Months):
- Hairline Cracks (Stable): Minor cracks that aren't actively growing or causing water penetration.
- Isolated Areas of Crumbling: Small, localized areas of mortar deterioration.
- Minor Efflorescence: While often cosmetic, repeated efflorescence suggests ongoing moisture issues that should be addressed.
Low (Monitor and Address as Budget Allows):
- Cosmetic Issues: Minor cracks or discoloration that don't affect the structural integrity or weatherproofing.
Important Note: This prioritization is a guideline. A qualified professional should always assess the specific conditions and provide a customized repair plan. Remember that preventative maintenance now can save you significantly more in costly repairs later.
Step 9: Recommended Remediation Techniques - From Repointing to Replacement
Once you're done with your inspection, the next crucial step is determining the appropriate remediation techniques. The solution will vary depending on the severity and extent of the damage. Here's a breakdown of common repair approaches, ranging from less invasive to more extensive:
1. Repointing: This is the most common repair. Repointing involves carefully removing deteriorated mortar and replacing it with new mortar that is compatible with the existing masonry and surrounding joints. It's ideal for situations where the mortar is crumbling, cracked, or recessed, but the bricks/blocks themselves are in good condition. Proper preparation (cleaning the existing masonry) and using the correct mortar mix are essential for a long-lasting repair.
2. Mortar Patching: For localized areas of damage, mortar patching can be a cost-effective solution. This involves carefully removing loose or crumbling mortar and filling the void with a pre-mixed or custom-mixed patching compound. It's suitable for small areas of spalling or recessed mortar.
3. Raking and Sealing: In cases of hairline cracks or minor surface degradation, raking (widening the crack slightly) followed by a sealant application can help prevent water penetration and stabilize the joint. This isn't a permanent fix but can provide temporary protection. Caution: Over-sealing can trap moisture and exacerbate problems, so proper ventilation is crucial.
4. Joint Replacement (Partial): If a significant portion of a joint is missing or severely deteriorated, removing and replacing that specific section of joint is often necessary. This is more involved than repointing but less disruptive than a complete joint replacement.
5. Complete Joint Replacement: This is the most extensive and costly repair option, but it's sometimes unavoidable, especially for older buildings with severely deteriorated masonry or for joints that have been previously repaired multiple times. It involves completely removing the old mortar and re-pointing the entire joint. Matching the original mortar composition and profile is vital for maintaining the building's historical integrity and ensuring compatibility.
6. Addressing Underlying Issues: Remember that joint deterioration is often a symptom of a larger problem. Investigate and address any underlying issues like water drainage problems, foundation settlement, or improper construction techniques to prevent future joint failure.
Always consult with a qualified masonry contractor to determine the best remediation technique for your specific situation.
Step 10: Creating a Maintenance Schedule - Ongoing Protection
Identifying issues is only half the battle; a proactive maintenance schedule is crucial for long-term protection. Think of it as an investment in your building's lifespan and value. Here's how to build a sustainable plan:
1. Frequency Based on Risk:
- Newer Buildings (under 20 years): A visual inspection every 3-5 years is usually sufficient.
- Mid-Age Buildings (20-50 years): Inspect every 2-3 years, especially if exposed to harsh weather conditions (freeze-thaw cycles, heavy rainfall, coastal environments).
- Older Buildings (over 50 years): Annual or bi-annual inspections are highly recommended. These buildings are more likely to have existing degradation and require closer monitoring.
2. Integrate with Other Maintenance:
Coordinate masonry joint inspections with other building maintenance tasks, such as window washing, roof inspections, and painting. This allows for a more holistic assessment of the building's condition.
3. Document and Track:
Maintain detailed records of each inspection, including dates, findings, photos, and repair actions taken. This historical data is invaluable for identifying trends and anticipating future problems. Use a spreadsheet or dedicated maintenance management software to organize your records.
4. Budget Accordingly:
Allocate a portion of your annual maintenance budget specifically for masonry repairs. Even small, preventative repairs can save significant costs down the line.
5. Assign Responsibility:
Clearly assign responsibility for scheduling and overseeing inspections. This ensures that the maintenance schedule doesn't fall by the wayside. Consider a property manager, building superintendent, or dedicated maintenance personnel.
6. Review and Adjust:
Regularly review the maintenance schedule (at least annually) and make adjustments as needed. Changes in building usage, environmental factors, or the discovery of new issues may warrant modifications.
Step 11: Checklist Template Download - Your Ready-to-Use Guide
Ready to put this inspection checklist into action? We've created a handy, downloadable template to streamline your masonry joint assessment. This template is designed to be easy to use, whether you're a building owner, property manager, or maintenance professional.
What's included in the template?
- A printable version of the checklist outlined in this article, formatted for clear and organized data collection.
- Sections mirroring each step of the inspection process (General Information, Visual Inspection, Joint Type Verification, etc.).
- Space for detailed notes and photos, allowing you to document your findings comprehensively.
- A prioritization matrix to help you rank repair needs and allocate resources effectively.
How to Download & Use It:
- Click the button below to download the Masonry Joint Inspection Checklist template in PDF format.
- Print the template or use it digitally on your tablet or laptop.
- Carefully follow each step of the checklist, documenting your observations with photos and detailed notes.
- Use the prioritization matrix to identify and address the most critical areas first.
Important Note: This template is a helpful tool, but remember that a thorough masonry inspection often requires the expertise of a qualified professional. Use the template as a guide, but always seek professional advice when needed.
Resources & Links
- The Masonry Institute : A leading resource for masonry information, technical guidelines, best practices, and training. Contains information on joint types, mortar failure modes, and repair techniques. Crucial for understanding the complexities of masonry construction and deterioration.
- International Code Council (ICC) Evaluation Service : Provides reports and evaluations of building products and systems, including masonry-related components. Useful for verifying compliance with building codes and understanding approved repair materials and methods. Look for reports related to repointing mortars.
- CEMEX : A global building materials company. Their website offers technical resources and data sheets on mortars and concretes, including information on mix designs and properties relevant to repointing. Many cement manufacturers have similar resources.
- Sika USA : A specialty chemicals company offering a range of construction materials, including mortars, sealants, and adhesives. They provide technical data sheets and application guidelines for masonry repairs and joint stabilization. Check for products suitable for repointing and joint reinforcement.
- BTS Concrete : Provides detailed guides and resources about concrete and mortar, including articles explaining the chemistry of cement hydration and the effects of different aggregates on mortar performance. Helps understand the science behind joint deterioration.
- Portland Cement Association (PCA) : Offers extensive technical resources on cement, concrete, and masonry construction. Look for publications on masonry repair, durability, and best practices for repointing. Valuable for understanding the science behind masonry and its vulnerabilities.
- National Institute of Standards and Technology (NIST) : A government agency that conducts research and provides data related to building materials and construction techniques. While more technical, their research reports can provide valuable insights into masonry durability and deterioration mechanisms. Search for reports on masonry and moisture.
- The ASHRAE Reporter : A professional magazine related to the HVAC industry but often contains articles on building envelope performance, including moisture intrusion in masonry walls. Useful for understanding the interplay between masonry, weather, and moisture damage.
- Building Science Corporation : Provides in-depth analysis and solutions for building performance issues, including moisture-related problems in masonry walls. Their resources focus on understanding the science behind building envelope failures and how to prevent them.
- The Historic Masonry Foundation : Focuses on preservation and repair of historic masonry structures. Provides resources and guidance for appropriate repair techniques and materials, especially important for older buildings with unique masonry systems. Essential for handling heritage buildings.
- United States Bureau of Reclamation : While focused on dams and infrastructure, their technical reports on masonry deterioration in hydraulic structures can be highly relevant to understanding weathering and freeze-thaw damage in building walls. Helpful for identifying potential problems.
Frequently Asked Questions
Are there any safety precautions I should take when inspecting masonry joints?
Yes! Wear appropriate safety gear like gloves and eye protection. Be mindful of heights and any potential hazards like loose bricks or unstable structures. Consider having a professional inspect if you're uncomfortable or unsure.
Found this Article helpful?
Construction Management Solution Demo
Build smarter, not harder! ChecklistGuro streamlines construction projects from planning to closeout. Manage tasks, inspections, safety protocols & more - all in one place. Reduce delays, improve communication, and deliver projects on time & on budget.
Related Articles

The Ultimate Concrete Vibration Checklist Template

Unlock Value: Your Free Value Engineering Checklist Template

The Ultimate HVAC Ductwork Installation Checklist Template

The Ultimate Rebar Placement Checklist Template

Your Concrete Mix Design Verification Checklist: A Step-by-Step Guide

Backfilling & Compaction Checklist: A Foundation's Best Friend

The Ultimate Concrete Delivery & Placement Checklist Template

Your Ultimate Stakeholder Communication Plan Checklist Template
We can do it Together
Need help with
Construction?
Have a question? We're here to help. Please submit your inquiry, and we'll respond promptly.