The Ultimate Planting Installation Checklist Template
Published: 09/01/2025 Updated: 12/13/2025
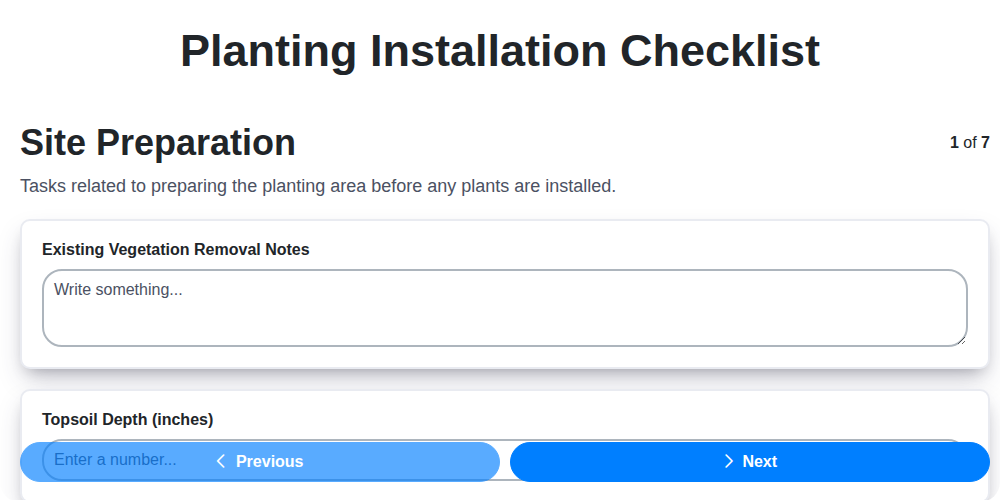
Table of Contents
- Why Use a Planting Installation Checklist?
- Pre-Planting Preparations: Site Assessment & Planning
- Gathering Your Supplies: Materials & Tools
- Step 1: Site Preparation - Clearing & Grading
- Step 2: Soil Amendment & Testing
- Step 3: Planting Hole Creation - Size & Depth
- Step 4: The Planting Process - Technique & Care
- Step 5: Watering & Initial Care
- Step 6: Mulching for Success
- Step 7: Post-Planting Protection - Animals & Elements
- Step 8: Documentation & Record Keeping
- Step 9: Long-Term Maintenance & Monitoring
- Resources & Links
TLDR: This free, downloadable checklist template guides you through every step of planting installation-from soil prep to final cleanup-ensuring your new plants thrive. It's your one-stop resource for avoiding common mistakes and creating a beautiful, long-lasting landscape!
Why Use a Planting Installation Checklist?
A planting installation checklist isn't just a formality; it's a vital tool for ensuring a successful and long-lasting landscape. Think of it as a roadmap, guiding you through each step of the process and minimizing the risk of costly mistakes. Without a structured approach, it's easy to overlook crucial details - a slightly incorrect planting depth, a forgotten soil amendment, or a failure to adequately protect young plants from harsh conditions. These seemingly minor oversights can lead to stunted growth, increased vulnerability to pests and diseases, and ultimately, a disappointing return on your investment.
Beyond simply avoiding errors, a checklist fosters consistency and promotes professionalism, whether you're a seasoned landscaper or a DIY enthusiast. It ensures every planting receives the care and attention it deserves, leading to a more aesthetically pleasing and ecologically healthy landscape. It also serves as a valuable reference point for future maintenance, providing a record of plant locations, species, and initial care instructions - saving time and effort down the line. Finally, a well-maintained checklist provides peace of mind, knowing you've taken all the necessary steps to create a thriving outdoor space.
Pre-Planting Preparations: Site Assessment & Planning
Before a single shovel hits the soil, a thorough site assessment and careful planning are paramount. Rushing into planting without understanding the existing conditions can lead to stunted growth, disease, and ultimately, a failed landscape. This initial phase lays the crucial groundwork for long-term success.
Start with a comprehensive observation of the site. Note the amount of sunlight each area receives throughout the day - full sun (6+ hours), partial shade (3-6 hours), or full shade (less than 3 hours). Record prevailing wind patterns, as they influence plant selection and placement. Pay close attention to soil conditions. Is it sandy, clay-like, or loamy? Perform a simple drainage test by digging a hole and filling it with water; observe how quickly it drains. Poor drainage can lead to root rot, so addressing this issue beforehand is vital.
Beyond the immediate area, consider the larger landscape context. Note the proximity of existing structures, utilities (underground cables and pipes are a serious hazard!), and overhead obstructions like trees. Assess the surrounding vegetation - are there invasive species present that need to be controlled?
Finally, develop a planting plan. This doesn't need to be a formal architectural drawing, but it should outline the proposed location of each plant, taking into account its mature size, sunlight requirements, and aesthetic contribution to the overall design. A well-thought-out plan minimizes future pruning and maintenance needs and ensures a harmonious and functional landscape. Don't forget to check local ordinances or HOA regulations regarding plant heights and species allowed.
Gathering Your Supplies: Materials & Tools
Before you even break ground, ensuring you have the right materials and tools on hand is crucial for a smooth and efficient planting process. Rushing back and forth to the hardware store mid-project is frustrating and delays progress. This section outlines a comprehensive list to ensure you've got everything covered.
Materials:
- Plants: Obviously! Double-check your order and ensure plants are healthy upon arrival.
- Soil Amendments: Compost, manure, peat moss, or other amendments based on your soil test results. Calculate the quantity needed accurately - underestimating can lead to disappointment.
- Mulch: Organic mulch like wood chips, shredded bark, or pine straw. Estimate the volume required to cover the planting areas with a 2-4 inch layer.
- Fertilizer: A balanced fertilizer or a slow-release option formulated for your specific plant types.
- Planting Fabric (Optional): To suppress weeds under mulch, particularly in areas with persistent weed issues.
- Stakes & Ties (if needed): For young trees or plants needing support. Consider the size and strength requirements based on local wind conditions.
- Wire Mesh/Fencing (Optional): For protecting plants from animals.
Tools:
- Shovel: For digging planting holes.
- Spade: For edging and dividing plants.
- Hand Trowel: For smaller planting tasks and transplanting seedlings.
- Garden Fork: For aerating soil and mixing in amendments.
- Wheelbarrow or Buckets: For transporting soil, mulch, and plants.
- Measuring Tape: To ensure proper spacing and depth.
- Gloves: To protect your hands.
- Pruners/Shears: For trimming roots and pruning branches.
- Watering Can or Hose: For irrigating newly planted materials.
- Level (Optional): For ensuring proper drainage and visual appeal, particularly for larger installations.
It's always wise to have a few extra supplies on hand - you never know what unexpected issues may arise!
Step 1: Site Preparation - Clearing & Grading
Before you even think about digging a single hole, thorough site preparation is the bedrock of a successful planting project. This goes far beyond just removing weeds! Clearing and grading are critical for ensuring proper drainage, creating a level and aesthetically pleasing landscape, and ultimately, maximizing the health and longevity of your new plants.
Clearing the Canvas: Begin by removing all existing vegetation - grass, weeds, shrubs, and even tree stumps if necessary. This ensures the new plants aren't competing for resources and provides a clean slate for your design. Remove rocks, debris, and any other obstacles that could impede root growth or interfere with the planting process. Consider the long-term needs of your plantings; a seemingly small root system now could cause issues later.
Grading for Success: The grading process involves shaping the land to achieve the desired slope and elevation. Proper grading is essential for efficient water runoff, preventing pooling and potential root rot. Typically, you're aiming for a slight slope away from your home's foundation - generally around 1-2% is sufficient. Carefully consider how the grade interacts with neighboring properties and existing structures. Significant grading projects may require permits and should ideally be handled by professionals to avoid unintended consequences. Compacting the soil slightly after grading can provide a stable base for planting, but avoid over-compaction which hinders root penetration. Finally, remember to consider the mature size of your plants and how the grade will look in years to come.
Step 2: Soil Amendment & Testing
Understanding your soil is the cornerstone of a successful planting project. It's more than just "dirt"; it's a complex ecosystem influencing nutrient availability, water retention, and overall plant health. Skipping this crucial step can lead to stunted growth, disease susceptibility, and ultimately, wasted investment.
Why Soil Testing Matters
A professional soil test, or even a DIY kit, will provide valuable insights into your soil's composition. Key metrics to look for include:
- pH: Ideal pH for most plants falls between 6.0 and 7.0. Too acidic (low pH) or alkaline (high pH) can hinder nutrient absorption.
- Nutrient Levels: Tests will reveal the presence of essential nutrients like nitrogen (N), phosphorus (P), and potassium (K), as well as micronutrients. Deficiencies or excesses can impact plant growth.
- Organic Matter: Organic matter improves soil structure, water-holding capacity, and nutrient availability.
- Soil Texture: The proportion of sand, silt, and clay influences drainage and aeration.
Common Soil Amendments
Based on your soil test results, you can amend your soil to create an optimal growing environment. Here are some common amendments and their uses:
- Compost: Improves soil structure, adds organic matter, and provides nutrients.
- Manure (well-rotted): Similar benefits to compost, but use cautiously as it can be rich in salts.
- Peat Moss: Improves water retention and aeration, especially in sandy soils.
- Lime: Raises soil pH (makes it less acidic).
- Sulfur: Lowers soil pH (makes it more acidic).
- Sand: Improves drainage in heavy clay soils (use coarse sand, not play sand).
- Specific Fertilizers: Address nutrient deficiencies identified by the soil test (e.g., phosphorus fertilizer for phosphorus-deficient soil).
Important Considerations:
- Follow Test Recommendations: Always follow the specific amendment recommendations provided by your soil test results. Over-amending can be just as detrimental as under-amending.
- Incorporate Amendments Properly: Amend the soil thoroughly by incorporating the materials into the top 6-12 inches of soil.
- Time for Integration: Allow several weeks or even months for amendments to fully integrate into the soil before planting.
Step 3: Planting Hole Creation - Size & Depth
Creating the right planting hole is arguably the most critical step in ensuring a plant's successful establishment. Too small, and the roots will be constricted, hindering growth. Too large, and the plant could dry out quickly or become unstable. Here's how to nail it:
Size Matters: Twice the Width, Same Depth
The general rule of thumb is to dig a hole that's twice as wide as the root ball or container, and the same depth. Why so wide? The loosened soil around the hole encourages root expansion outward, allowing the plant to readily establish a larger root system beyond the immediate planting area.
Depth Precision - Matching the Root Ball
Depth is equally important. Dig the hole so that the top of the root ball sits level with or slightly above (no more than 1-2 inches) the surrounding soil. Planting too deep is a common mistake and can suffocate the roots, leading to rot and decline. Gently loosen the root ball before placement to ensure accurate depth assessment.
Dealing with Root-Bound Plants:
If you're planting from a container, the roots may be circling the bottom, a condition known as being root-bound. In this case, gently score the sides of the root ball vertically in several places with a knife or pruning shears to encourage outward root growth. You can also tease out some of the circling roots. Don't be afraid to prune back excessively circling roots, but avoid drastic pruning unless absolutely necessary.
Step 4: The Planting Process - Technique & Care
Now comes the heart of the operation: actually getting those plants in the ground! This isn't just about digging a hole and dropping a plant in; proper technique is vital for establishing a strong root system and ensuring long-term health.
Root Ball Preparation is Key: Before placing the plant, take a moment to assess the root ball. If it's circling tightly around the interior, gently loosen the roots. This encourages them to grow outwards into the surrounding soil instead of continuing to circle, which can eventually strangle the plant. Use your fingers or a small hand trowel to tease out the roots, particularly at the bottom and sides of the root ball. For plants that have been in containers for a long time, more extensive root pruning might be necessary - consider cutting larger roots in a radial pattern.
Planting Depth Matters: A common mistake is planting too deep. The top of the root ball should be level with, or slightly above (about an inch) the surrounding soil. Check the plant tag - it often indicates the ideal planting depth. Planting too deep can suffocate the roots and lead to rot. Conversely, planting too shallow can expose roots to drying and damage.
Backfilling & Watering: Once the plant is positioned correctly, begin backfilling the hole with the soil you originally excavated. Gently break up any large clumps of soil and avoid compacting it too much. Water the plant thoroughly after planting, ensuring the entire root zone is saturated. This helps settle the soil and eliminate air pockets. A second watering shortly after the first is often beneficial, especially in dry or windy conditions.
Handling Bare-Root Plants: If you're dealing with bare-root plants (typically shrubs or trees), they require special care. Soak the roots in water for 15-30 minutes before planting. Spread the roots outward in the hole, ensuring they are not bent or cramped. Backfill with a mixture of soil and compost to provide nutrients and improve moisture retention.
Tip: Add a handful of mycorrhizae to the planting hole. These beneficial fungi form a symbiotic relationship with plant roots, enhancing nutrient uptake and overall plant health.
Step 5: Watering & Initial Care
The weeks following planting are a critical period for establishing healthy root systems and ensuring long-term success. Consistent and attentive care during this initial phase will significantly impact how your new plants thrive.
Watering is Paramount: Forget-me-not watering isn't an option. New plants need consistent moisture to encourage root growth. Water deeply and regularly, especially during hot and dry weather. How often depends on your soil type, climate, and plant species - sandy soils drain quickly and require more frequent watering than clay soils. Aim to keep the soil consistently moist, but not waterlogged. Check the soil moisture by sticking your finger about an inch deep; if it feels dry, it's time to water.
Morning is Best: Water in the morning whenever possible. This allows the foliage to dry out during the day, minimizing the risk of fungal diseases.
Beyond Water: While water is the primary need, consider a gentle feeding after a few weeks. A diluted, balanced fertilizer can help boost growth, but avoid over-fertilizing, which can burn delicate roots. Observe your plants closely for signs of stress (wilting, yellowing leaves) and adjust your care accordingly. Providing a good start will set the stage for years of beauty and enjoyment.
Step 6: Mulching for Success
Mulch isn't just about aesthetics; it's a vital component of a thriving landscape. Applying a layer of mulch around your newly planted areas provides a wealth of benefits, contributing to plant health, soil stability, and overall landscape beauty.
Here's why mulching is so crucial and how to do it right:
The Benefits of Mulch:
- Moisture Retention: Mulch acts like a blanket, reducing water evaporation from the soil, meaning less frequent watering.
- Weed Suppression: A thick layer of mulch significantly inhibits weed growth, minimizing competition for water and nutrients.
- Temperature Regulation: Mulch insulates the soil, keeping it cooler in the summer and warmer in the winter, protecting roots from extreme temperature fluctuations.
- Soil Enrichment: As organic mulches decompose, they release valuable nutrients back into the soil, improving its fertility.
- Erosion Control: Mulch helps prevent soil erosion, especially on slopes or in areas with heavy rainfall.
Choosing the Right Mulch:
- Organic Mulches (Wood Chips, Shredded Bark, Pine Straw): These decompose over time, enriching the soil. They require replenishment every 1-3 years.
- Inorganic Mulches (Rock, Gravel): These are long-lasting and don't decompose, but they don't add nutrients to the soil. They are suitable for certain design aesthetics and areas where soil enrichment isn't a priority.
Applying Mulch Correctly:
- Depth: Apply a layer of 2-4 inches of mulch.
- Placement: Keep mulch a few inches away from the plant stems or tree trunks to prevent rot and pest problems. "Volcano mulching" (piling mulch directly against stems) is discouraged.
- Distribution: Spread the mulch evenly across the planting area.
Step 7: Post-Planting Protection - Animals & Elements
Once your plants are nestled into their new home, safeguarding them from the elements and unwanted visitors is crucial for their survival and thriving. Here's how to protect your investment:
Animal Deterrents:
- Fencing: For vulnerable species, especially young trees or shrubs, consider temporary fencing to exclude deer, rabbits, and other herbivores. Chicken wire or netting can be surprisingly effective.
- Tree Guards/Shrub Shields: These plastic or mesh guards wrap around the trunk of young trees, preventing rabbits and rodents from gnawing on the bark.
- Repellents: Several commercial animal repellents are available. Follow product instructions carefully and be mindful of potential impacts on other wildlife. Homemade solutions (e.g., cayenne pepper spray) can sometimes offer limited protection, but their effectiveness varies.
- Motion-Activated Sprinklers: These can be a humane way to deter larger animals like deer from entering your landscape.
Elemental Protection:
- Windbreaks: Newly planted trees and shrubs are susceptible to wind damage. Temporary windbreaks (e.g., burlap screens) can provide shelter during windy periods.
- Sun Shade: Young plants, especially those not acclimated to full sun, may benefit from temporary shade cloth to prevent scorching.
- Winter Mulching: A thick layer of mulch around the base of plants helps insulate roots and protect them from freezing temperatures.
- Frost Protection: In areas prone to late spring frosts, covering sensitive plants with blankets or frost cloths can prevent damage. Remember to remove the covers once the threat of frost has passed.
Step 8: Documentation & Record Keeping
Beyond the immediate satisfaction of a beautifully planted landscape, meticulous documentation proves invaluable for long-term maintenance, future renovations, and even resolving potential warranty claims. It's about creating a "memory" of your planting project that extends far beyond the initial installation.
Here's what you should record:
- Plant Inventory: This is your most crucial asset. Create a spreadsheet or use a dedicated garden planning app. Include the plant's common and scientific name, location within the landscape (e.g., "south side of patio"), planting date, and initial size. Photographs at planting time are incredibly helpful for later reference.
- As-Built Drawings: While not always essential for smaller projects, as-built drawings are vital for larger landscapes. They accurately reflect the final layout, showing the precise location of all plants, hardscaping features (paths, patios), and irrigation lines. These become your definitive guide for future changes and maintenance. Even a simple hand-drawn sketch is better than nothing!
- Material Records: Keep records of soil amendments, fertilizers, and mulch used. Knowing what you applied and when can help troubleshoot future issues.
- Contractor Information: If you hired a contractor, retain copies of contracts, warranties, and any communication regarding the project.
- Maintenance Schedule: Develop a preliminary maintenance schedule outlining watering frequencies, fertilization dates, and pruning requirements specific to each plant. This provides a roadmap for ongoing care.
- Warranty Details: Document plant warranties and guarantees, including expiration dates and contact information.
Proper documentation isn't just about paperwork; it's an investment in the longevity and health of your landscape.
Step 9: Long-Term Maintenance & Monitoring
Planting is just the beginning! A thriving landscape requires ongoing care and vigilant observation. Long-term maintenance isn't about heavy labor; it's about preventative measures and early intervention.
Regular Inspections (Seasonal): Conduct thorough inspections at least four times a year - spring, early summer, fall, and late fall/early winter. Look for signs of stress, disease, pest infestations, or nutrient deficiencies. Don's neglect even seemingly small issues; they can quickly escalate.
Watering Adjustments: Monitor soil moisture levels and adjust watering frequency based on weather conditions and plant needs. Newly planted trees and shrubs require more frequent watering until their root systems are established. Remember that overwatering can be as detrimental as underwatering.
Fertilization: Implement a fertilization schedule based on soil test results and plant requirements. Avoid excessive fertilization, which can harm plants and pollute waterways. Organic fertilizers offer a slow-release option that's gentle and beneficial for soil health.
Pruning & Training: Prune plants regularly to maintain their shape, promote healthy growth, and remove dead or diseased branches. Train young trees and shrubs to develop strong structures. Research the proper pruning techniques for each species.
Pest & Disease Management: Monitor for signs of pest infestations or disease. Identify problems early and take appropriate action, preferably with environmentally friendly methods. Preventative measures, like promoting healthy soil and choosing disease-resistant varieties, are key.
Mulch Refresh: Replenish mulch as needed to maintain a 2-4 inch layer. Topdressing with compost can provide additional nutrients.
Weed Control: Stay on top of weeds to prevent them from competing with your plants for resources. Hand-pulling, mulching, and targeted herbicides (used sparingly) are effective methods.
Record Keeping: Maintain a log of maintenance activities, observations, and any issues encountered. This information can be invaluable for future planning and problem-solving.
Resources & Links
- Royal Horticultural Society (RHS) : A comprehensive resource for all things gardening. Great for understanding plant needs, soil types, pest and disease identification (relevant to Step 1, Step 4, Step 7, and Step 9). They offer detailed guides on plant selection and care appropriate to different climates.
- Gardener's Supply Company : A fantastic source for tools, materials (soil, amendments, mulches), and equipment. Useful for building out your 'Gathering Your Supplies' section and potentially linking to specific product recommendations (relevant to header 'Gathering Your Supplies').
- Soil Testing Services : Provides professional soil testing services. Essential for the 'Soil Amendment & Testing' stage (Step 2). Understanding pH and nutrient levels is crucial for plant success. You can reference this as an option for detailed soil analysis.
- The Spruce - Gardening : Offers a wide range of gardening articles, including planting guides, landscaping tips, and how-to tutorials. Supports multiple steps including site preparation, planting techniques, and post-planting care.
- Burpee : A reputable seed and plant supplier. Helpful for understanding plant spacing recommendations and learning about specific plant needs (relevant to Step 7 - animal protection and Step 3 - hole size).
- Forestry Suppliers : Great for supplies beyond the standard garden center. Think protective tree guards, erosion control fabrics (useful for Step 7), and larger-scale soil amendment materials.
- Proloco : Professional landscaping tools and equipment. Useful for illustrating tools needed for larger planting installations (referencing in 'Gathering Your Supplies').
- Evernote : A digital note-taking application. Perfect for illustrating and recommending digital record-keeping methods (directly supports Step 4 - Documentation & Record Keeping). Other note-taking apps are good too.
- Canva : Easy-to-use graphic design platform. Can be used to create a visually appealing, printable checklist template to accompany your post (directly supports Step 1, 2, 3,4,5,6,7,8,9 - the entire process).
- EPA - Integrated Pest Management : Provides information on environmentally responsible pest control. Directly supports 'Post-Planting Protection' (Step 7) by providing sustainable strategies.
- Planet Natural : Source for organic gardening supplies and information. Offers alternatives for soil amendments, pest control, and mulches (supports multiple steps: Step 2, Step 7).
Frequently Asked Questions
What is a planting installation checklist and why do I need one?
A planting installation checklist is a detailed guide outlining all the steps needed to successfully install a planting project, from initial planning to final watering. It's crucial for ensuring nothing is missed, minimizing errors, and ultimately maximizing the survival and health of your new plantings. It ensures consistency, especially if you're working with a team or handling multiple projects.
Is this checklist template customizable?
Yes! The template is designed to be flexible. You can add, remove, or modify steps to perfectly match your specific project's requirements, plant types, site conditions, and team processes. Feel free to adjust the priority levels too.
What kind of projects is this checklist template suitable for?
This template is versatile and can be used for various planting projects including residential gardens, commercial landscaping, public parks, and even smaller container plantings. It's adaptable for annuals, perennials, trees, shrubs, and groundcovers.
What information will I need to gather *before* using the checklist?
Before using the checklist, you'll need to have: a site assessment (soil type, sunlight exposure, drainage), a planting plan (plant types, quantities, locations), material lists (soil amendments, mulch, tools), and a budget. Knowing these details will allow you to accurately populate the checklist and track progress.
The checklist has priority levels - what do those mean?
The priority levels (High, Medium, Low) indicate the urgency and criticality of each task. 'High' priority items are essential for successful planting and should be completed first. 'Medium' priority items are important for overall plant health. 'Low' priority items are beneficial but can be addressed later.
Can I use this checklist for a team? How?
Absolutely! The checklist is ideal for team projects. Assign tasks to team members, use the checklist to track progress, and use the notes section to communicate any issues or updates. Consider using a shared digital version of the checklist for easy collaboration.
What should I do if I encounter an unexpected issue during the planting installation?
Record the issue in the 'Notes' section of the checklist. Re-evaluate the task and adjust the checklist as needed. Prioritize solutions and document any changes made to the original plan. Don't hesitate to consult with a horticultural expert if necessary.
Where can I download the Planting Installation Checklist Template?
You can find the downloadable template linked within the article. Look for the button or link that says 'Download Checklist Template'. It's usually available in multiple formats (e.g., PDF, Excel/Google Sheets).
What's the difference between a planting plan and this installation checklist?
The planting plan outlines *what* plants to use and where to place them. The installation checklist details the *how* - the steps required to actually implement the planting plan. They work together - the plan guides the checklist.
Are there any specific tools or equipment I need to ensure are accounted for in the checklist?
Yes! Consider including tools like shovels, rakes, wheelbarrows, soil testing kits, measuring tapes, gloves, and any specialized equipment needed for specific planting techniques or site conditions.
Found this Article helpful?
Construction Management Solution Demo
Build smarter, not harder! ChecklistGuro streamlines construction projects from planning to closeout. Manage tasks, inspections, safety protocols & more - all in one place. Reduce delays, improve communication, and deliver projects on time & on budget.
Related Articles

The Ultimate Concrete Vibration Checklist Template

Unlock Value: Your Free Value Engineering Checklist Template

The Ultimate HVAC Ductwork Installation Checklist Template

The Ultimate Rebar Placement Checklist Template

Your Concrete Mix Design Verification Checklist: A Step-by-Step Guide

Backfilling & Compaction Checklist: A Foundation's Best Friend

The Ultimate Concrete Delivery & Placement Checklist Template

Your Ultimate Stakeholder Communication Plan Checklist Template
We can do it Together
Need help with
Construction?
Have a question? We're here to help. Please submit your inquiry, and we'll respond promptly.