Sheathing Installation Checklist Template: Your Step-by-Step Guide
Published: 09/02/2025 Updated: 12/13/2025
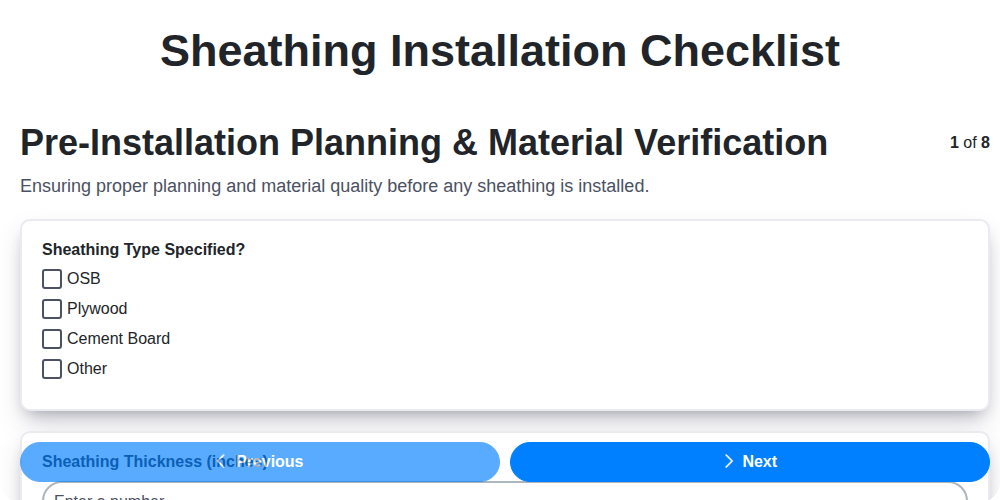
Table of Contents
- Introduction: Why a Sheathing Checklist Matters
- 1. Pre-Installation Planning & Material Verification
- 2. Framing Inspection: Setting the Foundation
- 3. Sheathing Material Selection & Assessment
- 4. Layout and Staggering: Maximizing Strength
- 5. Fastener Installation: Ensuring Secure Attachment
- 6. Panel Placement & Alignment: Achieving Precision
- 7. Joint Treatment & Seam Detailing
- 8. Wind and Seismic Considerations
- 9. Quality Control: A Critical Review
- 10. Common Sheathing Installation Mistakes to Avoid
- 11. Tools and Materials Checklist
- 12. Final Inspection and Documentation
- Resources & Links
TLDR: This checklist template ensures a structurally sound and weather-resistant sheathing installation. It breaks down the process into manageable steps - from planning & material verification to final inspection - so you don't miss crucial details and stay compliant with building codes. Download the template and use it to nail your sheathing project!
Introduction: Why a Sheathing Checklist Matters
Sheathing: it's the silent backbone of your building, often hidden beneath siding or roofing. But don't let its unassuming nature fool you - a properly installed sheathing layer is critical for structural integrity, weather protection, and long-term durability. Cutting corners or skipping steps during installation can lead to a cascade of problems down the road: moisture damage, warped siding, compromised structural stability, and expensive repairs.
A simple checklist might seem like a minor detail, but it's a powerful tool for ensuring consistent quality and avoiding costly mistakes. Whether you're a seasoned contractor or a determined DIYer, a well-structured sheathing checklist guarantees a systematic approach, minimizes oversights, and ultimately safeguards your investment. Let's dive into why this seemingly small step makes a huge difference.
1. Pre-Installation Planning & Material Verification
Before a single sheet of sheathing touches your framing, meticulous planning and material verification are absolutely essential. Rushing this stage can lead to costly rework and compromise the long-term integrity of your structure.
Blueprint Review and Code Compliance: The first step is a thorough review of your architectural plans. Ensure the specified sheathing type (OSB, plywood, or another material) and thickness align precisely with the design requirements and the load-bearing demands of the project. Don't forget to factor in any specific wind or snow load considerations. Simultaneously, verify that your planned installation method and materials comply with all applicable local building codes and secure any necessary permits before you begin work. Ignorance of code isn't an excuse - it's a liability.
Material Inventory & Condition: Accurate material estimation prevents frustrating delays and waste. Calculate the required quantity of sheathing sheets based on your framing layout, accounting for overlap and waste. When materials arrive on-site, perform a comprehensive inspection. Check for any signs of damage, such as delamination, voids, warping, or breakage. Also, assess the moisture content of the sheathing - overly moist material can warp and shrink after installation. Store materials properly, protected from the elements, until they are ready to be used. Proactive verification here prevents headaches later.
2. Framing Inspection: Setting the Foundation
Before you even think about laying down that first sheet of sheathing, a rigorous framing inspection is absolutely critical. Think of it this way: the framing is the skeleton upon which the entire structure relies. If the framing is out of alignment or compromised, the sheathing installation, no matter how meticulous, won't compensate.
First, verify that all walls are perfectly square and plumb. Even slight deviations here can create major headaches later on, leading to misaligned siding, difficulty sealing gaps, and potential structural weaknesses. Use a framing square and a level to confirm these conditions. Correct any discrepancies before proceeding - shimming, bracing, or re-framing may be necessary.
Next, ensure that stud spacing adheres to local building codes, typically 16 or 24 on center. Improper spacing can compromise the sheathing's ability to transfer loads effectively. Closely examine the existing fasteners in the framing. Look for signs of corrosion, loosening, or damage. Replace any questionable fasteners to ensure a strong and reliable connection. Finally, double-check that the top plate is level. A level top plate guarantees that the sheathing panels will be properly aligned and provides a consistent reference point for the installation. Don't skip this step - it's your foundation for a successful sheathing job!
3. Sheathing Material Selection & Assessment
Choosing the right sheathing material is a foundational decision, significantly impacting your project's structural integrity, cost, and longevity. While OSB (Oriented Strand Board) and Plywood are the most common choices, understanding their nuances and assessing their condition is critical.
OSB vs. Plywood: A Quick Comparison
- OSB: Generally more cost-effective than plywood. It's made from compressed wood strands and offers good shear strength - excellent for resisting racking forces. However, it can be more susceptible to moisture damage if not properly sealed. Look for OSB specifically rated for structural applications.
- Plywood: Offers superior moisture resistance compared to standard OSB, particularly CDX grades. It provides good dimensional stability and is less prone to warping. Consider "Exposure 1" plywood for most exterior applications.
Assessing Material Condition - Don't Just Grab the Stack!
Before installation, meticulously inspect each sheet. Look for:
- Delamination: Separation of the layers within the sheet. This compromises strength and weather resistance.
- Voids: Air pockets or gaps within the sheet - a sign of poor manufacturing.
- Warping & Bowing: Significant curvature makes installation difficult and affects panel flatness.
- Surface Damage: Excessive knots, splits, or insect damage reduce the sheet's structural performance.
- Moisture Content: While ideal acclimation is best, visually assess. Darker coloring or a musty odor can indicate excessive moisture.
- Grade Stamps: Verify the grade stamp matches project specifications (e.g., "Exposure 1" for exterior use).
Remember, a seemingly small defect can significantly impact the sheathing's performance over time. Reject any questionable materials to ensure a robust and durable structure.
4. Layout and Staggering: Maximizing Strength
The way you lay out and stagger your sheathing panels isn't just about aesthetics; it's a critical factor in the structural integrity of your building. Think of it as creating a brick wall - you wouldn't stack bricks directly on top of each other! The same principle applies to sheathing.
Why Staggering Matters:
- Prevents Weak Lines: A continuous vertical or horizontal seam of joints creates a weak point in the wall's structure, vulnerable to wind uplift and structural stress. Staggering breaks up these lines, distributing the load more evenly.
- Enhanced Resistance: Proper staggering increases the wall's resistance to racking forces - the tendency to distort under lateral pressure.
- Code Compliance: Many building codes specifically require staggered sheathing patterns.
Best Practices for Layout:
- Minimum Offset: Aim for a minimum overlap of 8-12 inches. Greater overlap is even better for high-wind areas.
- Plan the Layout: Before you start nailing, lay out the panels on the floor to visualize the pattern and minimize waste.
- Consistent Pattern: Maintain a consistent staggering pattern throughout the entire wall.
- Consider Sheet Sizes: Strategically position your starting panel to minimize cuts and waste. Sometimes, a slight angle adjustment at the corners can greatly reduce scrap.
5. Fastener Installation: Ensuring Secure Attachment
The integrity of your sheathing hinges significantly on how securely it's attached to the framing. Using the correct fastener and employing precise placement techniques are paramount. Not all fasteners are created equal - nails and screws each have their pros and cons, and the choice often depends on the sheathing material, local code requirements, and the anticipated loads.
Nails vs. Screws: A Quick Comparison
- Nails: Generally more economical, fast to install, and suitable for many applications. However, they can loosen over time due to movement in the wood. Ring shank nails are a significant upgrade, offering superior holding power compared to standard nails.
- Screws: Provide a stronger, more consistent hold than nails. They resist loosening and are less likely to pop out due to wood shrinkage. However, they are typically more expensive and require more time to install.
Key Installation Best Practices:
- Spacing is Critical: Adhere strictly to the fastener spacing guidelines specified in your plans and local building codes. Overly sparse spacing creates weak points, while excessively dense spacing can lead to sheathing blowout. Typical spacing ranges from 6 to 12 on center, but always confirm with your specific project requirements.
- Depth Matters: Ensure fasteners penetrate the framing members sufficiently. Insufficient penetration reduces holding power, while over-driving can damage the sheathing and framing. A minimum penetration of 1 into the framing member is generally recommended.
- Angle of Drive: Drive fasteners straight and at a consistent angle. Angled drives can split the sheathing and compromise the structural integrity. A nail gun or screw gun can help maintain a consistent angle and driving depth.
- Predrilling (for Screws): Predrilling pilot holes, especially when using screws, can prevent splitting, particularly when working with brittle sheathing materials like plywood. Choose a drill bit slightly smaller than the screw diameter.
- Keep it Consistent: A consistent pattern of fastener installation makes inspection easier and helps detect any potential issues early on.
6. Panel Placement & Alignment: Achieving Precision
Achieving precise panel placement and alignment is paramount for a structurally sound and weather-resistant building envelope. It's more than just slapping sheets of sheathing onto the framing - it's about creating a system that works as a cohesive unit. Here's how to nail it (pun intended!):
Start with a Strong Foundation: Before you even lift a panel, ensure your framing is square, plumb, and level. Any inaccuracies in the framing will be magnified in the sheathing layer. A slight deviation now can lead to significant issues later.
Layout is Key: Take the time to plan your layout. Consider the panel sizes and how they're best oriented to minimize waste and maximize structural performance. Think about how the panel seams will interact with the framing and avoid creating weak points. Use chalk lines to guide your placement for accuracy.
Panel Orientation & Wind Loads: When possible, orient the sheathing panels parallel to the prevailing wind direction. This maximizes the panel's resistance to wind uplift.
Edge Distance Matters: Ensure the edges of the panels extend beyond the framing members by the recommended distance (typically 3/8 to allow for expansion and contraction). This prevents binding and ensures proper nailing.
Flush & Flush: Each panel edge should be flush with the corresponding framing member. A slight overhang or gap can compromise the overall integrity of the system. Use shims if necessary to achieve a perfectly flush alignment.
Regular Checks: As you install each panel, step back and assess the overall alignment. A fresh perspective can help identify any minor deviations before they become major problems.
Good luck with your sheathing installation!
7. Joint Treatment & Seam Detailing
Joint treatment and seam detailing are often overlooked, but they're vital for a weathertight and structurally sound building. Simply nailing the sheathing down isn't enough - you need to address the vulnerable areas where panels meet.
Here's a breakdown of best practices:
- Caulking: Apply a high-quality, paintable exterior caulk along all seams and around penetrations (windows, doors, vents). This creates a flexible barrier against moisture and air infiltration. Ensure the caulk is compatible with the sheathing material and the exterior finish.
- Sheathing Tape (Highly Recommended): Consider using a self-adhesive sheathing tape specifically designed for this purpose. Applied over the seams before installing siding or roofing, it creates a seamless, waterproof bond. This is a significant upgrade in weather protection, especially in regions with heavy rain or snow. Follow the manufacturer's instructions for proper application - clean surfaces are crucial for good adhesion.
- Flashing Integration: Carefully integrate flashing around all openings and intersections. Ensure flashing overlaps seams and is properly sealed to direct water away from the structure. This is critical for preventing rot and mold.
- Panel Edge Sealing (For certain climates): In areas with extremely harsh weather conditions, consider applying a sealant along the edges of the sheathing panels where they meet the framing.
- Pay Attention to Corners: Corners are particularly vulnerable points. Ensure they are meticulously sealed and flashed to prevent water penetration.
8. Wind and Seismic Considerations
Sheathing plays a critical role in a building's resistance to wind uplift and seismic forces. Proper installation isn't just about nailing straight; it's about strategically ensuring the entire structure acts as a unified system.
Wind Uplift: High winds can create significant uplift forces, potentially ripping sheathing from the framing. To combat this:
- Increased Fastener Density: In high-wind zones, building codes often require increased fastener density - closer spacing between nails or screws - along panel edges and corners. Refer to local wind load requirements.
- Panel Orientation: Orient sheathing panels perpendicular to the prevailing wind direction whenever possible. This maximizes resistance to uplift forces.
- Sheathing Edge Distance: Ensure adequate edge distance from framing members - typically a minimum of 3/8" - to allow for expansion and contraction and prevent premature fastener pullout.
- Specialized Fasteners: Consider using specialized wind-rated fasteners that offer superior holding power.
Seismic Activity: In earthquake-prone areas, a flexible and interconnected sheathing system is crucial.
- Continuous Load Path: The sheathing contributes to a "continuous load path," transferring seismic forces from the roof and walls down to the foundation. Proper fastening and panel alignment are vital for this transfer.
- Staggered Joints: The staggered joint pattern helps distribute seismic stress, preventing concentrated points of failure.
- Increased Fastener Density (Again!): Seismic design often mandates higher fastener counts, particularly in areas with high seismic risk.
- Panel Interlock (Where Applicable): Some advanced sheathing systems incorporate interlocking edges, further enhancing seismic performance. Always check local building codes and consult with a structural engineer.
9. Quality Control: A Critical Review
Quality control isn't just a final check; it's woven into every step of the sheathing installation process. However, this final review is your last line of defense against potential problems. Don't rush through it!
Begin with a systematic walk-around, using a checklist (like the one we're following!) to ensure each item has been addressed. Pay particular attention to areas prone to errors - corners, around openings, and where complex framing intersects with the sheathing.
Look for visual cues: uneven fastener lines, gaps between panels, signs of splitting or warping, and inconsistencies in fastener spacing. Use a straight edge to verify panel alignment. A simple tap test can often reveal loose or improperly secured panels.
Document any issues you find, and immediately correct them. Don't assume a minor imperfection won't become a major problem later. Thoroughness at this stage minimizes costly rework and ensures a long-lasting, structurally sound building envelope. Consider having an experienced eye review your work if possible - a fresh perspective can often catch details you might have overlooked.
10. Common Sheathing Installation Mistakes to Avoid
Even with a detailed checklist, mistakes can happen. Recognizing these common pitfalls before they impact your project can save significant time and money.
- Ignoring Local Codes: Building codes aren't suggestions; they're mandatory. Failing to adhere to them can lead to failed inspections and costly rework.
- Inconsistent Fastener Spacing: Uneven fastener placement weakens the sheathing's integrity. Use a consistent pattern and spacing guide.
- Improper Staggering: Random panel arrangement offers minimal strength. Stagger joints strategically to distribute loads.
- Skipping the Framing Inspection: Assuming the framing is perfect without checking is risky. Minor corrections early on can prevent major headaches later.
- Using the Wrong Fastener Type: Different sheathing materials require specific fasteners. Using the wrong type can lead to pull-out and failure.
- Overdriving Fasteners: This crushes the sheathing, reducing its holding power and creating weak points.
- Ignoring Moisture Content: Using damp sheathing leads to warping, shrinkage, and potential mold growth. Acclimate the material beforehand.
- Neglecting Panel Support: Lack of adequate support around openings can cause panels to sag and shift.
- Overlooking Seam Treatment: Gaps and cracks in seams create easy pathways for water infiltration. Seal appropriately.
- Rushing the Process: Sheathing installation isn't a race. Taking your time and paying attention to detail is key to a quality outcome.
11. Tools and Materials Checklist
Before you even think about laying that first sheet of sheathing, make sure you're fully equipped! Running out of materials mid-project is a major setback. Here's a comprehensive list to ensure you have everything you need:
Materials:
- Sheathing: (Calculate quantity based on building plans, adding 5-10% for waste) - Specify type (OSB, Plywood, etc.) and thickness.
- Fasteners: Nails or Screws (quantity depends on sheathing type, spacing requirements, and area to be covered). Check fastener specifications for code compliance.
- Seam Tape (Optional): Sheathing seam tape for enhanced weather resistance.
- Caulk/Sealant: For joints and penetrations.
- Flashing: For windows, doors, and other roof penetrations.
Tools:
- Tape Measure: 25' or longer.
- Speed Square/Framing Square: Essential for accurate cuts.
- Circular Saw: For cutting sheathing panels.
- Miter Saw (Optional): For more precise cuts, especially for complex angles.
- Hammer or Screw Gun: Depending on fastener choice.
- Level (4' minimum): For ensuring walls and panels are level.
- Chalk Line: For marking straight lines.
- Safety Glasses: Mandatory!
- Work Gloves: Protect your hands.
- Dust Mask/Respirator: Especially when cutting.
- Utility Knife: For trimming and adjustments.
- Pencil: For marking.
- Stapler (for seam tape, if used): Appropriate for the type of tape.
12. Final Inspection and Documentation
The final inspection isn't just a formality; it's your last chance to catch any oversights and ensure your sheathing installation meets the highest standards. Walk the entire structure, both inside and out, with a critical eye. Specifically look for:
- Fastener Integrity: Are all fasteners driven straight and fully seated? Pull on a few panels (gently!) to verify their hold.
- Panel Alignment: Double-check that panels remain properly aligned, particularly around openings and transitions.
- Seam Condition: Examine taped seams and caulked joints to confirm they's uniform and free from gaps or cracks.
- Overall Appearance: Does the sheathing look even and professional? Any visible damage or inconsistencies?
Beyond the visual inspection, create a thorough documentation record. This includes:
- Photos: Take clear photos of the completed installation, including close-ups of key areas and details.
- Material Records: Maintain records of the sheathing type, grade, and quantity used.
- Inspection Checklist: Mark off each item on your checklist to confirm completion.
- Change Orders: If any deviations from the original plans occurred, document them clearly with details of the reasoning and corrective actions.
This detailed record serves as proof of quality workmanship, simplifies future maintenance, and can be invaluable if any issues arise later on. It's the final step in solidifying a job well done.
Resources & Links
- U.S. Department of Housing and Urban Development (HUD) : HUD provides technical guidelines and information related to building codes and construction standards, particularly relevant for wall and roof sheathing. Look for their documents on structural performance and safety.
- International Code Council (ICC) : The ICC develops the International Building Code (IBC) and International Residential Code (IRC), which provide detailed requirements for sheathing installation, including thicknesses, fastening patterns, and performance criteria. Essential reference.
- ASI : ASI offers a wealth of technical resources, including design guides, technical bulletins, and webinars, specifically covering sheathing and panel products. Their content is often highly technical and useful for deeper understanding.
- The Plywood Federation : Provides information and resources specifically related to plywood sheathing, including grades, applications, and installation guidelines. Useful for plywood-focused topics.
- The Engineered Wood Association (EWA) : Dedicated to OSB (Oriented Strand Board), this site offers specifications, technical data, and installation recommendations for OSB sheathing. Great for OSB-specific questions.
- The Home Depot : While a retailer, Home Depot's website often has helpful guides and articles related to construction projects, which can include general information on sheathing installation. Search for their articles and how-to guides.
- Lowe's : Similar to Home Depot, Lowe's provides online resources and advice related to construction and home improvement, which can include information on sheathing installation and material selection.
- Building Science Corporation : A leader in building science, BSC provides research-based information and training on building performance, including moisture management and detailing, which is vital in understanding proper sheathing installation practices.
- Fine Homebuilding : A leading publication for professional builders and serious DIYers, Fine Homebuilding often features in-depth articles and videos related to construction techniques, including sheathing installation. Requires subscription for full access, but offers a wealth of information.
- ASI Resource Library : ASI's website has an extensive resource library with technical bulletins, design guides, and application details covering a wide range of sheathing and structural panel products. Useful for very specific details.
- Tools Today : A good source for looking at the types of tools typically used during sheathing installation, provides information on power nailers, measuring tools and more. Helpful for the Tools and Materials Checklist section.
- National Association of Home Builders (NAHB) : The NAHB offers educational resources and best practices for home construction, potentially including guidance on sheathing installation. Might be helpful for broader industry standards and best practices.
- International Association of Certified Home Inspectors (InterNACHI) : InterNACHI provides resources for home inspectors, which can include information on identifying and evaluating sheathing defects. Useful for understanding potential issues and quality control.
- DuPont : DuPont offers products and resources related to construction materials, including information on moisture management and sheathing systems. Their website may have specific details on compatible products and installation techniques.
Frequently Asked Questions
What is sheathing and why is it important?
Sheathing is the structural layer applied over wall framing and roof rafters. It provides a nailing surface for exterior finishes, adds strength to the structure, and provides a weather barrier. Proper sheathing installation is critical for the overall integrity and longevity of a building.
What's included in the sheathing installation checklist template?
The template covers key areas like material selection, safety precautions, framing inspection, sheathing layout, fastener patterns, flashing details, and final inspection points. It ensures a thorough and compliant installation process.
What types of sheathing are commonly used, and how does the checklist guide me in choosing the right one?
The checklist addresses common sheathing types like plywood, OSB (Oriented Strand Board), and magnesium oxide (MgO) board. It prompts you to consider factors like structural requirements, code compliance, moisture resistance, and project budget to select the appropriate material.
Does the checklist cover different framing materials (wood, steel)?
The checklist primarily focuses on wood framing, which is the most common. However, it includes notes and considerations for adapting the process for steel framing, emphasizing the need for appropriate fasteners and detailing.
What safety precautions are highlighted in the checklist?
The checklist emphasizes personal protective equipment (PPE) like gloves, eye protection, and dust masks. It also addresses fall protection, safe lifting techniques, and awareness of potential hazards associated with power tools and materials.
How does the checklist help with fastener spacing and patterns?
The checklist provides guidelines for fastener spacing based on sheathing type, thickness, and structural load requirements. It includes recommendations for staggered patterns and edge distances to ensure proper attachment.
What should I do if I find issues with the framing before installing sheathing?
The checklist includes a section for framing inspection. If you identify issues like out-of-plumb walls, warped studs, or inadequate spacing, it instructs you to correct them before proceeding with sheathing installation.
How does the checklist address flashing and weatherproofing?
The checklist emphasizes the importance of properly flashing windows, doors, and other penetrations before installing sheathing. It provides guidance on overlap requirements and material compatibility to prevent water intrusion.
Is this checklist compliant with local building codes?
The checklist is designed to align with common building code practices but is not a substitute for local code compliance. Always consult with your local building department to ensure your installation meets all applicable requirements.
Can I customize the checklist template?
Yes, the template is designed to be a starting point. You can customize it to reflect specific project requirements, local building codes, and contractor preferences. Add notes, adjust fastener spacing, or include additional inspection points as needed.
Found this Article helpful?
Construction Management Solution Demo
Build smarter, not harder! ChecklistGuro streamlines construction projects from planning to closeout. Manage tasks, inspections, safety protocols & more - all in one place. Reduce delays, improve communication, and deliver projects on time & on budget.
Related Articles

The Ultimate Concrete Vibration Checklist Template

Unlock Value: Your Free Value Engineering Checklist Template

The Ultimate HVAC Ductwork Installation Checklist Template

The Ultimate Rebar Placement Checklist Template

Your Concrete Mix Design Verification Checklist: A Step-by-Step Guide

Backfilling & Compaction Checklist: A Foundation's Best Friend

The Ultimate Concrete Delivery & Placement Checklist Template

Your Ultimate Stakeholder Communication Plan Checklist Template
We can do it Together
Need help with
Construction?
Have a question? We're here to help. Please submit your inquiry, and we'll respond promptly.