Downloadable Soil Compaction Verification Checklist Template
Published: 09/02/2025 Updated: 12/13/2025
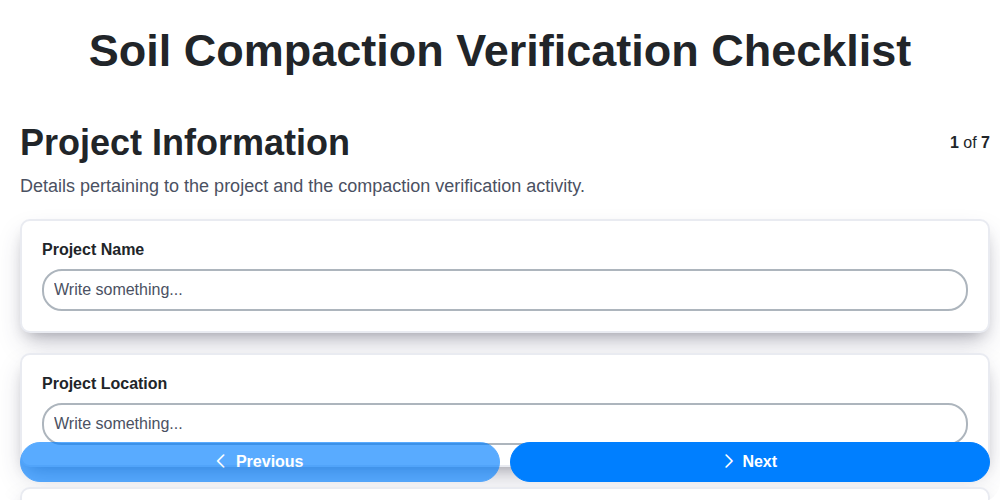
Table of Contents
- Why a Soil Compaction Checklist is Essential
- Understanding Soil Compaction Requirements
- Key Elements of a Robust Checklist
- Template Breakdown: Sections and What They Cover
- Download Your Free Soil Compaction Verification Checklist
- How to Use the Checklist Effectively
- Common Pitfalls to Avoid
- Beyond the Checklist: Best Practices
- Stay Compliant: Legal and Regulatory Considerations
- Resources & Links
TLDR: Need to ensure proper soil compaction for your construction project? Download our free, easy-to-use checklist template! It guides you through equipment calibration, testing procedures, result analysis, and corrective actions, helping you avoid costly mistakes and build a solid foundation - all in one organized document.
Why a Soil Compaction Checklist is Essential
Insufficient soil compaction isn't just an inconvenience; it's a potential structural nightmare. Imagine a building settling unevenly, roads cracking prematurely, or pipelines shifting - all consequences of a poorly compacted foundation. A Soil Compaction Verification Checklist isn't about ticking boxes; it's about preventing these costly and potentially dangerous scenarios.
Think of it as a proactive safety net. Without a systematic checklist, you're relying on guesswork and hoping for the best. A checklist provides a structured, documented process, ensuring that compaction activities are consistently performed to the required standards. It minimizes errors, reduces the risk of non-compliance with specifications, and provides a clear audit trail for accountability. Ultimately, a detailed checklist translates to increased project longevity, reduced maintenance costs, and a more stable, reliable finished product. It's a small investment that delivers significant long-term value.
Understanding Soil Compaction Requirements
Before a single pass of a compactor happens, it's vital to understand why soil compaction is necessary and what the project specifications actually demand. It's not just about making the soil "harder"; it's about achieving a specific density and moisture content to ensure stability and prevent future problems.
These requirements typically stem from geotechnical investigations, which analyze the existing soil conditions and determine the appropriate compaction levels needed for the intended use. You'll commonly encounter specifications referencing Proctor density, which represents the maximum dry density achievable for a given soil type when compacted under standardized laboratory conditions. The project documents will then specify a percentage of this Proctor maximum density - often 90%, 95%, or even higher - that the in-place compacted soil must achieve.
Beyond density, moisture content is equally crucial. Soil compaction is most effective within a specific moisture range. Too dry, and the soil particles won't bind effectively. Too wet, and the water will fill the voids, hindering compaction and potentially causing instability. Specifications will often dictate a permissible moisture content range alongside the density requirements.
Finally, be aware that different soil types (e.g., sandy soils, clayey soils, gravelly soils) will have varying compaction characteristics and will therefore require different approaches and specifications. Ignoring these differences can lead to ineffective compaction and compromised structural integrity. Always consult the project's geotechnical report and specifications carefully to fully grasp the compaction requirements for your specific project.
Key Elements of a Robust Checklist
A truly effective soil compaction verification checklist goes beyond a simple list of tasks. It's a carefully constructed tool designed to ensure consistent, reliable results. Here's what elevates a checklist from adequate to robust:
- Specificity is Paramount: Avoid vague language. Instead of "check moisture," specify "record moisture content using ASTM D3015 method." The more precise the instruction, the less room for interpretation and potential errors.
- Integration with Project Specifications: The checklist must directly reference the relevant project specifications and drawings. Cross-referencing specific density requirements, allowable tolerances, and testing methods ensures everyone is working to the same standards.
- Detailed Record-Keeping: Space for detailed observations is crucial. This isn't just about passing or failing; it's about documenting why results are what they are. Note things like weather conditions, equipment settings, and any unusual soil characteristics.
- Clear Roles & Responsibilities: Clearly define who is responsible for each step - the operator, the contractor's representative, the project inspector. Accountability drives diligence.
- Photographic Evidence: Include provisions for photographs at each stage. Visual records provide invaluable context and can be crucial for dispute resolution.
- Version Control: Implement a system for tracking revisions to the checklist. This ensures everyone is using the most current version and can trace the evolution of the process.
- Regular Review & Updates: The checklist shouldn't be static. Regularly review it with the project team and update it based on lessons learned and changes in regulations or best practices.
Template Breakdown: Sections and What They Cover
Let's break down the checklist itself. Think of it as a structured conversation between the site crew, the engineer, and the project goals. Here's a look at each section and what it's designed to capture:
- Project Identification: More than just names, this section sets the context. It's your reference point for traceability and accountability.
- Site & Material Prep: This is your initial assessment. Are you starting with the right material? Is it properly prepared for compaction? Organic matter, moisture levels - it all matters here.
- Equipment Verification: Improperly calibrated equipment will give you false readings. This ensures your tools are working as they should. Think of it as a mini-equipment inspection.
- Compaction Procedures: This documents the how of the compaction process - number of passes, lift thickness, and any adjustments made on the fly.
- Results Recording: The core data! Density, moisture content, compared against specifications. This is your proof.
- Corrective Actions: A critical section. Deviations from the specs are inevitable; this documents how you addressed them and retested to confirm resolution.
- Sign-Off: Final confirmation that the work meets requirements, providing a documented record of approval.
Download Your Free Soil Compaction Verification Checklist
Want to streamline your soil compaction verification process? We've created a handy, downloadable checklist to help you stay organized and ensure compliance with project specifications. This checklist mirrors the steps outlined in our comprehensive guide, providing a practical tool for contractors, site managers, and inspectors. Simply enter your email address below to receive your free, printable checklist, designed to help you build a solid foundation and avoid costly mistakes. Let's build better, together!
How to Use the Checklist Effectively
To truly reap the benefits of this Soil Compaction Verification Checklist, it's not enough to simply complete it. You need to integrate it as a living part of your workflow. Here's how to use it effectively:
1. Pre-Construction Planning: Don't wait until compaction begins. Review the checklist with your team before any work starts. Understand the specifications, identify potential challenges, and plan accordingly.
2. Team Communication: Share the checklist with all relevant parties-contractors, operators, inspectors, and project engineers. Ensure everyone understands their roles and responsibilities. Open communication prevents misunderstandings and promotes accountability.
3. Real-Time Monitoring: The checklist isn't just for post-compaction review. Use it as a guide during the process. Regularly observe the compaction activities, document observations, and proactively address any issues.
4. Detailed Documentation: Don't be brief. Thoroughly record all observations, measurements, and actions taken. This provides a valuable audit trail and helps identify trends or recurring problems. Photos and videos can be incredibly useful additions.
5. Continuous Improvement: After each compaction phase (or project), review the completed checklist and identify areas for improvement. Were there any bottlenecks? Could the process be streamlined? Incorporate these lessons into future checklists.
6. Adaptability: This is a template. Tailor it to your specific project's needs and site conditions. Don've hesitate to add or modify steps to ensure comprehensive verification.
7. Digital is Best: Consider using a digital checklist form on a tablet. This allows for easy data entry, photo attachments, and real-time sharing, enhancing efficiency and accuracy.
Common Pitfalls to Avoid
Rushing the Process & Ignoring Moisture
One of the biggest mistakes we see is contractors trying to rush compaction. Soil needs adequate time to settle and consolidate under the equipment's force. Too many passes too quickly doesn't necessarily equate to better compaction; it can actually disrupt the layers and create uneven density. Similarly, ignoring the soil's moisture content is a recipe for disaster. Soil that's too dry won't bind properly, while overly saturated soil becomes unstable and difficult to compact effectively. Always adhere to the project's specified moisture range and allow sufficient time between passes.
Neglecting Layer Thickness & Improper Equipment Selection
The depth of each lift, or layer, of soil being compacted is critical. If the layers are too thick, the compactor's force won't penetrate adequately, leading to insufficient compaction at the lower depths. Conversely, layers that are too thin can waste time and resources. Equally important is selecting the correct type of compaction equipment for the soil type and project requirements. Using a plate compactor for a large area of granular fill, for example, would be inefficient and potentially ineffective. Carefully consider the soil characteristics and project needs when choosing the appropriate equipment.
Failing to Document & Communicate Issues
Lack of thorough documentation is a serious oversight. Detailed records of compaction test results, equipment settings, and any observed issues are essential for accountability and problem-solving. These records should be readily accessible and shared with the project engineer and other relevant stakeholders. Open communication is key - don't hesitate to raise concerns about potential compaction problems. Addressing issues proactively can prevent costly delays and structural issues down the line.
Beyond the Checklist: Best Practices
While a thorough checklist is your foundation, truly exceptional soil compaction goes beyond ticking boxes. It's about proactively ensuring quality and anticipating potential issues. Here are some best practices to elevate your compaction process:
1. Geotechnical Investigation is King: Don't rely solely on the checklist. A comprehensive geotechnical investigation before construction begins is crucial. It provides vital information about soil type, bearing capacity, and potential compaction challenges, allowing for tailored compaction strategies.
2. Moisture Management is Key: Soil compaction is heavily influenced by moisture content. Don't just record moisture; actively manage it. Consider using water trucks to add moisture to dry soils or employing techniques like aeration to remove excess moisture. Aim for the optimal moisture range specified in the geotechnical report.
3. Layer Thickness Matters: Adhering to specified lift (layer) thicknesses is vital for uniform compaction. Too thick, and the lower layers won't adequately compact. Too thin, and it becomes inefficient.
4. Dynamic Cone Penetrometer (DCP) - A Quick Check: Incorporate DCP testing as a supplementary tool. It's a quick, non-destructive method to assess soil density in the field, providing a rapid check between formal testing cycles.
5. Operator Training and Competency: Don't assume all operators are created equal. Regular training and competency assessments are essential to ensure consistent and effective operation of compaction equipment.
6. Communication is Paramount: Maintain open communication between the geotechnical engineer, contractor, and inspector. Address concerns and adjust the process as needed.
7. Continuous Monitoring and Adjustment: Soil conditions can change. Continuous monitoring of compaction results and a willingness to adjust the compaction plan based on real-time data are crucial for success. Don't be afraid to adapt your approach.
Stay Compliant: Legal and Regulatory Considerations
Ensuring proper soil compaction isn't just about building a stable foundation; it's about adhering to a complex web of legal and regulatory requirements. Failing to do so can lead to substantial fines, project delays, and even legal action. Understanding your obligations is paramount.
Regulations regarding soil compaction vary significantly based on your location and project type. Municipalities often have specific ordinances outlining permissible compaction methods, allowable noise levels during operation, and environmental protection measures. State-level regulations may govern soil erosion and sediment control, particularly near waterways or sensitive ecosystems. Federal laws, like those related to wetlands protection, can also impose restrictions.
Beyond general regulations, specialized projects, such as those involving hazardous materials or near historical sites, may trigger additional compliance requirements. It's crucial to proactively investigate and understand these project-specific mandates.
To stay compliant, it's recommended to:
- Consult Local Authorities: Contact your local building department or permitting agency to clarify specific requirements.
- Review Project Permits: Carefully examine all project permits for any compaction-related conditions or restrictions.
- Engage a Geotechnical Expert: A qualified geotechnical engineer can help you navigate complex regulations and develop a compaction plan that meets all applicable standards.
- Maintain Detailed Records: Document all compaction activities, including test results, equipment calibration records, and any corrective actions taken. This documentation serves as evidence of compliance in the event of an audit or inquiry.
- Stay Updated: Regulations are subject to change. Regularly check for updates and revisions to ensure your practices remain compliant.
Resources & Links
- Geoengineer.com : A comprehensive resource for geotechnical engineering information. Offers articles, calculations, software, and more related to soil mechanics and foundation design - helpful for understanding compaction principles and testing methods.
- American Society of Civil Engineers (ASCE) : ASCE provides standards, publications, and continuing education resources. Their standards often address soil compaction requirements and best practices, especially relevant for construction projects.
- International Organization for Standardization (ISO) : While specific ISO standards related *directly* to compaction verification checklists may be limited, their general quality management system standards (e.g., ISO 9001) can inform a systematic approach to ensuring compaction compliance.
- Federal Highway Administration (FHWA) : The FHWA provides guidance and specifications for highway construction, including detailed requirements for soil compaction. Their publications often include acceptance criteria and testing procedures, valuable for understanding project-specific demands.
- United States Geological Survey (USGS) : The USGS provides data and information about the Earth's surface, including soil types and geological maps. Understanding the soil type is a crucial first step in any compaction verification process.
- Tetra Tech : Tetra Tech is a consulting and engineering firm that often deals with soil testing and remediation. Their website provides insights into geotechnical investigations and problem-solving techniques.
- ITE (Institute of Transportation Engineers) : For projects involving pavement construction, the ITE's resources detail proper soil compaction procedures essential for pavement longevity and performance. Their publications address subgrade preparation requirements.
- Proctor Bible : A great resource for understanding Proctor testing methods, a fundamental part of soil compaction verification. Explains the theory and procedure behind determining optimum moisture content and maximum dry density.
- Terra International : Terra International specializes in soil stabilization and compaction. Their website offers technical articles and case studies demonstrating various compaction techniques and challenges encountered.
- Dynamically Speaking : This website focuses on non-destructive testing (NDT) methods for concrete and soil. Exploring NDT techniques, such as sonic reverberation, can supplement traditional compaction testing.
- EarthManual : Provides comprehensive information on earthwork construction, including soil compaction techniques, quality control, and best practices. Useful for gaining a broader understanding of the construction process.
Frequently Asked Questions
What is soil compaction verification and why is it important?
Soil compaction verification is the process of ensuring that soil has been properly compacted to meet specified density requirements. It's important for structural stability, preventing settlement, and ensuring the long-term integrity of construction projects like roads, foundations, and pipelines.
Who would benefit from using this checklist template?
This template is designed for engineers, contractors, construction site supervisors, quality control personnel, and anyone responsible for ensuring proper soil compaction during construction projects.
What kind of information should I fill in on the checklist?
The checklist includes sections for project details, soil type, compaction method, testing frequency, test results (density, moisture content), observations, and corrective actions taken. You'll need to fill in the specifics relevant to your project.
What types of soil compaction methods are typically covered by this checklist?
The checklist is generally applicable to various compaction methods like static compaction (rollers), dynamic compaction (impact), and vibratory compaction. It's adaptable to the specifics of your chosen method. Specify the method used in the 'Compaction Method' section.
What is Proctor density and how does it relate to the checklist?
Proctor density, or maximum dry density, is a laboratory-determined value representing the densest state of the soil. The checklist will often reference this value as a target for field compaction. Field density tests are then compared to the Proctor density to assess compaction quality.
What are acceptable ranges for compaction percentages as indicated in the checklist?
Acceptable compaction percentages are typically specified by project requirements or building codes. The checklist is designed to allow you to input these specific values (e.g., 95% of Proctor density). Consult your project specifications for the required percentage.
Can I customize this checklist template?
Yes, absolutely! The template is designed to be customizable. Feel free to add, remove, or modify sections to fit your specific project needs and local regulations. You can add notes, revise test parameters, and change formatting to suit your workflow.
Are there any training resources available to help me understand soil compaction verification?
While the checklist itself provides a framework, understanding soil compaction principles requires some geotechnical knowledge. Consult relevant engineering handbooks, online resources, or consider attending a geotechnical training course for a deeper understanding.
Found this Article helpful?
Construction Management Solution Demo
Build smarter, not harder! ChecklistGuro streamlines construction projects from planning to closeout. Manage tasks, inspections, safety protocols & more - all in one place. Reduce delays, improve communication, and deliver projects on time & on budget.
Related Articles

The Ultimate Concrete Vibration Checklist Template

Unlock Value: Your Free Value Engineering Checklist Template

The Ultimate HVAC Ductwork Installation Checklist Template

The Ultimate Rebar Placement Checklist Template

Your Concrete Mix Design Verification Checklist: A Step-by-Step Guide

Backfilling & Compaction Checklist: A Foundation's Best Friend

The Ultimate Concrete Delivery & Placement Checklist Template

Your Ultimate Stakeholder Communication Plan Checklist Template
We can do it Together
Need help with
Construction?
Have a question? We're here to help. Please submit your inquiry, and we'll respond promptly.