The Ultimate Solar Panel Inspection Checklist Template
Published: 09/10/2025 Updated: 05/06/2026
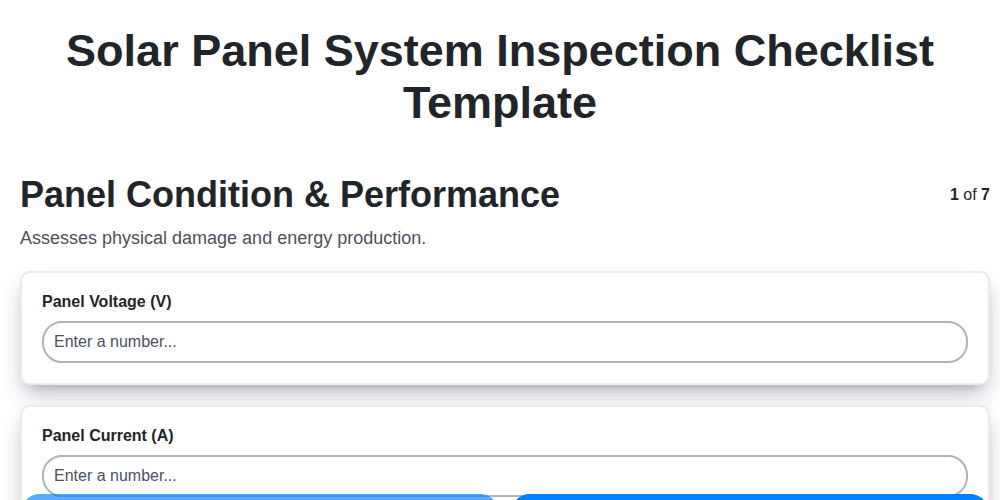
Table of Contents
- Why Regular Solar Panel Inspections Matter
- Essential Tools for Your Inspection
- Visual Inspection: Panel Condition & Performance
- Electrical System Check: Wiring & Connections
- Mounting Structure & Hardware Assessment
- Inverter Diagnostics & Performance Monitoring
- Safety & Labeling Verification
- Documentation & Record Keeping
- Resources & Links
TLDR: Ensure your solar panels are running efficiently and safely! This checklist template guides you through key inspections - from panel condition to inverter performance - helping you identify potential issues and keep your system optimized. Download it now for easy solar system maintenance!
Why Regular Solar Panel Inspections Matter
Beyond just ensuring your system is running, regular inspections are a critical investment in the long-term health and efficiency of your solar panel array. Think of it like preventative healthcare for your home's energy source. Ignoring these checks can lead to a cascade of issues, from reduced energy production and higher electricity bills, to costly repairs down the line and even safety hazards.
Here's a breakdown of why those periodic assessments are so vital:
- Maximizing Energy Production: Even seemingly minor issues like dirt buildup or shading can significantly impact energy output. An inspection helps identify and address these performance-limiting factors, ensuring you're getting the most from your investment.
- Early Problem Detection: Many solar panel issues don't present obvious signs. Regular inspections allow for the early detection of developing problems, such as panel cracks, wiring degradation, or inverter malfunctions - often before they escalate into major (and expensive) repairs.
- Warranty Protection: Many solar panel warranties require proof of regular maintenance. Skipping inspections could jeopardize your ability to claim warranty coverage if a problem arises.
- Safety First: Faulty wiring, damaged panels, or a malfunctioning inverter can pose safety risks. Inspections help identify and mitigate these potential hazards, protecting your family and property.
- Extending System Lifespan: Proactive maintenance extends the operational life of your solar panel system, maximizing your return on investment and minimizing the need for premature replacements.
Essential Tools for Your Inspection
While a thorough visual inspection can be done with just your eyes and a keen attention to detail, having the right tools can significantly enhance the accuracy and efficiency of your solar panel system inspection. Here's a rundown of essential tools to keep on hand:
- Ladder (Safe & Stable): For accessing roof-mounted panels, a sturdy and safe ladder is paramount. Prioritize safety - consider a ladder with wide steps and secure footing.
- Voltage Tester (Non-Contact): A non-contact voltage tester allows you to safely check for live voltage without direct contact, crucial for safety during electrical checks.
- Multimeter: A reliable multimeter is vital for measuring voltage, current, and resistance, allowing you to diagnose electrical issues with precision.
- Torque Wrench: Ensuring proper torque on mounting hardware is crucial for stability and preventing loosening over time. A torque wrench helps achieve this accurately.
- Flashlight/Work Light: Adequate lighting is essential for a thorough visual inspection, especially in shaded areas or under the panels.
- Binoculars: Helpful for a distant visual assessment of the entire array and identifying potential issues quickly.
- Thermal Imaging Camera (Optional but Highly Recommended): For more in-depth analysis, a thermal imaging camera allows you to identify hot spots and potential failures that aren't visible to the naked eye. This is a professional-level tool.
- Gloves (Insulated): Protect your hands during the inspection process.
Visual Inspection: Panel Condition & Performance
Before diving into technical diagnostics, a thorough visual inspection is your first and most accessible line of defense. Step back and take a comprehensive look at each panel. Are there any obvious signs of damage? Look for:
- Cracks: These can appear as visible lines across the panel's surface. Even small cracks can compromise performance.
- Delamination: This refers to peeling or separation of the panel's layers - often appearing as a cloudy or blistered area. It indicates moisture intrusion and degradation.
- Discoloration: Unusual color changes, like yellowing or browning, can suggest underlying problems. Compare panel colors to identify inconsistencies.
- Hot Spots: While professional thermal imaging is best, a trained eye can sometimes spot panels that appear noticeably warmer than others. This may indicate localized heating issues.
- Soiling: A layer of dirt, dust, leaves, bird droppings, or other debris can significantly reduce the amount of sunlight reaching the cells. Note the overall level of soiling across the array.
Document any observations with photos, as these will be invaluable for future reference or when consulting with a professional. A simple walk-around can reveal a surprising amount about your system's health.
Electrical System Check: Wiring & Connections
Ensuring the integrity of your solar panel system's electrical components is paramount for both efficiency and safety. This section focuses on a thorough inspection of the wiring and connections, identifying potential hazards before they become major problems.
Visual Inspection & Conduit: Begin by carefully examining all exposed wiring, conduit, and junction boxes. Look for any signs of physical damage, such as cuts, abrasions, or cracks in the conduit. Check for discoloration or brittleness in the wiring itself, which can indicate age or heat damage. Securely fastened conduit is vital; loose sections create a risk of damage.
Connection Tightness: Loose electrical connections are a common culprit in performance drops and can even pose a fire hazard. Using a thermal imaging camera is the most precise way to detect loose connections (which create resistance and heat), but you can also visually inspect for signs of corrosion or arcing around terminals. Gently tug on wires at connection points to ensure they are firmly secured.
Grounding Verification: Proper grounding is essential for safety. Confirm that the system is correctly grounded according to local electrical codes. This typically involves verifying a direct and low-resistance connection to a designated grounding point.
Disconnect Switch Functionality: Test both the DC and AC disconnect switches to ensure they operate smoothly and completely disconnect power to the system. A malfunctioning disconnect switch can prevent safe maintenance and emergency shutoff.
Corrosion Detection: Moisture and exposure to the elements can lead to corrosion on terminals and connectors. Look for green or white powdery deposits, which indicate corrosion. If corrosion is present, clean the connections with appropriate methods (consult a professional for guidance) and re-tighten.
Safety Note: Working with electrical systems can be dangerous. If you are not comfortable performing these checks yourself, or if you suspect any electrical issues, consult a qualified electrician immediately.
Mounting Structure & Hardware Assessment
The mounting structure is the backbone of your solar panel system, securing the panels to your roof or ground and withstanding weather conditions. A thorough assessment here is critical for safety and long-term performance.
Visual Inspection is Key: Begin with a careful visual inspection of the entire racking system. Look for signs of corrosion, particularly on metal components. Rust can compromise the structural integrity, especially in coastal or humid environments. Pay close attention to any areas where dissimilar metals are in contact, as this can accelerate corrosion.
Bolts and Fasteners: Loose bolts are a common problem and can lead to panel movement and potential damage. Tighten any loose bolts or fasteners, but be cautious not to overtighten, as this can strip threads. A torque wrench is recommended for critical fasteners. Check for any signs of damage or deformation to the bolts themselves.
Roof Integration (for Roof-Mounted Systems): If your panels are roof-mounted, carefully examine the area around the mounting hardware for any signs of roof damage, leaks, or compromised flashing. Any issues with the roof require immediate attention from a qualified roofing professional. We strongly recommend a roofing inspection alongside your solar panel inspection.
Ground Mount Considerations: For ground-mounted systems, ensure the footings are stable and haven't shifted due to ground movement. Check the connection points between the racking and the ground anchors.
Panel Alignment: Verify that the panels remain aligned and aren't tilted or twisted. Misalignment can reduce efficiency and increase stress on the mounting structure.
Remember: This assessment is a visual check. Professional inspections may involve more detailed testing and analysis to ensure the long-term stability of your solar panel system.
Inverter Diagnostics & Performance Monitoring
Your inverter is the brain of your solar system, converting the DC electricity from your panels into usable AC power for your home. Consistent monitoring and diagnostic checks are crucial for ensuring its efficient operation and early detection of potential issues.
Here's what to look for:
- Error Codes & Display Messages: Regularly check the inverter's display for any error codes or warning messages. Refer to the inverter's manual to understand the meaning of these codes and recommended actions. Don't ignore seemingly minor alerts-they can often indicate developing problems.
- AC Output Voltage & Frequency: Use a multimeter or the inverter's monitoring system to verify that the AC output voltage and frequency are within the acceptable range specified by the manufacturer (typically 220-240V or 110-120V and 50Hz or 60Hz respectively). Significant deviations suggest a malfunction.
- Efficiency Monitoring: Track the inverter's efficiency (typically expressed as a percentage). A sudden or consistent drop in efficiency can indicate reduced performance. Compare current readings with historical data to identify trends. Many modern inverters provide this data through online monitoring platforms.
- Audible Noises: Unusual buzzing, humming, or clicking sounds emanating from the inverter can signify mechanical issues. While some noise is normal, investigate any persistent or increasingly loud sounds.
- Cooling System Functionality: Ensure proper ventilation around the inverter to prevent overheating. Check for blocked vents or dust accumulation. If the inverter has fans, confirm they are operating correctly. Overheating significantly reduces efficiency and can lead to premature failure.
- DC Input Voltage and Current: (For advanced users) Monitoring the DC input voltage and current from the solar panels can help identify issues with panel performance or wiring problems before they affect AC output.
- Firmware Updates: Check the manufacturer's website for firmware updates. These updates often include performance improvements and bug fixes that can optimize inverter operation.
Safety & Labeling Verification
Ensuring the safety of your solar panel system and verifying proper labeling is paramount for preventing accidents and maintaining compliance. Start by visually inspecting all warning labels affixed to panels, inverters, disconnect switches, and other critical components. Confirm they are present, legible, and haven't been damaged or obscured. Pay particular attention to high-voltage warnings and instructions for safe operation.
Next, verify accessibility and functionality of all disconnect switches - both DC and AC. These switches are essential for isolating the system during maintenance or emergencies. Ensure they've not been obstructed and can be easily operated. Clearly marked emergency shut-off procedures should also be readily available and understood by anyone who may need to use them. Finally, ensure that all electrical enclosures are properly secured and protected from unauthorized access.
Documentation & Record Keeping
Maintaining meticulous records is as crucial as the physical inspection itself. A well-documented history of your solar panel system's performance and maintenance provides valuable insights into its health and longevity. This isn't just about warranty claims; it's about identifying trends, predicting potential issues, and demonstrating responsible system ownership.
Here's what you should be tracking:
- Installation Details: Keep the original system design, equipment specifications (panel model, inverter type, racking system), and contractor information readily accessible.
- Inspection Logs: Create a consistent format for recording each inspection date, findings (both positive and negative), and any corrective actions taken. Include photos where possible to visually document the condition of the system.
- Performance Data: Regularly monitor and record system output. Compare this data to expected production based on weather conditions and system specifications. Significant deviations should be investigated. Most inverters provide built-in monitoring capabilities - utilize them!
- Maintenance Records: Document any cleaning, repairs, or replacements performed on the system. Include dates, descriptions of work, and invoices.
- Warranty Information: Keep all warranty documents organized and readily available. Note expiration dates and coverage details.
- Software/Monitoring Platform Records: Screenshots or records from any online monitoring platforms used to track system performance.
Resources & Links
- EnergySage : A comprehensive resource for solar energy information, including reviews of installers, financing options, and a wealth of educational content on solar panel system performance and maintenance. Helpful for understanding overall system health and potential issues.
- Solar Energy Industries Association (SEIA) : The leading national trade association for the solar industry. Provides industry standards, best practices, and resources for solar professionals and homeowners.
- National Renewable Energy Laboratory (NREL) : A research laboratory focused on renewable energy and energy efficiency. Offers data, reports, and research findings that can help understand solar panel technology and performance.
- Underwriters Laboratories (UL) : Provides safety certifications and standards for solar panels and related equipment. Crucial for understanding the safety and compliance of your system components. Relevant to the Safety & Labeling Verification section.
- Fluke Corporation : A leading manufacturer of electrical testing equipment. Highly relevant for the Essential Tools section, they provide tools for voltage, current, and insulation testing. Their website has product guides and resources.
- Extech Instruments : Another supplier of electrical testing equipment, providing a range of tools relevant to the Electrical System Check and Inverter Diagnostics sections. They offer various meters and probes.
- SMA America : A major inverter manufacturer. Their website offers inverter manuals, technical specifications, and troubleshooting guides. Important for the Inverter Diagnostics & Performance Monitoring section. Many inverter brands have similar resources on their websites.
- Solar Estimate : Offers resources and guides on various aspects of solar energy, including maintenance, repair, and troubleshooting. Provides helpful context for understanding inspection results and potential fixes.
- Solar Panel Tips : A website dedicated to providing tips and advice on solar panel installation, maintenance, and troubleshooting. Can help with understanding the visual inspection process and identifying common issues.
- InspectApedia : Provides technical information on various building components, including solar panels and related systems. Can be helpful in understanding mounting structure issues and overall system integration. Useful for the Mounting Structure & Hardware Assessment section.
Frequently Asked Questions
What is a solar panel inspection and why is it important?
A solar panel inspection is a thorough assessment of your solar panel system's components and performance. It's important to identify potential issues early on, maximizing energy production, extending system lifespan, and preventing costly repairs. Regular inspections help ensure your investment continues to pay off.
Who should perform a solar panel inspection?
Ideally, a qualified solar professional with experience in system inspections should perform the assessment. However, homeowners can conduct basic visual inspections using the checklist provided. A professional inspection is recommended every 2-3 years, or sooner if you notice any concerning signs.
What does this 'Ultimate Solar Panel Inspection Checklist Template' cover?
The checklist covers a range of areas, including visual inspection of panels, racking, wiring, inverter, and overall system performance. It includes checks for physical damage, corrosion, loose connections, and performance deviations.
Can I use this checklist without any prior solar knowledge?
While some familiarity with solar terminology is helpful, the checklist is designed to be user-friendly. We've included brief explanations for each item. However, if you're uncomfortable with any aspect, it's best to consult a professional.
How often should I use this checklist?
We recommend using the checklist at least once a year. If your system is in an area with harsh weather conditions (heavy snow, extreme heat, coastal environments), more frequent inspections (every 6 months) are advisable.
What should I do if I find a potential issue during the inspection?
Document the issue thoroughly (take photos, note the location and description). Then, contact a qualified solar professional for a more detailed assessment and repair. Don't attempt to fix problems yourself unless you are a trained and certified technician.
What is the difference between a visual inspection and a performance inspection?
A visual inspection is a check for physical damage and condition. A performance inspection involves using specialized equipment (like a thermal camera or multimeter) to measure output and identify hidden issues that might not be visible to the naked eye. The checklist includes elements of both, but a professional will likely conduct a more detailed performance inspection.
My solar panels are relatively new. Do I still need to inspect them?
Yes! Even new systems can experience issues like manufacturing defects or installation errors that may not be immediately apparent. Regular inspections, even for newer systems, help ensure optimal performance and identify potential problems early on.
Found this Article helpful?
Audit/Inspection Management Solution Demo
Ensure compliance & improve performance! ChecklistGuro streamlines audit/inspection creation, execution, and reporting. Reduce risk, enhance quality, & maintain consistency. Manage it all with our Work OS.
Related Articles
Your Essential Guide to the Oil and Gas Pipeline Inspection Checklist Template
Your Essential Guide to a Manufacturing Quality Control Inspection Checklist
Your Ultimate HVAC Inspection Checklist Template
The Ultimate Brewery Equipment Sanitation & Safety Checklist Template
The Ultimate Data Center Inspection Checklist Template
Wind Turbine Inspection Checklist Template: Your Comprehensive Guide
The Ultimate Apartment Building Maintenance Inspection Checklist Template
Restaurant Kitchen Safety Inspection Checklist Template
We can do it Together
Need help with
Inspection Management?
Have a question? We're here to help. Please submit your inquiry, and we'll respond promptly.