The Ultimate Taping & Mudding Inspection Checklist Template
Published: 09/01/2025 Updated: 12/13/2025
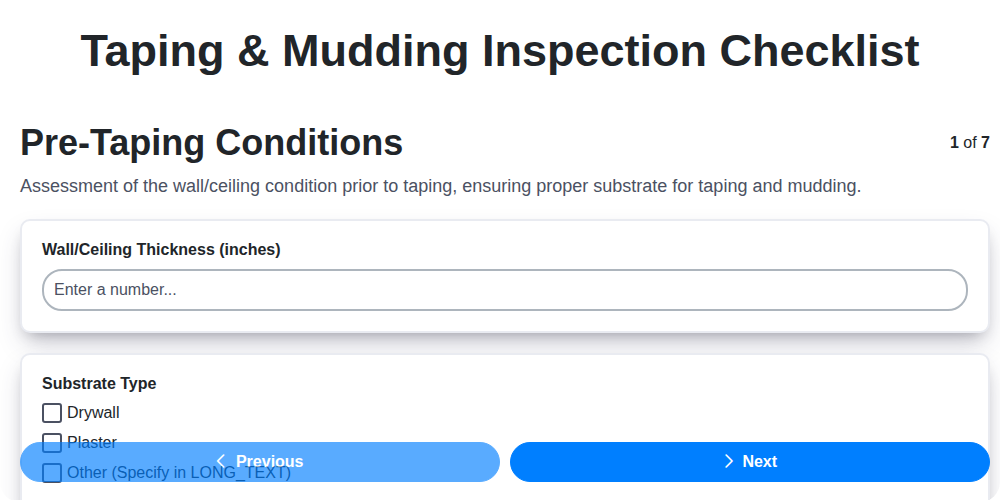
Table of Contents
- Why a Taping & Mudding Inspection Matters
- Understanding the Stages of Drywall Finishing
- The Ultimate Taping & Mudding Inspection Checklist
- Pre-Taping Conditions: Setting the Foundation
- Taping Installation: Ensuring a Strong Bond
- First Coat Mudding: Achieving Even Coverage
- Subsequent Coats & Sanding: The Path to Smoothness
- Corner & Joint Mastery: Eliminating Imperfections
- Texture & Finish: Achieving the Desired Look
- Identifying Common Defects & Troubleshooting
- Final Inspection & Sign-Off
- Resources & Links
TLDR: Get our free Taping & Mudding Inspection Checklist Template to ensure a flawless drywall finish! It guides you through each stage - from pre-taping conditions to the final texture - helping you spot and correct issues *before* they become costly headaches. Download now and wave goodbye to cracked walls and uneven surfaces!
Why a Taping & Mudding Inspection Matters
A seemingly minor flaw during taping and mudding can snowball into a major headache later. Imagine the frustration of painting a beautiful new color, only to discover cracks appearing within weeks or months. Or the cost of repairing a wall that's peeling or uneven because the initial work wasn't done correctly.
Beyond the immediate cosmetic issues, a poorly executed taping and mudding job can impact the overall structural integrity of your walls and ceilings. Cracks can allow moisture to penetrate, potentially leading to mold growth and wood rot. Uneven surfaces can affect the performance of flooring and other finishes.
Think of it as preventative maintenance. A thorough inspection at each stage catches problems early, when they're much easier and cheaper to fix. It ensures that the finished product is not only visually appealing but also durable and long-lasting - a testament to quality workmanship and attention to detail. Investing a little time and effort upfront saves you considerable time, money, and frustration down the line.
Understanding the Stages of Drywall Finishing
Drywall finishing isn't a one-step process; it's a carefully sequenced series of applications and refinements. Each stage builds upon the last, contributing to the final, smooth, and paint-ready surface. Let's break down what happens in each step to truly understand the complexities involved.
1. Pre-Taping & Prepping: This crucial first stage is all about setting the foundation. It ensures the drywall is properly fastened, level, and free from debris. Any significant misalignments or inconsistencies at this point will be difficult to correct later.
2. Taping: This involves applying mesh tape over all seams and corners. The tape acts as a reinforcement, bridging the gap between drywall panels and preventing cracks as the house settles. Proper tape application is vital for a long-lasting finish; air bubbles and loose tape can lead to future problems.
3. First Coat (Scratch Coat): This initial layer of joint compound, often referred to as the scratch coat, is applied liberally over the taped seams and corners. It's designed to fully embed the tape and cover the screw or nail heads. The scratch coat is intentionally a bit rough, allowing for better adhesion in subsequent coats.
4. Second and Third Coats (Fill Coats): Subsequent coats of joint compound are applied, gradually smoothing out the surface and filling in any imperfections left by the first coat. These fill coats build up the thickness of the compound, creating a uniform base for the final coat.
5. Topping Coat: The final coat, often referred to as the topping coat, is applied thinly and carefully. The goal here is to create a perfectly smooth surface, ready for priming and painting. This coat requires meticulous attention to detail and often involves a finer grade of joint compound.
6. Sanding: Between each coat of joint compound (and particularly after the topping coat), the surface is sanded smooth. This removes any ridges, imperfections, or excess material, preparing the wall for the next step. Proper sanding technique is essential to avoid damaging the drywall.
The Ultimate Taping & Mudding Inspection Checklist
Before diving into the detailed checklist, it's vital to grasp the sequential nature of taping and mudding. Each phase builds upon the last, and deficiencies at one stage can significantly impact the final result. Treating each step as a critical checkpoint allows for early correction and prevents costly rework later on.
Here's a breakdown of what happens at each phase:
- Pre-Taping Conditions: This initial assessment ensures the drywall is properly installed and ready for taping. Issues like misalignment or debris can compromise adhesion and create future problems. Think of it as prepping a canvas before painting.
- Taping - Installation: This stage focuses on applying the mesh tape correctly to all joints and corners. Proper tape placement is crucial for creating a strong, seamless joint.
- First Coat Mudding - Application: The first coat of joint compound acts as a binder, embedding the tape and filling in minor imperfections. It sets the foundation for subsequent coats.
- Subsequent Coats & Sanding: Multiple thin coats of mud are applied, allowing each to dry and shrink before the next is applied. Each coat is sanded smooth, gradually refining the surface. This is the most time-consuming and skill-dependent portion.
- Corners & Joints: These areas require extra attention as they are inherently more vulnerable to cracking and separation.
- Finish & Texture: This final phase introduces the desired aesthetic, whether it's a smooth, modern look or a textured finish.
- Overall Appearance & Defects: A comprehensive review to catch any overlooked imperfections and ensure a professional, high-quality finish.
Pre-Taping Conditions: Setting the Foundation
Before a single strip of tape is applied or a dollop of mud is mixed, ensuring the underlying conditions are right is paramount. Think of it as laying the foundation for a smooth, flawless finish. Neglecting this initial assessment can lead to a host of problems down the line, from peeling paint to unsightly cracks.
First, drywall alignment and levelness is critical. While minor imperfections can often be corrected with mud, significant bowing or gaps will require re-hanging the drywall. Use a long level (at least 6 feet) to check panel alignment. Similarly, check that the edges of the panels meet flush - gaps larger than 1/8 inch will need attention.
Cleanliness is another often-overlooked factor. Drywall panels can accumulate dust, debris, grease, or even residual construction materials. These contaminants interfere with the adhesion of the joint compound, leading to a weak bond and potential failures. Wipe down the drywall surfaces with a damp cloth to ensure they're clean and ready for taping.
Finally, fastener spacing needs to be accurate. While the specifics can vary based on local codes and manufacturer recommendations, generally, screws or nails should be spaced no more than 12 inches apart on the field (the flat portion of the drywall panel) and no more than 7 inches apart along the edges. Consistent spacing ensures a secure hold and prevents rippling or movement during the taping and mudding process.
Taping Installation: Ensuring a Strong Bond
Proper taping installation is the foundation of a flawless drywall finish. It's where the real work begins, and a rushed or sloppy job here will haunt you with cracks and peeling later on. The goal is to create a strong, durable bond between the drywall panels and the corner beads, ensuring a seamless transition and preventing future problems.
Mesh Tape: Your Best Friend
Today, mesh tape is the overwhelmingly preferred choice for most applications. Its flexibility allows it to conform to the contours of the drywall, creating a more even surface. However, its pliability also means it needs to be applied with care. Avoid stretching the tape excessively during installation; this can lead to it shrinking back and creating gaps. Instead, aim for a smooth, consistent lay that adheres firmly to the drywall surface.
Key Considerations:
- Clean Surface: As with all stages, a clean drywall surface is crucial. Dust and debris can interfere with the tape's adhesion.
- Overlap: Ensure the tape overlaps the drywall edge by approximately ½ inch on either side of the joint. This creates a wider area of adhesion and strengthens the bond.
- Firm Pressure: Apply firm, even pressure across the entire length of the tape as you install it. This ensures full contact and eliminates air bubbles. A drywall knife or taping knife works well for this.
- Corner Beads: For exterior corners, ensure metal or paper corner beads are securely fastened with nails or staples, creating a crisp, protected edge. Proper alignment of the corner bead is vital for a professional-looking finish.
- Inspection: After taping, take a moment to inspect your work. Look for any gaps, wrinkles, or areas where the tape isn't adhering properly. Addressing these issues immediately will save you headaches later.
First Coat Mudding: Achieving Even Coverage
The first coat of mud, often referred to as the "skim coat," is arguably the most critical. It's your foundation for a flawless finish, so getting it right sets the stage for success. This layer serves two primary functions: fully embedding the mesh tape and concealing the fastener heads. Rushing this step or applying the mud incorrectly will lead to headaches later on.
Consistency is Key: The ideal consistency for the first coat is often described as "cake batter" - not too thick, and certainly not runny. Too thick, and it will be difficult to spread evenly, leaving visible ridges. Too thin, and it won't adequately cover the tape and fasteners, resulting in a weak bond. Experiment with your mud mix to find what works best for your climate and tools.
Application Techniques: Using a 6-inch taping knife is standard practice for this first coat. Load the knife with a moderate amount of mud and apply it in long, overlapping strokes, ensuring complete coverage of the tape and screw heads. Don't try to cover too much area with a single stroke; smaller, controlled passes are better. Think of feathering the edges - gradually tapering the mud outward from the joint to blend it seamlessly with the surrounding drywall. A drywall hawk is incredibly helpful for holding the mud and minimizing trips back to the mixing bucket.
Common Pitfalls & Solutions: Watch out for these common issues:
- Runs and Sags: Caused by applying too much mud at once or on a surface that isn't adequately supported. Scrape off excess mud immediately and reapply in thinner layers.
- Uneven Coverage: Likely due to inconsistent mud application or an improperly loaded knife. Practice your technique and ensure even pressure on the knife.
- Air Bubbles: Can be trapped in the mud, especially if it's been sitting for a while. Gently tap the mudded area to release trapped air.
Subsequent Coats & Sanding: The Path to Smoothness
The magic truly happens with subsequent coats and sanding. This isn't about slapping on more mud; it's about layering, drying, and meticulously refining the surface. Each coat builds upon the last, gradually filling in imperfections and creating a perfectly smooth canvas for paint or texture.
Why Multiple Coats?
One thick coat of mud never works. As the mud dries, it shrinks, and that shrinkage can lead to cracking and unevenness. Multiple thin coats allow for a more gradual drying process, minimizing shrinkage and maximizing adhesion.
The Sanding Dance
Sanding isn't just about making it smooth; it's about preparing the surface for the next coat. Here's the process:
- Start Coarse, Finish Fine: Begin with a coarser grit sandpaper (around 80-100 grit) to remove major imperfections and ridges from the previous coat. Progressively move to finer grits (120, 150, 180, or even higher) with each subsequent coat. This gradual refinement ensures a flawlessly smooth finish.
- Dust Control is Key: Sanding creates a lot of dust. Use a vacuum with a HEPA filter to capture the dust as you go. A wet sanding technique (lightly misting the surface with water) can also help minimize dust.
- Feel the Surface: Don't just rely on sight. Run your hand across the surface after each sanding. You should feel a perfectly smooth and consistent texture.
- Patience is Paramount: Rushing the sanding process will only lead to frustration and a less-than-perfect finish. Take your time and focus on achieving a consistently smooth surface.
Corner & Joint Mastery: Eliminating Imperfections
Corners and joints are often the Achilles' heel of a drywall finish. They're more prone to cracking, unevenness, and unsightly gaps than the flat field of the drywall panels. Mastering these areas requires extra attention and a slightly different approach.
Inside Corners: These are notoriously tricky. The key is to build up the mud gradually, applying thin, even coats. Avoid the temptation to slap on a thick layer, as this will almost certainly lead to cracking as it dries and shrinks. Feather each coat generously, extending the mud well onto the adjoining panels. Use a corner trowel specifically designed for inside corners to ensure a smooth, even fill. Check for concavities or convexities - a perfectly executed inside corner should be a gentle, consistent curve.
Outside Corners: Properly installed corner beads (metal or paper) are essential here. Metal beads offer superior protection and durability, especially in high-traffic areas or where impact is a concern. Ensure the bead is securely fastened and that the mud completely embeds the legs of the bead, creating a clean, crisp edge. Feather the mud generously beyond the bead, carefully blending it with the surrounding wall surface. Don't underestimate the importance of proper corner bead alignment - a crooked bead will result in a crooked corner.
Joints: Beyond the Tape: While proper tape installation is vital, the subsequent mudding coats are where you truly eliminate imperfections. Watch for nail pops - fasteners that have driven too deep and are pushing the mud outward. These need to be addressed before proceeding. Regularly inspect the joint lines with bright, direct light. This will reveal any slight ridges or depressions that need further attention. Patience is key - building up a flawless joint takes multiple thin coats, not one thick one. Don't rush the process, and always allow adequate drying time between coats.
Texture & Finish: Achieving the Desired Look
The final steps in taping and mudding aren't just about smoothness; they're about crafting the aesthetic you envision for your space. Whether you prefer a flawlessly smooth, modern look or a more rustic, textured feel, the finish you choose significantly impacts the overall ambiance.
Smooth Finish - The Modern Classic:
A smooth finish, often favored in contemporary designs, requires meticulous attention to detail. This involves multiple thin coats of joint compound, each meticulously sanded to eliminate any imperfections. Achieving a truly smooth finish demands a keen eye and patience - even the slightest ridge or swirl can detract from the overall look. Power sanding is often utilized, but must be done carefully to avoid damage to the drywall. Priming is essential to seal the surface and ensure proper paint adhesion.
Popular Textured Finishes:
Beyond smooth, a variety of textures can add character and depth. Here's a brief overview of some popular choices:
- Orange Peel: This subtle texture resembles the skin of an orange. It's achieved by spraying joint compound with a special hopper gun and is relatively easy to apply.
- Knockdown: Similar to orange peel, knockdown involves lightly tapping the sprayed compound with a trowel, creating a more pronounced and controlled pattern.
- Popcorn (Acoustic): While once a standard, popcorn texture is less common now due to its tendency to trap dust and be difficult to clean. It's created by spraying a mixture of joint compound and lime.
- Swirl: This technique involves creating a circular pattern with a swirling motion of the trowel.
- Skip Trowel: Created by lightly dragging a trowel across the wet joint compound, leaving a random, patchy texture.
Application & Considerations:
Regardless of the texture you choose, proper application is key. Sprayers are typically used for textured finishes, requiring practice and a steady hand to avoid uneven coverage. Always test the application technique on a small, inconspicuous area before committing to the entire surface. Remember to account for the texture when selecting paint - matte or flat paints tend to accentuate texture more than glossy paints.
Identifying Common Defects & Troubleshooting
Even with diligent inspection, issues can arise during taping and mudding. Recognizing these common defects early allows for quicker, less costly corrections. Here's a breakdown of frequent problems and how to address them:
1. Cracking:
- Cause: Often results from shrinkage as the mud dries, underlying movement in the framing, or applying mud too thickly.
- Troubleshooting: For minor cracks, re-apply a thin coat of mud, feathering the edges. If cracks reappear, investigate the underlying cause - is the framing settling? Are fasteners secure? Larger cracks may require removing and replacing the drywall section.
2. Runs & Sags:
- Cause: Applying mud too thickly, improper consistency, or working on a surface that's too slick.
- Troubleshooting: Carefully scrape away the run or sag with a wide putty knife. Re-apply a thinner, properly mixed coat of mud, ensuring good adhesion to the existing surface.
3. Air Bubbles & Pinholes:
- Cause: Trapped air during application, dry drywall, or using incorrect mud consistency.
- Troubleshooting: For pinholes, a "skim coat" - a very thin layer of mud - can fill them. For larger bubbles, it's best to re-tape and mud the area, paying close attention to proper adhesion.
4. Uneven Texture:
- Cause: Inconsistent application techniques, using incorrect tools, or changes in mud consistency during the process.
- Troubleshooting: Try to blend the uneven areas by carefully applying additional mud, matching the existing texture as closely as possible. A skilled applicator may be needed to achieve a uniform finish.
5. Fish Eyes (Small Circular Imperfections):
- Cause: Contamination on the drywall surface (e.g., grease, silicone).
- Troubleshooting: Thoroughly clean the affected area with a suitable cleaner and allow it to dry completely before re-applying mud.
6. Nail Pops/Screw Heads Protruding:
- Cause: Drywall shrinkage or loose fasteners.
- Troubleshooting: Countersink the nail or screw head, apply a small amount of mud, and feather the edges. Ensure the underlying fastener is securely anchored.
Important Note: Persistent or severe defects often indicate an underlying problem with the framing or drywall installation. Consult a qualified professional for evaluation and repair.
Final Inspection & Sign-Off
The finish line is in sight! But don't rush the final inspection. This is your opportunity to ensure all previous stages were executed correctly and that the completed drywall surface meets your expectations and any contractual requirements.
What to Look For:
- Lighting is Key: Inspect the walls under bright, even lighting - ideally natural light - to reveal any subtle imperfections that might be missed in dimmer conditions.
- Tactile Check: Run your hand across the entire surface. It should feel consistently smooth, without bumps, ridges, or rough patches.
- Color Consistency (if Primed/Painted): Verify the evenness of the primer or paint coat. Look for streaks, blotches, or areas where the color appears different.
- Re-Check Corners & Joints: Perform a final visual and tactile inspection of all corners and joints to ensure no cracks have developed during the drying process.
- Address Any Remaining Issues: Note any remaining imperfections and request the contractor to address them promptly. Don's accept a rushed or inadequate fix.
The Sign-Off Process:
Once you're satisfied with the finished product, it's time to formally sign off on the work. This signifies your acceptance of the completed drywall installation.
- Written Documentation: Ensure the sign-off is documented in writing, clearly stating that you've inspected the work and found it acceptable (or outlining any remaining issues that need to be resolved).
- Retain Copies: Both you and the contractor should retain copies of the signed documentation for your records.
- Warranty Information: Clarify any warranties related to the drywall installation and ensure you understand the terms and conditions.
A thorough final inspection and proper sign-off provide peace of mind and protect your investment in a quality drywall finish.
Resources & Links
- Drywall Manufacturers Association (DMA) : The DMA is a comprehensive resource for all things drywall, including installation guidelines, best practices, and technical documents. Essential for understanding industry standards and proper techniques. Includes guides for taping & mudding specifically.
- Home Repair Website : Offers detailed guides and articles on drywall finishing, covering taping, mudding, and sanding. Features tutorials and insights for both DIYers and professionals.
- Family Handyman : A popular DIY resource with a wealth of articles and videos related to home improvement, including several focused on drywall finishing and identifying common mistakes. Good for visual learners and practical tips.
- This Old House : A trusted source for home renovation expertise. Provides articles, videos, and expert advice on drywall finishing, including best practices and troubleshooting common issues. Offers a professional perspective.
- Hansen Pole Buildings : While specializing in pole buildings, they have an excellent and detailed article on drywall installation, including a segment on taping and mudding. Focuses on achieving a professional finish.
- Jeffrey Montgomery - Drywall Expert : Jeffrey Montgomery is a highly regarded drywall consultant. His website provides invaluable resources and insights, particularly for professionals looking to refine their skills. Features educational videos and detailed articles on various drywall finishing techniques. (May include paid content).
- The Spruce : Offers a broad range of home improvement guides, with several articles on drywall finishing. Provides clear, step-by-step instructions and helpful visuals for various skill levels.
- YouTube - Drywall Finishing Tutorials : A vast resource for visual learners. Search for terms like 'drywall taping tutorial,' 'drywall mudding,' and 'drywall sanding' to find numerous videos demonstrating techniques and best practices. (Be sure to vet the source's expertise).
- Knauf : A major manufacturer of drywall and related products. Offers technical documentation, guides, and resources focused on proper installation and finishing techniques, promoting their materials. Useful for understanding material specifications.
- USG : Another key drywall manufacturer. Provides product information, installation guides, and resources for achieving professional-quality drywall finishing. May provide detail on how their specific products should be applied.
Frequently Asked Questions
What is taping and mudding, and why is it important to inspect?
Taping and mudding (also known as drywall finishing) involves covering drywall seams with paper tape and a joint compound (mud) to create a seamless and smooth wall or ceiling surface. Inspection is crucial to ensure proper adhesion, prevent cracks, and avoid costly repairs later on. It affects the aesthetics and structural integrity of the finished surface.
Who should use this inspection checklist?
This checklist is designed for home inspectors, contractors, building inspectors, homeowners performing their own inspections, and anyone involved in evaluating drywall finishing work. It's useful for both new construction and renovations.
What's the difference between the 'Taping' and 'Mudding' sections in the checklist?
The 'Taping' section focuses on the paper tape itself - its placement, application, and condition. The 'Mudding' section covers the application of the joint compound, its thickness, dryness, and the overall smoothness of the finish.
What does 'nail pops' refer to in the checklist?
'Nail pops' are situations where drywall nails haven't fully sunk into the framing, causing them to protrude through the drywall surface. These need to be addressed before taping and mudding to prevent imperfections in the finished wall.
What is 'feathering' and why is it important to check for?
'Feathering' refers to the gradual blending of the mud beyond the taped seam to create a smooth transition. Proper feathering prevents visible ridges and ensures a uniform finish.
Why is checking for cracking so important in the mudding inspection?
Cracks in the drywall finishing indicate potential issues like insufficient drying time, improper compound application, or movement in the framing. Addressing cracks early prevents them from worsening.
What does 'flushness' refer to in the checklist?
'Flushness' describes whether the drywall surface is perfectly even and level with the surrounding walls and ceiling. Imperfections in flushness create an uneven appearance.
Can I modify the checklist to fit my specific needs?
Absolutely! This checklist is a template. Feel free to add, remove, or modify items to accurately reflect your inspection scope and the specific details of the project you're evaluating.
Are there any resources to help me understand drywall finishing terms if I'm unfamiliar with them?
Yes! Websites like The Spruce and YouTube channels dedicated to DIY and construction offer valuable explanations and tutorials on drywall finishing techniques and terminology. Search for 'drywall finishing terms explained' for more information.
Found this Article helpful?
Construction Management Solution Demo
Build smarter, not harder! ChecklistGuro streamlines construction projects from planning to closeout. Manage tasks, inspections, safety protocols & more - all in one place. Reduce delays, improve communication, and deliver projects on time & on budget.
Related Articles

The Ultimate Concrete Vibration Checklist Template

Unlock Value: Your Free Value Engineering Checklist Template

The Ultimate HVAC Ductwork Installation Checklist Template

The Ultimate Rebar Placement Checklist Template

Your Concrete Mix Design Verification Checklist: A Step-by-Step Guide

Backfilling & Compaction Checklist: A Foundation's Best Friend

The Ultimate Concrete Delivery & Placement Checklist Template

Your Ultimate Stakeholder Communication Plan Checklist Template
We can do it Together
Need help with
Construction?
Have a question? We're here to help. Please submit your inquiry, and we'll respond promptly.