Tenant Move-Out Checklist for Real Estate Management: A Comprehensive Guide
Published: 11/26/2025 Updated: 12/14/2025
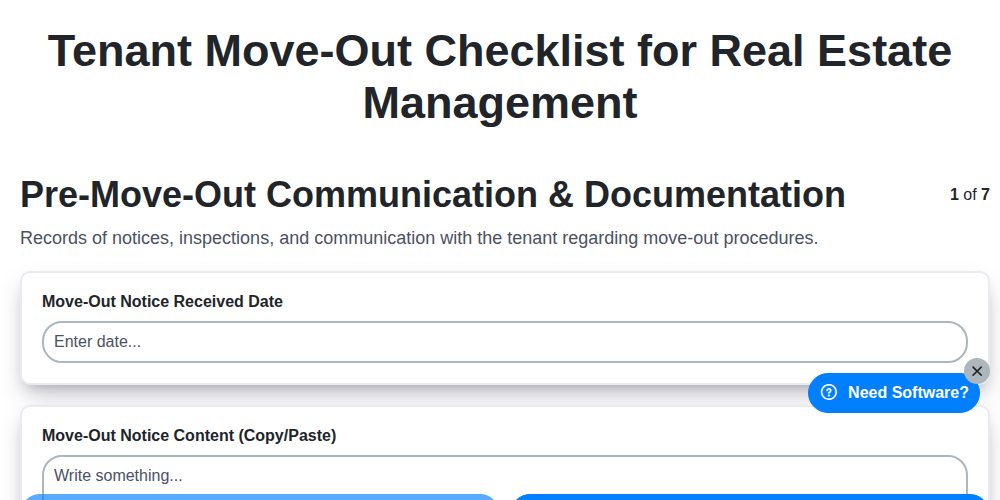
Table of Contents
- Introduction: Why a Move-Out Checklist is Essential
- 1. Pre-Move-Out Communication & Documentation
- 2. Key Return & Security Deposit Procedures
- 3. Property Inspection - Interior: Detailed Assessment
- 4. Property Inspection - Exterior: Curb Appeal and Structural Integrity
- 5. Cleaning & Repairs: Addressing Damages and Maintaining Value
- 6. Utilities & Final Billing: Ensuring Accurate Transfers
- 7. Documentation & Record Keeping: Protecting Your Interests
- 8. Lease Agreement Review: Confirming Move-Out Compliance
- 9. Legal Considerations: Avoiding Disputes
- 10. Post-Move-Out Tasks: Preparing for the Next Tenant
- Resources & Links
TLDR: Moving tenants out? This checklist simplifies the process! It covers everything from initial communication and key return to property inspections, cleaning, repairs, utility transfers, and crucial record-keeping - ensuring a smooth move-out and protecting your investment.
Introduction: Why a Move-Out Checklist is Essential
A smooth tenant move-out is a cornerstone of efficient property management. It benefits everyone involved - the departing tenant and your management team. Without a structured process, move-out can quickly devolve into disputes, delays, and potential legal issues. A comprehensive move-out checklist isn't just a nice-to-have; it's essential for protecting your property, ensuring a positive tenant experience (even in departure!), and streamlining the re-renting process. This checklist provides a clear framework, documenting each step and minimizing potential misunderstandings. Ultimately, it safeguards your investment and maintains a professional reputation.
1. Pre-Move-Out Communication & Documentation
Proactive communication is key to a hassle-free move-out process. Start engaging with your tenants well in advance of their departure date, ideally 60-90 days prior. This isn't just about reminding them of the move-out date; it's about setting clear expectations and minimizing potential disputes later on.
Here's what this initial communication should include:
- Move-Out Notice Acknowledgement: Confirm receipt of their official move-out notice and reiterate the terms outlined in the lease agreement regarding the timeframe required.
- Move-Out Instructions: Provide a comprehensive guide outlining your expectations for the move-out condition. This should include information on cleaning expectations, trash removal, key return procedures, and forwarding address requirements.
- Inspection Scheduling: Mention that a move-out inspection will be conducted and request their availability to be present (or authorize access if they cannot be). This demonstrates transparency and allows for open dialogue.
- Security Deposit Explanation: Clearly explain the process for security deposit return, including deductions for damages beyond normal wear and tear, and the timeframe for returning the deposit (as dictated by local laws). Provide a link to the relevant sections of the lease agreement.
- Documentation: Encourage tenants to document the property's condition with photos and/or videos before they move out. While you will also be conducting your own thorough inspection, this offers an extra layer of protection for both parties.
By proactively addressing these points, you can foster a positive relationship with your tenants even as they prepare to leave, reducing the likelihood of disagreements and streamlining the move-out process.
2. Key Return & Security Deposit Procedures
The key return process is a crucial first step in a smooth move-out. Clearly outline your expectations before the tenant moves out - this should be included in your lease agreement and reiterated in pre-move-out communication.
Key Return: Specify the exact time and method for key return. Do they drop them off at the office? Is there a designated drop box? Document the date and time of key return, ideally with a signed acknowledgement from the tenant. This provides evidence of the transaction and prevents future disputes.
Security Deposit Handling: This is often the most contentious aspect of move-outs. Be absolutely meticulous.
- Lease Agreement Clarity: The lease should clearly outline the conditions for security deposit deductions (e.g., damage beyond normal wear and tear, unpaid rent, cleaning fees).
- Move-In/Move-Out Inspections: Comparing the move-in and move-out inspection reports is essential. Document everything with photos and videos.
- Itemized Deduction List: Provide the tenant with a detailed, itemized list of deductions from the security deposit, along with supporting documentation (photos, invoices for repairs). This is legally required in many jurisdictions.
- Timelines: Adhere strictly to the timelines mandated by local laws for returning the security deposit (or a portion thereof) and providing the itemized list. Failing to do so can result in penalties.
- Certified Mail: Consider sending the security deposit and itemized list via certified mail with return receipt to ensure proper delivery and proof of notification.
3. Property Inspection - Interior: Detailed Assessment
The interior inspection is arguably the most critical part of the move-out process. This isn't just a quick walkthrough; it's a detailed assessment of the unit's condition against the original move-in condition report (MICR). Bring your MICR, a measuring tape, a notepad, and a camera (or tablet) for thorough documentation.
Focus Areas:
- Walls & Ceilings: Look for nail holes, scuffs, excessive wear and tear, water stains, and any unauthorized paint. Note the extent of the damage.
- Floors: Assess carpeting for stains, tears, and excessive wear. Check hardwood floors for scratches, gouges, and damage. Tile should be inspected for cracks or missing pieces.
- Appliances: Test all appliances (oven, stove, refrigerator, dishwasher, microwave, washer, dryer) to ensure they are working correctly and in good condition. Document any issues.
- Fixtures: Inspect all light fixtures, faucets, toilets, showerheads, and outlets. Ensure they are functioning properly and are free from damage.
- Cabinets & Drawers: Check for damage, missing hardware, and cleanliness.
- Windows & Doors: Assess for broken glass, damaged screens, and proper functionality.
- Smoke Detectors & Carbon Monoxide Detectors: Verify they are present and functional. Note any missing or damaged batteries.
- Overall Cleanliness: While cleaning is the tenant's responsibility, note the general level of cleanliness and whether it meets the standards outlined in the lease agreement.
Documentation is Key: Take clear, dated photos and videos of everything. If damage is present, note the specific location and the estimated cost of repair. Be objective and stick to the facts. Remember, a well-documented inspection is your best defense against potential disputes.
4. Property Inspection - Exterior: Curb Appeal and Structural Integrity
The exterior inspection is crucial for protecting your investment and ensuring a smooth transition for the next tenant. Don't just glance - be thorough! Here's what to look for:
- Landscaping: Note the condition of lawns, gardens, shrubs, and trees. Are they neatly trimmed? Is there excessive debris? Document any damage or neglect.
- Exterior Walls & Siding: Check for cracks, damage, or peeling paint. Look for signs of water damage, mold, or insect infestation.
- Roof: While a full inspection might require a professional, a visual check for missing shingles, leaks, or sagging is essential.
- Gutters & Downspouts: Ensure they are clean and functioning correctly, directing water away from the foundation.
- Driveway & Sidewalks: Document any cracks, potholes, or trip hazards.
- Fencing: Inspect for damage, leaning, or missing sections.
- Outdoor Structures: Sheds, decks, patios, and other outdoor features should be assessed for structural integrity and condition.
- Appliances: Inspect any exterior appliances like grills or window AC units, noting their condition and functionality.
- Lighting: Confirm all exterior lights are working.
Take detailed photos and videos of any issues found. This documentation is vital if disputes arise regarding security deposit deductions.
5. Cleaning & Repairs: Addressing Damages and Maintaining Value
The move-out process isn't just about documenting the condition of the property; it's also a crucial opportunity to address any necessary cleaning and repairs. This directly impacts your ability to recoup costs and maintain the property's value for the next tenant.
Cleaning Expectations: Your lease agreement should clearly outline cleaning expectations. Refer back to this document - does the tenant need to professionally carpet clean? Are appliances required to be spotless? If not, it's reasonable to expect a basic level of cleanliness. Any excessive grime, lingering odors, or neglected areas will need to be addressed.
Damage Assessment & Repair Responsibility: This is where a thorough initial inspection (covered earlier) is vital. Distinguish between "wear and tear" (which the landlord typically covers) and damages caused by the tenant. If damages exist - such as holes in walls, broken appliances, or significant staining - document them with photos and estimates for repair. Determine the tenant's responsibility based on the lease agreement.
Negotiation & Cost Recovery: While you can deduct repair costs from the security deposit, it's always best to attempt communication with the tenant. Explain the damages, provide repair estimates, and discuss potential solutions. This proactive approach can sometimes resolve issues without resorting to deductions and potential disputes. Make sure all deductions adhere to your state's laws regarding security deposit handling.
Repair Timeline: Plan for a reasonable timeframe to complete repairs after the tenant vacates. This allows for contractor scheduling, material procurement, and the overall process of restoring the property to its rentable condition. Delaying repairs can impact your ability to re-rent quickly and could necessitate price reductions.
Ultimately, a well-handled cleaning and repair process benefits everyone. It ensures the property is presented well for potential new tenants and minimizes financial losses for you.
6. Utilities & Final Billing: Ensuring Accurate Transfers
One of the most critical, and often overlooked, aspects of a tenant move-out is handling utilities and final billing. Failing to do so correctly can lead to disputes, legal issues, and ultimately, lost revenue. Here's a breakdown of what needs to be done:
1. Initial Communication: Begin communicating with the tenant well in advance of their move-out date (at least 30 days is ideal). Clearly outline your expectations regarding utility transfers. State whether they are responsible for transferring services themselves or if you, as the property manager, will handle it. If you're handling it, specify what information you require from them (account numbers, dates of transfer, etc.).
2. Account Information Verification: Promptly request all necessary utility account information from the departing tenant. This includes:
- Account numbers for electricity, gas, water, sewer, trash, internet, cable, and any other services.
- Desired transfer dates.
- Contact information for the utility companies.
3. Transferring Services (If Applicable): If you're responsible for transferring utilities, contact the utility companies and arrange for service to be transferred to the new tenant (or put into your name if the property is vacant). This requires accuracy and timeliness to avoid service disruptions.
4. Final Billing & Dispute Resolution: Review the final utility bills received from the utility companies. Compare these bills to the tenant's initial usage records (if available). Any discrepancies should be investigated and resolved promptly. Document any communication with the utility companies regarding billing issues. Be prepared to mediate any disputes the tenant might have about final billing amounts.
5. Record Keeping: Maintain meticulous records of all utility transfer communications, account numbers, final bills, and any associated payments. This documentation is crucial for legal protection and can easily resolve future tenant inquiries.
7. Documentation & Record Keeping: Protecting Your Interests
Moving a tenant out is rarely a completely smooth process. That's why meticulous documentation and record keeping are absolutely critical for real estate managers. These records aren't just helpful for resolving disputes; they can be essential for legal protection.
Here's what you need to document throughout the move-out process:
- Initial Communication: Keep a record of all correspondence with the tenant regarding the move-out process, including notices, deadlines, and agreements. Email is ideal, as it provides a timestamped record.
- Move-Out Notice: Preserve a copy of the tenant's official move-out notice and your acknowledgment of receipt. Verify this aligns with the lease agreement's required timeframe.
- Condition Reports: The move-in and move-out condition reports are your primary defense against unfair damage claims. Ensure both reports are detailed, with photos and clear descriptions of any existing or newly observed issues. Have the tenant acknowledge receipt of the move-out condition report, even if they disagree with its contents.
- Inspection Notes: Document everything observed during the property inspection - interior and exterior - with photos and notes. Be specific and objective.
- Security Deposit Accounting: Detailed records of any deductions from the security deposit are essential. Include invoices from vendors, photos documenting the repairs, and a clear explanation of how the deductions align with state laws and the lease agreement. Send the itemized security deposit accounting to the tenant via certified mail with return receipt requested.
- Key Return: Document the date and time the keys were returned, and who received them.
- Final Bills & Utility Transfers: Keep copies of final utility bills and transfer confirmations.
- Lease Agreement: Of course, always maintain the original lease agreement in a secure location.
Why is this so important?
- Dispute Resolution: Detailed records are your best evidence if a tenant disputes deductions from their security deposit or claims you're in violation of state law.
- Legal Compliance: Many states have specific legal requirements for security deposit accounting and move-out procedures. Proper documentation helps you demonstrate compliance.
- Audit Trail: In case of any legal challenges, these records provide a clear audit trail of the move-out process.
By prioritizing thorough documentation and record-keeping, you protect your interests as a real estate manager and minimize potential legal issues.
8. Lease Agreement Review: Confirming Move-Out Compliance
Before you officially close out a tenancy, it's vital to revisit the original lease agreement. Many leases contain specific clauses regarding move-out procedures, cleaning requirements, and acceptable condition of the property. Don't assume you know what it says - pull it out and read it carefully!
Look for sections detailing:
- Notice Requirements: Did the tenant provide the legally required notice? Verify this against the lease terms and local laws.
- Cleaning Standards: Does the lease specify a particular level of cleanliness required for move-out? This could include details about carpets, appliances, bathrooms, etc.
- Condition Expectations: Does the lease outline the expected condition of the property upon move-out, beyond normal wear and tear?
- Forwarding Address: Confirm the tenant provided a forwarding address for return of the security deposit statement and any remaining communication.
Referencing the lease agreement provides a clear legal framework for evaluating the tenant's compliance and helps protect you from potential disputes. It also provides a solid foundation for justifying any deductions from the security deposit.
9. Legal Considerations: Avoiding Disputes
Navigating a tenant move-out can be smooth, but misunderstandings about responsibilities are a major source of disputes. To protect yourself and your property, solid documentation is key.
Security Deposit Laws: Familiarize yourself thoroughly with your state and local laws regarding security deposit handling. These laws dictate timelines for returning deposits, allowable deductions, and required itemized lists detailing any damages. Failing to comply can lead to legal action and forfeiture of the right to withhold any portion of the deposit.
Move-Out Notices & Communication: Ensure the tenant provides proper move-out notice as stipulated in the lease agreement. Document everything - the date the notice was received, any conversations about the move-out process, and agreements made. Written communication (email or letters) is preferable to verbal agreements.
Lease Agreement Adherence: Refer back to the original lease agreement. It outlines tenant responsibilities for cleaning, repairs, and property condition. Use this as the benchmark for evaluating the move-out.
Witnesses: For critical inspections, consider having a neutral third party (another property manager, a reliable contractor) present. This can provide an unbiased record of the property's condition.
Photographic Evidence: High-quality photos and videos of the property's condition before and after the tenant moves out are invaluable. Document everything - from scuffs on walls to broken appliances. These visuals provide concrete evidence to support any deductions from the security deposit.
Itemized Deductions: When returning the security deposit, provide a detailed, itemized list of any deductions, along with supporting documentation (photos, invoices for repairs). This transparency significantly reduces the likelihood of disputes.
Certified Mail: Sending the security deposit accounting via certified mail with return receipt provides proof that the tenant received it, further protecting you legally.
Disclaimer: This information is for general guidance only and does not constitute legal advice. Consult with an attorney to ensure compliance with applicable laws.
10. Post-Move-Out Tasks: Preparing for the Next Tenant
Once your tenant has officially moved out, the work doesn't stop. Efficient post-move-out tasks are crucial for minimizing downtime and maximizing your return on investment. Here's what you need to tackle:
Deep Cleaning & Refreshing: While your tenant might have done a basic clean, a professional deep clean is highly recommended. This includes scrubbing bathrooms, kitchens, floors, and windows. Consider repainting walls (especially if there's damage) and refreshing carpets. Small improvements go a long way in making the property appealing to potential new tenants.
Addressing Deferred Maintenance: Now's the time to catch up on any maintenance requests that were deferred during the tenancy. This might include fixing leaky faucets, repairing damaged appliances, or addressing cosmetic issues.
Making Necessary Repairs: Any damages beyond normal wear and tear identified during the move-out inspection need to be repaired. Obtain quotes from qualified contractors and complete these repairs promptly.
Marketing & Listing: Begin marketing the property for re-rental. Update listings with fresh photos showcasing the refreshed condition. Highlight any improvements made post-move-out.
Reviewing Move-Out Process: Take some time to review the entire move-out process - from pre-move-out communication to the final inspection. Identify any areas where you can improve efficiency or clarity for future tenants. This continuous improvement helps streamline operations and ensures a positive experience for everyone involved.
Scheduling Viewings: Carefully schedule showings, ensuring the property is clean, presentable, and accessible to potential renters.
Resources & Links
- Investopedia: A comprehensive resource for real estate investing terminology and concepts. Useful for clarifying legal and financial terms mentioned in the move-out checklist.
- The Balance Small Business: Offers practical advice on legal and financial aspects of property management, including tenant relations and security deposits. Could support sections on lease agreement review and legal considerations.
- Nolo: Provides legal information and forms related to landlord-tenant law. Especially relevant for 'Legal Considerations' and documentation sections. Check for state-specific laws.
- National Association of REALTORS®: Provides resources and best practices for real estate professionals, including information relevant to property condition and valuation. Useful for 'Property Inspection' and 'Cleaning & Repairs' sections.
- U.S. Department of Housing and Urban Development (HUD): Provides information about fair housing laws and tenant rights, which can inform the 'Legal Considerations' section and promote ethical move-out procedures.
- Tenant.net: A resource aimed at tenants, offering insights into tenant expectations and potential dispute points. Provides a valuable perspective for understanding tenant concerns during move-out.
- Landlordology: A website dedicated to landlord information and resources covering various aspects of property management, including move-out procedures. Good for expanding on specific tasks and addressing common challenges.
- Buildium: Property management software provider with a blog offering insights into best practices, including move-out checklists. Useful for showcasing efficient workflow and documenting processes.
- AppFolio: Another property management software provider with a blog that contains helpful articles and templates.
- Avail: Provides resources and tools for landlords, including downloadable move-out checklists and lease agreement templates.
Frequently Asked Questions
What is a tenant move-out checklist and why is it important?
A tenant move-out checklist is a detailed list of tasks and inspections performed when a tenant vacates a rental property. It's crucial for documenting the property's condition, protecting the landlord's interests, and minimizing potential disputes with the former tenant regarding the security deposit.
Who should use this checklist?
This checklist is beneficial for real estate managers, property managers, landlords, and anyone involved in the process of a tenant moving out of a rental property.
What should be included in the initial walkthrough with the tenant?
The initial walkthrough should focus on noting any visible damage or necessary repairs. It's a collaborative process to ensure both parties understand the condition of the property before the tenant officially moves out. Document everything with photos and signatures.
What are some common areas of damage/wear and tear to document?
Typical areas to check include walls, floors, appliances, fixtures (lights, faucets), windows, doors, and any landscaping. Note any stains, scratches, holes, or broken items.
What's the difference between 'wear and tear' and 'damage'?
'Wear and tear' refers to the natural deterioration of the property due to normal use (e.g., faded paint, worn carpet). 'Damage' is caused by negligence or misuse (e.g., holes in walls, broken appliances). Landlords are not responsible for wear and tear, but they are responsible for damage caused by the tenant.
What documentation is necessary when a tenant moves out?
You should document everything with photos and videos. Obtain a signed move-out inspection report from the tenant (if they agree). Keep copies of the lease agreement, any addendums, and all communication with the tenant.
How long do I have to return the security deposit after the tenant moves out?
The timeframe varies by state. Check your local laws for the specific deadlines and requirements regarding security deposit returns and itemized deductions.
What if the tenant refuses to participate in the move-out inspection?
While a collaborative inspection is ideal, if the tenant refuses, you can still proceed with the inspection. Document the refusal and perform the inspection anyway. Send the tenant a copy of the inspection report, even if they didn't participate.
Can I use the move-out checklist as evidence if there's a security deposit dispute?
Yes, a detailed and properly documented move-out checklist, along with photos and the tenant's signature (if possible), serves as valuable evidence to support your deductions from the security deposit and can be used in mediation or legal proceedings.
Are there any legal considerations I need to be aware of when conducting a move-out inspection?
Always be familiar with your state and local laws regarding tenant rights, security deposit handling, and eviction processes. Providing proper notice and conducting fair and impartial inspections are essential to avoid legal issues.
Found this Article helpful?
Real Estate Management Solution Demo
Simplify your real estate operations! ChecklistGuro streamlines property management, lease renewals, and maintenance requests. Enhance tenant satisfaction and maximize ROI. Manage it all with our Work OS.
Related Articles
Stress-Free Inspections: Your Home Inspection Coordination Checklist Template
The Ultimate Website Maintenance Checklist Template
10 Essential Checks: Your Brokerage Policy Review Checklist
The Ultimate Office Opening/Closing Checklist Template
Your Ultimate AML Compliance Checklist Template
Rent Collection Checklist Template: Your Landlord's Guide
Your Complete Flood Zone Disclosure Checklist Template
Fair Housing Training Checklist Template: Your Guide to Compliance
We can do it Together
Need help with
Real Estate?
Have a question? We're here to help. Please submit your inquiry, and we'll respond promptly.