Topsoil Salvage & Stockpiling Checklist Template: Your Guide to Sustainable Soil Management
Published: 08/31/2025 Updated: 12/13/2025
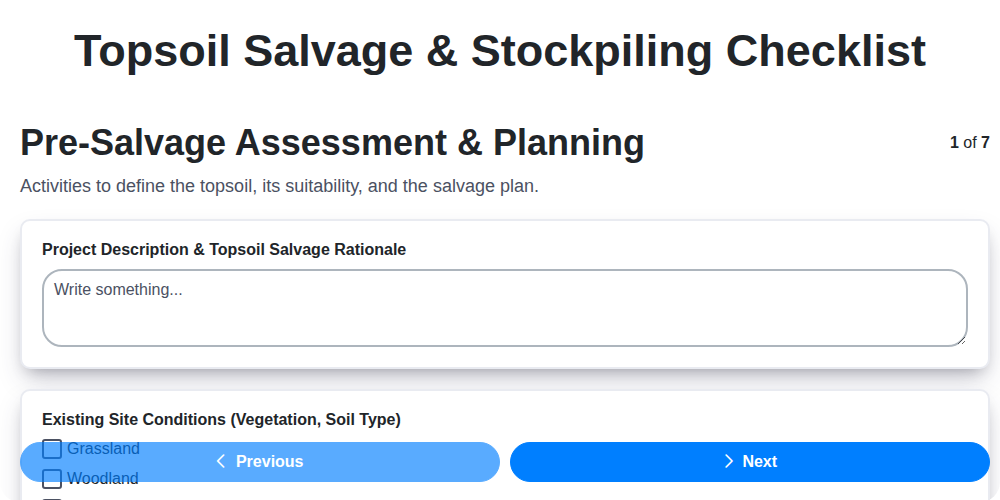
Table of Contents
- Why Salvage Topsoil? Benefits for Your Project & the Environment
- Phase 1: Pre-Salvage Planning & Assessment
- Step 2: Identifying & Delineating Your Topsoil Resource
- Excavation & Handling: Best Practices for Minimal Soil Disturbance
- Building a Stable Stockpile: Location, Construction & Protection
- Documentation & Record Keeping: Tracking Your Soil Journey
- Re-Use Planning: Returning Soil to the Landscape
- Essential Checklist Template: A Downloadable Guide
- Resources & Links
TLDR: This checklist template simplifies responsible soil management by guiding you through assessing, excavating, stockpiling, and reusing topsoil. It ensures project sustainability, saves costs, and minimizes environmental impact - perfect for contractors, landscapers, and anyone prioritizing healthy soil practices. Download the template and start managing your soil smarter!
Why Salvage Topsoil? Benefits for Your Project & the Environment
Beyond simply avoiding landfill fees, salvaging topsoil offers a wealth of benefits that extend to both your project's bottom line and the health of our environment. Let's break down the key advantages:
Economic Gains: Purchasing virgin topsoil can be a significant expense, especially for large-scale projects. Salvaging your existing topsoil directly reduces this cost, freeing up budget for other crucial aspects of the project. Furthermore, avoiding disposal fees associated with sending soil to a landfill provides an additional cost saving.
Environmental Stewardship: Topsoil represents a finite resource. Mining for new topsoil often disrupts ecosystems, contributes to erosion, and degrades valuable land. By salvaging and reusing what's already present, you minimize your project's environmental footprint and contribute to responsible land management. Healthy topsoil supports biodiversity, sequesters carbon, and helps maintain water quality - all crucial for a sustainable future.
Improved Soil Quality for Future Growth: Often, the topsoil already on site is well-adapted to the local climate and conditions. Reusing this soil provides a strong foundation for landscaping, seeding, and planting, often requiring fewer amendments compared to introducing new, potentially less-suitable soil.
Enhanced Project Sustainability: Demonstrating a commitment to sustainable practices can be a significant advantage, attracting environmentally conscious clients and improving your project's reputation. This resonates with a growing awareness of responsible construction and land management.
Faster Project Timeline: Utilizing salvaged topsoil can streamline your project timeline. Eliminating the need to source, transport, and spread new topsoil can save valuable time, particularly when material availability is a concern.
Phase 1: Pre-Salvage Planning & Assessment
Before a single shovel hits the ground, thorough planning is paramount for a successful and compliant topsoil salvage operation. This initial phase focuses on understanding the site, identifying potential challenges, and establishing a clear salvage strategy. Skipping this crucial step can lead to costly delays, environmental damage, and regulatory penalties.
1. Site Investigation & Soil Mapping: Begin with a detailed site investigation. This includes reviewing existing maps, aerial photography, and potentially conducting a site walk-over to identify existing vegetation, drainage patterns, and potential hazards. Soil mapping, even a basic assessment, helps to understand the distribution and characteristics of different soil layers. Look for variations in color, texture, and organic matter content - these can indicate distinct soil horizons.
2. Regulatory Compliance is Key: Research and understand all applicable local, state, and federal regulations regarding soil salvage and handling. Permit requirements often vary considerably, and it's your responsibility to ensure full compliance. Contact your local environmental protection agency or permitting office early in the process to clarify requirements and timelines. Don't assume; verify!
3. Defining Salvage Goals & Scope: Clearly define the objectives of the salvage operation. Are you aiming to reuse all salvaged topsoil? Is there a specific area where it will be reapplied? Defining the scope upfront informs the quantity to be salvaged and the quality standards to be maintained.
4. Environmental Considerations: Assess the potential environmental impacts of the salvage operation. Consider proximity to waterways, sensitive habitats, and potential for erosion or contamination. Develop mitigation strategies to minimize these impacts, such as silt fences, straw bales, and erosion control blankets.
5. Stakeholder Communication: Open communication is essential. Inform all relevant stakeholders - clients, contractors, engineers, and regulatory agencies - about your salvage plan and timeline. This fosters transparency and minimizes potential conflicts.
Step 2: Identifying & Delineating Your Topsoil Resource
Accurately identifying and delineating your topsoil is more than just marking a boundary; it's about ensuring you're salvaging the right material. Topsoil isn't just "dirt"-it's a complex ecosystem vital for plant growth. Visually, healthy topsoil typically appears darker than the underlying subsoil, owing to its higher organic matter content. It often has a looser, crumblier texture compared to the denser layers below. Look for evidence of roots, leaves, and other organic debris - these are telltale signs of a thriving topsoil layer.
While visual inspection is a great starting point, consider supplementing it with a simple scratch test. Carefully scratch the surface to reveal the soil profile. This can help you distinguish the upper, organic-rich layer from the mineral-rich subsoil.
For larger projects or when precision is paramount, soil testing offers a definitive answer. A simple laboratory analysis can confirm the topsoil's characteristics like pH, nutrient levels (nitrogen, phosphorus, potassium), and organic matter percentage. This is particularly valuable if you suspect contamination.
Once identified, clearly delineate the topsoil boundaries. This can be achieved through a variety of methods:
- Flags: Affordable and readily visible, strategically placed flags mark the edges.
- Spray Paint: Using a contrasting color of paint can define the boundary, especially on sloped areas.
- Marking Tape: A flexible option that conforms to uneven terrain.
Consistent marking is key for all team members involved in the excavation process. Accurate delineation minimizes accidental removal of subsoil and maximizes the volume of valuable topsoil salvaged. Don't underestimate the importance of clear communication and consistent marking throughout the project!
Excavation & Handling: Best Practices for Minimal Soil Disturbance
The way you excavate and handle topsoil significantly impacts its quality and viability for reuse. Rushing the process or using inappropriate methods can lead to compaction, loss of organic matter, and the introduction of contaminants - all of which diminish its value. Here's how to minimize disturbance and maintain topsoil integrity:
Gentle Excavation Techniques:
- Slow and Steady: Excavate slowly and deliberately. Rapid movements and aggressive digging compact the soil and break down aggregates.
- Appropriate Equipment: Choose equipment sized appropriately for the job. Overly large machinery causes unnecessary compaction. Skid steers and smaller backhoes are often preferred for sensitive topsoil removal.
- Low Ground Pressure (LGP) Tires: If using heavy equipment, opt for machines equipped with Low Ground Pressure (LGP) tires. These significantly reduce soil compaction compared to standard tires.
- Avoid Multiple Passes: Minimize the number of passes made over the topsoil layer. Each pass contributes to compaction.
- Careful Blade Control: When using a loader or backhoe, carefully control the bucket angle and depth to avoid digging too deep or scooping too much subsoil.
Handling & Transport Considerations:
- Dedicated Equipment: Ideally, use dedicated equipment for topsoil handling - separate from equipment used for subsoil or other materials. This prevents contamination.
- Minimize Drop Heights: When loading and unloading topsoil, minimize the drop height. A significant drop can cause soil breakup.
- Gentle Conveying (if applicable): If using conveyors, ensure they are appropriately padded to prevent soil damage.
- Prompt Transport: Transport the excavated topsoil to the stockpile area as quickly as possible to reduce exposure and potential loss.
- Secure Loads: Securely load topsoil onto trucks or trailers to prevent spillage and scattering during transport.
Building a Stable Stockpile: Location, Construction & Protection
A poorly constructed stockpile isn't just unsightly - it's a liability. Its stability directly impacts soil quality and presents potential environmental and safety risks. Careful planning and execution are essential for a successful stockpile.
Location, Location, Location:
Choosing the right location is the foundation of a stable stockpile. Consider these factors:
- Accessibility: Easy access for loading and unloading equipment is crucial for efficiency.
- Elevation: Locate the stockpile on relatively high ground to minimize the risk of flooding.
- Slope Stability: Avoid areas with existing slope instability or a history of landslides.
- Buffer Zones: Maintain adequate buffer zones from waterways, wetlands, and sensitive environmental areas. Check local regulations for specific distance requirements.
- Surface Permeability: Ideally, choose a location with reasonably permeable soil to prevent waterlogging.
Construction Best Practices:
- Foundation Preparation: Level the stockpile base and compact the soil if necessary to provide a stable foundation. Remove any rocks, roots, or debris.
- Layered Placement: Deposit soil in thin, even layers (6-12 inches) and compact each layer using a plate compactor or similar equipment. This prevents settling and promotes stability.
- Slope Management: Aim for a gentle stockpile slope (no steeper than 3: 1) to minimize the risk of slumping. Terracing the stockpile can be helpful for larger volumes.
- Water Management: Incorporate drainage channels or swales around the stockpile to divert surface water away from the base.
Protective Measures:
- Erosion Control: Install silt fences, straw bales, or other erosion control measures around the stockpile perimeter to prevent soil loss during rainfall.
- Covering: Protect the stockpile from direct sunlight and heavy rainfall by covering it with a durable tarp or other waterproof material. Secure the cover tightly to prevent it from blowing away.
- Vegetation (Long-term): For stockpiles intended for long-term storage, consider establishing a temporary vegetative cover on the slopes to stabilize the soil.
- Regular Inspection: Routinely inspect the stockpile for signs of instability, erosion, or drainage problems. Address any issues promptly to prevent further damage.
Documentation & Record Keeping: Tracking Your Soil Journey
Maintaining meticulous records throughout the topsoil salvage and stockpiling process isn't just good practice-it's essential for accountability, regulatory compliance, and ensuring the long-term health of your project's soil resources. Think of it as tracing your soil's journey from excavation to re-use.
What should you document? Start with the basics: the precise location of the salvaged area (GPS coordinates are invaluable!), the date of excavation, and the approximate volume of topsoil removed. Photos, taken before, during, and after the excavation, provide a visual timeline.
Expand on that with a detailed log, including the names of personnel involved in each stage, any amendments applied to the stockpile, and results from soil tests (if conducted). This data is crucial if questions arise about soil origin or quality later on. A simple spreadsheet works wonders, but more sophisticated project management software can streamline the process. Don't underestimate the power of consistent, organized record keeping - it can save you time, money, and headaches down the line.
Re-Use Planning: Returning Soil to the Landscape
The effort put into salvaging and stockpiling topsoil isn't complete until it's thoughtfully incorporated back into the project or another suitable location. Simply spreading it around isn't always the best approach; careful planning maximizes its benefits and prevents unintended consequences.
Assessing Soil Condition Post-Stockpiling: Before spreading, evaluate the stockpile's condition. Time spent in storage can alter its characteristics. A visual inspection is a good starting point: is it compacted? Are there signs of weed infestation or erosion? Consider a simple penetrometer test to gauge compaction.
Amendment Considerations: Depending on the storage period and visual assessment, soil amendment might be beneficial. Compost or well-rotted manure can improve structure, nutrient content, and microbial activity. A light application of lime can adjust pH if acidity has developed. Conduct a small-scale test patch to ensure compatibility and desired results before applying broadly.
Application Rates & Depth: The ideal application depth depends on the intended use. For establishing a new lawn, a depth of 2-4 inches is often recommended. For planting trees or shrubs, a deeper layer (4-6 inches) provides a better root zone. Avoid excessive depth, which can lead to compaction or oxygen deprivation.
Incorporation Techniques: Whether you're seeding a new lawn or preparing a planting bed, proper incorporation is key. Lightly rake the salvaged soil into the existing ground to create a loose, aerated mix. Avoid heavy tilling, which can damage soil structure.
Contamination Monitoring: If there's any suspicion of contamination during storage (e.g., runoff from a contaminated site), test the soil before re-use, especially for food crops or areas frequented by children.
Long-Term Management: After incorporation, continue to monitor the soil's health through regular observations and, if necessary, periodic testing. Consistent mulching helps retain moisture, suppress weeds, and maintain a healthy soil ecosystem.
Essential Checklist Template: A Downloadable Guide
Putting this plan into action can feel overwhelming. That's why we've created a comprehensive, printable checklist template to guide you through each step of the topsoil salvage and stockpiling process. This isn't just a list; it's a working document designed for site supervisors, project managers, and environmental teams to ensure consistent, responsible execution.
What's Included in the Template?
- Detailed Task Breakdown: Each of the seven key steps outlined in the blog post is broken down into actionable tasks with space for notes and responsible party assignment.
- Checkboxes & Sign-Offs: Easily track progress and ensure accountability with clear checkboxes for each task. Designated spaces are included for team members to sign off on completed stages.
- Measurement Logs: Built-in sections for recording soil depths, volumes salvaged, stockpile dimensions, and GPS coordinates.
- Photo Log Template: A simple table to document key stages of the process with date, description, and photo reference.
- Printable & Editable: The template is formatted for easy printing and is designed to be readily adaptable to your specific project requirements.
(Please note: This template is provided for informational purposes only and should be used in conjunction with applicable regulations and best practices.)
Resources & Links
- USDA Natural Resources Conservation Service (NRCS) : The NRCS offers a wealth of information on soil health, conservation practices, and technical assistance. Excellent for understanding soil types, erosion control, and sustainable land management principles - fundamental to topsoil salvage. Provides data and guides on soil science.
- U.S. Environmental Protection Agency (EPA) : The EPA provides guidance and regulations related to erosion and sediment control, stormwater management, and environmental protection. Crucial for understanding legal requirements and best practices for responsible topsoil handling and stockpiling.
- Conservation Design : Conservation Design specializes in sustainable land management practices. Their site has resources on erosion control, stormwater management, and soil stabilization - all vital for proper topsoil salvage and stockpile protection.
- Soil Health Institute : Dedicated to advancing soil health, this institute offers research, resources, and tools to understand and improve soil function. Provides context on why topsoil is valuable and how to protect it.
- American Geoservices : Offers geotechnical services, including soil testing and analysis. Helps determine soil composition, load-bearing capacity, and suitability for various re-use applications - important for project planning.
- American Society of Landscape Architects (ASLA) : The ASLA provides resources and information for landscape architects, who often deal with topsoil management in construction and design projects. Provides a design and planning perspective.
- Aggregate Association : Provides information and resources related to aggregate production, which often involves working with soil. Can be useful for understanding earthmoving techniques and soil handling practices.
- Construction Site Control, Inc. : Offers erosion and sediment control solutions, including products and technical guidance. A valuable resource for understanding best practices for protecting stockpiled topsoil from erosion and runoff.
- National Erosion Control Technology Center (NCET) : NCET provides technical assistance and resources for erosion control and stormwater management. Useful for selecting appropriate techniques to protect topsoil during salvage and stockpiling.
- Geoengineering International : Features articles and news related to earthmoving, soil stabilization, and geotechnics. Relevant for understanding excavation techniques and stockpile construction.
- USGS Soil Maps : The US Geological Survey provides soil maps for the United States. Useful for understanding the regional context of your topsoil and potential soil types you might encounter.
Frequently Asked Questions
What is topsoil salvage and why is it important?
Topsoil salvage is the process of carefully removing and storing existing topsoil from a site before construction or disturbance. It's important because topsoil is a vital resource - it's rich in organic matter and nutrients that support plant life. Salvaging it prevents loss, reduces the need for new soil, and promotes sustainable land management practices.
Why should I use a checklist template for topsoil salvage?
A checklist template ensures a systematic and consistent approach to topsoil salvage. It helps you track steps, identify potential issues, and ensure you're complying with local regulations. It minimizes errors and promotes a higher quality salvage operation.
What information should be included in a topsoil salvage checklist?
The checklist should include details such as site assessment, documentation of soil types, stripping depth, storage location, erosion control measures, testing requirements, and record-keeping procedures. It should also cover responsibilities and communication protocols.
What kind of soil qualifies as 'topsoil' and should be salvaged?
Typically, topsoil is the uppermost layer of soil, usually 6-12 inches deep, and is dark in color due to its organic content. It's characterized by its ability to support plant growth. The specific definition can vary based on local regulations and project requirements. A soil analysis can help confirm its suitability.
How do I determine the correct stripping depth for topsoil salvage?
Stripping depth depends on the intended use of the salvaged topsoil. Factors include soil type, existing vegetation, future landscaping plans, and local regulations. Generally, 4-8 inches is common, but a professional soil assessment is recommended for accurate determination.
What are the best practices for stockpiling salvaged topsoil?
Stockpiles should be located on level ground, away from waterways and areas prone to erosion. They should be covered with tarps to prevent drying and erosion and properly labeled with dates and soil type information. Slope stability and proper drainage are also crucial.
What kind of testing should I conduct on salvaged topsoil?
Typical tests include nutrient analysis (nitrogen, phosphorus, potassium), pH testing, and sometimes heavy metal testing (depending on site history). Testing ensures the salvaged soil is suitable for its intended purpose and meets environmental standards.
How long can topsoil be safely stockpiled?
While topsoil can be stockpiled for extended periods, degradation occurs over time. Ideal storage minimizes exposure to weather. Generally, within 1-2 years is best, but proper storage techniques can extend the timeframe. Regular monitoring and potentially re-amending the soil may be necessary for longer storage periods.
Are there any regulations or permits required for topsoil salvage?
Yes, local and regional regulations often govern topsoil salvage. These can involve permits, specific storage requirements, and disposal limitations. Always check with your local environmental agency or planning department before starting a salvage operation.
Can salvaged topsoil be reused on the same project?
Yes, in most cases. Properly stored and tested salvaged topsoil is often the preferred option for landscaping or re-vegetation on the same site. It reduces costs and minimizes environmental impact.
What happens to topsoil if it isn't salvaged?
If topsoil isn't salvaged, it's often lost forever, contributing to soil erosion, nutrient depletion, and increased need for synthetic fertilizers. It's a significant waste of a valuable natural resource.
Found this Article helpful?
Construction Management Solution Demo
Build smarter, not harder! ChecklistGuro streamlines construction projects from planning to closeout. Manage tasks, inspections, safety protocols & more - all in one place. Reduce delays, improve communication, and deliver projects on time & on budget.
Related Articles

The Ultimate Concrete Vibration Checklist Template

Unlock Value: Your Free Value Engineering Checklist Template

The Ultimate HVAC Ductwork Installation Checklist Template

The Ultimate Rebar Placement Checklist Template

Your Concrete Mix Design Verification Checklist: A Step-by-Step Guide

Backfilling & Compaction Checklist: A Foundation's Best Friend

The Ultimate Concrete Delivery & Placement Checklist Template

Your Ultimate Stakeholder Communication Plan Checklist Template
We can do it Together
Need help with
Construction?
Have a question? We're here to help. Please submit your inquiry, and we'll respond promptly.