Streamline Your Shop: The Ultimate Auto Repair Parts Ordering Checklist Template
Published: 09/29/2025 Updated: 03/25/2026
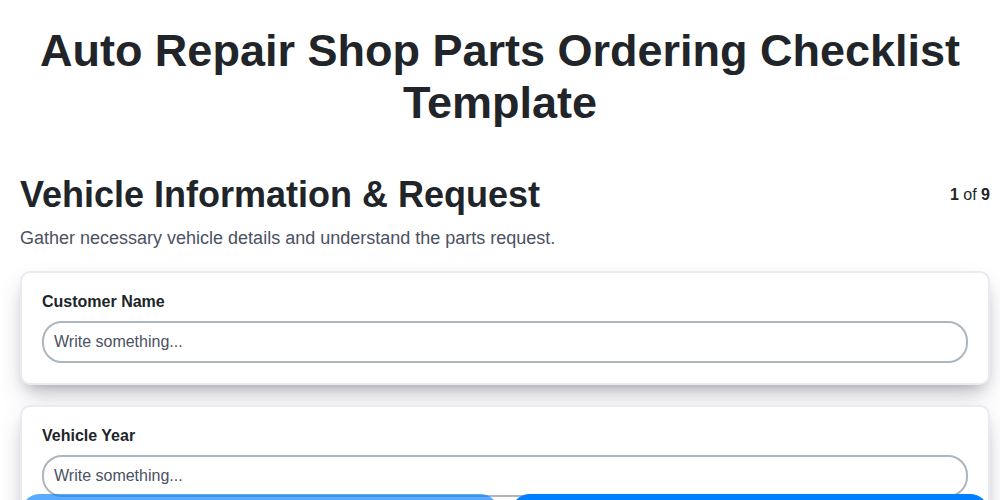
Table of Contents
- Why a Parts Ordering Checklist Matters
- The Cost of Inefficient Parts Ordering
- Introducing the Ultimate Auto Repair Parts Ordering Checklist
- Step 1: Vehicle Information & Repair Request
- Step 2: Accurate Parts Identification & Cross-Referencing
- Step 3: Inventory Verification - What's On Hand?
- Step 4: Vendor Selection & Pricing Comparison
- Step 5: Placing the Order & Securing Confirmation
- Step 6: Order Tracking & Delivery Management
- Step 7: Receiving, Inspecting, and Verifying Parts
- Step 8: Organized Storage & Inventory Control
- Step 9: Record Keeping & Documentation for Traceability
- Step 10: Continuous Improvement: Refining Your Process
- Resources & Links
TLDR: Overwhelmed by auto repair parts ordering? This checklist template helps you avoid errors, save time, and boost efficiency by standardizing your process - from vehicle info to storage & record keeping. Download it now to streamline your shop!
Why a Parts Ordering Checklist Matters
Beyond simply being a list of steps, a well-executed parts ordering checklist directly impacts several critical areas of your auto repair shop's performance. Let's break down why this seemingly small process holds so much weight.
Boosting Technician Productivity: Imagine your technician waiting for a missing part, disrupting their workflow and delaying a repair. A checklist minimizes these frustrating interruptions, allowing them to focus on what they do best: fixing cars. This translates to more repairs completed per day and increased billable hours.
Minimizing Costly Errors: Ordering the wrong part isn't just inconvenient; it's expensive. Return shipping, restocking fees, and the potential need for re-diagnosis all eat into your profit margins. A checklist ensures accuracy, reducing these costly mistakes.
Enhancing Customer Satisfaction: Delays and incorrect repairs damage your reputation. A streamlined parts ordering process contributes to faster turnaround times and accurate repairs, leading to happier customers and repeat business.
Improving Inventory Control: The checklist process provides valuable data points for inventory management. Observing frequently ordered parts and vendor performance allows you to optimize your stock levels and negotiate better pricing.
Promoting Team Accountability: A clear, documented process clarifies roles and responsibilities, fostering a more accountable and efficient work environment for your entire team.
The Cost of Inefficient Parts Ordering
It's easy to dismiss parts ordering as a minor operational detail. However, inefficient processes can silently erode profitability and damage customer satisfaction. The true cost extends far beyond the price of the parts themselves. Think about the technician's time wasted waiting for parts - that's billable hours lost. Consider the service advisor's frustration and potential customer dissatisfaction when a repair is delayed. Frequent errors lead to reorders, returns, and additional shipping fees, all adding to overhead. Beyond the financial impact, a chaotic parts ordering system breeds frustration amongst your team, lowers morale, and contributes to a less professional shop image. Ultimately, these seemingly small inefficiencies accumulate into a significant drain on your bottom line and a barrier to long-term success. Investing in a streamlined process, like implementing a dedicated checklist, isn't just about saving time; it's about protecting your shop's profitability and reputation.
Introducing the Ultimate Auto Repair Parts Ordering Checklist
Let's be honest, the parts ordering process in an auto repair shop can be a chaotic mess. From frantic searches for the right part number to chasing down vendors and dealing with incorrect shipments, it's a time-consuming and often frustrating experience - for your team and your customers. This isn't just about saving a few minutes here and there; it's about fundamentally improving efficiency, reducing errors, and creating a smoother, more profitable workflow.
That's why we've developed this comprehensive checklist - not just a list of tasks, but a meticulously designed system to guide your team through every step, from initial request to final storage. This isn't a nice-to-have - it's an essential tool for any auto repair shop serious about optimizing operations and delivering exceptional service. We'll break down the entire process into ten easily digestible steps, equipping you with the knowledge and tools you need to transform your parts ordering from a source of headaches into a streamlined success. Let's dive in!
Step 1: Vehicle Information & Repair Request
The foundation of a successful parts order lies in comprehensive and accurate information. Rushing this initial step is a recipe for costly errors and frustrating delays. This isn't just about getting the make, model, and year correct - it's about understanding why the parts are needed in the first place.
Here's what needs to be captured:
- Vehicle Identification Number (VIN): The VIN is your most reliable source of information. It unlocks a wealth of vehicle-specific data, ensuring compatibility and preventing misidentification.
- Make, Model, and Year: Essential for basic parts identification.
- Engine Size: Critical for differentiating parts based on engine configuration.
- Mileage: While not always a direct factor in parts selection, high mileage can indicate potential wear and tear that impacts part suitability.
- Service Requested: A detailed description of the repair is paramount. Brakes isn't enough; specify Front Brake Pads & Rotors or Rear Wheel Bearings.
- Service Advisor Input: The service advisor acts as a crucial link between the customer and the parts department. Their understanding of the technician's diagnosis and the required repairs is vital.
- Customer Approval (If Applicable): For higher-cost repairs or parts, obtaining customer approval upfront avoids surprises and builds trust. Clearly communicate the cost and the necessity of the parts.
Step 2: Accurate Parts Identification & Cross-Referencing
Getting the right part is paramount. A misidentified part wastes everyone's time, delays repairs, and can potentially damage the vehicle. This step goes beyond just finding a part that looks like it fits. It's a process of verification and confirmation.
1. Consult Multiple Resources: Don't rely solely on one catalog or database. Cross-reference information from manufacturer catalogs, reputable online parts retailers (RockAuto, etc.), and repair manuals specific to the vehicle's make, model, and year. Different resources can have varying levels of accuracy and provide different perspectives.
2. Understand Part Numbers: Familiarize yourself with the structure and meaning of part numbers. While not always essential to decipher the entire code, understanding the key components (e.g., manufacturer code, vehicle application) can provide valuable context.
3. VIN Decoding is Your Friend: The Vehicle Identification Number (VIN) is the ultimate key to accurate parts identification. Many online VIN decoders allow you to input the VIN and retrieve a list of compatible parts. While these aren't foolproof, they provide a solid foundation for your search.
4. Be Aware of Variations: Vehicles often have variations based on trim level, engine type, and optional equipment. A part that fits one configuration might not be compatible with another. Pay close attention to these details during your search.
5. Double-Check Fitment Guides: Reputable parts suppliers provide detailed fitment guides that specify which vehicles a part is compatible with. Study these guides carefully and note any exclusions or special considerations.
6. When in Doubt, Ask! Don't hesitate to contact the parts supplier's technical support team for assistance. They can often provide valuable insights and help you confirm the correct part number.
Step 3: Inventory Verification - What's On Hand?
Before placing an order, a thorough inventory check is absolutely crucial. It's more than just a glance at the shelves; it's a systematic process to confirm what parts you already have on hand. Start by physically checking your parts room or designated storage area. Don't rely solely on your inventory system-a quick visual confirmation helps catch discrepancies that automated systems might miss.
Next, consult your parts inventory management software. Note the quantity listed and compare it to the physical count. If there's a difference, investigate immediately. Is it a system error, a misplaced part, or a simple miscount? Correcting these discrepancies now prevents future ordering mistakes.
Beyond the obvious, consider the 'rotation' of your stock. Parts with earlier arrival dates should be used first (FIFO - First In, First Out) to minimize the risk of obsolescence and ensure freshness. Knowing your stock levels not only prevents unnecessary orders but also helps predict future demand and optimize your overall inventory management. Finally, flag frequently used parts for potential restocking, even if you're not quite out - proactively managing your stock ensures you're always prepared for your technicians' needs.
Step 4: Vendor Selection & Pricing Comparison
Choosing the right parts vendor isn't just about finding the lowest price; it's about building a reliable partnership. Here's a breakdown of factors to consider when selecting and comparing vendors:
1. Build a Vendor List: Don't rely on just one supplier. Cultivate a list of at least 3-5 approved vendors. Consider both national suppliers and local distributors.
2. Price Isn't Everything: While competitive pricing is vital, prioritize vendors who offer:
- Accuracy: Consistent pricing and accurate part numbers are crucial to avoid costly errors.
- Reliability: Can you depend on them to deliver parts on time, every time?
- Customer Service: A responsive and helpful customer service team is invaluable when issues arise.
- Warranty Support: Understand their warranty policies and how they handle defective parts.
3. Request Quotes: For each order, obtain quotes from multiple vendors. Clearly specify part numbers, quantities, and any special requirements (e.g., expedited shipping).
4. Compare Total Cost of Ownership: Don't just compare the price per part. Factor in:
- Shipping Costs: Calculate shipping fees to determine the true cost.
- Handling Fees: Are there any extra charges for processing orders?
- Return Policies: What are the costs and processes involved in returning defective or incorrect parts?
- Volume Discounts: Inquire about potential discounts for bulk orders.
5. Track Vendor Performance: Regularly evaluate your vendors based on price, reliability, and customer service. This data will inform your future vendor selection decisions and help you build stronger, more beneficial partnerships.
Step 5: Placing the Order & Securing Confirmation
Once you've finalized the part selection and pricing, it's time to formally place the order. This isn't just about clicking Submit; it's about establishing a clear record and ensuring accountability. Utilize your shop's preferred ordering method - whether that's through a vendor's online portal, a phone call, or a fax. Regardless of the method, meticulous detail is key. Double-check everything before transmission: part numbers, quantities, shipping address (verify zip codes!), and any specific instructions (e.g., "Rush Delivery" or "Handle with Care"). Crucially, and this cannot be stressed enough, always secure an order confirmation number. This acts as your proof of order placement and a vital reference point should any issues arise. Keep a copy of this confirmation readily available - a screenshot is ideal - and note it within your shop's order tracking system. This simple step prevents disputes and provides a paper trail for accountability.
Step 6: Order Tracking & Delivery Management
Waiting for parts can feel like an eternity - both for your technicians and your customers. Proactive order tracking and clear communication are vital to minimizing frustration and keeping repairs on schedule.
Immediately after placing your order, secure the tracking number from the vendor. This is your key to knowing exactly where the parts are and when they're expected to arrive. Input this tracking number into your shop management system, if applicable. Otherwise, create a simple spreadsheet or document to monitor the shipment's progress.
Regularly check the tracking information - most carriers provide updates every few hours. Share the estimated delivery date (ETA) with the service advisor and the technician working on the repair. Keeping everyone informed builds trust and prevents unnecessary inquiries.
Be prepared for potential delays. Communicate any unforeseen issues (weather, carrier problems) to the service advisor promptly, so they can inform the customer and adjust the repair timeline accordingly. Consider setting up email or text notifications for significant tracking updates - this automation can save you valuable time and ensure no delivery is missed. Finally, establish a clear process for receiving and confirming delivery upon arrival.
Step 7: Receiving, Inspecting, and Verifying Parts
This step is your last line of defense against costly errors. Don't rush it! When the parts arrive, a thorough receiving, inspection, and verification process is critical.
1. Package Arrival & Initial Check: Upon delivery, immediately inspect the shipping container for any signs of damage - dents, tears, or water stains. Document any visible damage before opening the package. This is crucial for filing claims with the carrier if necessary.
2. Cross-Referencing the Packing Slip: Compare the packing slip (or the vendor's shipping manifest) with your original order confirmation. Ensure the correct part numbers and quantities are listed. Discrepancies here need immediate resolution - contact the vendor before proceeding.
3. Physical Inspection of the Parts: Once you're confident the order appears correct on paper, carefully inspect each part. Look for:
- Manufacturer Defects: Cracks, scratches, or other visible flaws.
- Incorrect Part: Even if the part number seems right, double-check its physical characteristics against the vehicle's specifications and repair manual.
- Missing Components: Ensure all necessary hardware (bolts, clips, etc.) are included.
4. Documentation is Key: If you find any issues - damaged parts, incorrect parts, or missing components - meticulously document everything. Take photos, record the vendor's contact information, and keep all correspondence. This documentation will be invaluable if you need to file a claim or request a replacement.
5. Reporting Discrepancies: Promptly notify the vendor of any discrepancies. Follow their established procedures for returns or replacements. Don't install the part if you're uncertain of its correctness - it's better to hold it aside and investigate.
Step 8: Organized Storage & Inventory Control
Proper storage isn't just about stacking parts; it's a critical element of inventory control and shop efficiency. A disorganized parts room wastes valuable time searching for items, risks damage, and can lead to lost parts. Here's how to establish a system that works:
- Designated Zones: Create clear zones for different part categories (e.g., engine components, brakes, electrical). Label each zone prominently.
- Shelving & Bins: Invest in sturdy shelving units and appropriately sized bins to maximize space and protect parts.
- FIFO (First-In, First-Out): This is vital. Older parts should be used before newer ones to prevent obsolescence and ensure quality. Rotate stock regularly.
- Shadow Board (Highly Recommended): For frequently used parts, consider a shadow board - a board where the outline of each part is marked, providing a visual cue for restocking.
- Regular Audits: Conduct periodic inventory audits (weekly or monthly) to identify discrepancies and ensure accuracy.
- Security: Secure your parts room to prevent theft and unauthorized access.
- Condition Matters: Store parts in a clean, dry environment to prevent rust and deterioration.
Step 9: Record Keeping & Documentation for Traceability
Maintaining meticulous records isn't just about compliance; it's the backbone of a smoothly running and defensible auto repair shop. This step encompasses everything from order confirmations to part usage and vendor performance. Why is this so vital? Traceability. If a part fails prematurely, a warranty claim arises, or an audit is initiated, having clear and organized documentation is your strongest asset.
Here's what you need to capture:
- Order Records: Keep digital or physical copies of all purchase orders, invoices, and order confirmations. Include dates, part numbers, quantities, vendor contact information, and confirmation numbers.
- Part Usage Records: Link each part to the specific repair order it was used for. This is critical for warranty tracking, identifying frequently failing parts, and assessing vendor quality. Your shop management software should ideally automate this, but manual logging is acceptable if systems are limited.
- Vendor Performance Tracking: Note vendor pricing, delivery times, and any issues encountered (e.g., incorrect parts, delays). This data informs vendor selection and allows for negotiation of better terms.
- Digital Storage is Key: Prioritize digital storage for ease of access, searchability, and data security. Consider cloud-based solutions for accessibility across multiple devices and backup.
Clearly labeled files and a consistent naming convention are essential for efficient retrieval of information.
Step 10: Continuous Improvement: Refining Your Process
The beauty of any well-designed process lies in its ability to evolve. What works perfectly today might need tweaking tomorrow. That's where continuous improvement comes in. Regularly revisiting your parts ordering checklist isn't about finding fault; it's about identifying opportunities to make it even better.
Here's how to actively refine your process:
- Schedule Regular Reviews: Aim for quarterly or bi-annual reviews with your team.
- Gather Feedback: Don't just assume everything is running smoothly. Directly solicit feedback from service advisors, technicians, and anyone involved in the parts ordering lifecycle. A simple What's working well? What could be improved? can yield valuable insights.
- Analyze Data: Track key metrics like order accuracy, lead times, and vendor performance. Data reveals trends and areas ripe for optimization.
- Adapt to Change: The automotive industry is constantly evolving. New parts, new vendors, and new technologies emerge regularly. Your checklist should be flexible enough to accommodate these changes.
- Document Updates: When you make changes to the checklist, clearly document them. This ensures everyone is on the same page and prevents confusion.
Embrace the mindset that your parts ordering process is never truly finished. Ongoing refinement is key to maintaining efficiency, accuracy, and ultimately, customer satisfaction.
Resources & Links
- MITO Professional : MITO Professional offers a comprehensive suite of automotive diagnostic and repair tools, software, and information. Their solutions can assist with accurate parts identification and repair documentation, aligning with the 'Accurate Parts Identification' and 'Record Keeping' sections of the checklist.
- NAPA Auto Parts : A major auto parts supplier with online ordering and parts catalogs. Useful for vendor selection and pricing comparison (Step 2 & 4), and a general resource for parts availability.
- RockAuto : Another large online auto parts retailer offering a vast selection and price comparison tools. Supports vendor selection and pricing comparison (Step 4).
- AutoZone : A popular chain auto parts store, their website offers parts lookup capabilities and can inform vendor selection and pricing comparisons (Step 4).
- IDEX : While primarily focused on diamond industry, their article on Inventory Management Techniques could be adapted and applied to auto repair parts inventory (Step 8) - emphasizing organization and efficiency.
- Shopware : Shopware provides Repair Shop Management software, automating parts ordering, inventory control, and record keeping. Great for enhancing the entire process outlined in the checklist (all steps).
- CCC Information Services : CCC provides repair information and estimating software. Crucial for accurate vehicle information and repair requests (Step 2) and aligns with overall repair documentation improvements.
- Partslink24 : Global online auto parts marketplace, facilitating parts sourcing and vendor selection across multiple suppliers (Step 4).
- Partsformercials : A resource providing parts diagrams and videos, aiding in accurate parts identification (Step 2) and understanding part functions and replacement.
- Automotix : Provides inventory management and shop management software that streamlines parts ordering and helps with traceability and record-keeping. Supports multiple steps in the checklist.
- Partscatalog.com : An online parts catalog with cross-referencing capabilities. A useful resource for step 2, identifying the correct part even with multiple manufacturer codes or designations.
Frequently Asked Questions
What is this checklist template for?
This checklist template is designed to help auto repair shops streamline their parts ordering process, minimizing errors, delays, and lost revenue. It ensures you have all necessary information before placing an order.
Who is this checklist template for?
This template is specifically created for auto repair shops, technicians, and parts order personnel. It's useful for shops of all sizes, from small independent garages to larger multi-bay facilities.
What information should be included on the checklist?
The checklist covers essential information like vehicle specifics (VIN, year, make, model, trim), the exact part numbers needed, quantity, supplier details, customer authorization, and internal notes.
Can I customize the template to fit my shop's specific needs?
Absolutely! The template is a starting point. You can add or remove fields, adjust terminology, and add your shop's logo or contact information to fully personalize it.
What are the benefits of using a parts ordering checklist?
Using a checklist reduces errors in parts ordering (ordering the wrong part), improves order accuracy, speeds up the ordering process, enhances communication between service advisors and parts departments, and increases customer satisfaction.
What is a VIN and why is it important?
VIN stands for Vehicle Identification Number. It's a unique identifier for each vehicle and provides crucial details about its manufacture, which is vital for accurate parts identification.
Where can I access the checklist template?
The article linked in the title provides a downloadable checklist template. Simply follow the instructions within the article to acquire it.
Are there any software alternatives to using a paper checklist?
While this template is a paper-based solution, several shop management software platforms offer integrated parts ordering functionality that automates much of the process. This checklist is a great starting point even if you plan to eventually transition to software.
What should I do if I'm unsure about a part number?
If you're unsure about a part number, double-check the vehicle's VIN using a parts catalog or online database. Consult with a more experienced technician or contact the parts supplier directly for assistance.
Found this Article helpful?
Auto Repair Shop Management Solution Demo
Level up your auto repair shop & boost profits! ChecklistGuro simplifies job tracking, inventory management, and customer communication. Improve efficiency, reduce errors, & enhance customer satisfaction. Manage it all with our Work OS.
Related Articles

The Ultimate Auto Repair Shop Customer Follow-Up Checklist Template
Level Up Your Auto Repair: The Ultimate Customer Service Checklist Template

Mastering Warranty Claims: Your Auto Repair Shop Checklist Template
Auto Repair Shop Digital Marketing Checklist Template
Auto Repair Shop Checklist Template: Operations & Compliance
The Ultimate Auto Repair Shop Employee Training Checklist Template
Your Ultimate Guide to Auto Repair Shop Environmental Compliance: A Checklist Template

The Ultimate Vehicle Return Checklist for Auto Repair Shops
We can do it Together
Need help with
Auto Repair Shop Management?
Have a question? We're here to help. Please submit your inquiry, and we'll respond promptly.