Mastering Warranty Claims: Your Auto Repair Shop Checklist Template
Published: 09/29/2025 Updated: 03/23/2026

Table of Contents
- Why a Warranty Claim Checklist is Essential for Your Shop
- Understanding Warranty Coverage: The Foundation of a Successful Claim
- Step-by-Step: Your Auto Repair Shop Warranty Claim Checklist
- 1. Vehicle and Customer Information: Setting the Stage
- 2. Warranty Verification: Confirming Coverage
- 3. Failure Diagnosis & Documentation: Building a Solid Case
- 4. Repair Procedures & Parts Used: Maintaining Transparency
- 5. Completing the Warranty Claim Form: Accuracy is Key
- 6. Supporting Documentation: Strengthening Your Claim
- 7. Submission and Tracking: Monitoring Progress
- 8. Resolution & Communication: Keeping Customers Informed
- Resources & Links
TLDR: Get paid what you're owed! This checklist template guides your auto repair shop through every step of warranty claims - from verifying coverage and documenting failures to submitting forms and communicating with customers. It reduces denials, speeds up processing, and boosts your shop's profitability - all with a clear, step-by-step system.
Why a Warranty Claim Checklist is Essential for Your Shop
Beyond simply ensuring reimbursement for covered repairs, a well-defined warranty claim checklist acts as a critical safeguard for your auto repair shop's operations and reputation. Without it, you're essentially gambling with your profit margins and risking frustrated customers. Think of it this way: a checklist isn's just about getting paid back; it's about preventing costly mistakes and fostering a culture of precision within your shop.
Here's why that checklist is absolutely essential:
- Minimizes Denials and Delays: A structured process ensures every necessary detail is captured upfront, drastically reducing the chances of a claim being denied due to missing information or documentation. Fewer denials mean faster payouts and less administrative headaches.
- Protects Your Shop from Liability: Detailed records provide a clear audit trail, shielding your business from potential disputes or legal challenges related to repairs.
- Boosts Customer Satisfaction: Proactive communication and transparency throughout the claim process build trust and enhance the overall customer experience - even when a repair isn't fully covered.
- Streamlines Workflow and Improves Efficiency: A standardized checklist eliminates guesswork and streamlines the claim submission process, freeing up valuable time for your technicians and office staff.
- Ensures Compliance with Manufacturer Guidelines: Following a checklist helps guarantee adherence to each manufacturer's specific warranty requirements and procedures, minimizing risks and maximizing approval rates.
Understanding Warranty Coverage: The Foundation of a Successful Claim
Navigating warranty coverage can feel like deciphering a complex code, and it's arguably the most critical step in securing a successful claim. It's not enough to simply believe a repair is covered; you need to prove it. Let's break down what to look for.
Key Areas to Scrutinize:
- Coverage Period & Mileage Limits: These are the obvious starting points. Note the start date and mileage allowed for coverage. Has the vehicle exceeded these limits?
- Specific Components Covered: Warranties rarely cover everything. Carefully identify exactly which parts and systems are included. Does the failure fall under that specific listing?
- Exclusions - The Fine Print: This is where many claims get tripped up. Common exclusions include wear-and-tear items (brakes, belts, hoses), damage caused by accidents or misuse, and modifications to the vehicle. Read these very carefully.
- Maintenance Requirements: Most warranties stipulate adherence to a specific maintenance schedule. Document all maintenance performed, including dates, mileage, and services completed. Lack of proper maintenance is a frequent reason for claim denial.
- Consequential Damage: Many warranties limit coverage to the failed part itself. Consequential damage - damage resulting from the initial failure - might not be covered. For example, a failed water pump might not cover damage to the engine it caused.
- Transferability: Determine if the warranty is transferable to a new owner if the vehicle is sold. This can impact coverage for subsequent owners.
Understanding these nuances upfront will save you significant time and frustration down the line. Don't hesitate to contact the manufacturer directly for clarification if you have any doubts - it's far better to ask questions before submitting a claim.
Step-by-Step: Your Auto Repair Shop Warranty Claim Checklist
Let's break down each step of the checklist with practical examples to ensure a smooth and successful warranty claim process. This isn't just about ticking boxes; it's about building a defensible record.
1. Vehicle & Customer Information - Laying the Foundation
Start with the basics. Incorrect VINs are a common cause of claim denials. Double-check using a VIN decoder if necessary. Record the customer's preferred contact method - a misdirected email can delay processing. For instance, if a customer purchased their vehicle from a dealership, note the dealership's name and contact details. This can be helpful for verifying purchase dates or warranty specifics.
2. Warranty Coverage Verification - Avoiding Costly Surprises
Don't assume coverage! Manufacturers' websites often have searchable databases of warranty details. Take screenshots of online coverage confirmations - these are powerful supporting documents. Let's say a customer claims their transmission failed. Don't just assume it's covered. Research the manufacturer's warranty terms for transmissions-is it covered under a mileage or time limit? Are there specific maintenance requirements that must be met for coverage to apply? A quick phone call to the manufacturer's warranty department before starting repairs can save significant time and money.
3. Failure Diagnosis & Documentation - Telling the Story
Beyond just stating engine noise, describe the sound precisely: "a knocking sound originating from the lower engine, most noticeable during acceleration." Record all DTCs, even seemingly unrelated ones; they could provide valuable clues. Photographic evidence is gold. Take close-up photos of the failed component, the surrounding area, and any related damage. Video is even better - a short video demonstrating the failure can be incredibly persuasive.
4. Repair Procedures & Parts Used - Maintaining Transparency
Follow the manufacturer's recommended repair procedures meticulously. Deviating from these procedures can be grounds for denial. Document the steps taken and the reasoning behind them. When replacing parts, use OEM parts unless explicitly permitted by the warranty. If an aftermarket part is allowed, document the manufacturer and part number. Accurately record labor times - inflate them at your peril.
5. Warranty Claim Form Completion - Accuracy is Key
These forms can be confusing, so take your time. Use the manufacturer's website or portal to download the correct form, and refer to their instructions carefully. If there's a box for "reason for failure code," use the appropriate code from the manufacturer's list. Don't leave anything blank - enter "N/A" if information isn't applicable.
6. Supporting Documentation - Building a Defensible Case
Think of your supporting documentation as the evidence that supports your claim. Include everything that strengthens your story: warranty booklets, diagnostic reports, repair orders, photos, videos, and any correspondence with the manufacturer. Organize these documents logically - a well-organized file makes the review process smoother.
7. Submission & Tracking - Staying on Top of Things
Most manufacturers prefer electronic submissions for faster processing and better tracking. Get a confirmation number and record the submission date. Regularly check the manufacturer's online portal to monitor the claim's status. Don't hesitate to contact the manufacturer's warranty department if you have any questions or concerns.
8. Resolution & Customer Communication - Keeping Everyone Happy
Keep the customer informed throughout the process. Even if there are delays or complications, proactive communication builds trust and manages expectations. When the claim is approved, clearly explain the coverage details and reimbursement amount to the customer. A satisfied customer is your best advertisement.
1. Vehicle and Customer Information: Setting the Stage
Accurate vehicle and customer information forms the very foundation of a successful warranty claim. A simple typo or missing detail at this stage can lead to frustrating delays, denials, and unnecessary back-and-forth with the manufacturer. Let's break down exactly what you need to gather and verify.
First, the Vehicle Identification Number (VIN) is king. Triple-check its accuracy against the vehicle's title and registration. Even a single digit out of place will flag the claim. Next, meticulously collect the customer's contact information - name, address, phone number, and email. This ensures clear communication throughout the claim process. Don't underestimate the importance of recording the vehicle's original purchase date and mileage; this data validates warranty eligibility. Finally, and critically, document the warranty details themselves: what coverage period is in effect, what mileage restrictions apply, and any specific terms or conditions. Keeping this information readily available prevents confusion and streamlines the entire process. Consider creating a digital record-keeping system for this data to simplify future claims.
2. Warranty Verification: Confirming Coverage
Before diving into repairs, rigorously verifying warranty coverage is paramount. A rushed or incomplete verification can lead to denied claims, frustrating delays, and potentially strained relationships with both the manufacturer and your customer. Don't assume coverage - confirm it.
Begin by accessing the vehicle's warranty documentation. This might be a physical booklet, a digital record accessible through the manufacturer's portal, or information embedded within the vehicle's computer system. Pay close attention to the terms and conditions, including the coverage period (start and end dates) and mileage limitations.
Next, meticulously compare the reported failure to the warranty's specific coverage details. Does the warranty explicitly cover the type of issue the vehicle is experiencing? Many warranties have exclusions - conditions or circumstances that are not covered. Common exclusions include damage resulting from accidents, misuse, lack of scheduled maintenance, or aftermarket modifications. Scrutinize these exclusions carefully.
Furthermore, some warranties have tiered coverage levels. For example, the first few years might cover all repairs, while subsequent years might only cover specific components or systems. Understand these tiers to set accurate customer expectations.
Finally, when in doubt, don't hesitate to contact the manufacturer's warranty department directly. They can provide clarification on coverage specifics and help you avoid costly mistakes down the line. Document this communication - noting the representative's name, date, and the information provided - to strengthen your claim.
3. Failure Diagnosis & Documentation: Building a Solid Case
Accurate and thorough failure diagnosis and documentation are the bedrock of a successful warranty claim. A vague description or a missed detail can easily lead to a denial. This isn't just about identifying the failed part; it's about proving why it failed and demonstrating that a proper repair was performed.
Start with a systematic diagnostic approach. Utilize all available tools - OBD-II scanners, multimeters, oscilloscopes - and follow manufacturer-recommended diagnostic procedures. Don't rely solely on diagnostic trouble codes (DTCs); these are clues, not definitive answers. Investigate the underlying causes. For example, a P0420 code (catalytic converter efficiency below threshold) could be caused by a faulty converter, but also by exhaust leaks, faulty oxygen sensors, or engine issues. Ruling out all possibilities is critical.
Your documentation should be meticulous. Write a detailed narrative describing the symptoms the customer reported, the diagnostic steps taken, and the findings. Include all DTCs, even if they seem unrelated. Photographs and videos are invaluable - capture the failed component, any damage to surrounding parts, and the repair process. A picture truly is worth a thousand words when it comes to convincing a warranty adjuster. Be sure your photos are clear and well-lit. For complex failures, consider creating a short video demonstrating the issue. Remember, you're building a case - present the evidence clearly and concisely.
4. Repair Procedures & Parts Used: Maintaining Transparency
Maintaining meticulous records of the repair process and the parts utilized isn't just good practice; it's a cornerstone of a successful warranty claim. Transparency with the manufacturer builds trust and significantly increases the likelihood of approval. Here's what you need to document:
- Detailed Step-by-Step Procedures: Go beyond simply stating replaced the thermostat. Instead, document how you performed the repair. For example: Disconnected coolant lines, removed old thermostat, cleaned mating surfaces, installed new thermostat with new gasket, refilled coolant system, bled air from cooling system, verified temperature gauge reading within normal range.
- OEM vs. Aftermarket Parts: Warranty agreements often specify the use of Original Equipment Manufacturer (OEM) parts. Clearly indicate whether OEM or aftermarket parts were used and why. If an OEM part wasn't available, explain the reasoning and document the alternative part number.
- Part Identification is Key: Don't just note thermostat. Specify the manufacturer and part number. This leaves no room for ambiguity. A spreadsheet or digital inventory system can be invaluable here.
- Photographic Evidence: A picture is worth a thousand words. Take photos of the failed part before it's removed and document the process of replacing it.
- Labor Time Accuracy: Accurate labor time recording is critical for fair reimbursement. Use a standardized time tracking system and ensure accurate documentation.
- Reason for Repair Beyond Initial Complaint: If additional issues were discovered during the repair process, document them thoroughly. This can justify increased labor time and parts usage.
5. Completing the Warranty Claim Form: Accuracy is Key
The warranty claim form is your opportunity to present your case. Don't let a simple error derail the process! These forms are often complex, and manufacturers scrutinize them carefully. Here's what you need to know:
- Read the Instructions Thoroughly: This seems obvious, but it's frequently overlooked. Many claim denials stem from misinterpreting the form's requirements.
- Use the Correct Form Version: Manufacturers often update their forms. Using an outdated version is an automatic red flag. Verify you have the latest version from their website or portal.
- VIN and Customer Information Alignment: Ensure the Vehicle Identification Number (VIN) and customer details exactly match those on the repair order and warranty documentation. Any discrepancies will trigger a review - and potential delays.
- Failure Description - Be Precise: Don't just say "engine noise." Describe the type of noise, when it occurs, and any accompanying symptoms. Use the same terminology used in the diagnostic reports.
- Parts List - OEM vs. Aftermarket: Clearly indicate if OEM (Original Equipment Manufacturer) or aftermarket parts were used. Adherence to warranty requirements here is critical.
- Labor Time Validation: Make sure the labor time entered corresponds to the time recorded on the repair order and aligns with the manufacturer's allowable labor rates.
- Signatures and Dates: Don't forget to obtain the necessary signatures and date the form correctly. An unsigned or improperly dated form is invalid.
- Double, Triple Check! Before submitting, have a second technician or shop administrator review the completed form to catch any overlooked errors. A few extra minutes of review can save a lot of headaches later.
6. Supporting Documentation: Strengthening Your Claim
Supporting your warranty claim isn't just about filling out forms; it's about building a compelling case. Think of it as presenting evidence to a judge - the stronger your evidence, the more likely you are to win. This is where robust supporting documentation becomes absolutely critical.
Beyond the basics like the warranty booklet and initial repair order, let's dig into what really strengthens your claim. Detailed photographs and videos are your best friends. Capture clear visuals of the failed part, the surrounding area, and any related damage. Don't be afraid to get close-up shots - showing the extent of the failure can be incredibly persuasive.
Diagnostic reports, listing all relevant DTCs (Diagnostic Trouble Codes), are also essential. These provide a technical record of the problem and validate your diagnosis. Keep meticulous notes of any conversations you have with the manufacturer's warranty department, including dates, times, names, and key points discussed. This documentation can be vital if discrepancies arise later on.
Finally, if the failure was precipitated by a specific incident (e.g., a sudden impact, a fluid leak), document those details as thoroughly as possible. Even seemingly minor details can contribute to a stronger, more convincing warranty claim. Remember, clear, concise, and complete documentation is your shield against claim denials and delays.
7. Submission and Tracking: Monitoring Progress
Submitting your warranty claim isn't the finish line - it's the start of a monitoring phase crucial for ensuring a timely and successful resolution. While electronic submissions are increasingly favored for their speed and efficiency, it's vital to maintain meticulous records regardless of the method used. Immediately record the date of submission and, critically, the confirmation number provided by the manufacturer. This confirmation number serves as your proof of entry into their system and can be invaluable if questions arise later.
Don't just passively wait for a response. Regularly (we recommend weekly, or more frequently for complex claims) check the manufacturer's online portal, if available. These portals often provide real-time updates on claim status, allowing you to proactively identify and address potential roadblocks. If no online portal exists, note down the date and time of any phone calls or emails exchanged with the manufacturer, along with the name of the representative you spoke with and a summary of the conversation. A centralized spreadsheet or CRM system is incredibly helpful for organizing this data. Early detection of issues, such as requests for additional documentation or questions about repair procedures, allows for quick action, minimizing delays and potential denials. Finally, remember to consistently update your customer and your team on the claim's progress, fostering trust and transparency throughout the process.
8. Resolution & Communication: Keeping Customers Informed
Keeping your customers informed throughout the warranty claim process is just as important as getting the claim approved. A lack of communication can breed frustration, distrust, and ultimately, lost business. Here's how to navigate resolution and keep your customers happy:
Proactive Updates are Key: Don't wait for the customer to call and inquire about their claim's status. Schedule regular check-in points - whether it's a quick phone call, a brief email, or a text message - to provide updates, even if there's no significant news. This demonstrates you're actively working on their behalf.
Transparency Builds Trust: When explaining the claim resolution, be upfront about the manufacturer's decision. If the claim is approved, clearly outline the covered repairs and any reimbursement amounts. If the claim is denied, patiently and thoroughly explain the reasons, avoiding jargon and offering potential alternatives if possible.
Manage Expectations: Be realistic about timelines. Warranty claims can take time, and setting clear expectations from the beginning helps avoid disappointment. Provide an estimated timeframe for resolution and keep the customer updated if there are any delays.
Document Everything: Maintain a detailed record of all communications with the customer, including dates, times, and a summary of the discussion. This protects your shop and provides a reference point if any misunderstandings arise.
Follow Up: Once the repair is complete and the claim is resolved, follow up with the customer to ensure they are satisfied with the service and the outcome. This final touch reinforces your commitment to customer satisfaction and can lead to valuable referrals.
Resources & Links
- Automotive Service Association (ASA) : The ASA is a leading voice for the auto care industry, offering resources, training, and advocacy. They have information on warranty regulations and best practices relevant to auto repair shops.
- Automotive Aftermarket Professional Association (AAPA) : The AAPA provides industry data, analysis, and resources for aftermarket suppliers and retailers, including information pertaining to warranty parts and claims processes. Their data can inform your understanding of coverage trends.
- NAPA Auto Parts : While primarily a parts supplier, NAPA often provides helpful documentation and guidance on warranty claims related to their parts. Their website can provide context on warranty policies for specific components.
- RockAuto : Similar to NAPA and other parts suppliers, RockAuto's resources may offer information (though not direct claim assistance) concerning parts warranties and potential coverage areas. Good for understanding what's commonly claimed.
- RepairDriver : RepairDriver is a comprehensive resource for auto repair professionals, covering business management, technical information, and compliance. They frequently discuss legal aspects of repair shop operations, including warranty issues.
- Mitchell 1 : Mitchell 1 provides repair information, diagnostic tools, and management software for auto repair shops. Their platforms often integrate warranty claim processes and offer guidance on documentation and claim preparation.
- ALLDATA : ALLDATA is another leading provider of automotive repair information, including OEM repair procedures, technical service bulletins (TSBs), and diagnostic assistance, all critical for supporting warranty claim justifications.
- OEM Parts Online : Accessing OEM (Original Equipment Manufacturer) parts information and documentation can strengthen your warranty claim case. This site provides access to parts and information, often directly from manufacturers.
- RepairPal : RepairPal provides consumer-facing repair information and estimates. While not a direct resource for claim assistance, understanding consumer expectations and pricing structures influenced by repair transparency is valuable.
- AutoZone : AutoZone, like other major auto parts retailers, sometimes offers resources and FAQs regarding parts warranties and can provide general background information related to claim processes.
Frequently Asked Questions
What is this checklist template for?
This checklist template is designed to help auto repair shops systematically manage warranty claims, ensuring accuracy, completeness, and a higher chance of approval from manufacturers. It streamlines the process, reducing errors and saving time.
Who is this checklist template for?
This template is specifically tailored for auto repair shops and technicians who handle warranty claims on vehicles.
What are the key sections included in the checklist?
The checklist generally includes sections on vehicle information, repair details, warranty coverage verification, diagnostic procedures, parts information, labor documentation, and supporting documentation requirements.
Why is a detailed checklist important for warranty claims?
A detailed checklist ensures you document everything necessary for the claim, minimizes rejections due to missing information, and provides a clear audit trail for both your shop and the manufacturer.
Can I customize this checklist template?
Yes, absolutely! The template is designed to be a starting point. You can add, remove, or modify sections and fields to align with your shop's specific processes and the requirements of different manufacturers.
What kind of diagnostic information should I include in the checklist?
Be sure to record all diagnostic trouble codes (DTCs), diagnostic procedures performed, test results, and any observations made during the diagnostic process. Detailed explanations are crucial.
What if I'm unsure if a repair is covered by warranty?
Always review the manufacturer's warranty guidelines and technical service bulletins (TSBs) *before* proceeding with the repair. Document your rationale for why you believe the repair is covered, referencing specific warranty provisions.
How can I ensure accurate parts information is recorded?
Record the part number, description, vendor, and cost of each part used in the repair. Keep copies of invoices and parts documentation.
What kind of supporting documentation is typically required?
Supporting documentation often includes repair orders, invoices, diagnostic reports, TSBs, warranty information, photos/videos of the issue, and any customer communication related to the repair.
How can this checklist help my shop's efficiency?
Using a standardized checklist reduces errors, saves time searching for information, and improves communication between technicians and warranty administrators. It creates a more organized and efficient claims process.
Where can I find the manufacturer's warranty guidelines and TSBs?
Manufacturers usually provide warranty guidelines and TSBs online through their service portals or technical information systems. Consult the manufacturer's website or contact their warranty department directly.
Found this Article helpful?
Auto Repair Shop Management Solution Demo
Level up your auto repair shop & boost profits! ChecklistGuro simplifies job tracking, inventory management, and customer communication. Improve efficiency, reduce errors, & enhance customer satisfaction. Manage it all with our Work OS.
Related Articles

The Ultimate Auto Repair Shop Customer Follow-Up Checklist Template
Auto Repair Shop Checklist Template: Operations & Compliance
Your Ultimate Guide to Auto Repair Shop Environmental Compliance: A Checklist Template
Level Up Your Auto Repair: The Ultimate Customer Service Checklist Template

The Ultimate Vehicle Return Checklist for Auto Repair Shops
The Ultimate Auto Repair Shop Employee Training Checklist Template
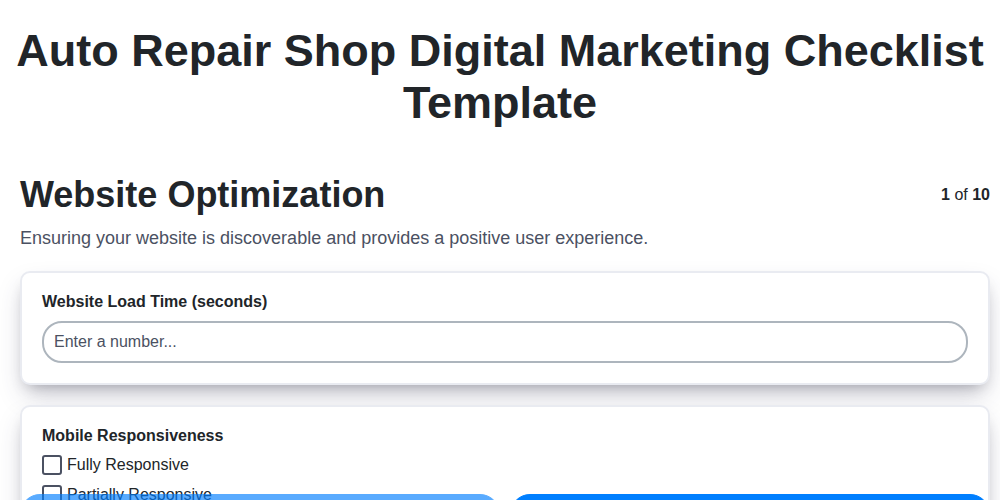
Auto Repair Shop Digital Marketing Checklist Template
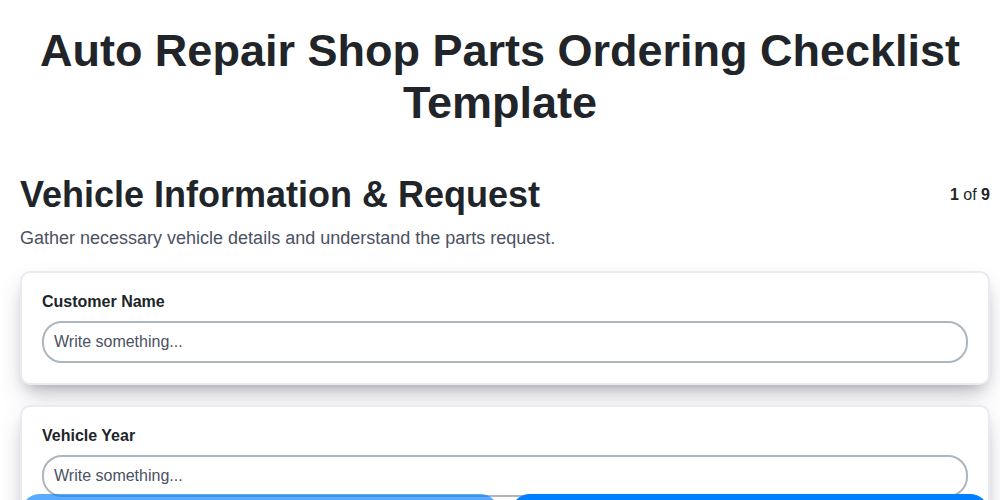
Streamline Your Shop: The Ultimate Auto Repair Parts Ordering Checklist Template
We can do it Together
Need help with
Auto Repair Shop Management?
Have a question? We're here to help. Please submit your inquiry, and we'll respond promptly.