The Ultimate Ceiling Tile Installation Checklist Template
Published: 08/31/2025 Updated: 12/13/2025
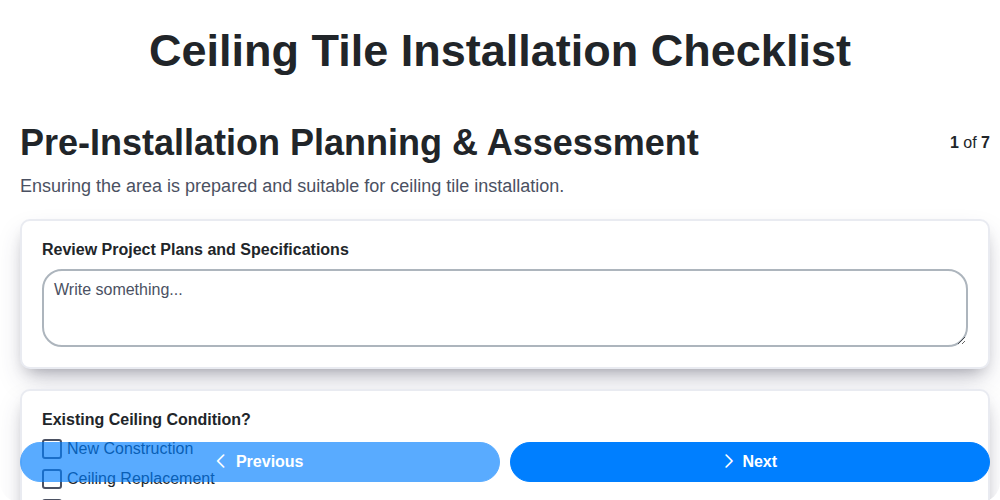
Table of Contents
- Introduction: Why a Ceiling Tile Installation Checklist Matters
- 1. Pre-Installation Planning & Assessment: Laying the Foundation
- 2. Material Verification & Handling: Setting Yourself Up for Success
- 3. Grid System Installation (For Suspended Ceilings): Building the Framework
- 4. Essential Tools & Safety Gear: Preparing Your Workspace
- 5. Ceiling Tile Installation: The Core Process
- 6. Cutting & Fitting: Handling Obstacles & Edges
- 7. Finishing Touches: Trim, Sealant, & Cleanliness
- 8. Addressing Common Installation Challenges
- 9. Acoustic Considerations: Optimizing Sound Performance
- 10. Final Inspection & Quality Control
- 11. Documentation & Record Keeping
- 12. Troubleshooting & Warranty Information
- Resources & Links
TLDR: This checklist template guides you through every step of ceiling tile installation - from planning & material checks to the final inspection. It's perfect for DIYers or contractors, ensuring a professional, quality ceiling while avoiding costly mistakes. Download it to streamline your project and achieve flawless results!
Introduction: Why a Ceiling Tile Installation Checklist Matters
A rushed or haphazard ceiling tile installation can lead to a frustrating and costly mess - uneven surfaces, compromised acoustics, or even structural issues. Whether you're a seasoned DIYer or hiring a professional, a clear, step-by-step checklist is your secret weapon. Think of it as your roadmap to a flawless ceiling. This isn't just about following steps; it's about minimizing mistakes, ensuring a high-quality finish, and streamlining the entire project. A well-defined checklist helps you stay organized, prevents costly errors, and guarantees a professional-looking result that you (and your clients) will appreciate. It's the foundation for a ceiling transformation that's both beautiful and functionally sound.
1. Pre-Installation Planning & Assessment: Laying the Foundation
Accurate planning is the cornerstone of a successful ceiling tile installation. Rushing this phase can lead to costly mistakes and a less-than-ideal result. Start by meticulously measuring the area to be covered. This isn't just about square footage; consider the shape of the room and any architectural quirks. A detailed measurement allows you to order the correct quantity of tiles, always adding a buffer of roughly 10% to account for cuts, waste, and potential errors.
Next, assess the existing ceiling. Is it drywall, concrete, or another material? Its condition is critical; any cracks, water damage, or structural weaknesses must be addressed before you even think about tiles. Carefully identify and map out all obstacles - recessed lights, ventilation ducts, sprinkler systems, or wiring. These will require careful cutting and precise tile placement. Finally, and importantly, determine the desired tile layout. Centering the layout on a focal point (like a fireplace or window) often creates a more visually appealing result. Don't forget to check local building codes; compliance is essential for a safe and legally sound installation.
2. Material Verification & Handling: Setting Yourself Up for Success
Choosing the right materials and handling them correctly is the foundation of a successful ceiling tile installation. It's more than just unpacking a box; it's about preventing problems before they start. Let's break down what's involved:
Confirming Your Order: Double-check your delivery against your purchase order. Ensure you have the correct tile type, size, color, and quantity. Even a slight discrepancy can derail your project.
The Damage Inspection: Upon arrival, don't just assume everything's fine. Carefully inspect several boxes, opening them to check for any damage during shipping. Look for cracks, chips, or manufacturing defects. If you find any significant issues, immediately contact the supplier and document the damage with photos - this is crucial for warranty claims.
Acclimation is Key: This is a step many overlook, but it's vital for preventing future headaches. Ceiling tiles, like wood flooring, are hygroscopic - meaning they absorb moisture from the air. Rapid changes in temperature and humidity can cause them to expand or contract, leading to warping, gaps, or cracking. Allow the tiles to acclimate to the room's environment for at least 24-48 hours before installation. Simply spread them out on a protected surface, away from direct sunlight and drafts.
Proper Storage: If you're not installing all the tiles immediately, store them in a clean, dry, and protected area. Keep them stacked flat and covered to prevent dust accumulation and potential damage. Avoid leaning tiles against walls, as this can lead to warping.
3. Grid System Installation (For Suspended Ceilings): Building the Framework
Before you even think about placing a single tile, a solid grid system is absolutely crucial for a level, professional-looking suspended ceiling. This isn't just about hanging something; it's about creating a precisely engineered framework.
Planning is Paramount: Begin by accurately determining the optimal grid height. This needs to account for the clearance needed for recessed lighting, ductwork, sprinkler systems, and any other utilities running above the ceiling. Too low, and you risk interference. Too high, and you're potentially losing valuable headroom.
Main Runner Installation - The Foundation: These are your primary supports and must be perfectly level and securely fastened to the existing structure. Use a laser level to ensure absolute accuracy - even slight variations here will compound throughout the entire grid. Fasteners should be appropriate for the ceiling type (concrete, wood joists, etc.).
Cross Tee Precision: Once the main runners are set, install the cross tees, typically spaced 4 feet apart. This spacing is standard for most ceiling tile sizes, but always verify the manufacturer's recommendations. Again, laser leveling is your best friend. Double-check the alignment of each cross tee as you go. A slight deviation in one tee can throw off the entire layout. Utilize a T-bar level to confirm each connection is secure and flush.
Don't Skip the Checks! Throughout the entire process, frequently check your work with a level and plumb bob. A small error early on can become a significant problem later. Consider having a second pair of eyes to double-check your measurements and alignment. This is a collaborative effort, and accuracy is the ultimate goal.
4. Essential Tools & Safety Gear: Preparing Your Workspace
Before you even think about laying a single tile, ensuring you have the right tools and safety gear is paramount. Skimping here can lead to frustration, inaccurate cuts, and - more importantly - injuries. Here's a breakdown of the essential equipment for a successful and safe ceiling tile installation:
Tools You're Going to Need:
- Measuring Tape: Accuracy is key! A good quality measuring tape is indispensable.
- Pencil: For marking cuts and layouts.
- Laser Level (Highly Recommended): Crucial for ensuring a level grid system (if installing a suspended ceiling). A traditional level will work, but a laser makes the job much easier and more accurate.
- Utility Knife: For scoring and cutting lightweight tiles.
- Ceiling Tile Cutter/Scissor: A dedicated tile cutter or heavy-duty scissors will provide cleaner cuts than a utility knife for thicker tiles.
- Drywall Saw or Utility Knife: For intricate cuts around fixtures and edges.
- Miter Box and Hand Saw (Optional): For precise angled cuts.
- Caulking Gun: For applying acoustic sealant (if needed).
- Stud Finder: Helps locate ceiling joists when securing the grid system.
Safety First: Gear Up for Protection
- Safety Glasses: Protect your eyes from debris and tile fragments.
- Dust Mask or Respirator: Essential for preventing inhalation of dust and particles.
- Gloves: Protect your hands from sharp edges and potential irritants.
- Hearing Protection (Optional): Cutting tiles can be noisy; earplugs or earmuffs can reduce fatigue.
- Sturdy Ladder or Scaffolding: Ensure you have stable and secure access to the ceiling.
5. Ceiling Tile Installation: The Core Process
This is where your hard work really pays off! While the grid system provides the framework, careful tile placement is what brings your ceiling to life. Here's a breakdown of the core process:
Strategic Starting Point: Always begin your tile installation in a corner. This provides a visual anchor and ensures straight alignment throughout the room. Use a chalk line to mark a perfectly straight line along one wall - this will be your guide.
The Gentle Lowering: Carefully lower each tile into the grid slots. Avoid dropping or slamming them, as this can damage the tile edges and compromise the overall appearance. Consider having a second person to assist, especially with larger tiles.
Precision Alignment is Key: As you place each tile, take a moment to ensure its edges align perfectly with the tiles already in place. Minor misalignments can become very noticeable over time. Use a level to ensure a consistent and professional appearance.
Cutting Around Obstacles: This is where your measuring and cutting skills come into play. Carefully measure the space around light fixtures, vents, and other obstructions. Use a sharp utility knife or tile cutter to make precise cuts. Always double-check your measurements before cutting! A tile cutter designed for the specific tile material will provide the cleanest edges.
Tile Rotation Considerations: Depending on the tile pattern and layout, you may need to rotate tiles to achieve the desired visual effect. Plan your rotations carefully to avoid awkward cuts or uneven patterns.
The Test Tile Approach: Before committing to the entire room, it's wise to install a test tile in an inconspicuous area. This allows you to fine-tune your technique and make any necessary adjustments before tackling the main installation.
Remember, patience and attention to detail are your best allies in this step!
6. Cutting & Fitting: Handling Obstacles & Edges
The most challenging part of ceiling tile installation often comes down to precision cutting and fitting around obstacles and ensuring a clean, professional edge. Don't rush this step!
Around Lights & Fixtures: Measure carefully - twice! Use a template (cardboard works well) to transfer the fixture's shape onto the tile. A tile cutter is often sufficient for straight lines, but a jigsaw or oscillating multi-tool might be necessary for complex shapes. Take your time and make small cuts; you can always take off more material, but you can't easily add it back. Test the fit frequently as you work.
Dealing with HVAC Vents: Similar to lights, template creation is key. If possible, slightly recess the tile around the vent to allow for proper airflow. Consider the vent's depth when cutting - you don't want to create a noticeable gap.
Creating Clean Edges: The appearance of the edges significantly impacts the overall look. For a flush look against walls, carefully measure and cut the tiles to the exact wall width. Wall caps or edge trim are your friends here, helping to conceal any minor imperfections and create a polished finish. Remember to factor in any expansion or contraction when cutting near walls - leaving a small gap (1/8 inch) can prevent issues down the line. For a drop ceiling, ensure the edge trim is properly aligned and secured to create a consistent and professional look.
7. Finishing Touches: Trim, Sealant, & Cleanliness
The final few steps are often what elevate a good installation into a truly professional-looking finish. It's tempting to rush, but taking the time for these finishing touches makes a huge difference. Let's break down the key elements:
Trim Installation: Properly installed trim-whether it's wall caps, edge trim, or shadow trim-conceals the grid and creates a crisp, clean line where the ceiling meets the walls. Carefully follow the manufacturer's instructions for attaching the trim, ensuring it's level and securely fastened. Pre-painting the trim before installation can save a lot of time and ensure a consistent finish.
Sealant Application: Minor gaps between tiles, especially in areas with potential moisture, can be sealed with an acoustic sealant. Choose a sealant specifically designed for this purpose-standard silicone may not provide the desired acoustic properties. Apply the sealant sparingly and wipe away any excess immediately with a damp cloth.
The Final Clean: Dust and debris are inevitable during installation. A thorough cleaning is essential. Use a soft brush attachment on your vacuum to gently remove dust from the tile surfaces. For stubborn spots, a slightly damp cloth may be necessary, but be careful not to oversaturate the tiles. A final buff with a clean, dry cloth will leave your new ceiling sparkling. Don't forget to clean up any dropped screws or small debris that could be a tripping hazard!
8. Addressing Common Installation Challenges
Even with careful planning, unexpected hurdles can arise during ceiling tile installation. Let's tackle some of the most common challenges and how to overcome them.
Uneven Existing Ceiling: If the ceiling below is significantly uneven, the grid system may wobble or become unstable. Consider using shims between the grid and the existing ceiling to level it out. Alternatively, thicker grid components designed for uneven surfaces can provide extra support.
Obstacles and Cutouts: Lights, vents, and sprinkler heads require precise cutouts. Measure twice, cut once! Use a specialized hole saw for large fixtures, and a tile cutter for smaller adjustments. Don't be afraid to use multiple cuts to achieve a clean, accurate opening.
Difficult Tile Cutting: Certain tile materials (like mineral fiber or metal) can be challenging to cut cleanly. Use the right tools - a sharp tungsten carbide blade for mineral fiber, and a metal-cutting blade for metal tiles. A slow, steady cutting motion minimizes chipping and cracking.
Warped Tiles: Occasionally, tiles may arrive warped. Gently flex the tile to straighten it, or use a weight to flatten it during installation. If the warp is severe, replace the tile.
Matching Patterns: When using patterned tiles, pay close attention to aligning the patterns correctly. Dry-fit the tiles before installation to visualize the overall design.
Dealing with Old Adhesive (if replacing an existing ceiling): If removing an old adhesive-backed ceiling, be prepared for residue. A putty knife and appropriate solvent can help lift the old adhesive.
Noise and Dust: Ceiling tile installation can be noisy and dusty. Provide adequate ventilation, wear a dust mask and ear protection, and cover furniture to minimize the impact.
9. Acoustic Considerations: Optimizing Sound Performance
Beyond aesthetics, ceiling tiles play a crucial role in a room's acoustics. Understanding these principles can dramatically improve sound quality and reduce noise levels. Different tile materials and designs offer varying degrees of sound absorption and noise reduction.
Understanding Absorption vs. Blocking: It's important to differentiate between sound absorption (reducing reverberation within a room) and sound blocking (preventing sound from entering or exiting a space). Ceiling tiles primarily focus on absorption.
NRC & NRC Ratings: Look for the Noise Reduction Coefficient (NRC) rating when selecting tiles. NRC is a number between 0 and 1, with 1 indicating perfect absorption. Higher NRC values mean better sound absorption. A typical NRC value for ceiling tiles ranges from 0.20 to 0.70. Consider the room's purpose: a home theater will benefit from higher NRC values than a standard living room.
Material Matters:
- Mineral Fiber: A common and effective choice, offering good sound absorption.
- Acoustic Foam: Excellent for sound dampening and reducing echo.
- Perforated Tiles: Often combined with sound-absorbing insulation layers for enhanced performance.
- Fabric-Wrapped Tiles: Offer both acoustic benefits and a softer aesthetic.
Room Size & Usage: A larger room generally requires more sound absorption to prevent excessive reverberation. Rooms used for activities that generate significant noise (e.g., music practice, home theaters) will also benefit from prioritizing acoustic performance.
Layered Systems: For truly exceptional acoustic performance, consider a layered system that combines ceiling tiles with additional sound-dampening materials, such as insulation above the grid or specialized acoustic panels.
10. Final Inspection & Quality Control
Your work isn't truly done until you've taken the time for a meticulous final inspection. Don't rush this crucial step! Walk the entire room, paying close attention to the alignment of tiles, the secureness of any fasteners, and the overall visual appeal. Look for any gaps, inconsistencies in height, or damaged tiles that might have been missed during installation. Take a step back and observe the ceiling from different angles to ensure the layout is balanced and aesthetically pleasing. If you're dealing with an acoustic ceiling, consider a simple clap test to get a sense of the sound dampening - an unusual echo could indicate a problem. Document your findings with photographs - they're invaluable for future reference, potential warranty claims, and for showcasing your finished project. If any issues are identified, address them promptly. A little extra time spent now can prevent headaches down the road and guarantee a ceiling you're truly happy with.
11. Documentation & Record Keeping
Creating a comprehensive record of your ceiling tile installation isn't just a good practice; it's a smart one. This documentation proves invaluable for several reasons. Firstly, it serves as a reference point if any issues arise later - whether it's a minor tile replacement or a warranty claim. Secondly, it's a valuable asset if you're a contractor, demonstrating the quality and scope of your work to potential clients.
What should you document? At a minimum, include:
- Material List: Detailed records of the tile type, quantity, manufacturer, and any associated hardware used. Save receipts!
- Installation Date(s): Note when the work was performed.
- Photographic Evidence: Before, during, and after photos are a powerful visual record.
- Contractor Information (If Applicable): Include contact information, license numbers, and insurance details.
- Any Deviations from Plan: Document any unexpected challenges or modifications made during the installation process, along with the reasoning behind them.
- Warranty Information: Keep all warranty documents readily accessible.
Digitally storing this information - in a dedicated folder, cloud storage, or project management software - ensures easy retrieval and protects against physical loss.
12. Troubleshooting & Warranty Information
Even with meticulous planning and careful installation, hiccups can happen. Here's a quick guide to some common ceiling tile issues and how to address them:
- Tiles Not Level: Double-check the grid system for level and plumb. Minor adjustments can often be made by slightly bending the cross tees.
- Gaps Between Tiles: Ensure tiles are properly seated in the grid. Larger gaps might indicate a damaged tile or a problem with the grid spacing.
- Tiles Sagging: This can be caused by an improperly supported grid or tiles that are too heavy for the grid's capacity. Consult a structural engineer if you suspect a serious issue.
- Popping or Clicking Sounds: Temperature and humidity fluctuations can cause tiles to expand and contract, leading to noises. Ensure proper acclimation and consider using acoustic sealant.
- Water Stains: Immediately address any leaks in the roof or plumbing to prevent further damage. Replace affected tiles.
Understanding Your Warranty
Your ceiling tiles are backed by a manufacturer's warranty, typically covering defects in materials and workmanship. Carefully review the warranty documentation for specifics, as coverage can vary. Here's what to generally look for:
- Warranty Period: How long is the warranty valid?
- Coverage Details: What types of defects are covered?
- Claim Process: What steps do you need to take to file a warranty claim? (Photos, receipts, etc.)
- Limitations & Exclusions: What situations are not covered? (Damage from misuse, natural disasters, etc.)
Keep records of your purchase and installation dates, as they are crucial for any warranty claims. Contact the manufacturer directly for warranty inquiries or to initiate a claim.
Resources & Links
- The Home Depot : A major home improvement retailer offering a vast selection of ceiling tiles, grid systems, tools, and safety equipment. Good for sourcing materials and finding tutorials (though specific checklists might not be available, it's a source for product information).
- Lowe's : Similar to Home Depot, Lowe's provides a wide range of building materials and tools needed for ceiling tile installation. Check their website for product specifics and sometimes DIY guides.
- CeilingFan.com : While primarily focused on ceiling fans, they have a surprisingly detailed section on ceiling tiles and suspended ceilings. Look for their project guides and educational content relating to types of tiles and installation considerations. They offer great information about tile types and hanging systems, which will be helpful for section 1 & 9.
- ArborCraft : Specializes in acoustic ceiling tiles and suspended ceiling systems. Provides technical specifications, installation guides, and sound performance data (very relevant for section 9). Their product pages can be very detailed.
- Armstrong Ceilings : A leading manufacturer of ceiling systems. Their website offers extensive resources including installation guides, CAD drawings, technical specifications, and acoustic performance data. Essential for understanding ceiling systems & acoustic properties (relevant to sections 3, 9, & 12).
- USG : USG is a major building materials supplier. While they sell grid systems, they also have useful resources on proper installation techniques and handling of materials (relevant to sections 2, 3, & 4). Look for their technical bulletins.
- Build With STL : This site (and others like it) specialize in steel building products, many of which are essential for suspended ceiling grid systems. Good for detailed information on hanger wires, main runners, cross tees, and other structural components (relevant to section 1 & 3).
- GuildQuality : This site is a directory of contractors and a source for reviews. Searching for ceiling installers in your area can provide potential sources for quotes and potentially find contractors who provide checklists (though not direct checklist resources themselves).
- TH Handy : A DIY information website. Search their site for 'ceiling tile installation' to find general guides and tips that might complement the checklist approach. Focus on their general DIY content.
- Family Handyman : Offers various DIY project guides, including articles related to ceiling repairs and installations. Good for finding general guidance and techniques.
- OSHA (Occupational Safety and Health Administration) : Provides safety guidelines and regulations for construction work. Important for ensuring a safe workspace and following proper safety protocols (essential for section 4). Focus on general construction safety.
Frequently Asked Questions
What is this checklist template for?
This checklist template is designed to guide you through every step of installing ceiling tiles, ensuring a professional and successful project. It covers everything from pre-installation preparation to final cleanup.
What types of ceiling tiles does this checklist apply to?
This checklist is generally applicable to most standard ceiling tile installations, including mineral fiber, fiberglass, and vinyl tiles. However, always refer to the specific manufacturer's instructions for your tile type as some may have unique requirements.
Do I need any special tools for ceiling tile installation?
Yes! The checklist outlines essential tools including a T-bar level, measuring tape, utility knife, safety glasses, gloves, a stepladder, and potentially a tile cutter or saw. Having the right tools will significantly improve the quality and efficiency of the job.
What is a plenum and why is it important?
The plenum is the space above the ceiling tiles, often containing HVAC ducts and wiring. The checklist emphasizes verifying plenum access and ensuring proper clearances before starting the installation.
How do I ensure the ceiling grid is level?
The checklist details the importance of using a T-bar level to ensure the main runners and cross tees are perfectly level. An unlevel grid will result in a visually unappealing and potentially unstable ceiling.
What should I do if I encounter an obstruction like a duct or light fixture?
The checklist includes a section on dealing with obstructions. It recommends careful measuring, cutting tiles as needed, and maintaining proper clearances around fixtures.
How do I cut ceiling tiles?
The checklist provides guidance on using both a utility knife and a tile cutter to achieve clean, accurate cuts. Safety is paramount - always use a sharp blade and take precautions to avoid injury.
What are expansion gaps and why are they necessary?
Expansion gaps account for the expansion and contraction of ceiling tiles due to temperature and humidity changes. The checklist explains where and how to incorporate these gaps to prevent cracking or warping.
What should I do after the ceiling tiles are installed?
The checklist outlines final steps like cleaning up debris, inspecting the ceiling for any imperfections, and touching up any necessary areas.
Is this checklist suitable for beginners?
While the checklist provides detailed guidance, ceiling tile installation can be challenging. Beginners should read the entire checklist carefully, watch tutorial videos, and consider seeking assistance from a professional if needed.
Found this Article helpful?
Construction Management Solution Demo
Build smarter, not harder! ChecklistGuro streamlines construction projects from planning to closeout. Manage tasks, inspections, safety protocols & more - all in one place. Reduce delays, improve communication, and deliver projects on time & on budget.
Related Articles

The Ultimate Concrete Vibration Checklist Template

Unlock Value: Your Free Value Engineering Checklist Template

The Ultimate HVAC Ductwork Installation Checklist Template

The Ultimate Rebar Placement Checklist Template

Your Concrete Mix Design Verification Checklist: A Step-by-Step Guide

Backfilling & Compaction Checklist: A Foundation's Best Friend

The Ultimate Concrete Delivery & Placement Checklist Template

Your Ultimate Stakeholder Communication Plan Checklist Template
We can do it Together
Need help with
Construction?
Have a question? We're here to help. Please submit your inquiry, and we'll respond promptly.