Electrical Wiring Inspection Checklist Template
Published: 09/02/2025 Updated: 12/13/2025
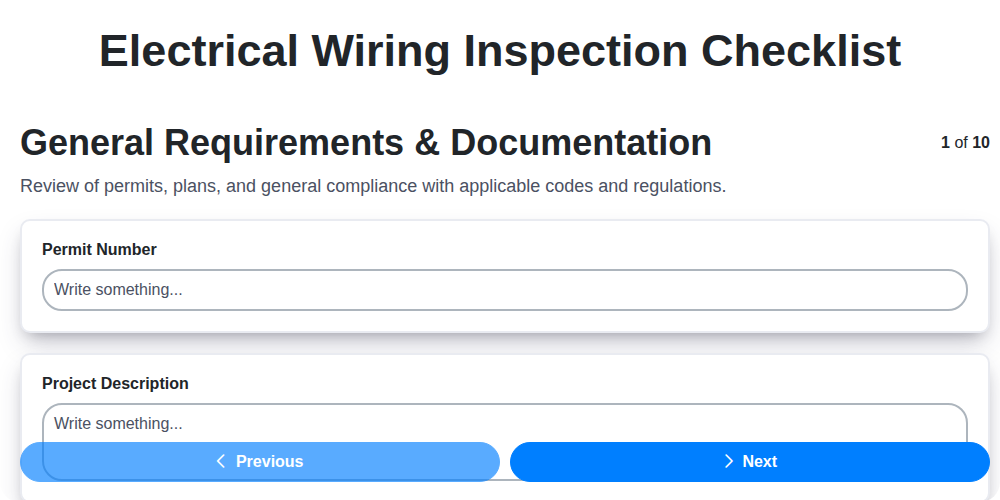
Table of Contents
- Introduction: Why an Electrical Inspection Matters
- Before You Start: Essential Tools & Safety Precautions
- 1. General Requirements & Documentation Review
- 2. Main Service Entrance Assessment
- 3. Panelboard and Overcurrent Protection Evaluation
- 4. Branch Circuit and Wiring Methods Inspection
- 5. Grounding and Bonding System Verification
- 6. Receptacle and Switch Functionality Check
- 7. Lighting Fixture Inspection
- 8. Special Appliance and Equipment Assessment
- 9. Smoke and Carbon Monoxide Detector Compliance
- 10. Documentation & Reporting: What to Record
- 11. Common Issues & Remediation Steps
- 12. Final Sign-Off & Ongoing Maintenance
- Resources & Links
TLDR: Need to inspect electrical wiring? This template guides you through every step - from service entrance to smoke detectors - ensuring safety and code compliance. Download it, follow the checklist, and identify potential issues *before* they become costly or dangerous problems!
Introduction: Why an Electrical Inspection Matters
Buying a home is likely one of the biggest investments you'll ever make. You've likely spent weeks, maybe months, searching for the perfect place - the right neighborhood, the right layout, the right feel. But amidst all the excitement of envisioning your future, it's easy to overlook a critical element: the electrical system. Faulty wiring isn't just an inconvenience; it's a serious safety hazard. Hidden problems like outdated wiring, overloaded circuits, or improper grounding can lead to electrical fires, shocks, and costly repairs down the line. An electrical inspection isn't just a formality - it's a crucial step in protecting your family, your property, and your peace of mind. This isn't about finding fault; it's about uncovering potential risks and ensuring a safe and reliable electrical system for years to come.
Before You Start: Essential Tools & Safety Precautions
An electrical inspection isn't just about observation; it requires the right tools and, most importantly, a commitment to safety. Don't attempt this without proper preparation! Here's what you're going to need and how to stay safe:
Essential Tools for the Job:
- Non-Contact Voltage Tester (NCVT): This is crucial for identifying live wires before touching anything. Absolutely mandatory.
- Multimeter: For measuring voltage, current, and resistance. Useful for troubleshooting specific circuit issues (but should be used by those with electrical knowledge).
- Flashlight or Headlamp: Poor lighting can obscure vital details.
- Ladder: To reach higher areas safely. Ensure it's stable and in good condition.
- Safety Glasses: Protect your eyes from dust and debris.
- Gloves (insulated): While not a substitute for turning off the power, they provide an extra layer of protection.
- Camera/Smartphone: Documenting issues is invaluable for reporting and tracking progress.
- Notepad and Pen/Digital Recorder: To record your observations.
Safety First - Non-Negotiable Precautions:
- Power Down: Always turn off the relevant circuit breaker(s) before starting any inspection. Double-check with a non-contact voltage tester to confirm power is off. When in doubt, turn off the main power.
- Assume Everything is Live: Until you're absolutely certain a circuit is de-energized, treat it as if it's live.
- No Water: Keep the work area dry. Water and electricity are a dangerous combination.
- Work with a Partner (Ideal): Having someone else present can be helpful for safety and assistance.
- Don't Overreach: Use a stable ladder and avoid stretching to reach areas.
- Know Your Limits: If you're uncomfortable or unsure about any aspect of the inspection, stop and consult a qualified electrician. Your safety is paramount.
1. General Requirements & Documentation Review
Before diving into the physical inspection, a crucial first step involves reviewing the documentation and ensuring basic requirements are met. This isn't about scrutinizing blueprints (unless available!), but rather verifying that proper procedures were followed during any electrical work.
Start by requesting and examining any electrical permits obtained for recent renovations or additions. These permits often detail the scope of work and the inspector's approvals. A lack of permits can be a red flag, potentially indicating unpermitted and potentially unsafe work.
Next, look for any electrical plans or diagrams. While often missing in older homes, they can be invaluable for understanding circuit layouts and identifying potential issues. Even a rough sketch can be helpful.
Crucially, the entire electrical system must comply with the National Electrical Code (NEC) - or your local equivalent, which often adopts or modifies the NEC. Ensure that the work performed adheres to the applicable code in effect at the time of the installation.
Finally, a vital aspect of documentation review is verifying proper labeling. Circuit breakers and panels should be clearly labeled, indicating the circuits they control. This not only simplifies troubleshooting but also demonstrates a degree of professionalism and attention to detail. Unlabeled or poorly labeled panels are a common sign of rushed or incomplete work.
2. Main Service Entrance Assessment
The main service entrance is the gateway to your home's electrical system, and its condition directly impacts the safety and reliability of your entire electrical supply. A comprehensive assessment begins with a visual inspection of the service drop or lateral - the wires connecting your home to the utility's power lines. Look for any signs of damage, such as frayed insulation, cracks, or discoloration. Ensure these conductors have adequate clearance from the ground and any obstructions, adhering to established safety distances.
Next, we're checking the meter. Confirm it's properly installed and functioning correctly, free from obvious damage or tampering. Following the service conductors, we're looking for a readily accessible and operational service disconnect - this is the crucial switch allowing you to shut off power to the entire home in an emergency. Verify its functionality and label it clearly.
The amperage rating of your service entrance is also vital. An undersized service can lead to overloaded circuits and potential hazards. A qualified electrician can assess your current and future electrical needs to determine if your existing amperage is sufficient. Finally, look for any signs of corrosion or damage to the main disconnect box itself. This area is a primary concern for maintaining a safe and reliable electrical supply to your home.
3. Panelboard and Overcurrent Protection Evaluation
The heart of your home's electrical system lies within the panelboard, often referred to simply as the electrical panel. This is where the main power enters your home and is distributed to individual circuits. A thorough evaluation here is critical for safety and efficiency.
Visual Inspection is Key: Start with a visual assessment. Look for any signs of damage, corrosion, or overheating. Discoloration, rust, or a burnt smell are red flags that warrant immediate attention from a qualified electrician.
Circuit Breaker and Fuse Sizing: Each circuit breaker or fuse is designed to protect a specific circuit from overload. It's essential that these overcurrent devices are correctly sized for the wiring they serve. An undersized breaker can fail to protect the circuit, potentially leading to overheating and fire. An oversized breaker can allow a circuit to draw too much current, also creating a fire hazard. We're looking to ensure that breaker sizes match the amperage rating of the wire they're protecting.
Panel Labeling: Clear and accurate labeling of each circuit breaker is vital for safety and troubleshooting. If labels are missing or unclear, it can be incredibly difficult to quickly identify which breaker controls which appliance or area of the home. While not always required, clear labeling is a best practice that simplifies future maintenance and repairs.
Breaker Condition: Circuit breakers can degrade over time, potentially failing to trip when they should. A qualified electrician can perform tests to ensure breakers are functioning correctly. Look for signs of physical damage or deformation on the breakers themselves.
Panel Capacity & Load Calculation: For older homes, the panel's capacity might be inadequate for modern electrical demands. A load calculation, performed by a qualified electrician, can determine if the panel is appropriately sized for the home's current and anticipated electrical load. If the panel is nearing its maximum capacity, an upgrade might be necessary.
Grounding and Neutral Bus: The grounding and neutral bus bars provide a critical safety pathway. These should be secure and free from corrosion. Loose connections or corrosion can compromise the system's safety.
4. Branch Circuit and Wiring Methods Inspection
This section focuses on the nuts and bolts of your electrical system - how the power is delivered from the panel to the outlets, lights, and appliances. We're looking beyond just the presence of wires; we're assessing their quality, how they've been installed, and whether they meet code requirements.
Here's what we're checking:
- Wiring Types: The type of wire used matters. NM-B (Romex) is common for interior wiring, but UF cable is required for underground applications. We're verifying the correct wire type is used for each application, based on its environment and the electrical load it's carrying.
- Conduit & Raceway: If conduit (rigid metal, PVC, etc.) or raceways are used, we're looking for proper installation, secure connections, and signs of damage. These protect wiring from physical hazards and are crucial for safety.
- Box Fill & Secure Mounting: Electrical boxes must not be overcrowded with wires (box fill limitations) to ensure proper heat dissipation and prevent damage. They must also be securely mounted to prevent them from pulling away from the wall or ceiling.
- Support & Protection: Wiring must be properly supported to prevent sagging or strain. This includes using staples and supports at appropriate intervals, especially where wires run through walls or ceilings. Where wiring is exposed to potential damage, it should be protected with conduit or other barriers.
- Penetrations: Where wiring passes through walls or floors, proper sealing techniques are essential to prevent moisture intrusion and maintain fire safety. We're checking for adequate firestopping and sealing materials.
- Connections & Splices: All wire connections must be secure and properly insulated. Splices (where wires are joined) must be made with approved connectors and techniques. We look for signs of loose connections or damaged insulation.
- Grounding: Proper grounding is vital for safety. We're verifying that all circuits are properly grounded and that ground wires are securely connected.
5. Grounding and Bonding System Verification
Grounding and bonding are often misunderstood but are absolutely critical for electrical safety. They work together to provide a low-resistance path for fault currents to return to the source, preventing dangerous voltage buildup and minimizing the risk of electric shock or fire. Think of it as a vital safety net for your electrical system.
What's the Difference?
- Grounding: Connects the electrical system's metal parts (like the metal enclosure of a panel or appliance) to the earth. This creates a stable reference point and helps dissipate fault currents.
- Bonding: Interconnects all the metal parts of your home's electrical system and other metallic objects like water pipes and gas lines. This ensures they're at the same electrical potential, reducing the risk of voltage differences that could cause shocks.
Key Checks for a Solid System:
- Grounding Electrode System: This includes the grounding electrode (typically a metal rod driven into the ground, or a connection to a metal water pipe) and the grounding wire that connects it to the main electrical panel. We verify the electrode's integrity and proper connection.
- Bonding Jumpers: These ensure that all sections of your electrical panel are bonded together.
- Water Pipe Bonding: Bonding to the metal water pipe (if present) provides a vital pathway for fault current. We're checking for proper bonding and corrosion.
- Gas Pipe Bonding: Similar to water pipes, gas pipes need to be bonded to prevent dangerous voltage buildup.
- Continuity Testing: We use specialized tools to ensure there's a low-resistance, continuous path throughout the grounding and bonding system. This confirms everything is properly connected.
Important Note: Improper grounding and bonding can be extremely dangerous. If there are any concerns about your system, it's crucial to have it inspected and corrected by a qualified electrician immediately.
6. Receptacle and Switch Functionality Check
It's easy to glance at a receptacle or switch and assume everything's fine. But a truly comprehensive inspection goes beyond that initial visual check. We're looking for subtle signs of wear, improper wiring, and potential hazards that might not be immediately apparent. Here's what a thorough inspection entails:
1. Grounding Confirmation: Using a receptacle tester (often called a "plug tester"), verify that each receptacle is properly grounded. A properly wired receptacle will show a green/ground indication. If it shows an open ground, a reverse polarity, or an open neutral, that's a red flag needing immediate attention.
2. GFCI Testing (Critical!): Ground Fault Circuit Interrupters (GFCIs) are your front line of defense against electrical shock in areas like bathrooms, kitchens, and outdoors. Don't just press the Test button - always press the Reset button afterward to ensure it returns to normal function. A GFCI that fails either test needs to be replaced.
3. Switch Operation and Tightness: Each switch should operate smoothly and without excessive looseness. A wobbly or "sticky" switch can indicate worn contacts and is a potential safety hazard. Visually inspect the switch plate to ensure it's securely attached and in good condition.
4. Polarity Checks: While the receptacle tester can give a quick assessment, a more in-depth check of the wiring's polarity can be valuable. This involves verifying the hot, neutral, and ground connections are correct.
5. TRR Verification: Tamper-Resistant Receptacles (TRRs) are now required in many areas, particularly for new construction. Confirm that these receptacles are present where mandated by code.
6. Identifying Unusual Noises or Heat: During operation, listen for any buzzing or crackling sounds, and carefully feel for any unusual heat emanating from the receptacle or switch. These can be indicators of loose connections or internal shorts.
Pro Tip: Document any issues found! A detailed report, even with photos, will be invaluable for coordinating repairs and ensuring all deficiencies are addressed.
7. Lighting Fixture Inspection
Lighting fixtures are often overlooked during electrical inspections, but they're vital for both safety and functionality. A faulty fixture can pose a fire hazard, and inadequate lighting can impact visibility and safety within a home. Here's what to look for during a lighting fixture inspection:
1. Secure Mounting & Fixture Condition: Begin by visually inspecting each fixture to ensure it's securely mounted to its junction box. Look for signs of damage, rust, corrosion, or loosening. A wobbly or damaged fixture needs immediate attention.
2. Proper Wiring Connections: Carefully examine the wiring connections within the fixture. These should be tight, properly insulated, and free from corrosion or exposed wiring. Loose connections are a common cause of flickering lights and potential fire hazards.
3. Appropriate Fixture Type & Rating: Confirm the fixture type is appropriate for its location. For example, bathrooms require damp-rated or wet-rated fixtures, while outdoor areas necessitate weatherproof fixtures. Also, verify the fixture's wattage rating isn't exceeded. Overloading a fixture can cause overheating and fire.
4. Bulb Compatibility & Efficiency: If the inspection occurs with existing bulbs in place, observe if the bulbs appear compatible with the fixture's design and intended use. Modern LED bulbs often require specific fixture compatibility to function properly and safely. If replacements are anticipated, discuss energy-efficient options and proper installation techniques.
5. Junction Box Integrity: Inspect the junction box itself for cracks, damage, or inadequate size. A junction box that is too small can lead to overheating. Make sure it's securely fastened to the ceiling or wall.
6. Recessed Lighting Considerations: Recessed lights (can lights) require specific attention. Verify the can's insulation rating (IC-rated for direct contact with insulation or non-IC rated with a gap). Check for signs of overheating or moisture. Ensure the trim is properly sealed to prevent air leakage.
7. Outdoor Lighting Specifics: Outdoor fixtures must be weatherproof and properly grounded to prevent electrical shock hazards. Check for cracks or damage to the weatherproof seals and ensure the fixture is securely attached to its mounting surface.
8. Special Appliance and Equipment Assessment
Major appliances and specialized equipment often require dedicated electrical circuits and unique safety considerations. This isn't just about ensuring they work; it's about preventing overloading, fire hazards, and damage to your electrical system. Here's what we're looking at during this critical assessment:
HVAC Systems (Heating, Ventilation, and Air Conditioning): We're verifying dedicated circuits with appropriate amperage ratings, ensuring proper disconnect switches are readily accessible for maintenance, and confirming the wiring is protected - often with conduit - from physical damage. We also check for proper grounding of the outdoor condenser unit. Inefficient or improperly sized HVAC systems can strain your electrical panel, leading to issues down the line.
Water Heaters (Electric): Electric water heaters demand substantial power. We're inspecting dedicated circuits sized correctly for the tank's capacity, confirming proper overcurrent protection, and ensuring the wiring is protected from moisture and heat. A dedicated disconnect switch near the water heater is a must for safety and maintenance.
Electric Vehicle (EV) Chargers: The rise of EVs means increased electrical load. We assess the existing panel's capacity to handle a Level 1 or Level 2 charger, and if necessary, recommend upgrades like a subpanel or load management system. Proper wiring and grounding are critical for safety.
Ovens, Ranges, and Cooktops: We examine the voltage and amperage requirements, confirming dedicated circuits and ensuring anti-short circuit protection. Gas appliances with electric ignition systems also receive scrutiny.
Well Pumps & Sump Pumps: These essential systems often operate continuously, requiring stable power. We're verifying dedicated circuits and proper grounding to prevent damage from surges and leaks.
Refrigeration (Large Commercial/Residential): Similar to other major appliances, refrigeration units often necessitate dedicated circuits and special wiring considerations for optimal performance and safety.
Note: Improperly sized or installed circuits for special appliances can be a significant fire hazard. If any concerns arise during our assessment, we're prepared to provide recommendations for upgrades or repairs to ensure your electrical system can safely handle these demanding loads.
9. Smoke and Carbon Monoxide Detector Compliance
Smoke and carbon monoxide (CO) detectors aren't just helpful devices; they're vital safety components mandated by code and designed to protect you and your family from potentially deadly threats. Staying compliant isn's just about avoiding fines; it's about peace of mind and a proactive approach to home safety.
Understanding the Requirements
Regulations surrounding smoke and CO detectors vary by state and local jurisdictions. However, common requirements often include:
- Placement: Smoke detectors are typically required in each bedroom, outside sleeping areas, and on every level of the home, including the basement. CO detectors are often mandated on each level of the home and near sleeping areas.
- Type: Regulations often specify the type of detectors allowed - ionization, photoelectric, or combination detectors. Newer codes frequently favor or require photoelectric detectors for smoke.
- Interconnection: Increasingly, detectors are required to be interconnected, meaning when one alarms, they all alarm. This provides an early warning, especially at night.
- Power Source: Detectors can be powered by batteries, hardwired into the home's electrical system, or a combination of both (hardwired with battery backup).
- Maintenance: Regular testing (monthly) and battery replacement (typically every six months or as indicated by the detector) are crucial for proper function.
Beyond the Basics: Best Practices
While code compliance is essential, consider these proactive steps for enhanced safety:
- Replace Detectors Regularly: Smoke and CO detectors have a limited lifespan (typically 10 years). Check the manufacturer's instructions for replacement dates.
- Test Monthly: Conduct a monthly test to ensure detectors are functioning correctly.
- Install Combination Detectors: Consider combination smoke/CO detectors to simplify maintenance and provide dual protection.
- Consider Smart Detectors: Smart detectors offer features like remote monitoring, alerts to your smartphone, and voice alerts.
- Educate Your Family: Make sure everyone in your household knows the sound of the alarm and knows what to do if it sounds.
Disclaimer: Local regulations regarding smoke and carbon monoxide detectors can vary. It's essential to consult your local fire marshal or building department for specific requirements in your area.
10. Documentation & Reporting: What to Record
A thorough electrical inspection isn't just about finding issues; it's about documenting them clearly and concisely. This documentation protects you, the homeowner (or the inspector), and provides a roadmap for remediation. Here's what you need to record:
- Detailed Descriptions: Don't just write loose wire. Instead, write Loose connection at receptacle #4 in the kitchen, visibly corroded and creating a potential fire hazard. Specificity is key.
- Photographs/Videos: Visual evidence is invaluable. Take pictures or videos of every deficiency, clearly showing the location and severity of the issue. Date-stamping these media is highly recommended.
- Measurements & Readings: Record voltage readings, amperage draws, and ground resistance values where applicable. This provides objective data to support your observations.
- Code Violations: Clearly identify the specific code(s) violated by each deficiency. This is crucial for legal defensibility and ensuring compliance. Refer to the relevant code edition (e.g., NEC 2023).
- Severity Ranking: Assign a severity ranking to each issue (e.g., Critical, High, Medium, Low). This prioritizes repairs and helps allocate resources effectively. "Critical" issues pose immediate safety risks.
- Remediation Recommendations: Offer clear and concise recommendations for correcting each deficiency. Consider including estimated repair costs (if possible, with disclaimers about fluctuating labor rates).
- Witness Signatures: If possible, obtain signatures from the homeowner and any witnesses present during the inspection. This verifies the accuracy of the report and acknowledges the findings.
- Digital Reporting: Utilize digital reporting tools or templates to ensure consistency and efficiency. Cloud-based platforms facilitate easy sharing and collaboration. Include a digital copy of the report along with any photographs or videos.
- Report Versioning: Maintain version control of the report to track any changes or updates made after the initial inspection. This provides an audit trail of the remediation process.
- Retention Policy: Establish a clear retention policy for all inspection records, adhering to any legal or regulatory requirements.
11. Common Issues & Remediation Steps
Even with diligent inspections, some issues pop up more frequently than others. Here's a look at what to watch for, along with initial steps for remediation. Remember, these are suggestions; a professional electrician should always evaluate and perform the necessary repairs.
1. Knob and Tube Wiring: This outdated wiring system lacks grounding and is a significant fire hazard. Remediation: Complete replacement of the wiring is highly recommended.
2. Aluminum Wiring: While not inherently dangerous, aluminum wiring is more prone to loosening and overheating. Remediation: COPALUM connectors can be installed on branch circuits, or complete replacement is preferred.
3. GFCI Outlet Failure: A non-responsive GFCI outlet can indicate a faulty device or a problem with the circuit. Remediation: Try resetting the GFCI. If it continues to fail, replace the outlet.
4. Loose Wiring Connections: Over time, electrical connections can loosen, creating heat and potential arcing. Remediation: A qualified electrician should tighten all connections and inspect for signs of corrosion.
5. Outdated Electrical Panel: Panels with inadequate amperage or lacking proper labeling can be a bottleneck and a safety concern. Remediation: Panel upgrade may be necessary, along with proper labeling of circuits.
6. Improper Wiring of Smoke/CO Detectors: Non-interconnected or malfunctioning detectors compromise safety. Remediation: Interconnect detectors, replace faulty units, and ensure proper battery power or hardwiring.
7. Damaged or Frayed Wiring: Exposed or damaged wiring is a fire hazard. Remediation: Replace damaged wiring and ensure proper insulation and protection.
8. Overloaded Circuits: Constantly tripping breakers indicates an overloaded circuit. Remediation: Redistribute appliances and devices to different circuits or consider adding new circuits.
9. Ungrounded Outlets: Lack of grounding increases the risk of electrical shock. Remediation: Retrofit outlets with ground fault circuit interrupters (GFCIs) or install a grounding system.
10. Improperly Installed Lighting Fixtures: Loose or incorrectly wired fixtures can be a fire hazard. Remediation: Securely mount fixtures, ensuring proper wiring connections and appropriate fixtures for the location.
11. Rodent Damage: Chewed or damaged wires pose a significant risk. Remediation: Complete inspection of the wiring system, replacing damaged areas, and addressing the source of the rodent problem.
12. Final Sign-Off & Ongoing Maintenance
The final inspection isn't the finish line; it's the starting point for a long-term commitment to electrical safety. Getting that sign-off is fantastic, but it's crucial to integrate ongoing maintenance into your homeownership routine. Here's what you need to know:
1. Remediation & Follow-Up: Make sure all identified deficiencies have been properly addressed and corrected by qualified professionals. Don't hesitate to schedule a re-inspection to confirm the work meets code and is done correctly. Document all remediation work for your records.
2. Visual Checks: Regularly (at least annually) perform visual inspections of your electrical panels, outlets, and wiring. Look for signs of damage, discoloration, or unusual smells. Note any concerns and address them promptly.
3. Appliance Maintenance: Follow manufacturer's instructions for maintaining electrical appliances. This often includes cleaning, checking cords, and ensuring proper ventilation.
4. Cord Safety: Replace damaged cords immediately. Avoid overloading outlets and extension cords. Use surge protectors to safeguard electronics from power fluctuations.
5. Tree Trimming: Keep trees and branches away from overhead power lines to prevent hazards during storms.
6. Carbon Monoxide Detector Maintenance: Test your CO detectors monthly and replace batteries as needed. Replace the entire detector every 5-7 years, as recommended by manufacturers.
7. Professional Inspections: Consider periodic professional electrical inspections, especially for older homes or after renovations. These can proactively identify potential issues before they become serious.
8. Stay Informed: Familiarize yourself with common electrical safety tips and warnings. Knowledge is your best defense against electrical hazards.
Resources & Links
- Occupational Safety and Health Administration (OSHA) : OSHA provides regulations and guidelines related to electrical safety in the workplace, providing foundational information for inspection understanding.
- National Fire Protection Association (NFPA) : The NFPA develops and publishes codes and standards, especially NFPA 70 (National Electrical Code - NEC), which is the benchmark for electrical installations and inspections. Essential for ensuring compliance and safety.
- Electrical Contractor Magazine : Offers articles, resources, and technical information relevant to electrical professionals, including inspection best practices and updates to codes.
- Building Science Corporation : While focused on the broader building envelope, Building Science covers electrical considerations affecting building performance and safety, useful for nuanced assessments.
- U.S. Department of Justice - Office of the Inspector General : While primarily a government watchdog, their site can offer insights into common electrical failings and consequences if poor practices are found. Helpful to understand the stakes of a proper inspection.
- International Association of Electrical Inspectors (IAEI) : Provides training, certifications, and resources for electrical inspectors, promoting best practices and code compliance. A great source for professional development and advanced information.
- Home Inspection Institute (HII) : Provides resources and training for home inspectors, including sections on electrical systems. Useful for understanding the broader context of electrical inspections as part of a home inspection.
- The ASHI Reporter : A publication for home inspectors, often featuring articles on electrical systems and inspection techniques.
- National Association of Home Inspectors (NAHI) : Provides information and resources for home inspectors, including articles and training related to electrical systems. Good source for inspector perspectives.
- Energy Star : While primarily focused on energy efficiency, Energy Star highlights the importance of proper electrical installation and maintenance for optimal performance and safety. Relevant for assessing appliance and lighting systems.
- Intertek : A testing, inspection, and certification company that provides services related to electrical safety and compliance. Useful to understand testing standards and product safety.
- Underwriters Laboratories (UL) : A recognized testing and certification laboratory that evaluates products for safety. Provides a means to verify that electrical components have been independently assessed.
Frequently Asked Questions
What is an electrical wiring inspection and why is it important?
An electrical wiring inspection is a thorough assessment of your home's electrical system to ensure it meets safety codes and is functioning correctly. It's important to identify potential hazards like faulty wiring, overloaded circuits, and improper grounding, preventing fires and electrical shocks, and ensuring safe operation of your home's electrical appliances and systems.
Who needs an electrical wiring inspection?
Homeowners, prospective homebuyers, real estate agents, landlords, and anyone concerned about the safety of their electrical system should consider an inspection. It's particularly important when buying or selling a home, after renovations or additions, or if you're experiencing electrical problems.
What does the checklist template cover?
The checklist template covers key areas of electrical wiring, including panel assessment, receptacle testing, wiring condition, grounding, GFCI protection, smoke detectors, and adherence to local electrical codes. It provides a structured approach to identify common issues.
Is this checklist template for DIY use, or should I hire a professional?
The template is intended as a guide for homeowners who are comfortable with basic electrical safety practices. However, electrical work can be dangerous and complex. **It is strongly recommended that a qualified and licensed electrician perform the actual inspection and any necessary repairs.** The template can help you understand what an electrician will be looking for.
Can I customize the checklist template?
Yes, absolutely. The template is designed to be a starting point. Feel free to add or remove items to tailor it to your specific needs and the scope of your home's electrical system. Consider adding details relevant to your local codes and concerns.
What is a GFCI outlet, and why is it important?
GFCI stands for Ground Fault Circuit Interrupter. These outlets are designed to quickly shut off power when they detect a ground fault, preventing electric shock. They are crucial in areas where water is present, such as bathrooms, kitchens, and outdoors.
What does 'proper grounding' mean, and why is it important?
Proper grounding provides a safe path for electricity to flow back to the electrical panel in the event of a fault. It helps prevent electrical shock and reduces the risk of fire.
What is the difference between a visual inspection and a more in-depth electrical test?
A visual inspection involves looking for obvious signs of damage or improper installation. An in-depth electrical test uses specialized equipment to measure voltage, amperage, and other parameters to identify hidden issues that aren't visible during a visual inspection. This is typically performed by a qualified electrician.
Where can I find local electrical codes?
Your local government's building department or a reputable online resource for your area will have information on electrical codes. It is essential to ensure your electrical system complies with these codes.
What should I do if I find a potential electrical hazard during the inspection?
**Do not attempt to repair the issue yourself.** Immediately contact a qualified and licensed electrician to assess and fix the problem. Document the issue and share your findings with the electrician.
Found this Article helpful?
Construction Management Solution Demo
Build smarter, not harder! ChecklistGuro streamlines construction projects from planning to closeout. Manage tasks, inspections, safety protocols & more - all in one place. Reduce delays, improve communication, and deliver projects on time & on budget.
Related Articles

The Ultimate Concrete Vibration Checklist Template

Unlock Value: Your Free Value Engineering Checklist Template

The Ultimate HVAC Ductwork Installation Checklist Template

The Ultimate Rebar Placement Checklist Template

Your Concrete Mix Design Verification Checklist: A Step-by-Step Guide

Backfilling & Compaction Checklist: A Foundation's Best Friend

The Ultimate Concrete Delivery & Placement Checklist Template

Your Ultimate Stakeholder Communication Plan Checklist Template
We can do it Together
Need help with
Construction?
Have a question? We're here to help. Please submit your inquiry, and we'll respond promptly.