Your Go-To Excavation Safety Plan Checklist Template
Published: 09/02/2025 Updated: 12/13/2025
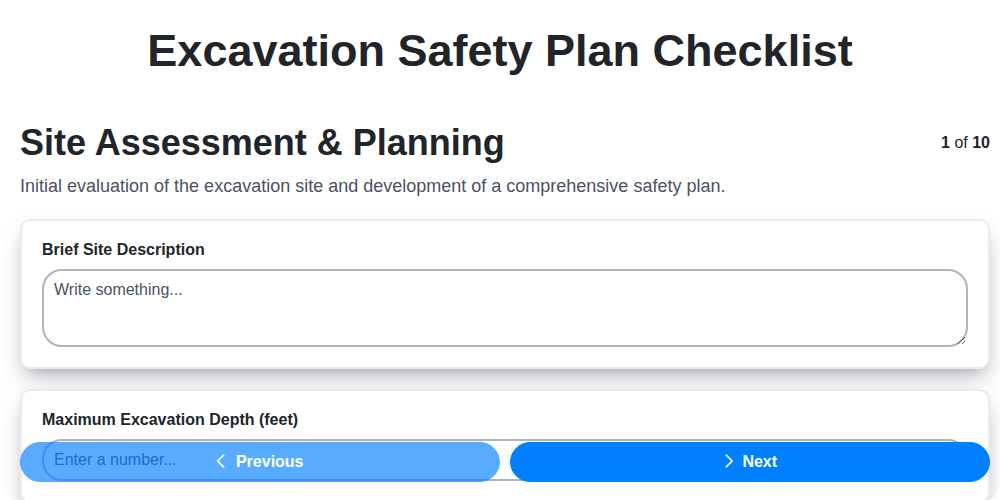
Table of Contents
- Introduction: Why Excavation Safety Matters
- Understanding Excavation Safety Regulations
- Step 1: Pre-Excavation Site Assessment
- Step 2: Utility Location - Dial 811
- Step 3: Soil Classification and Competent Person Inspection
- Step 4: Protective Systems: Sloping, Benching, and Shoring
- Step 5: Trench Box Installation and Maintenance
- Step 6: Safe Access and Egress Procedures
- Step 7: Water Management and Control
- Step 8: Atmospheric Hazard Identification and Mitigation
- Step 9: Soil Management and Material Storage Best Practices
- Step 10: Communication Protocols and Emergency Response
- Step 11: Daily Inspections and Record Keeping
- Step 12: Training and Competency Verification
- Step 13: Checklist Customization for Your Project
- Conclusion: Your Commitment to Excavation Safety
- Resources & Links
TLDR: Need a simple way to keep your excavation projects safe and compliant? This checklist template walks you through essential steps - from utility location and soil assessment to protective systems and emergency procedures - ensuring a safer worksite and reducing potential risks. Download it now and make excavation safety a priority!
Introduction: Why Excavation Safety Matters
Excavation work is the backbone of countless construction and infrastructure projects - from laying the foundations of a new building to installing underground utilities. However, the very nature of digging below ground presents significant and often overlooked hazards. A seemingly routine excavation can quickly turn dangerous, leading to cave-ins, utility strikes, atmospheric contamination, and other serious incidents. These events not only cause injuries and fatalities, but also result in costly project delays, legal ramifications, and reputational damage. Prioritizing excavation safety isn't just about following regulations; it's about safeguarding the lives of your team, protecting your investment, and upholding ethical responsibility on the jobsite. A proactive and well-executed safety plan, backed by consistent practices, is the foundation of a successful and secure excavation project.
Understanding Excavation Safety Regulations
Navigating the legal landscape of excavation safety can feel overwhelming, but it's absolutely critical. Regulations exist to protect workers and ensure projects are completed responsibly. While specific requirements vary by jurisdiction, some core principles consistently underpin excavation safety laws.
In the United States, the Occupational Safety and Health Administration (OSHA) sets the standards for excavation safety. OSHA's 29 CFR 1926 Subpart P outlines detailed requirements for trenching and excavation, covering aspects like soil classification, protective systems, access and egress, and atmospheric hazard control. Failure to comply with these regulations can result in significant fines, project delays, and, most importantly, serious injuries or fatalities.
Beyond federal regulations, states and municipalities may have their own, often stricter, requirements. For instance, some states mandate specific soil testing procedures or require permits for even minor excavations. It's essential to identify and understand the rules specific to your project's location.
Key areas commonly addressed by these regulations include:
- Utility Locating (One-Call/811): Mandatory notification to underground utility companies before digging.
- Competent Person Designation: Requirement for a designated individual to inspect the site and ensure safety protocols are followed.
- Soil Classification: Categorization of soil types to determine appropriate protective systems.
- Protective Systems: Specifications for sloping, benching, shoring, or trench boxes to prevent cave-ins.
- Recordkeeping: Maintaining detailed records of inspections, training, and corrective actions.
Staying informed about these regulations and ensuring compliance isn't just a legal obligation-it's a fundamental responsibility to safeguard your workforce. Regularly review applicable regulations and consult with safety professionals to ensure your excavation plan meets all requirements.
Step 1: Pre-Excavation Site Assessment
A thorough pre-excavation site assessment is the bedrock of any successful and safe excavation project. It goes far beyond simply looking at the ground; it's about understanding the site's history, geology, and potential hazards. This initial assessment informs every subsequent step in your excavation safety plan.
What does a comprehensive site assessment include?
- Review Project Plans & Historical Data: Start by meticulously reviewing project blueprints, geotechnical reports (if available), and any historical records pertaining to the site. This can reveal buried structures, previous excavations, or known geological features.
- Visual Inspection: Conduct a thorough visual inspection of the area. Look for signs of instability, erosion, nearby structures, and potential access routes for equipment and personnel.
- Utility Identification: Although the formal "Call Before You Dig" process (detailed in Step 2) is critical, the initial site assessment should include a preliminary survey for visible utilities, potential encroachment zones, and areas requiring further investigation.
- Soil Observation & Initial Classification: Observe the soil profile - note the color, texture, and layering. This provides a preliminary indication of soil type, which is vital for future classification and protective system selection. Document any visibly unstable or unusual soil conditions.
- Environmental Considerations: Identify potential environmental concerns, such as wetlands, protected species habitats, or areas prone to flooding.
- Documentation: Meticulously document all findings, including photographs, sketches, and detailed notes. This documentation will be invaluable for future reference and decision-making.
A well-executed initial site assessment is an investment that pays dividends in safety and efficiency throughout the entire excavation process.
Step 2: Utility Location - Dial 811
Before a single shovel breaks ground, locating underground utilities is paramount. Striking a buried line - gas, electric, water, or communications - can result in catastrophic damage, serious injury, or even fatalities. Don't take chances!
Dial 811 (in the US) - this number connects you to a central call center that will notify the appropriate utility companies to mark the location of their lines. This service is free, and it's the law in many jurisdictions.
Timing is Key: Make this call at least 48-72 hours before you plan to dig. This allows sufficient time for the utility companies to respond and accurately mark their lines.
Verify the Markings: Once the utilities are marked, carefully verify that the markings are accurate and clearly visible. If you have any doubts or questions about the location of a utility line, contact the utility company immediately for clarification. Don't proceed with excavation until you're absolutely certain about the utility locations. Improper utility location is a leading cause of excavation-related incidents, so take this step seriously.
Step 3: Soil Classification and Competent Person Inspection
The stability of an excavation hinges on accurately classifying the soil being dug. Soil isn't just "dirt"; it's a complex material with varying characteristics that dictate its behavior under pressure. OSHA categorizes soil into three main types: Type A, Type B, and Type C, each with increasing levels of instability.
Type A Soil: This is the most stable. It's typically granular, like sand or gravel, and demonstrates excellent grain-to-grain interlock. It's non-silica and free of visible cracks.
Type B Soil: This is a mixture of Type A and Type C soils, or a uniform soil that doesn't meet Type A criteria. It's often silty or contains a moderate amount of clay.
Type C Soil: This is the least stable. It's typically clay-like, contains a high percentage of silt, or is heavily fractured. It exhibits little to no grain-to-grain interlock.
Why the Competent Person Matters:
A "Competent Person" - someone designated and trained in excavation safety - is responsible for visually and physically inspecting the soil and assigning it a classification. This isn't guesswork; it requires knowledge of soil characteristics and the ability to perform field tests (like the slump test). The classification then dictates the necessary protective systems. For example, Type C soil requires more robust shoring or trench boxes than Type A.
Beyond Visual Inspection:
The Competent Person must also consider factors like:
- Moisture Content: Wet soil is generally less stable.
- Weather Conditions: Rainfall can dramatically alter soil stability.
- Previous Excavation History: Prior digging can weaken soil layers.
Documentation is Key:
All soil classifications must be documented, including the date of inspection, the classification assigned, and the Competent Person's signature. This documentation serves as a vital record for tracking changes and ensuring ongoing safety.
Step 4: Protective Systems: Sloping, Benching, and Shoring
Choosing the right protective system - whether sloped and benched excavations, or shoring - is paramount for preventing cave-ins. Each method has its advantages and limitations, and the selection must be based on a thorough assessment of soil type, excavation depth, proximity to structures, and potential hazards.
Slopping and Benching: This technique involves cutting the excavation walls at an angle (sloping) or creating a series of horizontal steps (benching). It's often the most economical option for shallower excavations in stable soil conditions. However, it reduces the workable area and can be unsuitable for excavations near structures or in unstable soils. Slope angles and bench heights must adhere to OSHA standards, and undercutting is strictly prohibited. Frequent inspections are critical to ensure slope stability.
Shoring: Shoring encompasses various methods like timber shoring, hydraulic shoring, and trench boxes. It provides a more robust and secure system, especially for deeper excavations or when working in unstable soils. Timber shoring utilizes interlocking timbers to support the walls, while hydraulic shoring employs jacks to apply pressure and create a solid wall. Trench boxes - prefabricated, steel structures - offer a quick and effective solution for protecting workers. Selection depends on soil conditions, depth, and available space. Proper installation and connection to the trench walls are vital for shoring to be effective. Remember, shoring should never be considered a substitute for proper soil classification and competent person oversight.
Careful planning and execution are essential, and a qualified engineer should be consulted to design the most appropriate protective system for your specific excavation project.
Step 5: Trench Box Installation and Maintenance
Trench boxes, also known as shielding systems, provide a physical barrier against cave-ins and are often the preferred method of protection, especially in unstable soil conditions. However, their effectiveness hinges on proper installation and consistent maintenance.
Installation Best Practices:
- Right Box for the Job: Selecting the correct trench box is paramount. Consider the soil type (as classified by a Competent Person), excavation depth, and the box's load capacity. Consult the manufacturer's specifications for guidance.
- Level and Secure: Ensure the trench box is perfectly level before installation. Any tilt can compromise its stability and create uneven pressure on the trench walls. Securely connect the box to the trench walls using the manufacturer's recommended methods - typically, this involves pins, spiles, or bracing systems.
- Overlapping & Continuous Protection: When using multiple trench boxes, overlap them sufficiently to prevent gaps between boxes. This provides continuous protection along the length of the excavation.
- Spacers & Hydraulic Pressure: If your box utilizes spacers, verify their proper placement and condition. For hydraulic systems, regularly check fluid levels and pressure gauges.
Ongoing Maintenance is Critical:
- Daily Inspections: Before each shift, conduct a thorough visual inspection of the trench box. Look for cracks, bends, corrosion, or any signs of damage.
- Connection Verification: Confirm that all pins, spiles, and bracing systems are securely in place.
- Manufacturer's Guidelines: Strictly adhere to the manufacturer's recommendations for inspection, maintenance, and repair.
- Record Keeping: Maintain a detailed log of all inspections, maintenance activities, and repairs performed on the trench box.
- Removal and Storage: When not in use, store trench boxes in a secure location, protected from the elements and potential damage. Inspect them before returning them to service.
Remember: A damaged or improperly installed trench box is worse than no protection at all. If in doubt, stop work and consult with a qualified professional.
Step 6: Safe Access and Egress Procedures
Maintaining clear and safe pathways in and out of an excavation is paramount to worker safety. OSHA regulations mandate specific requirements to prevent falls and ensure rapid escape in emergencies. Here's what you need to know:
Ladder/Stairway Placement & Spacing:
- Maximum Distance: A safe access/egress point (ladder, stairway, ramp) must be provided for every 25 feet of excavation depth or horizontal distance. This is a maximum; shorter distances are often preferable, especially in challenging soil conditions or when working with hazardous materials.
- Secure Placement: Ladders and stairways must be secured to prevent movement. This means tying them off at the top and ensuring they rest firmly on stable ground at the bottom. Don't allow them to shift during use.
- Proper Angle: Ladders should be placed at a safe angle (typically 75 degrees). Steep ladders are more prone to slippage.
- Clearance: Ensure the access/egress path is free from obstructions, debris, and stored materials.
Special Considerations:
- Steep Excavations: In excavations deeper than 12 feet, two separate means of egress may be required.
- Unstable Soil: If soil is unstable, consider using ramps or other stable access methods instead of ladders.
- Emergency Egress: Clearly designate and mark an alternate emergency egress point, ensuring its accessibility even if the primary route is blocked.
- Regular Inspection: Access and egress points must be inspected daily before work begins and after any significant changes to the excavation.
Remember: A quick escape can save a life. Don't compromise on access and egress safety.
Step 7: Water Management and Control
Water accumulation in excavations poses significant risks, destabilizing soil, creating hazardous working conditions, and potentially damaging utilities. Effective water management isn't just about keeping a trench dry; it's about proactively preventing problems.
Identifying Potential Water Sources
Before you even break ground, assess the potential for water intrusion. Consider:
- Groundwater Levels: High water tables are common in many areas and significantly increase the risk.
- Rainfall: Seasonal rainfall patterns and potential for flash floods must be factored in.
- Nearby Water Bodies: Proximity to rivers, lakes, or streams increases the likelihood of water infiltration.
- Utility Lines: Broken water or sewer lines can introduce significant volumes of water into the excavation.
Control Measures: A Multi-Pronged Approach
Once potential water sources are identified, implement a combination of control measures:
- Diversion Ditches: These channels redirect surface water away from the excavation.
- Sump Pumping: Submersible pumps remove water that accumulates in sumps (low-lying areas). Continuous monitoring of pump performance is essential.
- Well Points: These systems create a cone of depression, lowering the water table around the excavation.
- Trench Drains: Strategically placed drains help remove groundwater seepage.
- Impermeable Barriers: Temporary barriers like clay or geotextile fabrics can be used to prevent water infiltration in specific areas.
Ongoing Monitoring and Adaptation
Water management isn't a set it and forget it task. Regularly monitor water levels, drainage effectiveness, and the condition of control measures. Be prepared to adjust your strategy based on changing conditions (e.g., increased rainfall, pump failure). A written log of water levels and maintenance activities is highly recommended.
Step 8: Atmospheric Hazard Identification and Mitigation
Excavation work can disturb pockets of hazardous atmospheres, making atmospheric hazard identification and mitigation a critical safety step. These hazards aren't always obvious and can pose serious risks to your team. Here's what you need to know:
Potential Atmospheric Hazards:
- Oxygen Deficiency: Digging into low-lying areas or disturbing decaying organic matter can deplete oxygen levels, leading to asphyxiation.
- Toxic Gases: Methane (from decaying organic matter), hydrogen sulfide (often associated with sewage or sulfur deposits), and carbon monoxide (from nearby machinery or combustion) are common examples. Even seemingly small concentrations can be deadly.
- Flammable Gases: Methane and other flammable gases can create explosive atmospheres if ignited.
Identification and Mitigation Steps:
- Pre-Entry Testing: Before any worker enters an excavation, the atmosphere must be tested for oxygen content, flammable gases, and toxic gases. Use calibrated, appropriate gas meters.
- Continuous Monitoring: For deeper excavations or those with known hazard potential, consider continuous atmospheric monitoring with alarms.
- Ventilation: If hazardous atmospheres are detected, immediate ventilation is required. This might involve using blowers to force fresh air into the excavation. Assess the effectiveness of ventilation.
- Confined Space Procedures: If an excavation is classified as a confined space (limited entry/exit, poor ventilation), follow all applicable confined space entry procedures.
- Worker Training: Ensure all workers are trained on the hazards of atmospheric contamination, proper use of gas meters, and emergency procedures.
- Documentation: Record all atmospheric monitoring results, ventilation measures, and any corrective actions taken.
Step 9: Soil Management and Material Storage Best Practices
Managing excavated soil and storing materials safely isn't just about tidiness; it's a critical element in maintaining excavation stability and preventing hazards. Improper storage can create instability at the trench edge, increase the risk of materials falling into the excavation, and even undermine adjacent structures. Here's a breakdown of best practices:
The 2: 1 Rule & Beyond:
The most fundamental rule is the "2: 1 rule." This dictates that for every 1 foot of excavation depth, you must slope back the excavated material a distance of at least 2 feet. This creates a stable pile and prevents it from collapsing into the trench. However, don't rely solely on this - consider the soil type. Looser soils may require a steeper slope.
Strategic Placement & Distance:
- Maintain a Safe Distance: Store excavated material at least 2 feet away from the edge of the excavation. More distance is preferable, especially in areas with unstable soil or significant traffic.
- Avoid Overhanging: Never allow piles of soil to overhang the edge of the excavation - even slightly.
- Consider Foot Traffic: If the area has pedestrian traffic, the distance should be even greater to prevent accidental falls or destabilization.
Material Handling and Stacking:
- Controlled Removal: Use appropriate equipment (e.g., conveyors, chutes) for material removal to minimize soil spillage and disturbance.
- Stable Stacking: If stacking materials in tiers, ensure they are stable and won't topple. Use bracing or shoring as needed.
- Prevent Contamination: Keep excavated materials separate from other materials to prevent contamination.
Underlying Ground Protection:
- Address Undercutting: Pay close attention to the area immediately adjacent to the excavation. Ensure there's no undercutting or erosion that could compromise stability.
- Temporary Support: If necessary, provide temporary support to the ground around the excavation to prevent slumping.
Step 10: Communication Protocols and Emergency Response
Effective communication is the backbone of any successful excavation safety plan. It's not just about talking; it's about ensuring everyone on and around the site understands potential hazards, planned actions, and emergency procedures. Here's how to establish robust communication protocols and prepare for unexpected events.
Clear Communication Channels:
- Pre-Shift Briefings: Begin each shift with a mandatory safety briefing. Discuss the day's work, potential hazards, and safety precautions.
- Hand Signals: Establish and practice standard hand signals for common tasks and warnings, particularly for workers operating within the excavation. These are crucial when verbal communication is difficult or unsafe.
- Two-Way Radios: Equip key personnel (excavation foreman, spotters, equipment operators) with two-way radios for immediate communication. Ensure everyone knows proper radio etiquette and channel assignments.
- Spotters: Assign dedicated spotters to monitor equipment operation and worker movements around the excavation, particularly when backing up equipment or maneuvering loads.
- Regular Check-Ins: Implement a system for periodic check-ins between workers inside the excavation and those on the surface.
Emergency Response Procedures:
- Emergency Contact List: Display a readily accessible list of emergency contact numbers (police, fire department, ambulance, site supervisor, etc.).
- Cave-In Rescue Plan: Develop a written cave-in rescue plan, outlining procedures, equipment needed, and assigned roles. Conduct regular drills to ensure everyone is familiar with the plan.
- First Aid and Medical Response: Ensure a trained first-aid provider is on-site or readily available. Establish procedures for responding to injuries and summoning medical assistance.
- Evacuation Plan: Define clear evacuation routes and assembly points in case of an emergency. Practice evacuation drills to ensure everyone knows the plan.
- Incident Reporting: Establish a clear and straightforward process for reporting all incidents, near misses, and unsafe conditions. Encourage open communication and a no blame culture to facilitate accurate reporting.
Remember: Open communication and preparedness are your best defenses against excavation-related accidents.
Step 11: Daily Inspections and Record Keeping
Excavation safety isn't a set it and forget it process. Daily inspections are absolutely vital to maintaining a safe work environment and ensuring that your safety plan remains effective. These aren't just a formality; they're your frontline defense against unexpected hazards.
What to Inspect Daily:
- Protective Systems: Thoroughly examine all shoring, trench boxes, sloping/benching, and other protective measures for any signs of movement, damage, or instability.
- Soil Conditions: Reassess soil conditions. Have they changed due to rain, vibrations, or other factors? Document any changes.
- Water Accumulation: Check for any new water accumulation and ensure existing drainage systems are functioning properly.
- Access and Egress: Verify access and egress points remain clear and accessible.
- Atmospheric Hazards: If atmospheric testing is required, perform it daily and document the results.
- Overall Stability: Observe the entire excavation area and surrounding ground for any signs of potential instability.
The Power of Record Keeping:
Detailed record keeping is equally critical. A written log should include:
- Date and time of inspections
- Name of the inspector
- Observations (both positive and negative)
- Corrective actions taken (and dates completed)
- Photos documenting conditions (this is incredibly valuable!)
These records provide a valuable history of the excavation's safety performance, demonstrate due diligence, and are essential for identifying trends or recurring issues. Keep these records readily available for review and audits.
Step 12: Training and Competency Verification
Excavation safety isn't just about ticking boxes on a checklist; it's about ensuring everyone involved understands the risks and knows how to mitigate them. Robust training and ongoing competency verification are paramount. This goes beyond a quick safety briefing - it requires a documented, comprehensive approach.
What's Required?
- Initial Training: All workers entering the excavation area must receive initial training on excavation hazards, safe work practices, and the specifics of the site's safety plan. This should cover topics like soil classification, protective systems, utility location, and emergency procedures.
- Competent Person Training: The designated Competent Person must have demonstrated the knowledge, experience, and ability to identify excavation hazards and determine appropriate protective systems. This typically involves specialized training and certification.
- Refresher Training: Regular refresher training (at least annually, or more frequently based on site conditions) reinforces safe practices and updates workers on any changes to the safety plan.
- Task-Specific Training: Ensure workers receive training on any specific tasks they're performing, such as operating machinery, installing trench boxes, or conducting atmospheric monitoring.
- Documentation: Keep meticulous records of all training provided, including dates, topics covered, and attendee signatures. This documentation is vital for demonstrating compliance and identifying gaps in training.
- Practical Assessment: Don't just lecture - assess competency through practical demonstrations. Observe workers performing tasks under supervision to ensure they can apply their knowledge safely.
- Ongoing Verification: Continuously monitor worker performance and address any deficiencies promptly. Make corrections and provide additional training as needed.
A well-trained and competent workforce is the strongest line of defense against excavation-related accidents.
Step 13: Checklist Customization for Your Project
No two excavation projects are identical. What works perfectly for a shallow trench in sandy soil won't necessarily be suitable for a deep excavation near a building foundation. That's why your Excavation Safety Plan Checklist is a living document - it needs to be tailored to the specifics of your project.
Here's how to customize your checklist for maximum effectiveness:
- Review Site-Specific Hazards: Go beyond the general hazards listed and identify any unique risks posed by your location (e.g., nearby utilities not initially marked, unstable ground conditions, traffic patterns). Add new checklist items to address these.
- Consider Soil Type & Depth: Adjust protective system requirements and inspection frequencies based on the actual soil classification and the depth of the excavation. A Type A soil might require less frequent inspections than a Type C.
- Incorporate Project-Specific Procedures: If your project has unique protocols for water management, atmospheric monitoring, or material storage, add them to the checklist.
- Document Changes: Keep a record of all checklist modifications, including the date, reason for change, and the person who made it. This demonstrates your commitment to ongoing safety improvement.
- Regular Review: Revisit and update your checklist periodically (e.g., monthly, or after any significant changes to the project) to ensure it remains relevant and effective.
Remember, a customized checklist is a powerful tool for proactively identifying and mitigating risks, protecting your team, and ensuring project success.
Conclusion: Your Commitment to Excavation Safety
Excavation work presents inherent risks, but those risks are manageable with a proactive and comprehensive safety plan. This checklist serves as a foundation, but remember that true safety isn't just about ticking boxes - it's about fostering a culture of vigilance and continuous improvement. Every team member, from the project manager to the laborer, plays a vital role in ensuring the well-being of everyone on site. Regular training, open communication, and a willingness to stop work when something doesn't feel right are just as important as any physical protective system. Your commitment to excavation safety isn't just a legal obligation; it's a demonstration of your dedication to your workforce and a cornerstone of a successful project. Keep learning, keep adapting, and keep prioritizing safety above all else.
Resources & Links
- OSHA Excavation Page : The official OSHA page dedicated to excavation safety. It contains regulations, standards, training resources, and frequently asked questions. A crucial resource for understanding legal requirements.
- Call 811 - Before You Dig : The official website for locating underground utilities. Provides information on the process, local laws, and how to request utility locates.
- Federal Emergency Management Agency (FEMA) : FEMA provides general emergency preparedness information that can be relevant to excavation site safety and response plans. While not excavation-specific, preparedness principles apply.
- Conrad Brothers Excavation Safety Checklist : A downloadable excavation safety checklist offered by Conrad Brothers. Provides a comprehensive list of considerations and can serve as a good starting point for creating your own customized checklist (though always verify against OSHA requirements).
- Terratek - Excavation Safety Checklists : TerraTek's blog post provides further insights into developing a comprehensive excavation safety checklist, including considerations for different types of projects.
- Safety + Health Magazine - Excavation and Trenching : Safety + Health Magazine provides articles, case studies, and resources related to excavation safety, covering a range of topics and best practices.
- Associated General Contractors of America (AGC) : The AGC provides resources and training for construction professionals, including excavation safety. They offer webinars, courses, and publications on relevant topics.
- American National Standards Institute (ANSI) : ANSI develops and distributes standards related to safety, including those that may be relevant to excavation practices. Refer to specific ANSI standards as needed for technical details.
- Centers for Disease Control and Prevention (CDC) : The CDC provides information on health and safety hazards, including those that might be encountered during excavation projects (e.g., dust, atmospheric hazards). Useful for identifying and mitigating health-related risks.
- Engineering.com - Excavation & Trenching : Engineering.com offers articles and resources relevant to excavation safety, offering insights from a engineering perspective on potential risks and safety measures.
- Underwriters Laboratories (UL) : UL is a product safety testing and certification organization, and they have standards and certifications relevant to equipment used in excavation, such as trench boxes. Review equipment certifications to ensure compliance.
Frequently Asked Questions
What is an excavation safety plan and why do I need one?
An excavation safety plan is a document outlining the procedures and precautions to be taken before, during, and after excavation work. It's essential to protect workers from cave-ins, falling loads, and other hazards associated with digging. It's often legally required and crucial for worker safety and preventing serious accidents or fatalities.
Who needs to use this checklist template?
This checklist template is designed for anyone involved in excavation projects - contractors, site supervisors, safety officers, and workers. It's a useful tool for ensuring all necessary steps are taken regardless of the size or complexity of the excavation.
What are the key elements covered in an excavation safety plan?
A comprehensive plan typically covers site assessment (soil classification, utility location), protective systems (shoring, sloping, benching), means of egress, atmospheric testing, hazard communication, and emergency procedures. The checklist helps to ensure these elements are addressed.
What is soil classification and why is it important?
Soil classification determines the stability of the soil and guides the selection of appropriate protective systems. Different soil types (e.g., Type A, B, C) require different shoring or sloping techniques. Proper classification is critical to prevent cave-ins.
What does 'competent person' mean in the context of excavation safety?
A 'competent person' is someone who is capable of identifying excavation hazards and developing and implementing protective systems. They have the necessary training, experience, and knowledge to perform these tasks. Legal requirements dictate who can act as a competent person.
How do I locate underground utilities before digging?
Contact your local 'Call Before You Dig' service (like 811 in the US). They will mark the approximate location of underground utilities. It's also important to review available utility maps and perform visual inspections.
What are the different types of protective systems for excavations?
Common protective systems include shoring (timber, hydraulic, trench boxes), sloping, benching, and soil stabilization. The appropriate system depends on the soil type, excavation depth, and other factors.
What is a safe means of egress during excavation?
A safe means of egress means providing workers with a safe and unobstructed way to exit the excavation. This typically involves ladders, ramps, or stairs spaced no more than 25 feet apart.
What should I do if I encounter an unexpected hazard during excavation?
Immediately stop work, assess the hazard, and implement appropriate corrective actions. Consult with the competent person to determine the best course of action. Document the incident and corrective measures taken.
Where can I find more information about excavation safety regulations?
Consult your local Occupational Safety and Health Administration (OSHA) or equivalent regulatory agency for specific requirements. The OSHA website (www.osha.gov) provides extensive resources and guidelines on excavation safety.
Found this Article helpful?
Construction Management Solution Demo
Build smarter, not harder! ChecklistGuro streamlines construction projects from planning to closeout. Manage tasks, inspections, safety protocols & more - all in one place. Reduce delays, improve communication, and deliver projects on time & on budget.
Related Articles

The Ultimate Concrete Vibration Checklist Template

Unlock Value: Your Free Value Engineering Checklist Template

The Ultimate HVAC Ductwork Installation Checklist Template

The Ultimate Rebar Placement Checklist Template

Your Concrete Mix Design Verification Checklist: A Step-by-Step Guide

Backfilling & Compaction Checklist: A Foundation's Best Friend

The Ultimate Concrete Delivery & Placement Checklist Template

Your Ultimate Stakeholder Communication Plan Checklist Template
We can do it Together
Need help with
Construction?
Have a question? We're here to help. Please submit your inquiry, and we'll respond promptly.