The Ultimate Flooring Installation Checklist Template
Published: 09/02/2025 Updated: 04/20/2026
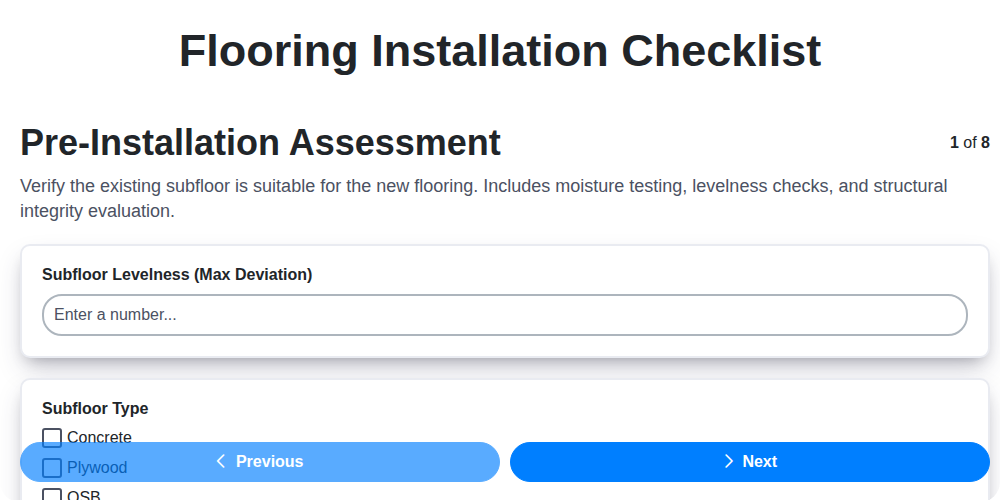
Table of Contents
- Why Use a Flooring Installation Checklist?
- Pre-Installation: Assessment & Planning
- Material Delivery & Acclimation - Setting the Stage
- Subfloor Preparation: The Foundation for Success
- Layout & Pattern Planning: Visualizing the Final Look
- Installation: Following the Manufacturer's Guidelines
- Seams, Transitions, and Trim: The Finishing Details
- Post-Installation: Clean-Up and Inspection
- Troubleshooting Common Flooring Installation Issues
- Client Walkthrough and Final Approval
- Resources & Links
TLDR: Download our free flooring installation checklist template! It guides you through every step, from assessing your subfloor and acclimating materials to the final walkthrough. It helps ensure a professional, problem-free flooring project, whether you're a DIYer or hiring a pro. Save time, avoid costly mistakes, and get beautiful floors!
Why Use a Flooring Installation Checklist?
A flooring installation is more than just laying down pretty material. It's a complex process with numerous steps, each critical to the final outcome and the longevity of your investment. Skipping even seemingly minor steps can lead to a cascade of problems down the line: squeaks, gaps, unevenness, premature wear, and even structural issues.
Using a checklist isn't just about ticking boxes; it's about ensuring a consistently high-quality job, whether you're a seasoned professional or tackling a DIY project. It helps to:
- Minimize Errors: A checklist provides a structured approach, reducing the likelihood of overlooking crucial steps.
- Improve Communication: If you're hiring a contractor, the checklist provides a clear understanding of the scope of work and allows for open communication.
- Ensure Quality: It helps maintain consistent quality, regardless of who's performing the installation.
- Save Time & Money: Identifying potential issues early prevents costly rework and delays later on.
- Protect Your Investment: A properly installed floor will last longer and perform better, protecting your investment.
Ultimately, a checklist provides peace of mind and helps you achieve the beautiful, durable flooring you deserve.
Pre-Installation: Assessment & Planning
Before a single plank or tile is laid, a thorough assessment is paramount. This isn't just about aesthetics; it's about preventing costly problems down the road. Start with a meticulous inspection of your existing subfloor. Is it concrete, plywood, or OSB? Is it level? Significant deviations from level (more than 1/4 inch over 6 feet) may require self-leveling compound. Look for signs of moisture damage - dark staining, warping, or a musty odor. A moisture meter is an invaluable tool here; readings exceeding the manufacturer's recommendations for your chosen flooring will necessitate remediation.
Beyond structural integrity, consider the existing conditions. Are there any protruding nails or screws? Is the surface clean and free of debris? Addressing these issues now prevents future squeaks, gaps, and adhesive failures.
Finally, take this opportunity to map out your flooring plan. Carefully measure the room's dimensions and consider the direction of the planks or tiles. Aligning planks with the longest wall typically makes a room feel larger, but ultimately, the best direction often depends on the room's layout and the desired aesthetic. A 'dry layout' - arranging a few rows of flooring without adhesive - can be incredibly helpful in visualizing the final result and identifying any potential layout challenges. Don't skip this!
Material Delivery & Acclimation - Setting the Stage
Getting your new flooring delivered is a moment of excitement, but don't rush into installation! The acclimation process is arguably one of the most crucial steps - and often the most overlooked. Think of it as allowing your flooring to breathe and adjust to its new environment.
Here's why it matters: Flooring materials, particularly hardwood and engineered wood, expand and contract with changes in temperature and humidity. Installing flooring that hasn't acclimated can lead to a host of problems down the line, including buckling, gapping, squeaking, and even warping.
Here's what to do:
- Check Manufacturer's Instructions: This is always your first step. They will specify the required acclimation time, which can range from 24 to 72 hours (or even longer for certain materials).
- Storage Matters: Store the flooring flat, stacked loosely, and covered to protect it from direct sunlight and extreme temperature fluctuations.
- Room Temperature & Humidity: Ideally, the acclimation process should occur in a room with a temperature and humidity level that closely matches the expected conditions after installation.
- Don't Skip It: Seriously, skipping acclimation is a gamble that's rarely worth taking. The short time investment will save you significant headaches and potential costly repairs later.
Subfloor Preparation: The Foundation for Success
The subfloor is the bedrock of your new flooring, and neglecting its condition is a recipe for squeaks, unevenness, and premature failure. Let's dive into how to tackle some common issues:
1. Unevenness: Small imperfections (less than 1/8 inch over 6 feet) can often be addressed with a layer of thicker underlayment. However, significant dips or humps require self-leveling compound. Applying self-leveling compound can be tricky; follow the manufacturer's instructions precisely regarding mixing ratios, application thickness, and drying times.
2. Moisture Problems: Moisture is the enemy of most flooring types. If you suspect a moisture issue (musty smells, visible mold, dampness), identify and fix the source before installing new flooring. This might involve repairing leaks, improving ventilation, or using a moisture barrier. A moisture meter is your best friend here - test multiple areas to get an accurate reading.
3. Loose or Damaged Boards: Loose subfloor boards (especially in plywood or OSB) need to be secured with screws. Damaged or rotting boards must be replaced. Improperly secured or damaged sections will telegraph through to the new floor, creating an uneven and unsightly result.
4. Contamination: Clean the subfloor thoroughly. This means removing old adhesive residue, nails, staples, dust, and debris. A shop vacuum and a scraper are essential tools. Residual contaminants can prevent proper adhesion of the new flooring.
5. Fastener Type Compatibility: When securing the subfloor, ensure the fasteners are appropriate for both the subfloor material and the new flooring being installed. Using the wrong fasteners can lead to squeaks or compromised adhesion.
Layout & Pattern Planning: Visualizing the Final Look
Before a single plank or tile hits the subfloor, taking the time to plan your layout and pattern is crucial for a stunning final result. It's more than just arranging pieces; it's about creating visual flow and maximizing the aesthetic appeal of your space.
Dry Lay - Your First Opportunity: We highly recommend a 'dry lay' - temporarily arranging a few rows of your flooring material without adhesive or fasteners. This allows you to visualize the final appearance and identify any potential issues early on. Pay close attention to how the pattern flows and whether the grain or tile design complements the room's architecture.
Considering the Room's Shape: Rectangular rooms often benefit from running planks or tiles parallel to the longest wall, which can make the space feel wider. In smaller rooms, a diagonal layout can create the illusion of more space. For square rooms, consider a geometric pattern or a contrasting tile border to add visual interest.
Accounting for Radiators and Fireplaces: These features will dictate where you need to make cuts and should be factored into your layout plan. Remember that the cut pieces from these areas can often be used as starting points for subsequent rows to minimize waste.
Dealing with Focal Points: If your room has a focal point like a fireplace or a large window, align the pattern to draw the eye towards it.
Waste Factor: Remember to account for waste! Complex patterns and intricate cuts will require more material. It's always better to overestimate slightly than to run short mid-project. Most manufacturers recommend adding 10-15% extra for waste, and potentially more for complex patterns.
Installation: Following the Manufacturer's Guidelines
Ignoring the manufacturer's instructions is a gamble you simply can't afford when it comes to flooring installation. These guidelines aren't arbitrary; they're the result of extensive testing and are specifically tailored to the material's performance characteristics. Every flooring type - hardwood, laminate, vinyl, tile - has unique installation requirements, from adhesive type and application techniques to expansion gap recommendations and fastening methods.
For instance, hardwood flooring often demands a specific moisture content in the subfloor and requires meticulous attention to expansion and contraction. Laminate flooring typically involves a click-lock system that needs precise alignment. Vinyl plank flooring might necessitate a self-leveling compound for a perfectly smooth surface. Tile installation demands proper mortar selection and grout application to prevent cracking and water damage.
Always have the installation manual readily available throughout the entire process. Pay close attention to details such as recommended tools, adhesive coverage, fastener spacing, and joint alignment. If you're unsure about any step, don't hesitate to consult the manufacturer's website, contact their technical support, or seek professional assistance. Cutting corners or deviating from the instructions can void warranties and lead to costly repairs down the line. Remember, a little bit of extra effort upfront translates to a beautiful, long-lasting floor.
Seams, Transitions, and Trim: The Finishing Details
The smallest details often make the biggest difference in a flooring project, and the finishing touches - seams, transitions, and trim - are no exception. These elements not only contribute to the overall aesthetic but also ensure a professional, long-lasting result.
Seam Integrity (For Tile & Plank): For tile and plank flooring, meticulous attention to seam alignment is crucial. Tight, consistent seams create a visually appealing and structurally sound floor. Use a tile leveling system for tile installations to ensure perfectly flat seams. With plank flooring, ensure the tongue-and-groove connections are tight and properly engaged. A slight stagger in the seams is generally recommended for visual appeal and added stability, but avoid lining seams directly above one another.
Transitions: Bridging the Gap: Transition strips are essential where different flooring types meet, or at doorways leading to adjacent rooms. Choose a transition strip that complements the style and color of your new flooring. Options range from simple metal strips to more decorative wood or composite trims. Ensure the transition strip is securely fastened and flush with both flooring surfaces to prevent tripping hazards. Consider using a threshold if there's a significant height difference between the floors.
Baseboards & Quarter Round: The Final Frame: Baseboards are more than just decorative; they cover expansion gaps around the perimeter of the room, concealing the necessary space between the flooring and the walls. Quarter round trim is often installed along the baseboard to create a softer, more refined edge. Properly secured trim not only provides a finished look but also helps to protect the flooring from damage and maintain consistent expansion gaps. Caulking the top edge of the baseboard where it meets the wall is a finishing touch that creates a watertight seal.
Post-Installation: Clean-Up and Inspection
The excitement of new floors is palpable, but don't rush off just yet! Proper post-installation care is crucial for protecting your investment and ensuring long-term beauty. Immediately after installation, a thorough clean-up is essential. This involves removing all debris - sawdust, adhesive residue, installer markings, and any protective coverings. Use a soft broom or vacuum with a brush attachment to avoid scratching the new surface.
Next, a deep inspection is necessary. Get down on your hands and knees - literally! Examine the entire floor under good lighting for any imperfections: gaps between planks or tiles, unevenness, scratches, or adhesive smears. Address any minor issues immediately. Small scratches can often be spot-treated with a specialized repair kit (check your flooring manufacturer's recommendations). Larger inconsistencies or damage may require professional intervention. Document any issues with photos and written notes for future reference, particularly if you have a warranty. Finally, adhere strictly to the manufacturer's cleaning and maintenance guidelines to preserve the look and lifespan of your beautiful new floors.
Troubleshooting Common Flooring Installation Issues
Even with meticulous planning and execution, flooring installations don't always go perfectly smooth. Here's how to tackle some of the most frequent issues:
1. Squeaks & Noises: These often indicate an issue with the subfloor. Re-securing the subfloor to the joists is usually the first step. Adding a sound-dampening underlayment can also significantly reduce noise. For floating floors (like laminate or vinyl plank), double-check that the expansion gaps are adequate and that the floor isn't overly tight against walls.
2. Gaps Between Planks/Tiles: Uneven subfloors or improper expansion gap management are often culprits. Shimming areas of the subfloor can help level the surface. For tile, regrouting might be necessary to fill minor gaps. Remember to re-evaluate the expansion gaps and ensure they haven't closed up due to humidity changes.
3. Warping or Buckling: This usually points to moisture issues or inadequate acclimation. Ensure the room's humidity levels are within the manufacturer's recommended range. If warping is significant, it might require replacing the affected planks/tiles. Prevention is key: prioritize proper acclimation and address any moisture problems before installation.
4. Difficulty Cutting: Precision is paramount. Use the right tools for the job - a quality circular saw, miter saw, or tile cutter. For intricate cuts around pipes and door frames, a jigsaw can be helpful. Take your time and double-check measurements before each cut.
5. Adhesive Failure (for glue-down installations): This could be due to an incompatible adhesive or a dirty subfloor. Ensure the adhesive is specifically designed for the flooring material and subfloor type. Thoroughly clean the subfloor to remove any contaminants.
Important Note: If you are unsure about how to resolve any issues, consult with a professional flooring installer. Incorrect repairs can damage the flooring and compromise its longevity.
Client Walkthrough and Final Approval
The final stage of any flooring project is the client walkthrough - a crucial opportunity to confirm everything meets their expectations and address any lingering concerns. This isn't just a formality; it's your chance to solidify a positive relationship and ensure lasting satisfaction.
What to Expect During the Walkthrough:
- Be Prepared: Have a checklist ready to reference, detailing all the completed tasks and any warranty information.
- Guided Tour: Conduct a thorough walk-through of the entire space, pointing out key features and highlighting the quality of workmanship.
- Encourage Feedback: Actively solicit feedback from the client. Ask open-ended questions like, "What are your initial impressions?" or "Is there anything you're not completely satisfied with?"
- Address Concerns Promptly: If any issues are raised, acknowledge them seriously and offer a clear plan of action for resolution. Even if the concern is minor, showing a willingness to address it demonstrates professionalism.
- Document Everything: Note any concerns raised and the agreed-upon resolution in writing. This protects both you and the client.
- Warranty Information: Clearly explain the warranty details for the flooring materials and the installation labor. Provide written documentation.
- Final Approval: Once all concerns are addressed and the client is happy, obtain their written approval, signifying their acceptance of the completed work. This can be a simple form or an email confirmation.
A positive client walkthrough leads to happy clients, referrals, and a reputation for excellence. Don't rush this final step - it's your opportunity to leave a lasting positive impression.
Resources & Links
- The Spruce : A comprehensive home improvement website with numerous articles on flooring, installation tips, and DIY guides. Great for general information and inspiration related to flooring.
- Family Handyman : Offers practical advice, projects, and how-to guides for homeowners, including detailed instructions for flooring installation and subfloor preparation.
- This Old House : A trusted resource for home renovation and repair projects. Their flooring section offers expertise and insights valuable for both DIYers and professionals.
- Hansen Wholesale Flooring : A flooring supply company with informative articles, how-to videos, and resources on different flooring types and installation techniques. Useful for understanding material specifics.
- Flooring America : A flooring retailer with a learning center filled with how-to guides, tips, and product information. Helpful for understanding different flooring materials and installation considerations.
- Woodworking Talk : While focused on woodworking, it has sections on flooring and woodworking-related tasks that can be helpful for understanding subfloor preparation and working with wood flooring.
- Home Depot : Offers a wide range of flooring products and installation guides. Their website includes how-to videos and articles demonstrating various flooring installation techniques. Check their 'How-To' section.
- Lowe's : Similar to Home Depot, Lowe's provides detailed product information, installation guides, and videos for various flooring types. Check their 'How-To' or 'Projects' section.
- Build with Bella : Blog focused on flooring and home design. They frequently cover installation tips, material comparisons, and pattern options. Excellent visual examples for layout planning.
- Flooring Superstore : Provides information, product specifications, and helpful guides related to flooring installation and maintenance, including sections on subfloor preparation and material acclimation.
- Pro Tools Direct : While primarily a tool supplier, their blog often features articles on flooring installation techniques and equipment recommendations - useful for understanding tools needed for each step.
- Contractor Calculator : Offers calculators and resources relevant to flooring projects. Useful for calculating material quantities, estimating costs, and managing timelines (particularly for the 'Assessment & Planning' section).
Frequently Asked Questions
What is this checklist template for?
This checklist template is designed to guide you through every step of a flooring installation project, from pre-installation preparation to the final cleanup. It aims to ensure a professional and successful flooring installation, minimizing potential issues and ensuring quality workmanship.
Who is this checklist for?
This checklist is suitable for both DIY enthusiasts and professional flooring installers. It's helpful for anyone looking to ensure they haven't missed any crucial steps during a flooring installation project.
What types of flooring does this checklist cover?
The checklist is generally applicable to most common flooring types, including hardwood, laminate, vinyl (LVT/LVP, sheet vinyl), carpet, and tile. Specific steps may need slight adjustments based on the flooring material.
Is the checklist customizable?
Yes! The template is designed to be customized. You can add, remove, or modify steps to better suit your specific project requirements, the flooring material you've chosen, and local building codes.
How do I access and use the checklist template?
The article linked in the title provides a link to download the checklist template. Simply download the file (likely a PDF or spreadsheet), print it out, and work your way through each item, checking off completed tasks.
What is the importance of the 'Acclimation' step?
Acclimation is crucial! It allows the flooring material to adjust to the room's temperature and humidity, reducing the risk of warping, buckling, or gapping after installation. The checklist provides specific acclimation time guidelines.
What should I do if I'm unsure about a step on the checklist?
If you're unsure about any step, research it thoroughly! Consult the flooring manufacturer's instructions, watch instructional videos, or seek advice from a professional flooring installer. Don't proceed if you are uncomfortable or lack the necessary skills.
Does this checklist include safety precautions?
Yes, the checklist incorporates important safety precautions related to working with tools, handling materials, and protecting yourself from potential hazards. Always prioritize safety throughout the installation process.
How can I ensure the subfloor is properly prepared?
Subfloor preparation is critical for a successful installation. The checklist includes steps for inspection, leveling, cleaning, and repairing the subfloor to ensure a stable and even surface for the new flooring. Follow the manufacturer's recommendations closely.
What are some common mistakes to avoid during flooring installation?
Common mistakes include improper subfloor preparation, skipping acclimation, using the wrong adhesives or underlayment, and not following the manufacturer's instructions. The checklist helps you avoid these pitfalls by providing a thorough guide.
Found this Article helpful?
Construction Management Solution Demo
Build smarter, not harder! ChecklistGuro streamlines construction projects from planning to closeout. Manage tasks, inspections, safety protocols & more - all in one place. Reduce delays, improve communication, and deliver projects on time & on budget.
Related Articles

The Ultimate Concrete Vibration Checklist Template

Unlock Value: Your Free Value Engineering Checklist Template

The Ultimate HVAC Ductwork Installation Checklist Template

The Ultimate Rebar Placement Checklist Template

Your Concrete Mix Design Verification Checklist: A Step-by-Step Guide

Backfilling & Compaction Checklist: A Foundation's Best Friend

The Ultimate Concrete Delivery & Placement Checklist Template

Your Ultimate Stakeholder Communication Plan Checklist Template
We can do it Together
Need help with
Construction?
Have a question? We're here to help. Please submit your inquiry, and we'll respond promptly.