Your Paving Project's Blueprint: A Free Checklist Template
Published: 09/01/2025 Updated: 12/13/2025
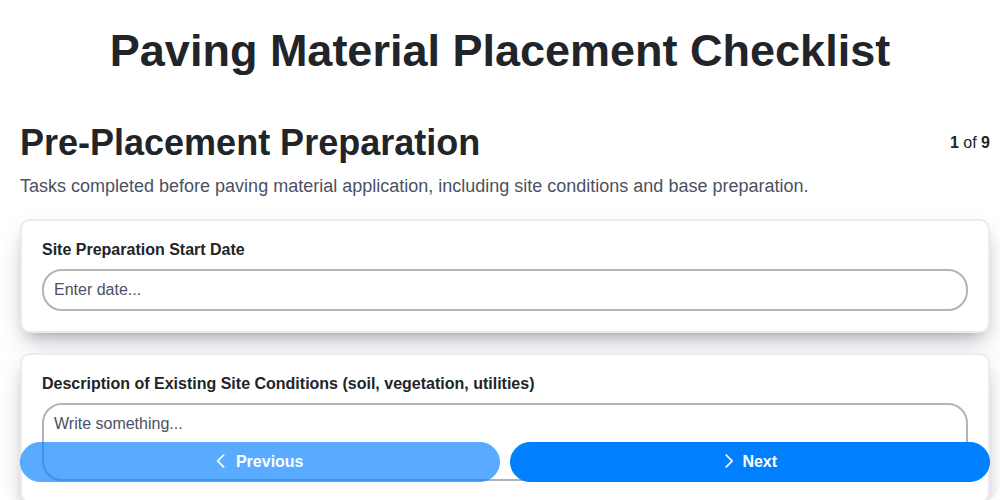
Table of Contents
- Introducing Your Paving Project's Blueprint
- Why a Paving Checklist Matters
- Free Checklist Template: A Quick Overview
- Pre-Placement Essentials
- Material Delivery & Storage: Setting the Stage
- Subgrade & Base Course Inspection: The Foundation
- Paving Material Quality Control: Ensuring Excellence
- Placement & Spreading: Precision in Action
- Compaction: Building Strength & Durability
- Jointing & Sealing (If Applicable): Long-Term Performance
- Finishing & Cleanup: The Final Touches
- Documentation & Sign-Off: Protecting Your Work
- Navigating Potential Challenges
- Maximizing Your Checklist's Value
- Resources & Links
TLDR: Need to ensure your paving project goes smoothly? Download our free checklist template! It breaks down every step - from prep to sign-off - helping you avoid costly mistakes, stay on schedule, and deliver a top-quality paving surface. Easy to use and customizable to fit any project!
Introducing Your Paving Project's Blueprint
A paving project isn't just laying down a surface; it's a complex process requiring meticulous planning and execution. Think of your paving checklist as the project's blueprint - a detailed guide ensuring every step aligns with the overarching goals of quality, durability, and safety. This isn't a nice-to-have document; it's the backbone of a successful project, preventing costly errors, maintaining consistency, and clearly defining responsibilities for everyone involved. A well-defined checklist proactively addresses potential pitfalls, fosters clear communication between team members, and provides a verifiable record of the work completed - a critical asset for quality control, dispute resolution, and future reference. By treating your paving checklist as your project's guiding star, you're setting the stage for a flawless outcome and a satisfied client.
Why a Paving Checklist Matters
Beyond just ticking boxes, a well-executed paving checklist is your project's insurance policy. It's the difference between a job done right and a costly headache down the line. Consider this: paving isn't cheap. Materials, labor, and equipment represent a significant investment. A checklist systematically reduces the risk of errors that can lead to premature failure, expensive repairs, and dissatisfied clients.
Think about it - inconsistencies in material quality, improper compaction, or overlooked joint sealing can all compromise the longevity and performance of a paved surface. A checklist ensures a consistent approach to each step, minimizing these risks and promoting a higher quality outcome. Furthermore, it provides clear documentation, proving adherence to specifications, which is invaluable for dispute resolution and warranty claims. Ultimately, a paving checklist isn't just about following steps; it's about safeguarding your investment and upholding a reputation for quality craftsmanship.
Free Checklist Template: A Quick Overview
Ready to put this knowledge into action? We've created a free, downloadable checklist template to guide your paving material placement process. This handy resource summarizes the key steps outlined in this article, providing a practical tool for ensuring quality and consistency on every project.
What's Included:
- Step-by-Step Breakdown: A concise list of all critical phases, from pre-placement preparation to final documentation.
- Checkboxes for Easy Tracking: Simple checkboxes allow for quick and easy verification of each task.
- Notes Section: Space to add project-specific details and observations.
- Printable Format: Easily printable for on-site use.
This template is a starting point - remember to customize it to fit your unique project requirements and always prioritize safety. Happy paving!
Pre-Placement Essentials
Before a single paving stone is laid or a ribbon of asphalt is poured, the groundwork - quite literally - is absolutely critical. Rushing this initial phase is a recipe for costly rework and compromised longevity. This isn't about checking boxes; it's about setting the stage for a flawless and durable paving surface.
First and foremost, thoroughly review the project specifications. Don't skim - understand. These documents are your roadmap, outlining material requirements, tolerances, and the expected performance of the finished project. Misinterpreting a seemingly minor detail here can lead to significant problems down the line.
Next, carefully assess the site itself. Is access clear and adequate for heavy equipment? Does the existing layout precisely match the design plans? Underground utility locations must be positively identified and marked. A single missed utility line can halt the entire project and potentially cause serious injury. Always call 811 before you dig!
The weather is also a significant factor. Avoid placing materials when conditions are unfavorable - extreme heat can cause premature drying, while rain can compromise the base and lead to instability. Finally, ensure all equipment, from pavers to compactors, is in top working order and properly calibrated. A well-maintained machine is a safe and efficient machine.
Material Delivery & Storage: Setting the Stage
Proper material delivery and storage are the unsung heroes of a successful paving project. Rushing this stage or neglecting best practices can lead to material degradation, delays, and costly rework later on. Here's how to ensure your materials arrive safely and are stored correctly:
Planning for Success:
- Advance Coordination: Don't wait until the last minute. Communicate with suppliers well in advance to coordinate delivery schedules, ensuring they align with your project timeline and site readiness.
- Site Access & Space: Confirm sufficient space is available at the site for unloading and short-term storage. Consider access limitations and maneuvering space for delivery trucks.
- Material Type Considerations: Different materials have different storage needs. Asphalt needs to maintain temperature, aggregates require protection from moisture, and concrete requires prompt use or proper curing conditions.
Upon Delivery: Inspection & Verification
- Manifest Verification: Carefully compare the delivery manifest against your purchase order and project specifications. Note any discrepancies immediately.
- Visual Inspection: Thoroughly inspect the materials for any signs of damage during transit - cracks, leaks, contamination, or compromised packaging. Document any issues with photos.
- Temperature Checks (Asphalt): For asphalt mixes, verify the temperature is within the specified range upon delivery.
Storage Best Practices:
- Covering & Protection: Protect materials from the elements. Cover aggregates to prevent moisture absorption, shield asphalt from sun and rain, and protect concrete from freezing.
- Temperature Control (Asphalt): Maintain asphalt mix temperatures within the recommended range to prevent cooling or overheating. Utilize insulated blankets or heaters as needed.
- Inventory Management: Implement a system for tracking material quantities and expiry dates (if applicable). A "first-in, first-out" (FIFO) approach helps ensure material freshness.
- Secure Storage: Keep the storage area clean, organized, and secure to prevent unauthorized access and potential damage.
Subgrade & Base Course Inspection: The Foundation
A robust subgrade and base course are the bedrock of any successful paving project. Skimping on this foundational work inevitably leads to premature failure, costly repairs, and a compromised final product. Before a single paving stone or asphalt layer is laid, a thorough inspection is paramount.
What to Look For:
- Compaction Density: This is arguably the most critical factor. The subgrade and base course must be compacted to the specified density, typically measured using a nuclear density gauge or sand cone test. Uneven compaction leads to differential settlement.
- Leveling and Grading: Verify that the surface is level and graded according to the project plans. Minor deviations can impact drainage and create uneven paving surfaces. Use a laser level or transit to confirm elevations.
- Drainage: Ensure proper drainage is in place to prevent water accumulation. Standing water weakens the subgrade and accelerates deterioration. Inspect for adequate slope and functionality of drainage structures.
- Material Uniformity: Check for uniformity in the base course material. Segregation or large voids can compromise structural integrity.
- Debris Removal: Any rocks, vegetation, roots, or other debris left on the surface will create voids and weaken the final pavement. A clean, prepared surface is essential.
- Moisture Content: Excessive moisture can hinder compaction and weaken the base course. If the material is too wet, allow it to dry before proceeding.
- Organic Matter: Organic matter decomposes and creates voids over time. Check for and remove any significant amount of organic material.
Documentation: All inspection findings, density test results, and any corrective actions taken should be meticulously documented and stored for future reference.
Paving Material Quality Control: Ensuring Excellence
Simply looking at a batch of paving material isn't enough to guarantee a durable and long-lasting result. Robust quality control is the backbone of any successful paving project, going far beyond superficial assessments. This involves a series of tests and checks, both before, during, and after material delivery to ensure it consistently meets project specifications.
Pre-Delivery Assurance:
The quality control process begins before the material even arrives on site. This includes verifying the supplier's certifications and reviewing their quality assurance program. It's prudent to request and review recent test reports for the material you're about to receive.
On-Site Testing - What to Look For:
Once the materials are delivered, a thorough inspection and testing regime should be implemented. Common tests include:
- Aggregate Gradation: Determines the particle size distribution of aggregates, critical for proper compaction and stability.
- Asphalt Content: Precise measurement of asphalt binder in asphalt mixes to ensure optimal bonding and flexibility.
- Concrete Slump: Measures the consistency of concrete mixtures - too wet or too dry can compromise strength and workability.
- Air Content (Concrete): Determines the amount of air entrained in concrete, crucial for freeze-thaw resistance.
- Density & Moisture Content: Assesses the density and moisture content of aggregates to ensure accurate mix design calculations.
- Marshall Stability & Flow (Asphalt): Evaluates the stability and workability of asphalt mixtures.
Documentation and Traceability:
Meticulous record-keeping is essential. Every test result, including date, time, location, and technician involved, must be accurately documented. This creates a traceable record for quality assurance and allows for swift identification and correction of any issues that may arise. Maintaining clear communication with the supplier is also vital - promptly report any non-conformances and work collaboratively to resolve them. Don't hesitate to reject loads that fail to meet the required specifications. Your commitment to quality assurance directly contributes to the project's long-term success.
Placement & Spreading: Precision in Action
The initial placement and spreading of paving material form the bedrock of a successful project. Rushing this stage or taking shortcuts here can lead to issues like uneven surfaces, cold joints, and ultimately, premature failure. Accuracy and consistency are paramount.
Layer Thickness & Consistency:
Before a single ton of material is laid, verify the planned layer thickness aligns precisely with the project specifications. This isn't just about volume; it's about ensuring adequate compaction potential and minimizing future settlement. Use calibrated screeds and automated leveling systems when possible to maintain consistent thickness across the entire paving area. Minor variations can compound over time.
Equipment Calibration - The Cornerstone of Accuracy:
Your paver is only as good as its calibration. Regularly check and adjust the paver's screed, width, and travel speed to ensure accurate material distribution. This includes verifying the fineness of the strike-off plate and ensuring consistent material feed. Improper calibration can lead to variations in thickness, inconsistent density, and difficulties in achieving a smooth, even surface.
Joint Alignment & Marking:
Pay meticulous attention to the location and alignment of future joints. Pre-mark these locations clearly before placement to guide the paving process. Consistent joint spacing isn't just aesthetic; it facilitates proper control of expansion and contraction, mitigating cracking and surface upheaval.
Addressing Segregation & Foreign Materials:
During placement, be vigilant for signs of material segregation - where aggregates and asphalt (or cement) separate. Immediately address any segregation by redistributing the material or adjusting the paving process. Similarly, remove any foreign materials (rocks, debris, vegetation) that could compromise the integrity of the paving layer.
Maintaining a Consistent Paving Train:
Ensure a smooth, coordinated workflow between the material delivery, paver operation, and compaction crew. A disrupted paving train can lead to cold joints, inconsistencies in material temperature, and difficulties in achieving uniform compaction. Communication is key to maintaining a consistent and efficient paving process.
Compaction: Building Strength & Durability
Achieving proper compaction is arguably the most critical step in creating a durable and long-lasting paving surface. Insufficient compaction leads to premature failure, rutting, and increased maintenance costs. Conversely, over-compaction can also cause issues, such as surface distress or roller marks. The goal is to achieve the specified density without compromising the structural integrity of the pavement.
The compaction process typically involves multiple passes with different types of rollers. A lighter roller, often a vibratory roller, is used for initial breakdown, achieving a uniform density and consolidating the material. Following the initial pass, one or more intermediate rolling passes are performed, often with a pneumatic or steel-wheeled roller, to further increase density and smooth the surface. Finally, a finishing roller, again often steel-wheeled, is used to produce a smooth, uniform surface texture and achieve the target density.
Density is verified through field testing, typically using a nuclear density gauge or a sand cone test. Results must meet the project specifications. Maintaining a consistent roller pattern is crucial for even compaction and preventing localized areas of higher or lower density. Operator skill and equipment calibration are equally important; improperly trained operators or poorly maintained equipment can negatively impact compaction quality. Remember, proper compaction isn't just about ticking a box; it's about building a foundation for long-term performance.
Jointing & Sealing (If Applicable): Long-Term Performance
Joints and sealing aren't just about aesthetics; they're critical components for the long-term performance and structural integrity of your paved surface. Without proper attention to these details, you risk premature cracking, water infiltration, and ultimately, costly repairs.
The primary function of joints is to accommodate movement caused by temperature fluctuations and ground settlement. Without these controlled release points, the paving material would be subjected to immense stress, leading to uncontrolled cracking. Different types of joints exist - contraction joints (designed to create weakness points for cracking), expansion joints (allowing for expansion), and construction joints (where pours meet).
Sealing these joints is an equally important step. The sealant acts as a barrier, preventing water and debris from entering the joints, which can erode the base material and accelerate deterioration. It also protects the joint from the damaging effects of freeze-thaw cycles.
Choosing the Right Sealant: The selection of appropriate sealant material is vital. Considerations include:
- Material Compatibility: Ensure the sealant is compatible with the paving material.
- Flexibility: The sealant must remain flexible to accommodate joint movement.
- Durability: Choose a sealant with proven durability and resistance to weathering.
- UV Resistance: Sunlight exposure can degrade some sealants; choose a UV-resistant option.
Proper Installation: Even the best sealant is ineffective if improperly installed. Following the manufacturer's instructions meticulously is essential, including proper surface preparation, joint cleaning, and application techniques. Regular inspection and re-sealing (typically every 3-5 years, depending on sealant type and traffic) will maximize the lifespan of your paving project and prevent costly future problems.
Finishing & Cleanup: The Final Touches
A pristine paving job isn't just about a smooth, level surface; it's about the overall presentation. This phase is your chance to elevate the project from functional to truly impressive.
Surface Perfection: Immediately after compaction, address any minor surface irregularities. This might involve a light touch with a drag or a quick pass with a specialized finishing tool to eliminate any roller marks or minor imperfections.
Edge Details are Critical: Properly formed and finished edges aren't just aesthetically pleasing; they're crucial for preventing water infiltration and protecting the pavement edges from damage. Ensure edges are sharp and consistent with the design specifications.
Debris Removal - Thoroughness Matters: Every stone, bit of dirt, or stray piece of material detracts from the final result. A thorough sweep, often followed by a power wash (depending on the material), will leave the surface clean and ready for use. Don't overlook the surrounding area; ensuring the adjacent landscape is tidy demonstrates professionalism and attention to detail.
Final Inspection - A Critical Review: Conduct a meticulous final inspection, ideally with a fresh perspective (perhaps a walk-backwards view). Look for any overlooked imperfections, and rectify them promptly. This final check is the last opportunity to ensure the paving meets or exceeds expectations.
Documentation & Sign-Off: Protecting Your Work
Documentation isn't just about ticking boxes; it's your project's historical record - a vital asset for resolving disputes, ensuring quality control, and facilitating future maintenance. A complete and organized documentation system protects your work and strengthens your reputation.
What to Document:
- Material Records: Track every material used, including batch numbers, supplier information, test results (aggregate gradation, asphalt content, slump, etc.), and delivery dates. Keep receipts and invoices organized.
- Testing Results: Document all density tests, compaction tests, and quality control tests performed, including dates, locations, and results. Keep calibration records for testing equipment.
- Inspection Reports: Record all inspections conducted, including the inspector's name, date, findings, and any corrective actions taken.
- Photographic Evidence: Take photos at each stage of the process - pre-placement, during placement, compaction, and the finished product. Photos serve as valuable visual records.
- Communication Logs: Document any significant communications with the project owner, engineer, or other stakeholders, including meeting minutes and email correspondence.
- Change Orders: If any changes are made to the original plans, document them thoroughly with detailed change orders approved by all parties.
Sign-Off Procedures:
- Formal Inspection: Conduct a final, formal inspection with the project owner and/or engineer to verify compliance with specifications.
- Punch List: Address and resolve any items identified on a punch list.
- Written Approval: Obtain written approval from the project owner and/or engineer confirming that the work is complete and meets all requirements.
- As-Built Drawings: Create as-built drawings accurately reflecting the final paving layout, elevations, and any deviations from the original plans. These drawings are invaluable for future maintenance and repairs.
Digital Management:
Consider utilizing a digital platform to store and manage your documentation. This simplifies organization, enhances accessibility, and facilitates collaboration among team members. Cloud-based storage options provide an added layer of security and redundancy. Proper documentation is an investment in the long-term success of your projects.
Navigating Potential Challenges
Even with meticulous planning and a robust checklist, paving projects aren't without their potential pitfalls. Recognizing these challenges proactively allows for swift course correction and minimizes disruption. Here's a look at some common hurdles and how to approach them:
Weather Woes: Unexpected rain, excessive heat, or freezing temperatures can significantly impact paving operations. Have contingency plans in place, such as scheduling work around weather forecasts, utilizing temporary heating or cooling methods, and adjusting material specifications.
Material Supply Disruptions: Shortages or delays in material delivery can halt progress. Maintain open communication with suppliers, explore alternative sourcing options, and build buffer time into the project schedule.
Subgrade Instability: Unforeseen ground conditions, like soft soils or buried obstructions, can compromise the subgrade's ability to support the pavement. Thorough subsurface investigations and potential soil stabilization techniques are crucial.
Equipment Malfunctions: Breakdown of critical equipment like pavers or rollers can create significant delays. Implement preventative maintenance programs and have backup equipment available if possible.
Coordination Issues: Paving projects often involve multiple trades and stakeholders. Clear communication, defined responsibilities, and regular coordination meetings are vital to avoid conflicts and delays.
Unexpected Utilities: Even with thorough utility locates, encountering unmarked or unmapped utilities can be disruptive. Establish a clear protocol for handling unexpected utility encounters, prioritizing safety and minimizing impact.
Quality Control Deviations: Identifying deviations from quality control specifications requires immediate attention. Implement corrective actions promptly to ensure the final product meets the required standards.
Maximizing Your Checklist's Value
A checklist is only as good as how you use it. It's not just about marking items complete; it's about embedding it into your workflow and using it to drive continuous improvement. Here's how to maximize your paving placement checklist's value:
1. Training & Communication is Paramount: Don't just hand out the checklist - ensure everyone on the team understands its purpose and their role in following it. Regular toolbox talks and refresher training are essential.
2. Make it a Dynamic Tool: This isn't a static document. Review and update the checklist periodically, especially after each project. Incorporate lessons learned, address any recurring issues, and reflect changes in best practices.
3. Encourage Open Feedback: Foster a culture where team members feel comfortable pointing out potential improvements to the checklist or the process itself. Their frontline perspective is invaluable.
4. Integrate with Project Management Software: Linking your checklist to your project management software allows for better tracking, accountability, and overall project visibility.
5. Embrace Technology: Consider utilizing digital checklist apps or platforms. These tools often offer features like photo documentation, automated reporting, and real-time updates, further streamlining the process.
6. Data-Driven Decisions: Use the checklist data to identify trends, pinpoint areas for improvement, and measure the effectiveness of your paving processes. Are certain steps consistently causing delays or quality issues? Analyze the data to find solutions.
7. Proactive Problem Solving: Don't wait for problems to arise. Regularly review checklist data to identify potential risks and implement preventative measures.
Resources & Links
- National Asphalt Pavement Association (NAPA) : The NAPA is a leading resource for asphalt pavement information, including best practices, technical guidelines, and industry standards. Excellent for understanding pavement construction principles.
- Portland Cement Association (PCA) : Provides technical information and resources related to concrete paving, including design, construction, and maintenance. Useful if your project involves concrete.
- International Concrete Pavement Institute (ICPI) : Focuses specifically on interlocking concrete pavement (ICPs), also known as pavers. Provides guidance on design, installation, and maintenance.
- Federal Highway Administration (FHWA) : The FHWA offers extensive information on pavement engineering and construction, including specifications, guidelines, and research reports. Useful for understanding government standards.
- State Department of Transportation (DOT) Websites : Most state DOT websites (e.g., Caltrans, TxDOT, NYSDOT) provide detailed specifications, design manuals, and construction guidelines relevant to paving projects in that state. Crucial for adhering to local regulations.
- ASTM International : ASTM develops and publishes technical standards for materials, products, systems, and services. Paving materials and construction processes often reference ASTM standards for quality control.
- Concrete Construction Magazine : A leading industry publication covering all aspects of concrete construction, including paving. Articles often discuss best practices, new technologies, and project management.
- ForConstructionPros : A comprehensive website with news, articles, and resources for the construction industry, including a section on paving and asphalt. Provides practical advice and insights.
- Builder Online : While geared towards residential construction, Builder Online covers a range of construction topics and includes information related to paving, especially for driveways and walkways. Provides insights into contractor perspectives.
- The Construction Zone : Offers a variety of construction resources, including guides, checklists, and templates (though not specifically paving focused, general construction principles apply).
- Pro Realty Training : This website provides guides and resources for real estate professionals, which may offer information related to paving project management from a property perspective.
- Home Depot (Paving Supplies) : While primarily a retailer, Home Depot's website often has informative guides and product information related to paving materials and basic techniques. Good for understanding homeowner level considerations.
Frequently Asked Questions
What is this checklist template for?
This checklist template is designed to help you plan and execute your paving project, ensuring you don't miss any crucial steps from initial planning to final inspection. It's applicable to various paving materials like asphalt, concrete, pavers, and more.
Is this checklist truly free?
Yes! We believe everyone deserves a tool to help them succeed with their paving project. The checklist template is completely free to download and use.
What file format will the checklist be in?
The checklist is available as a downloadable PDF file. This format is easily printable and accessible on most devices.
What kind of paving projects is this checklist suitable for?
This checklist is versatile and suitable for a wide range of paving projects, including driveways, patios, walkways, and more. It can be adapted for both small and large projects.
Do I need to have any prior paving experience to use this checklist?
No, this checklist is designed for users of all experience levels. It breaks down the process into manageable steps, even if you're a complete beginner.
What information do I need to gather before using the checklist?
Before using the checklist, it's helpful to have a general idea of your project scope, including the desired paving material, area size, budget, and any existing site conditions you need to consider.
How do I access and download the checklist template?
Simply click on the link provided within the article to download the free checklist template as a PDF file.
Found this Article helpful?
Construction Management Solution Demo
Build smarter, not harder! ChecklistGuro streamlines construction projects from planning to closeout. Manage tasks, inspections, safety protocols & more - all in one place. Reduce delays, improve communication, and deliver projects on time & on budget.
Related Articles

The Ultimate Concrete Vibration Checklist Template

Unlock Value: Your Free Value Engineering Checklist Template

The Ultimate HVAC Ductwork Installation Checklist Template

The Ultimate Rebar Placement Checklist Template

Your Concrete Mix Design Verification Checklist: A Step-by-Step Guide

Backfilling & Compaction Checklist: A Foundation's Best Friend

The Ultimate Concrete Delivery & Placement Checklist Template

Your Ultimate Stakeholder Communication Plan Checklist Template
We can do it Together
Need help with
Construction?
Have a question? We're here to help. Please submit your inquiry, and we'll respond promptly.