The Ultimate Plumbing Pipe Pressure Testing Checklist Template
Published: 09/02/2025 Updated: 05/11/2026
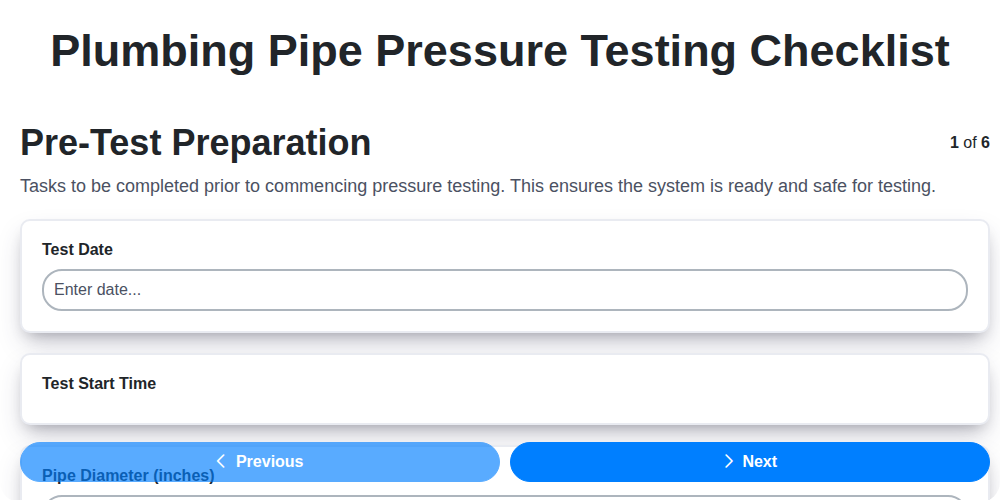
Table of Contents
- Why Pressure Testing is Essential
- Gathering Your Tools and Materials
- Preparing the Plumbing System for Testing
- Setting Up the Pressure Testing Equipment
- Applying Pressure and Monitoring for Leaks
- Interpreting Results: Pass or Fail
- Documenting Your Findings
- Post-Test Procedures: Safe System Return
- Safety First: Key Precautions
- Understanding Local Codes and Regulations
- Resources & Links
TLDR: Need to prove your plumbing is leak-free? This template gives you a step-by-step guide - from prepping the area to documenting results - ensuring a safe and thorough pressure test, saving you time and potential headaches. Download it now and protect your pipes!
Why Pressure Testing is Essential
Beyond simply verifying that pipes connect, pressure testing is the ultimate safeguard against costly and disruptive plumbing failures. Imagine the stress of discovering a leak behind a wall - the demolition, the repairs, the potential for water damage and mold. Pressure testing proactively identifies weaknesses before they become problems. It's not just about meeting code; it's about preventing headaches and protecting your investment. A successful pressure test provides documented assurance of a reliable plumbing system, giving you peace of mind knowing your plumbing is performing as intended. Think of it as preventative maintenance on a critical component of your home or business.
Gathering Your Tools and Materials
Before you even think about applying pressure, assembling the right tools and materials is crucial for a successful and safe test. Skimping here can lead to inaccurate results, damaged equipment, and potential hazards. Here's a breakdown of what you'll need:
- Calibrated Pressure Gauge: This is your primary instrument. Ensure it's the appropriate range for the anticipated test pressure and has been recently calibrated to ensure accuracy. A gauge with a clear, easy-to-read display is essential.
- Pressure Source: This could be a compressed air source (air compressor) or a water supply. Ensure the pressure source is capable of delivering the required pressure consistently.
- Test Fittings & Adapters: You'll need fittings to connect the pressure gauge to the test section, as well as adapters to ensure compatibility with the existing plumbing system. Consider using brass or stainless steel fittings for durability.
- Sealant/Thread Seal Tape (Teflon Tape): Essential for creating leak-tight connections at all threaded joints.
- Cap/Plug Material: Materials for capping off the plumbing lines that are not being tested.
- Leak Detection Solution (Soap Solution): A simple mixture of soap and water to help pinpoint pinhole leaks by creating bubbles.
- Measuring Tape/Ruler: Useful for documenting distances and positioning equipment.
- Safety Glasses & Gloves: Essential personal protective equipment.
- Wrench/Adjustable Wrench: For tightening fittings.
- Clean Rags/Towels: For cleaning and wiping up any spills.
Preparing the Plumbing System for Testing
Before you even touch the pressure gauge, meticulous preparation of the plumbing system is paramount. This phase isn's just about convenience; it's about ensuring accurate and reliable test results and minimizing potential hazards.
First, meticulously review the plumbing plans and specifications for the section under scrutiny. Understanding the design intent and material types used is vital for interpreting any anomalies detected during the test. Clearly define the boundaries of the test area - isolating the specific piping run you're evaluating.
Next, physically inspect the system for any obvious pre-existing damage - cracks, loose fittings, or corrosion. Document any findings; they may provide valuable context during the test's evaluation phase. Ensure all connections within the test section are securely tightened. While not a guarantee against leaks, it eliminates a common source of error.
Finally, and crucially, confirm that the plumbing system is completely free of debris. Sediment, construction materials, or any foreign objects can obstruct flow, skew pressure readings, and even damage equipment. Flush the test section thoroughly until the water runs clear (for water tests) or until all air is purged (for air tests).
Setting Up the Pressure Testing Equipment
Successfully pressure testing your plumbing requires more than just water or air - it's about having the right tools for the job. Here's a breakdown of the essential equipment you'll need, along with considerations for each:
1. Pressure Gauge: This is your primary indicator. Choose a gauge with an appropriate pressure range - typically 0-100 psi is suitable for residential systems, but verify the required range based on the system's design pressure. Crucially, ensure it's calibrated and accurate. A cheap, uncalibrated gauge will give you misleading results. Digital gauges offer greater precision and often feature data logging capabilities.
2. Pressure Source: You're generally looking at two options:
- Air Compressor: Provides a clean, dry pressure source. Ensure it's capable of reaching the required test pressure and has sufficient volume for the system size. Remember to use an air filter/regulator to remove moisture and control the pressure.
- Water Supply: Using a water supply is viable, but it introduces the risk of corrosion and can be messy. A backflow preventer is essential to protect the potable water supply.
3. Test Fittings & Connections: You're going to need fittings to connect the gauge and pressure source to the plumbing being tested. These need to be compatible with the pipe material (copper, PEX, PVC, etc.). Compression fittings, threaded adapters, or quick connects are common choices. Use appropriate sealant (Teflon tape or pipe dope) to ensure leak-free connections.
4. Isolation Devices (Caps/Plugs): Completely isolating the section under test is paramount. Use robust caps or plugs specifically designed for pressure testing. Verify their compatibility with the pipe material and ensure they create a watertight seal.
5. Backflow Preventer (if using water): A non-negotiable item when using a water supply. This prevents contaminated water from flowing back into the potable water system.
6. Miscellaneous: Consider having a few extra fittings and tools on hand - it's always better to be prepared for unexpected challenges. A pipe wrench and adjustable wrench are useful for securing connections.
Applying Pressure and Monitoring for Leaks
The core of the pressure test lies in the application of pressure and diligent monitoring for any signs of leakage. Start by gradually increasing the pressure within the isolated plumbing section, ensuring a slow and steady rise to avoid stressing the system. The target pressure will be dictated by local codes and manufacturer specifications, commonly around 1.5 times the system's working pressure - always prioritize these guidelines.
Once the target pressure is reached, the 'hold' phase begins. This is where patience and observation are paramount. Maintain that pressure consistently for the designated period (usually 30 minutes to 2 hours). During this time, meticulously observe the pressure gauge. A slight, gradual pressure drop is normal due to minor permeation through pipes and fittings. However, a sudden or significant pressure drop is a clear indication of a leak.
Document your observations regularly - note pressure readings at consistent intervals (e.g., every 15 minutes) and record any noticeable pressure fluctuations. Don't rely solely on visual observation; accurate documentation is essential for a comprehensive assessment. Should a pressure drop occur, carefully inspect the entire section of plumbing, paying close attention to joints, fittings, and any areas previously identified as potential weak points. A soap solution can be incredibly helpful in pinpointing even the smallest pinhole leaks, as it will reveal the presence of bubbles forming at the leak's origin.
Interpreting Results: Pass or Fail
The success of your pressure test hinges on accurately interpreting the results. Here's a breakdown of what constitutes a passing versus failing grade.
Passing the Test:
A successful pressure test means the pressure held steady within the specified tolerance range for the entire duration. Typically, this is a drop of no more than 3 PSI (pounds per square inch) for every hour of the hold time. For instance, if you're holding pressure at 80 PSI for 30 minutes, a drop of less than 5 PSI would indicate a pass. A stable reading, even if slightly lower than the initial pressure, is generally acceptable, provided there are no visible leaks. Document the final pressure reading and note any slight variations.
Failing the Test:
A failing test is indicated by a significant and rapid pressure drop - exceeding the allowable drop rate as defined by local codes and specifications. Any visible leakage, no matter how small, also constitutes a failure. A sudden, uncontrolled drop in pressure necessitates immediate investigation and corrective action. Don't attempt to troubleshoot a failing test yourself unless you are a qualified professional; it's crucial to identify the root cause accurately and safely repair the issue. Repeating the test after repairs is essential to verify the fix.
Documenting Your Findings
The pressure testing process itself is only half the battle. Comprehensive documentation is your safeguard against future problems and a vital record for warranty claims or renovations. Don't skimp on this critical step!
Your documentation should include, at a minimum:
- Project Details: Date, time, location of the test, specific section of plumbing tested, and the name of the project.
- Test Parameters: The specified test pressure, the duration the pressure was held, and the method of pressure application (air or water).
- Baseline Readings: Record the initial pressure gauge reading before the test began.
- Regular Pressure Observations: Document pressure readings at consistent intervals (e.g., every 15 minutes). A table format works well for this - easy to read and analyze.
- Leak Detection Details: If a pressure drop occurs, precisely document the location of any leaks observed. Be as specific as possible (e.g., "Joint between pipe section 3 and fitting A," rather than just "Near the sink").
- Corrective Actions: Clearly outline any repairs or adjustments made to address leaks or other issues discovered during the test. Include dates and descriptions of work performed.
- Tester Information: The name and credentials (license number, etc.) of the person who conducted the test.
- Photographic Evidence: Pictures can be invaluable. Take photos of the test setup, any leaks detected, and the completed repairs.
Consider creating a standard test report template to streamline the documentation process. This ensures consistency and makes it easier to analyze past tests. Store these records securely and make them readily accessible for future reference.
Post-Test Procedures: Safe System Return
After the pressure hold, the anticipation is over - but the job isn't quite done. Returning your plumbing system to normal operation requires a deliberate and safe process. Rushing this step can introduce new problems or even cause damage. Here's how to do it right:
1. Gradual Pressure Release is Key: Don't vent the pressure all at once! Slowly and steadily release the pressure from the system. A rapid release can shock the pipes and fittings, potentially loosening joints or causing cracks. Aim for a controlled pressure drop over a period of 15-30 minutes, depending on the system's size and complexity.
2. Inspection During Release: As the pressure decreases, carefully observe the pipes and fittings for any signs of stress or movement. This is a second chance to identify any potential weaknesses that may have been stressed during the test. Look for any unusual sounds - pops or creaks can indicate problems.
3. Draining (for Water Tests): If you conducted a water pressure test, thoroughly drain the system. Leaving water in the pipes can lead to corrosion, freezing issues in cold climates, or bacterial growth. Ensure all low points and traps are emptied.
4. Returning to Normal Operation: Once the system is fully depressurized and drained (if applicable), slowly reintroduce the normal water pressure. Monitor the pipes and fittings during this process for any leaks or unusual behavior.
5. Final System Check: After returning to normal operating pressure, perform a visual inspection of all accessible pipes and connections. Run fixtures to verify proper flow and check for any signs of leaks.
Safety First: Key Precautions
Pressure testing isn't something to take lightly. It involves potentially hazardous conditions, and neglecting safety can lead to serious injury or property damage. Here's what you must keep in mind:
- Personal Protective Equipment (PPE): Always wear safety glasses to protect your eyes from debris and potential spray. Gloves are also essential to safeguard your hands.
- Controlled Pressure Increase: Never rapidly increase pressure. Gradual application prevents sudden bursts or stress fractures in the pipes.
- Ventilation is Critical: If using compressed air, ensure the area is well-ventilated to prevent the build-up of potentially harmful gases.
- Stay Clear During Hold: During the pressure hold period, maintain a safe distance from the test area. Unexpected leaks can occur.
- Slow and Steady Pressure Release: Upon completion of the test, slowly release pressure. Rapid decompression can damage pipes and create hazardous conditions.
- Professional Expertise: If you lack experience or are uncomfortable with any part of the process, do not proceed. Hire a qualified and licensed plumber. Your safety and the integrity of your plumbing system are paramount.
- Check for Existing Damage: Before commencing any pressure testing, carefully inspect the plumbing for any existing signs of damage. Test areas with known weaknesses should be avoided or addressed beforehand.
Understanding Local Codes and Regulations
Plumbing codes aren't just arbitrary rules; they're in place to ensure the safety and functionality of your plumbing system and protect public health. These regulations dictate everything from allowable pipe materials and installation methods to the required test pressures and durations. Failing to adhere to local codes can result in failed inspections, costly rework, and potentially legal issues.
The specific requirements vary significantly depending on your location. What's acceptable in one city or state might be strictly prohibited in another. Common areas covered by plumbing codes include:
- Test Pressure: Most codes specify a minimum test pressure, often expressed as a multiple of the system's working pressure (e.g., 1.5x).
- Hold Time: The duration for which the pressure must be maintained during the test.
- Acceptable Leakage: Some codes allow for a small amount of leakage during the test, while others mandate a completely leak-free system.
- Permit Requirements: Many jurisdictions require a permit before conducting pressure testing.
- Approved Materials: Codes dictate which pipe materials (e.g., PVC, PEX, copper) are allowed for specific applications.
How to Find Your Local Codes:
- City/County Building Department: This is typically your primary resource. Their website usually has downloadable code books or contact information to request them.
- State Plumbing Board: Your state may have a plumbing board that oversees licensing and enforces regulations.
- Licensed Plumbing Contractor: A qualified contractor is familiar with local codes and can advise you on the specific requirements for your project.
It's your responsibility to be aware of and comply with all applicable local codes and regulations. When in doubt, always consult with a professional.
Resources & Links
- The Spruce - Plumbing : A comprehensive resource for plumbing information, including guides on plumbing repairs, fixture installations, and overall plumbing system maintenance. Useful for background on general plumbing principles related to pressure testing.
- Family Handyman - Plumbing : Offers practical DIY plumbing articles and tutorials. Useful for understanding basic plumbing concepts and potential issues encountered during testing.
- This Old House - Plumbing : Provides expert advice on home improvement projects, including plumbing. Offers insights into identifying and resolving plumbing problems, which can inform the testing process.
- Builder Online - Plumbing : Provides construction industry insights including plumbing practices and codes. Can be a valuable resource for understanding plumbing standards and building codes relevant to pressure testing, especially in new construction or renovations.
- ASHI (American Society of Home Inspectors) : ASHI provides resources and training for home inspectors. Understanding their guidelines on plumbing system assessment can inform your testing checklist and procedures.
- Plumbing World : An online retailer for plumbing supplies. The site offers technical information and product specifications for pressure testing equipment like gauges and pumps. Useful for researching specific tools.
- Harbor Freight - Plumbing Tools : Offers a wide range of plumbing tools at competitive prices. A good place to research the cost and types of equipment needed for pressure testing.
- Grainger Industrial Supply : A major supplier of industrial equipment, including pressure gauges, pumps, and fittings. Helps in understanding specifications and selecting appropriate testing equipment.
- Supply House : Another online supplier for plumbing and HVAC equipment. Provides detailed product information and specifications for pressure testing tools and materials.
- IAPMO (International Association of Plumbing and Mechanical Officials) : IAPMO is a standards development organization. Their resources are crucial for understanding the underlying standards and codes that govern plumbing installations and testing procedures.
- PMg - Plumbing Manufacturers Group : Represents leading plumbing manufacturers. They often provide technical documents and best practices related to plumbing systems, including installation and testing.
- ASADA (American Society of Appraisers) : While primarily focused on appraisals, understanding asset valuation (which plumbing systems represent) can add context to the importance of proper maintenance and testing.
- OSHA (Occupational Safety and Health Administration) : OSHA provides safety guidelines and regulations that must be followed during any work involving plumbing systems, including pressure testing. Essential for ensuring worker safety.
Frequently Asked Questions
What is plumbing pipe pressure testing and why is it important?
Plumbing pipe pressure testing is a process used to verify the integrity of newly installed or repaired plumbing pipes. It involves pressurizing the pipes with water or air and monitoring for leaks or drops in pressure. It's crucial to ensure no leaks exist before concealing the pipes within walls or floors, preventing costly damage and health hazards later on.
Who needs to use this checklist?
This checklist is designed for plumbers, contractors, building inspectors, and anyone responsible for ensuring the proper installation and integrity of plumbing pipes. It's useful for residential, commercial, and industrial projects.
What is the difference between hydro testing and pneumatic testing?
Hydro testing uses water to pressurize the pipes, while pneumatic testing uses compressed air. Hydro testing is generally preferred, but pneumatic testing can be used when water is unavailable or when dealing with specific pipe materials. Pneumatic testing requires more safety precautions due to the higher pressures involved.
What's included in the 'Materials & Tools' section of the checklist?
The 'Materials & Tools' section lists essential items like a pressure gauge, pressure pump (hydro or pneumatic), water or compressed air, fittings, and potentially leak detection solutions like fluorescent dye or ultrasonic leak detectors. The specific tools will depend on the chosen testing method.
How do I interpret the pressure drop readings during testing?
A pressure drop indicates a leak. The checklist specifies acceptable pressure drop tolerances. Any drop exceeding those tolerances requires investigation and repair before proceeding. The severity of the pressure drop can help pinpoint the location of the leak.
What safety precautions should I take when performing pressure testing?
Safety is paramount. Always wear appropriate personal protective equipment (PPE) like safety glasses and gloves. Ensure the area is clear of obstructions. If using pneumatic testing, follow strict procedures and use a pressure relief device to prevent over-pressurization. Never exceed the pipe's maximum allowable pressure.
What do I do if I find a leak during the testing?
Immediately depressurize the system. Locate the source of the leak. Repair the leak using appropriate methods - patching, replacing fittings, or re-soldering. Re-test the repaired section to ensure the leak is eliminated and the pressure holds steady.
Where can I download the checklist template?
The link to download the checklist template is provided within the article, usually as a button or prominent link.
Is there a maximum allowable pressure I should adhere to?
Yes, always adhere to the manufacturer's specifications for the maximum allowable working pressure (MAWP) of the pipe material. The checklist will often provide general guidelines, but it is your responsibility to verify the correct pressure based on the specific pipes being tested.
Found this Article helpful?
Construction Management Solution Demo
Build smarter, not harder! ChecklistGuro streamlines construction projects from planning to closeout. Manage tasks, inspections, safety protocols & more - all in one place. Reduce delays, improve communication, and deliver projects on time & on budget.
Related Articles

The Ultimate Concrete Vibration Checklist Template

Unlock Value: Your Free Value Engineering Checklist Template

The Ultimate HVAC Ductwork Installation Checklist Template

The Ultimate Rebar Placement Checklist Template

Your Concrete Mix Design Verification Checklist: A Step-by-Step Guide

Backfilling & Compaction Checklist: A Foundation's Best Friend

The Ultimate Concrete Delivery & Placement Checklist Template

Your Ultimate Stakeholder Communication Plan Checklist Template
We can do it Together
Need help with
Construction?
Have a question? We're here to help. Please submit your inquiry, and we'll respond promptly.