Mastering Post-Tensioning: Your Essential Checklist Template
Published: 09/02/2025 Updated: 12/13/2025
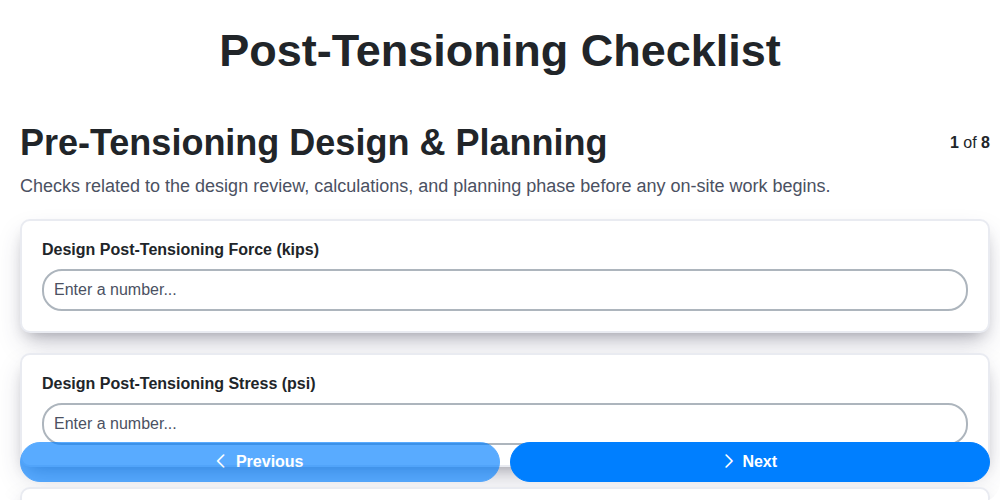
Table of Contents
- Introduction: Why a Post-Tensioning Checklist Matters
- Understanding Post-Tensioning Basics
- Phase 1: Pre-Construction Planning & Design
- Phase 2: Material Acquisition & Inspection
- Phase 2.5: Sheathing and Formwork Preparation
- Phase 3: Tendon Placement and Stressing - A Detailed Approach
- Phase 3.5: Anchorage and Plate Verification
- Phase 4: The Grouting Process: Ensuring Complete Encapsulation
- Phase 4.5: Post-Grouting Inspection & Testing Protocol
- Phase 5: Documentation & Record Keeping Essentials
- Common Pitfalls and How to Avoid Them
- Conclusion: Building Confidence in Your Post-Tensioning Projects
- Resources & Links
TLDR: Need to ensure a safe and structurally sound post-tensioning project? This blog post provides a free, downloadable checklist template covering everything from design and material inspection to grouting and documentation. It'll guide you step-by-step, helping you avoid costly errors and guaranteeing project excellence.
Introduction: Why a Post-Tensioning Checklist Matters
Post-tensioning isn't just about concrete; it's about precision, safety, and long-term structural integrity. While the process itself is a marvel of engineering, even the smallest oversight can have significant consequences. Imagine the potential for costly delays, structural compromise, or even safety hazards if a tendon isn't placed correctly, a duct isn't properly grouted, or stressing forces are miscalculated.
That's where a well-defined post-tensioning checklist becomes indispensable. It's more than just a formality - it's a crucial tool for ensuring that every step, from initial design to final inspection, is executed with accuracy and accountability. A checklist serves as a systematic guide, minimizing human error, promoting consistent quality control, and establishing a clear record of verification. It provides a safety net for the entire project team, contributing to a more reliable and durable final product. Simply put, a checklist is the foundation of successful post-tensioning.
Understanding Post-Tensioning Basics
Post-tensioning fundamentally changes how concrete structures are built and strengthened. Unlike traditional reinforced concrete, where rebar is embedded before the concrete sets, post-tensioning involves placing un-stressed tendons (high-strength steel cables or strands) within ducts or voids in the concrete formwork. The concrete is then poured and allowed to cure. After the concrete has gained sufficient strength, these tendons are tensioned - pulled tight - using hydraulic jacks. This pre-compression of the concrete introduces a permanent compressive force that counteracts tensile stresses that would naturally occur under load.
Think of it like squeezing a loaf of bread; the compression makes it stronger and more resistant to stretching. This process allows for longer spans, thinner slabs, and overall more efficient use of materials, as the concrete is working under constant compression instead of solely relying on rebar to handle tensile forces. The tendons are then permanently anchored within the concrete, "locking" in the compressive force. This system is particularly advantageous in structures like bridges, parking garages, and high-rise buildings where minimizing weight and maximizing structural efficiency are key.
Phase 1: Pre-Construction Planning & Design
The most critical phase in any post-tensioning project isn't the stressing or the grouting; it's the meticulous planning and design that precedes it. Insufficient upfront consideration can lead to costly rework, schedule delays, and compromised structural integrity. This initial phase establishes the framework for a successful project, demanding close collaboration between the owner, architect, structural engineer, and post-tensioning contractor.
The process typically begins with a comprehensive site investigation, evaluating soil conditions, existing utilities, and potential access challenges. The structural engineer then develops a post-tensioning design that integrates seamlessly with the overall building design, determining tendon placement, stressing forces, and anchorage locations. This design must be compliant with relevant building codes and address specific performance criteria, such as deflection limits and crack control.
Crucially, the post-tensioning contractor's input is vital during this phase. They possess specialized knowledge regarding constructability, tendon availability, anchorage options, and potential installation challenges. Early engagement allows for value engineering - exploring alternative solutions that optimize performance while minimizing costs and construction time. Detailed shop drawings, prepared by the contractor and reviewed by the engineer, are essential for visualizing the post-tensioning system and identifying any potential conflicts with other building components. Thorough coordination and communication throughout this pre-construction phase are paramount to establishing a solid foundation for a successful project.
Phase 2: Material Acquisition & Inspection
Securing the right materials and verifying their quality forms the bedrock of a successful post-tensioning project. Shortcuts here can lead to catastrophic failures later on, so meticulousness is paramount. This phase encompasses more than just ordering supplies; it's a rigorous process of verification and documentation.
Tendon Procurement & CoA Validation: Sourcing post-tensioning tendons from reputable suppliers is the first crucial step. Upon delivery, each bundle must be thoroughly inspected for any signs of damage - corrosion, dents, or kinks. Critically, the Certificate of Analysis (CoA) provided by the manufacturer must be carefully reviewed. This document details the tendon's properties: grade, diameter, elongation, and protective coating type. The CoA should be checked against project specifications to ensure a perfect match. Discrepancies, even seemingly minor ones, require immediate investigation and resolution. Retain all CoA documents in a centralized, accessible location.
Anchorage and Ductwork Scrutiny: Anchorages, often custom-fabricated, demand equal scrutiny. Verify dimensions against approved shop drawings and inspect welds for quality and adherence to welding procedures. Ductwork, whether corrugated plastic or steel, must be free from cracks or deformities. Ensure the duct diameter is accurate, as this directly impacts grout placement and cable stressing capacity. Pressure testing of steel ducts, as per project specifications, is a routine procedure to guarantee leak-free performance.
Grout Material Verification: Grout quality is vital for tendon longevity and load transfer. Ensure the grout mix design meets the project's requirements, considering factors like compressive strength, slump, and density. A representative sample of the grout should be tested to confirm its properties before use. Keep detailed records of the grout batch numbers and test results.
Consumables and Accessories: Don't overlook seemingly minor components like coupling sleeves, sheathing, and wire rope clips. These items must meet established standards and be compatible with the chosen tendon system. A visual inspection and dimensional check are essential to ensure their integrity.
Documentation is Key: Throughout this phase, comprehensive documentation is non-negotiable. Maintain records of supplier information, CoA validations, inspection reports, and any corrective actions taken. This meticulous record-keeping provides an audit trail and demonstrates due diligence in material acquisition and quality control.
Phase 2.5: Sheathing and Formwork Preparation
The integrity of the post-tensioning system hinges on a perfectly stable and accurately aligned foundation: the sheathing and formwork. This phase isn't merely about holding the tendons in place; it's about guaranteeing they remain precisely positioned throughout the stressing process, preventing movement and ensuring the intended forces are applied correctly.
Sheathing Inspection & Requirements:
The sheathing, typically plywood or OSB, must be in pristine condition. Scratches, delamination, or excessive warping are unacceptable. It's crucial that the sheathing is thick enough to withstand the considerable forces generated during stressing. Consult the project specifications for the required thickness and grade. Cleanliness is paramount - debris and dust can interfere with tendon placement and adhesion.
Formwork Alignment & Bracing:
Accuracy in alignment is non-negotiable. Use precision leveling techniques to ensure the sheathing is perfectly horizontal and parallel to the design lines. Any deviation can lead to uneven tendon placement and compromised structural performance. Furthermore, the formwork needs robust bracing to resist the lateral forces exerted during stressing. Consider:
- Diagonal Bracing: To prevent racking and distortion.
- Temporary Supports: For longer spans to provide additional stability.
- Secure Fastening: Ensure all connections are tight and cannot loosen under load.
Pre-Placement Verification:
Before the tendons are placed, conduct a final verification of the formwork. This includes:
- Level Checks: Reconfirm horizontal alignment.
- Straightness Verification: Ensure formwork is free from twists or bends.
- Secure Fastening: Visually inspect all bracing and connections.
A well-prepared sheathing and formwork system significantly reduces the risk of errors during tendon placement and ensures a structurally sound post-tensioning application. Don't underestimate the importance of this often-overlooked phase.
Phase 3: Tendon Placement and Stressing - A Detailed Approach
This phase represents a critical juncture in the post-tensioning process, demanding precision and meticulous attention to detail. Deviations from the approved shop drawings at this stage can compromise the structural integrity of the entire project. Let's break down tendon placement and stressing into manageable steps, ensuring consistent quality and minimizing potential errors.
1. Pre-Placement Verification:
Before a single tendon is placed, a final verification of the surrounding environment is essential. This includes confirming the alignment and stability of the sheathing, ensuring formwork integrity, and double-checking all spatial clearances. Any discrepancies must be addressed and approved by the engineer before proceeding.
2. Tendon Handling and Identification:
Tendons are susceptible to damage during handling. Implement strict protocols for lifting, transporting, and positioning. Each tendon must be positively identified as per the shop drawings - noting strand size, number, and specific location. Employ a barcode scanning system where possible for enhanced traceability.
3. Duct Positioning and Alignment:
Carefully position the tendons within the designated ducts, ensuring they maintain their intended alignment. Avoid kinks, bends, or undue stress on the strands. Minor adjustments to duct positioning may be necessary to facilitate tendon placement, but all modifications require documented approval.
4. Stressing Procedure - Step-by-Step:
The stressing process itself is a multi-stage operation requiring constant monitoring.
- Anchor Plate Engagement: Ensure the anchor plates are properly seated and engaged within the stressing jack.
- Incremental Stressing: Stress the tendons incrementally, adhering to the specified jacking sequence. Rapid stressing can lead to duct friction and uneven load distribution.
- Elongation Monitoring: Continuously monitor the tendon elongation throughout the stressing process. This data serves as an indicator of proper load transfer and helps identify any anomalies. Record the elongation at predetermined intervals.
- Pressure Readings: Regularly check hydraulic pressure readings on the stressing jack. Fluctuations can signal issues with the stressing equipment or the tendons themselves.
- Final Force Verification: Upon completion of stressing, verify the achieved force against the design requirements. This confirmation provides assurance that the tendons have been adequately tensioned.
- Grout Duct Cleaning Verification: Before grouting, ensure that the duct cleaning process has been verified and documented.
5. Post-Stressing Inspection & Documentation:
Following stressing, conduct a thorough visual inspection of the tendons and surrounding areas. Document any observed defects or inconsistencies. Update the project records with the achieved force, elongation data, and inspection findings. Photographs should be taken to provide a visual record of the completed stressing operation.
Phase 3.5: Anchorage and Plate Verification
This phase is critical for ensuring the load transfer from the stressed tendons to the surrounding concrete is secure and reliable. Visual inspection is paramount, but should be supplemented with documented verification steps.
Immediate Post-Stressing Checks:
- Alignment: Verify the anchor plates remain aligned with the tendon centerline after stressing. Minor adjustments might be permissible within tolerances specified in the shop drawings, and any adjustments must be documented.
- Plate-to-Strand Contact: A thorough visual inspection is needed to confirm intimate contact between the anchor plate and the stressed tendons. Any gaps or separation could compromise the load transfer. Utilize a flashlight and magnifying tools if necessary.
- Embedment Depth: Confirm the anchor plates are embedded to the correct depth as specified in the approved shop drawings. Lack of adequate embedment weakens the anchorage.
- Crack Assessment: Carefully examine the anchor plates and surrounding concrete for any new cracks. Small hairline cracks are not uncommon immediately after stressing, but larger or propagating cracks warrant immediate investigation and potential repair, with the guidance of a qualified engineer. Photograph any observed cracks for documentation.
- Secure Fasteners (if applicable): If anchor plates are secured with fasteners (bolts, welds), verify their integrity. Tighten any loose fasteners and re-examine welds for proper execution.
Documentation is Key:
Each inspection should be documented with the inspector's name, date, and any findings. Photographs are strongly recommended to provide visual records of the anchorage condition. These records should be readily accessible for future reference and potential audits. A signed-off checklist, similar to those used for other critical phases, will ensure consistency and accountability.
Phase 4: The Grouting Process: Ensuring Complete Encapsulation
Grouting isn't just about filling space; it's a critical step in protecting the post-tensioning tendons from corrosion and transmitting load effectively. This phase demands precision and a keen eye for detail. The primary objective is to completely fill all ducts with grout, eliminating air voids and ensuring intimate contact between the tendon and the surrounding concrete.
Preparation is Key: Before a single ounce of grout is mixed, meticulous preparation is essential. Each duct must be thoroughly cleaned, removing any debris, dust, or contaminants that could compromise the bond. This typically involves compressed air blowing and sometimes specialized cleaning tools. Any remaining air within the duct can lead to corrosion pockets and reduced load-carrying capacity, so its removal is paramount.
The Grouting Mix: The grout itself must adhere to stringent specifications, often involving a carefully controlled blend of cement, fine aggregates, and admixtures. The consistency is vital - it needs to be fluid enough to flow easily through the ducts, yet viscous enough to avoid segregation. Maintaining the correct water-to-cement ratio is crucial for achieving the desired strength and workability. Always refer to the project specifications for the precise grout mix design.
Positive Displacement - The Only Way: Positive displacement grouting is non-negotiable. This method forces grout into the ducts at a controlled rate, ensuring complete filling and eliminating the possibility of air entrapment. Monitoring the grout take - the volume of grout used - is essential for verifying that the ducts are fully occupied. A gradual increase in pressure during the grouting process is normal, but sudden surges or spikes should be investigated immediately.
Vibration is Your Ally: Throughout the grouting process, vibration of the ducts plays a vital role. Vibration helps to consolidate the grout, release trapped air bubbles, and ensure thorough wetting of the tendon surface. The frequency and intensity of vibration should be carefully controlled to avoid segregation or damage to the tendons.
Post-Grouting Inspection: Once grouting is complete, a visual inspection of the ducts is necessary to confirm full encapsulation. Any surface voids or incomplete filling should be addressed immediately. Temperature monitoring of the grout is also important to prevent thermal cracking as the grout cures. Proper documentation of the entire grouting process, including grout take and any observations, is essential for quality control and future reference.
Phase 4.5: Post-Grouting Inspection & Testing Protocol
Post-grouting is the critical final step in the post-tensioning process, ensuring long-term tendon protection and load transfer. A rigorous inspection and testing protocol are essential to verify grout integrity and identify any potential issues early on. This phase is not merely a visual confirmation; it requires a systematic approach and diligent record-keeping.
Immediate Visual Assessment:
Immediately following grout completion, conduct a thorough visual inspection of all ducts. Look for:
- Complete Filling: Verify that all ducts are completely filled with grout, free from voids or air pockets.
- Grout Consistency: Assess the grout's consistency - it should be homogenous and free from segregation.
- Surface Imperfections: Note any surface imperfections, such as cracks or pinholes, which may indicate a problem with the grout mix or placement.
- Grout Protrusion: Observe if grout is protruding from unvented areas; this confirms complete filling.
Temperature Monitoring and Control:
Grout temperature significantly impacts its performance. Continuous temperature monitoring is vital throughout the curing process.
- Initial Temperature: Record the initial grout temperature immediately after placement.
- Curing Temperature: Monitor and maintain the curing temperature within the manufacturer's recommended range. High temperatures can lead to rapid setting and cracking, while low temperatures can slow curing and weaken the grout.
- Temperature Fluctuations: Document any significant temperature fluctuations and their potential impact.
Duct Pressure Testing (When Specified):
In some projects, duct pressure testing may be required to further confirm grout integrity. This involves pressurizing the ducts and monitoring for pressure loss, which would indicate leaks or voids. The testing procedure and acceptance criteria should be clearly defined in the project specifications.
Non-Destructive Evaluation (NDE) Considerations:
While less common, certain projects may incorporate Non-Destructive Evaluation (NDE) techniques, such as ultrasonic testing or ground-penetrating radar, to assess grout quality and identify hidden voids. These methods should be performed by qualified personnel.
Record Keeping is Paramount:
Detailed records of all inspection activities, temperature readings, and test results are critical. These records should be readily accessible for future reference and potential dispute resolution. Include photographs documenting the post-grouting condition. Accurate and complete documentation is the best defense against future claims.
Phase 5: Documentation & Record Keeping Essentials
Documentation isn't just paperwork; it's the bedrock of a successful post-tensioning project. It serves as proof of compliance, facilitates future maintenance, and acts as a crucial resource for troubleshooting any unforeseen issues. Here's what you need to meticulously record and safeguard:
Essential Records to Maintain:
- Shop Drawing Approvals: Retain all approved shop drawings, revisions, and correspondence related to tendon placement and anchorage details.
- Material Certificates of Analysis (CoA): These are legally vital. Organize all CoAs for tendons, anchorages, and grout. Ensure traceability of materials.
- Stressing Records: Detailed records of stressing operations are paramount. Include date, time, stressing force achieved (for each tendon), elongation measurements, jacking pressures, and any deviations from the approved plan. Clearly note the stressor's name and signature.
- Grouting Logs: Document the grout mix design, grouting start and finish times for each duct, grout temperature monitoring records, and any observations made during the grouting process.
- Inspection Reports: Formalize all inspections - pre-stressing, post-grouting, and any others - with dates, findings, and signatures of the inspecting personnel.
- As-Built Drawings: Regularly update drawings to accurately reflect any field modifications or deviations from the original design. This creates a true representation of the installed system.
- Photographic Documentation: A picture is worth a thousand words. Take photos at key stages of the process: tendon placement, stressing, grouting, and final installation. Date and label all images.
- Deviation Reports: Any deviations from the approved plans must be documented with a detailed explanation, the reason for the deviation, and approval from a qualified engineer.
Storage and Accessibility:
- Digital Copies: Create digital backups of all records.
- Secure Storage: Store both physical and digital records in a secure, accessible location.
- Clear Indexing: Implement a clear indexing system for easy retrieval of information.
Why Good Records Matter:
Beyond compliance, comprehensive records enable informed decision-making, streamline maintenance processes, and provide invaluable data for future projects. They are your legacy and a testament to quality workmanship.
Common Pitfalls and How to Avoid Them
Even with a meticulous checklist, post-tensioning projects aren't without their challenges. Recognizing and proactively addressing common pitfalls is key to a successful outcome. Here's a look at frequent issues and how to sidestep them:
1. Insufficient Duct Cleaning: Residual debris in the ducts significantly impacts grout flow and can lead to voids. These voids compromise tendon bond strength and long-term durability. Avoidance: Implement a rigorous duct cleaning protocol, utilizing compressed air and mechanical brushing. Verify cleanliness with visual inspection and, if specified, pressure testing.
2. Grout Segregation: If the grout mix isn't properly handled or if the placement is too rapid, segregation can occur, leaving a weak, watery layer at the bottom of the duct. Avoidance: Carefully follow the grout manufacturer's instructions regarding mix ratios, ambient temperature, and placement rates. Utilize vibration techniques during placement to prevent settling.
3. Over-Pressurization During Stressing: Excessive force during stressing can damage the tendons or concrete, leading to premature cracking or failure. Avoidance: Strictly adhere to the design stress limits and elongation tolerances. Utilize calibrated stressing jacks and regularly check their accuracy.
4. Inadequate Temperature Control: Rapid temperature changes in the concrete or grout can induce thermal stresses and cracking. Avoidance: Implement a temperature monitoring plan, particularly during hot or cold weather. Consider using insulation or cooling measures to maintain stable temperatures.
5. Communication Breakdown: Lack of clear communication between the design team, contractors, and field personnel can lead to errors and rework. Avoidance: Establish a robust communication protocol, including regular site meetings, detailed shop drawings, and a designated point of contact for questions and clarifications.
6. Ignoring Shop Drawing Revisions: Often, field conditions necessitate changes from the original shop drawings. Failing to update the field team about these revisions can lead to errors. Avoidance: Implement a clear revision control process for shop drawings, ensuring all field personnel have the latest version and are aware of changes.
7. Improper Anchor Plate Alignment: Misaligned anchor plates can compromise tendon anchorage and lead to premature failure. Avoidance: Rigorously check anchor plate alignment before stressing and ensure they are securely fastened. Utilize precise surveying techniques for accurate placement.
Conclusion: Building Confidence in Your Post-Tensioning Projects
The successful execution of a post-tensioning project isn't solely about the final structural integrity; it's about the confidence built through a systematic and verifiable process. This checklist, when diligently followed and adapted to project specifics, acts as the bedrock of that confidence. It's a testament to a commitment to quality, safety, and long-term performance. Remember, a well-documented process not only minimizes risk but also provides invaluable data for future projects, allowing for continuous improvement and refinement of techniques. Embracing this level of detail isn't a burden; it's an investment in the durability, reputation, and success of your post-tensioning endeavors.
Resources & Links
- Post-Tensioning Institute (PTI) : The leading authority on post-tensioning technology. Offers extensive resources, standards, best practices, and publications for designers, contractors, and inspectors. Crucial for understanding current industry standards and guidelines.
- Concrete Construction Magazine : A trade publication with articles, case studies, and technical information related to concrete construction, including post-tensioning. Search for articles on post-tensioning techniques, challenges, and solutions.
- American National Standards Institute (ANSI) : ANSI develops standards, many of which are directly applicable to post-tensioning. Check for relevant standards related to materials, construction methods, and inspection procedures.
- Portland Cement Association (PCA) : PCA provides technical information and guidance on concrete design, construction, and maintenance. Useful for understanding concrete properties and behavior under post-tensioning stresses.
- American Wood Council (AWC) : While primarily focused on wood, AWC provides valuable insights into formwork design and construction which is key for accurate tendon placement.
- National Center for Construction Reports (NCCR) : NCCR conducts research and publishes reports on construction failures and near misses. Useful for identifying common causes of problems and preventative measures in post-tensioning projects.
- Engineer Calc : Provides tools, calculators, and resources for engineers, including some related to concrete design, though they might require deeper technical understanding.
- Federal Highway Administration (FHWA) : For projects involving bridges and other transportation infrastructure, the FHWA provides guidelines and specifications relating to post-tensioning techniques.
- International Code Council (ICC) : The ICC develops building codes. Familiarize yourself with relevant code provisions related to post-tensioning systems.
- American Society of Civil Engineers (ASCE) : ASCE is a professional society for civil engineers. They provide standards, publications, and continuing education opportunities that may be relevant to post-tensioning projects.
- Taylor Concrete Products : A supplier of post-tensioning hardware and systems. Their website often includes technical data sheets, installation guides, and application examples.
- Vicon Construction : Another major supplier of post-tensioning hardware. Look for product specifications and installation instructions.
Frequently Asked Questions
What is post-tensioning and why is it used?
Post-tensioning is a technique used in concrete construction where high-strength steel strands (tendons) are tensioned *after* the concrete has been cast and has gained sufficient strength. It's used to create stronger, more durable concrete structures that can span longer distances and resist cracking effectively. It allows for thinner slabs and beams, which can be beneficial for headroom and aesthetics.
What's the purpose of this checklist template?
The checklist template is designed to serve as a comprehensive guide for managing and verifying all critical steps throughout the post-tensioning process, from design review to final inspection. It aims to minimize errors, ensure quality, and promote safety on the job site.
Who is this checklist template for?
This template is intended for a wide range of professionals involved in post-tensioning projects, including engineers, project managers, contractors, field supervisors, and quality control personnel.
What sections are included in the checklist template?
The template is divided into several key sections covering design review, tendon placement, stressing operations, grout placement, and final inspection. Each section contains multiple individual checklists addressing specific tasks and considerations.
Can I customize the checklist template?
Yes, absolutely! The template is designed to be adaptable. You can add, remove, or modify checklist items to suit the specific requirements of your project and company's procedures. We encourage tailoring it to your unique circumstances.
What are tendons, and why are they so important?
Tendons are high-strength steel strands (or bars) that are embedded within the concrete. They are the elements that provide the post-tensioning force, significantly increasing the concrete's tensile strength and overall structural capacity.
Why is proper grouting so critical in post-tensioned structures?
Grouting is essential for protecting the tendons from corrosion and transmitting forces between the tendons and the concrete. It also prevents water and other harmful substances from entering the tendon ducts.
What types of projects commonly utilize post-tensioning?
Post-tensioning is widely used in a variety of structures, including bridges, parking garages, high-rise buildings, stadiums, and large-span slabs. Any project requiring long spans, reduced deflection, or increased durability can benefit from post-tensioning.
What safety precautions are important to consider during stressing operations?
Stressing operations involve high forces and potential hazards. Strict adherence to safety protocols is crucial, including proper lockout/tagout procedures, personal protective equipment (PPE), and designated exclusion zones.
Where can I find more information about post-tensioning best practices?
Several organizations and resources provide valuable information on post-tensioning, including the Post-Tensioning Institute (PTI), concrete industry associations, and relevant building codes and standards.
Found this Article helpful?
Construction Management Solution Demo
Build smarter, not harder! ChecklistGuro streamlines construction projects from planning to closeout. Manage tasks, inspections, safety protocols & more - all in one place. Reduce delays, improve communication, and deliver projects on time & on budget.
Related Articles

The Ultimate Concrete Vibration Checklist Template

Unlock Value: Your Free Value Engineering Checklist Template

The Ultimate HVAC Ductwork Installation Checklist Template

The Ultimate Rebar Placement Checklist Template

Your Concrete Mix Design Verification Checklist: A Step-by-Step Guide

Backfilling & Compaction Checklist: A Foundation's Best Friend

The Ultimate Concrete Delivery & Placement Checklist Template

Your Ultimate Stakeholder Communication Plan Checklist Template
We can do it Together
Need help with
Construction?
Have a question? We're here to help. Please submit your inquiry, and we'll respond promptly.