Your Ultimate Renovation Project Checklist Template
Published: 08/24/2025 Updated: 12/13/2025
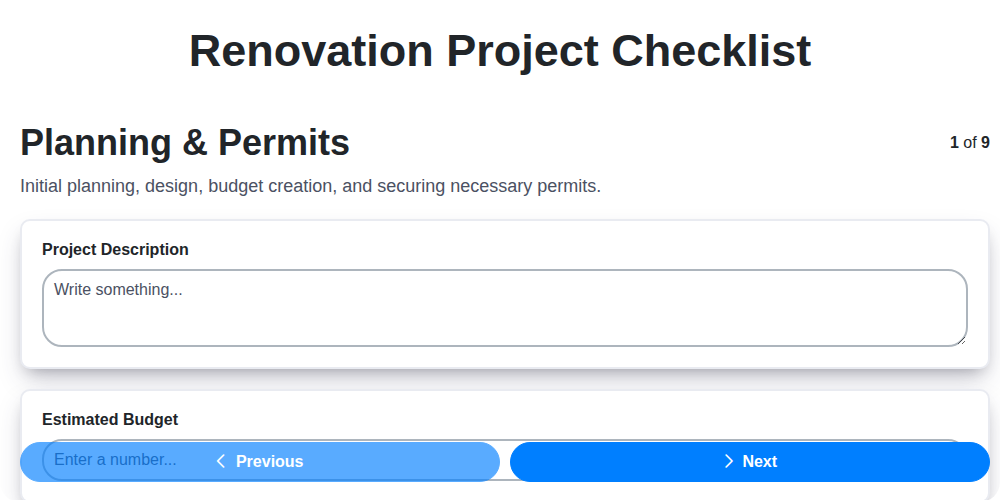
Table of Contents
- Planning & Permits: Laying the Foundation
- Design & Material Selection: Shaping Your Vision
- Demolition & Site Preparation: Clearing the Path
- Structural Work: Building the Framework
- Rough-In Stage: Essential Infrastructure
- Finishing the Space: Walls, Floors, and Fixtures
- Painting & Trim: The Polishing Touches
- Final Inspection & Project Closeout
- Resources & Links
TLDR: This free checklist template breaks down your renovation project into nine manageable stages (Planning, Design, Demolition, Structural, Rough-In, Finishing, Painting, Inspection, and Closeout). It's designed to keep you organized, on track, and avoid costly mistakes - so you can transform your home with confidence!
Planning & Permits: Laying the Foundation
Navigating the planning and permit phase is often the most daunting part of a renovation, but it's absolutely crucial for a smooth project. Skipping this step can lead to costly delays, fines, and even structural issues down the line. Let's break down what's involved:
Defining Your Project Scope: Before you even think about a single tile or paint color, clearly define what you want to achieve. A vague goal like updating the kitchen isn't enough. Instead, outline specific changes: replacing countertops, changing the layout, adding an island, upgrading appliances. The more detailed you are, the more accurate your budget and timeline will be.
Budgeting Realistically: It's tempting to dream big, but a realistic budget is essential. Research material costs, labor rates (if you're hiring professionals), and potential permit fees. Don't forget to factor in a contingency fund - aim for 10-20% of the total project cost. Unexpected issues always arise.
Hiring Professionals (If Needed): Are you handling the project yourself, or will you need help? Architects, interior designers, and contractors can bring invaluable expertise. Get multiple quotes, check references, and ensure everyone is properly licensed and insured.
The Permit Process: Your Local Building Department is Your Friend (Seriously!) Most renovations require permits, even seemingly minor ones. Contact your local building department early to understand their requirements. They're a valuable resource, and can guide you through the process. Be prepared to submit detailed plans and specifications. Don't attempt to cut corners - it's simply not worth the risk. Permit requirements vary widely by location, so there's no substitute for direct communication with your local authority.
Financing Your Project: Determine how you will pay for your renovation. Will you use savings, a home equity loan, a line of credit, or another financing option? Secure your funding before starting any work.
Design & Material Selection: Shaping Your Vision
This phase is where your vision truly takes shape. It's more than just picking pretty colors and patterns; it's about creating a space that's both aesthetically pleasing and functionally serves your needs. Here's a breakdown of how to nail this critical stage:
1. Develop Detailed Plans with a Professional (Often Crucial): While DIY renovations are possible, having an architect or designer create precise drawings is invaluable. They can ensure structural integrity, optimize layout for flow and functionality, and bring a professional eye to the design. These plans should include everything from electrical and plumbing locations to the placement of every fixture and appliance.
2. Material Samples are Your Best Friend: Don't rely on online pictures or showroom displays alone. Order physical samples of flooring, tiles, countertops, paint colors, cabinet styles, and hardware. View them in your space, under your lighting, and with your existing furnishings. Colors can look drastically different depending on the light!
3. The Power of a Material Board (or Digital Equivalent): Create a mood board - either a physical board with fabric swatches and paint chips, or a digital board using tools like Pinterest or Canva. This is a visual roadmap to ensure all your selections work together harmoniously. Include everything - not just the big items, but also smaller details like doorknobs and outlet covers.
4. Consider Longevity and Durability: While trends are tempting, prioritize materials that will stand the test of time. Think about the level of foot traffic, potential for spills, and overall wear and tear. Durable materials often represent a better long-term investment.
5. Factor in Lead Times - Seriously! Many materials, especially custom items like cabinets and specialty tiles, have long lead times (sometimes months!). Ordering well in advance is essential to keep your project on schedule. Don't get caught waiting for a backsplash to arrive mid-renovation!
6. Don't Forget the Details: Lighting is crucial! Plan your lighting carefully - a mix of ambient, task, and accent lighting can dramatically improve the feel of your space. And think about storage solutions - clever storage maximizes space and minimizes clutter.
Demolition & Site Preparation: Clearing the Path
Before the exciting part - the building - comes the necessary demolition and site preparation. This stage is often overlooked but is absolutely vital for a smooth and safe renovation. Improper demolition can damage existing structures, create hazards, and even violate local regulations.
Protecting What Remains:
The first step is safeguarding areas you're not renovating. Cover floors with drop cloths or heavy-duty paper to prevent dust and debris. Shield furniture and doorways with plastic sheeting. This will minimize cleanup later and prevent damage to your existing belongings.
Utility Disconnection: Safety First!
Before any demolition work begins, disconnect utilities to the affected area. Do not attempt this yourself! Hire licensed professionals to shut off gas lines, water pipes, and electrical circuits. This is crucial for preventing accidents and ensuring the safety of everyone involved.
Controlled Demolition:
Carefully plan your demolition strategy. Consider the resale value of your home - unnecessarily damaging structural elements can be costly to repair later. Start with non-load-bearing walls and work your way through the area. Be mindful of asbestos or lead paint-if suspected, have it professionally assessed and remediated before demolition.
Waste Removal: Plan Ahead
Demolition creates a lot of waste. Rent a dumpster or arrange for regular waste pickup. Properly dispose of debris according to local regulations. Consider donating reusable materials to Habitat for Humanity or other organizations.
Remember: Demolition isn't just about tearing things down; it's about carefully clearing the path for a beautiful, structurally sound renovation.
Structural Work: Building the Framework
This phase is the backbone of your renovation, ensuring the structural integrity of your updated space. It's absolutely crucial to get this right, and often requires professional expertise. Here's a breakdown of what's involved:
Foundation Work (if needed): Sometimes, renovations uncover issues with the existing foundation, such as cracks, settling, or water damage. Addressing these problems before moving forward is non-negotiable. This might involve underpinning, crack repair, or even partial foundation replacement - a job best left to experienced professionals.
Framing: Once the foundation is sound, framing begins. This involves constructing the skeleton of your renovation - walls, ceilings, and floors. Precision is key here, as misaligned framing can lead to long-term issues. Ensure all framing adheres to local building codes and is properly secured.
Load-Bearing Walls: Handle with Care! If your plans involve removing or altering load-bearing walls - walls that support the weight of the structure above - do not attempt this without consulting a structural engineer. Improper removal can compromise the stability of your entire home. A structural engineer will assess the wall, calculate the load, and provide plans for safe removal or support.
Roofing (if applicable): For renovations involving upper levels or roofs, this is the time to address any leaks, damage, or necessary repairs. Replacing or reinforcing roofing can be a significant undertaking, and it's vital to ensure the roof is watertight and structurally sound.
Important Note: Throughout this phase, be prepared for potential surprises. Hidden problems often emerge during structural work, so having a contingency fund in your budget is essential. Always prioritize safety and consult with qualified professionals when dealing with structural modifications.
Rough-In Stage: Essential Infrastructure
The Rough-In Stage marks a crucial transition in your renovation-moving from structural changes to laying the groundwork for the finished space. This is when the essential infrastructure - plumbing, electrical, and HVAC - takes shape. Don't underestimate the importance of meticulous planning and skilled execution during this phase; errors here can be incredibly costly to rectify later.
Plumbing: Licensed plumbers will install pipes for all water sources: sinks, toilets, showers, bathtubs, and appliances like dishwashers and washing machines. They're also responsible for drain lines and venting systems. Ensure all connections are secure and meet local codes. Pressure testing is critical at this point to identify and fix any leaks before walls are closed up.
Electrical: Electricians run all necessary wiring for outlets, switches, light fixtures, and appliance circuits. This includes running conduit where required and ensuring proper grounding. Circuit breakers and electrical panels are installed and wired according to approved plans. A thorough inspection is essential to confirm that all wiring meets safety standards.
HVAC: This stage sees the installation of ductwork for forced-air heating and cooling systems, as well as the placement of vents and registers. For systems utilizing furnaces or air conditioners, the units themselves will be positioned and connected to the ductwork. Proper sizing and efficient design of the HVAC system are key for comfortable living and energy savings.
The Inspection Imperative: It's absolutely vital to schedule inspections after each rough-in stage - plumbing, electrical, and HVAC - is complete. These inspections provide an opportunity to catch potential issues early, preventing costly rework and ensuring your project complies with local building codes. Don't skip this step!
Finishing the Space: Walls, Floors, and Fixtures
This is where your renovation truly comes to life! The finishing stages involve transforming the structural framework into a beautiful and functional space. Precision and attention to detail are paramount here, as these elements contribute significantly to the overall aesthetic and longevity of your renovation.
Walls: Drywall, Texture, and Paint
First comes drywall. Properly hung and finished drywall creates a smooth, even surface for painting or wallpapering. Don't underestimate the importance of taping, mudding, and sanding - a sloppy drywall job will be glaringly obvious under paint. Consider adding texture, like orange peel or knockdown, for added visual interest, though a smooth, modern look is often preferred.
Once the drywall is prepped, it's time for primer and paint. Choose high-quality paint formulated for the intended surface (walls, trim, ceilings). Multiple thin coats are almost always better than one thick coat - they're less likely to crack, peel, or show brushstrokes.
Floors: From Subfloor to Stunning Surface
The flooring installation process begins with a level and stable subfloor. Whether you're laying hardwood, tile, carpet, or luxury vinyl plank (LVP), proper preparation is key. Hardwood installation often involves acclimating the wood to the room's humidity levels to prevent warping. Tile requires meticulous attention to grout lines and waterproofing measures in wet areas like bathrooms. Carpet installation demands a clean, smooth subfloor for a uniform pile. LVP offers a more forgiving installation process but still requires a level surface to prevent imperfections from showing through.
Fixtures: The Finishing Touches
This stage involves installing the appliances, light fixtures, faucets, showerheads, and other functional elements that bring your design to fruition. This isn't just about screwing things into place; it's about ensuring proper connections and compliance with building codes.
- Lighting: Think beyond basic functionality. Layered lighting - combining ambient, task, and accent lighting - creates a more inviting and dynamic space.
- Plumbing Fixtures: Hire a qualified plumber for faucet, showerhead, and toilet installations to avoid leaks and ensure proper operation.
- Appliances: Careful measurements and proper leveling are essential for appliance installation. Double-check all connections and clearances before finalizing the job.
Finally, don't forget the small details - trim, baseboards, door hardware, and outlet covers. These seemingly minor elements contribute to the overall polish and professionalism of your finished renovation.
Painting & Trim: The Polishing Touches
Painting and trim work is where your space truly starts to feel finished-it's the polish that elevates a renovation from functional to beautiful. This stage can feel tedious, but the results are incredibly rewarding.
Preparation is Key: Before you even think about a brushstroke, thorough prep work is crucial. This includes patching any holes or imperfections in the walls with spackle, sanding smooth, and priming where necessary. Proper cleaning - removing dust and grime - ensures the paint adheres correctly and delivers a flawless finish. Don't skip this step!
Choosing Your Palette: Consider how your paint colors complement your flooring, cabinetry, and overall design scheme. Test paint samples in different lighting conditions before committing to a whole room. Don't be afraid to experiment with different sheens - matte for a cozy feel, satin or eggshell for durability, and semi-gloss or gloss for high-traffic areas.
Trim Work Details: Trim - baseboards, crown molding, window and door casings - adds architectural interest and a sense of sophistication. Precise miter cuts and perfectly aligned trim are hallmarks of quality workmanship. If you're DIYing, invest in a good miter saw and take your time! For a professional finish, consider hiring a skilled carpenter.
Finishing Touches: Don't underestimate the impact of detail work. Clean lines, crisp edges, and perfectly centered nail holes contribute to a polished look. Take a step back frequently to assess your progress and make adjustments as needed. And remember - patience is your best friend!
Final Inspection & Project Closeout
The final inspection isn't just a formality; it's your last chance to ensure everything aligns with your vision and meets local building codes. Schedule this with your local building department well in advance, as availability can be limited. Before the inspector arrives, do a thorough walk-through yourself, noting any minor imperfections or discrepancies.
During the inspection, be prepared to answer questions about the project's scope and construction methods. The inspector will examine the work performed, checking for compliance with permits and approved plans. Any issues identified will be documented, and you'll likely receive a list of corrective actions needed.
Once the inspector signs off, it's time for project closeout. This involves addressing any remaining punch list items - those small details that didn't quite meet your expectations. Work closely with your contractor (or handle it yourself if you DIYed) to complete these quickly and efficiently.
Finally, gather all warranty documentation for appliances, materials, and labor. Keep these organized and accessible, as they're invaluable for any future repairs or replacements. Don't forget to retain copies of all permits, contracts, and payment records for your own reference. A well-documented project closeout protects your investment and provides peace of mind for years to come.
Resources & Links
- Home Repair Calculator : A comprehensive resource for estimating renovation costs, material quantities, and timelines, useful for the Planning & Permits and Design & Material Selection sections.
- Build Permits Online : Provides information and guidance on obtaining building permits, essential for the Planning & Permits section. Coverage varies by location.
- U.S. Department of Housing and Urban Development (HUD) : Offers resources on building codes, accessibility guidelines, and energy efficiency, relevant to Planning & Permits and Structural Work.
- American Home Institute : Provides articles and guides on various home renovation topics, helpful for understanding different stages and techniques across all sections.
- Remodelista : Showcases beautiful and inspiring renovation designs, providing visual ideas for the Design & Material Selection section. Focus on aesthetics and high-end materials.
- Houzz : A vast online platform for home design and renovation inspiration, offering images, product listings, and contractor directories. Excellent for Design & Material Selection.
- Porch.com : Helps homeowners connect with local contractors, get quotes, and find inspiration for their renovations. Useful for finding professionals for all project phases.
- Thumbtack : Similar to Porch.com, allows users to find and book home renovation professionals, helpful for all phases, particularly Demolition & Site Preparation and Structural Work.
- Lowe's : Major home improvement retailer with a wealth of information on materials, installation guides, and DIY resources. Helpful for Design & Material Selection and Finishing the Space.
- The Home Depot : Similar to Lowe's, provides materials, tools, and how-to guides for various renovation tasks. Useful throughout the project.
- A.S.I. Remodeling : Provides information on the different phases of remodeling, and provides helpful advice on each stage of the process. Relevant across multiple sections.
- Family Handyman : Offers a vast library of DIY articles and videos on home improvement projects, useful for understanding various tasks and techniques, relevant to Demolition & Site Preparation onwards.
- This Old House : A long-running home renovation show and website offering expert advice, project guides, and inspiration. Relevant to all stages.
- Fine Homebuilding : Focuses on high-quality construction techniques and materials, particularly useful for the Structural Work and Rough-In Stage sections. Geared toward professionals and serious DIYers.
- Angi (formerly Angie's List) : Provides reviews and ratings for home service professionals, valuable for vetting contractors for all phases. Previously known as Angie's List.
Frequently Asked Questions
What is this checklist template for?
This checklist template is designed to help you plan and manage your home renovation project, from initial planning to final finishing touches. It aims to ensure you don't miss any crucial steps and stay organized throughout the process.
Is this checklist suitable for all renovation projects?
The checklist is designed to be adaptable. While it covers most common renovation projects (kitchen, bathroom, whole-house), you may need to customize it to fit your specific project's scope and complexity. Consider adding or removing items as needed.
How do I access and use the checklist template?
The template is linked within the article. Simply click the link to download it in [specify format, e.g., Excel, PDF]. You can then edit and adapt it to your individual needs. We recommend making a copy before you start customizing.
Can I modify the checklist?
Absolutely! The checklist is meant to be a starting point. Feel free to add, delete, or modify tasks to reflect the specifics of your renovation. Add deadlines, assign responsibilities, and track progress as needed.
What sections are included in the checklist?
The checklist is generally divided into sections such as Planning & Budgeting, Design & Permits, Hiring Professionals, Demolition & Construction, Finishing & Final Inspection. Specific tasks within each section will vary depending on the project.
What does 'Assignee' mean in the checklist?
'Assignee' refers to the person responsible for completing a specific task. This could be you, a contractor, a designer, or another professional involved in the project.
What if I don't have all the required permits?
Obtaining necessary permits is a critical step. The checklist highlights this. Research your local building codes and permit requirements early on. Failure to do so can lead to delays and legal issues. Contact your local building department for clarification.
How can I best track progress using the checklist?
As you complete tasks, mark them as 'Complete' in the checklist. You can also use the 'Notes' section to record details about the task, any problems encountered, or changes made. Regularly review the checklist to stay on track and identify potential bottlenecks.
What should I do if a task is delayed?
If a task is delayed, immediately update the checklist with the new estimated completion date and note the reason for the delay. Communicate with the assignee to understand the issue and find a solution. Update your overall project timeline accordingly.
Is there a cost estimation section in the checklist?
The checklist includes a section for budget planning and cost estimation. It's crucial to research costs accurately and include a contingency fund for unexpected expenses. The checklist provides a framework, but accurate pricing is your responsibility.
Found this Article helpful?
Construction Management Solution Demo
Build smarter, not harder! ChecklistGuro streamlines construction projects from planning to closeout. Manage tasks, inspections, safety protocols & more - all in one place. Reduce delays, improve communication, and deliver projects on time & on budget.
Related Articles
Stress-Free Inspections: Your Home Inspection Coordination Checklist Template

The Ultimate Website Maintenance Checklist Template

10 Essential Checks: Your Brokerage Policy Review Checklist
The Ultimate Office Opening/Closing Checklist Template

Your Ultimate AML Compliance Checklist Template
Rent Collection Checklist Template: Your Landlord's Guide

Your Complete Flood Zone Disclosure Checklist Template
Fair Housing Training Checklist Template: Your Guide to Compliance
We can do it Together
Need help with
Construction?
Have a question? We're here to help. Please submit your inquiry, and we'll respond promptly.