Your Ultimate Roof Deck Preparation Checklist Template
Published: 09/02/2025 Updated: 12/13/2025
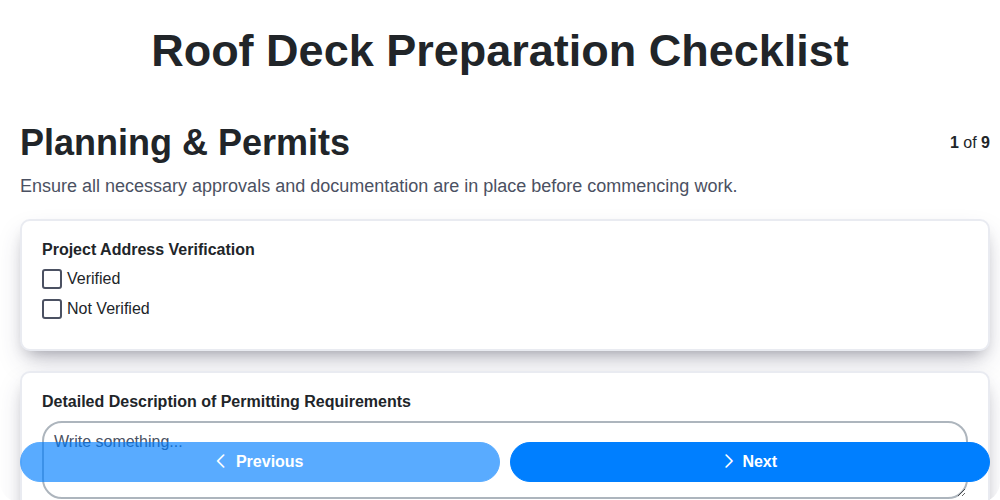
Table of Contents
- 1. Dreamy Rooftop Views: An Introduction to Roof Decks
- 2. Planning & Permits: Laying the Legal Foundation
- 3. Existing Roof Assessment: Understanding What You're Working With
- 4. Structural Reinforcement: Ensuring a Solid Base
- 5. Waterproofing & Membrane Installation: Preventing Leaks
- 6. Decking Material Selection: Choosing the Perfect Look & Feel
- 7. Framing & Layout: Building the Structure
- 8. Drainage Considerations: Water Management
- 9. Safety and Fall Protection: Prioritizing Well-being
- 10. Railing Selection & Installation
- 11. Final Inspection & Code Compliance
- 12. Post-Construction Cleanup & Maintenance
- 13. Enjoying Your New Roof Deck Oasis
- Resources & Links
TLDR: Need to build a roof deck? This checklist template breaks down the entire process, from permits to final cleanup, ensuring you cover all structural, safety, and legal requirements. Download it to stay organized, avoid costly mistakes, and build your dream rooftop space with confidence.
1. Dreamy Rooftop Views: An Introduction to Roof Decks
Imagine stepping outside onto your own private oasis, high above the hustle and bustle of city life. A roof deck offers just that - a unique and luxurious extension of your living space, blending indoor comfort with the refreshing embrace of the outdoors. More than just a platform, a roof deck transforms your home into a sanctuary, offering breathtaking views, a place for entertaining, or simply a quiet retreat to soak up the sun.
For decades, rooftop spaces were often overlooked or relegated to utilitarian purposes. However, evolving architectural trends, advancements in roofing technology, and a desire for unique outdoor experiences have fueled a resurgence in roof deck popularity. Modern construction techniques and waterproofing solutions have made it increasingly feasible and safe to create stunning, usable rooftop spaces.
Beyond the visual appeal, a roof deck offers a multitude of benefits. It can significantly increase your property's value, provide a dedicated space for social gatherings, and offer a welcome escape from confined indoor living. Whether you envision a sleek, modern entertaining zone or a cozy, landscaped garden, a well-planned roof deck can truly enhance your lifestyle and elevate your home. This guide will walk you through the essential steps to bring your rooftop dream to life, ensuring it's not only beautiful but also safe, structurally sound, and built to last.
2. Planning & Permits: Laying the Legal Foundation
Navigating the legal aspects of a roof deck project can feel overwhelming, but it's a critical first step. Ignoring these requirements can lead to hefty fines, forced removal of your deck, and potential legal action. Here's a breakdown of what you need to consider:
1. Zoning Regulations: Start by contacting your local zoning department. They're the ultimate authority on what's allowed in your area. Inquire specifically about regulations pertaining to rooftop structures, setbacks, height restrictions, and potential impact on neighboring properties. Some municipalities may have outright bans on roof decks, while others may have specific requirements you're unaware of.
2. Building Permits: Your Construction Passport: A building permit is almost universally required for a roof deck project. The application process typically involves submitting detailed plans, structural calculations (prepared by your engineer), and a scope of work. Be prepared for potential delays - permit approval can take several weeks or even months. Start the process early and budget for this timeframe.
3. Homeowners Association (HOA) Approval: If you live in a community governed by an HOA, their approval is essential. Review your HOA's covenants, conditions, and restrictions (CC&Rs) to understand their rules regarding rooftop structures. Submit your plans for review and be prepared to address any concerns they may have. Getting written approval is paramount - verbal agreements aren't sufficient.
4. Neighbor Notification (A Matter of Courtesy): While not always legally required, notifying your neighbors about your project is a courteous gesture. It can help prevent misunderstandings and potential disputes later on. Briefly explain the scope of work and potential impact (noise, views) and be open to addressing their concerns.
5. Understanding Setback Requirements: Setback requirements dictate how far your structure must be from property lines. These vary significantly by location and zoning designation, so accurately determining your property lines is crucial. A survey may be necessary to confirm these boundaries.
3. Existing Roof Assessment: Understanding What You're Working With
Before you build on your roof, understanding its condition undermeath is absolutely crucial. A roof deck adds considerable weight and stress, and overlooking existing issues can lead to costly repairs and potential structural failure. This isn't a DIY inspection; it requires a professional eye.
Here's what a thorough roof assessment should include:
- Shingle/Material Condition: A visual inspection of your current roofing material. Are shingles cracked, curled, or missing? Is the membrane showing signs of wear or damage?
- Underlayment Integrity: The underlayment provides a secondary layer of protection. Its condition is vital; deterioration can compromise the entire system.
- Flashing Inspection: Flashing around chimneys, vents, and skylights is a common source of leaks. Rust, cracks, or improper sealing need immediate attention.
- Sheathing Evaluation: The roof sheathing (usually plywood or OSB) needs to be solid and free from rot, water damage, or sagging.
- Drainage Assessment: Gutters, downspouts, and roof slope are inspected to ensure proper water runoff. Blockages or damage can lead to water pooling and leaks.
- Overall Structural Soundness: Beyond just the roofing materials, the underlying structure is assessed for signs of weakness or deterioration.
The assessment report should provide a clear picture of the roof's remaining life expectancy and any necessary repairs or replacements before proceeding with the deck construction. Don't skip this step - it's the foundation for a safe and long-lasting roof deck.
4. Structural Reinforcement: Ensuring a Solid Base
Adding a roof deck significantly increases the load on your home's existing structure. What once supported a relatively lightweight roof now needs to handle the weight of decking materials, furniture, people, and potential snow or ice. Ignoring this crucial factor can lead to catastrophic consequences, from sagging decks and cracked ceilings to, in the worst-case scenario, structural failure.
That's why consulting with a qualified and licensed structural engineer is absolutely non-negotiable. They're the experts in assessing your roof's capacity and designing a reinforcement plan tailored to your specific home.
Here's what a structural engineer will do:
- Comprehensive Load Assessment: They'll analyze your roof's design, existing materials, and span to determine its current load-bearing capabilities.
- Reinforcement Options: They'll provide detailed plans for strengthening your roof, which may involve adding support beams, joists, or even a new subfloor. The specifics depend entirely on your home's construction and the anticipated load.
- Detailed Drawings & Specifications: You'll receive clear, actionable plans that your contractor can follow precisely.
- Peace of Mind: Knowing your roof deck is structurally sound and safe will allow you to truly enjoy your new outdoor space.
Don't skimp on this vital step. A seemingly minor reinforcement project upfront can save you from incredibly costly repairs - or even prevent a disaster - down the road.
5. Waterproofing & Membrane Installation: Preventing Leaks
The most common culprit in roof deck disasters? Water infiltration. A compromised waterproof layer can lead to devastating damage to your home's interior - mold, rot, and costly repairs. Don't skimp here! Several excellent waterproofing options are available, each with its pros and cons.
1. Modified Bitumen: This is a traditional, durable option, often applied in multiple layers. It'm excellent for flat or low-sloped roofs. Installation typically requires heat, making professional expertise vital.
2. EPDM (Ethylene Propylene Diene Monomer): A rubber-like membrane known for its flexibility and resistance to UV rays. It's a good choice for roofs with complex shapes or areas prone to temperature fluctuations.
3. TPO (Thermoplastic Olefin): A single-ply membrane offering good durability and reflective properties (reducing heat absorption). It's also relatively easy to weld together, making installation quicker.
4. Liquid-Applied Membranes: These are spray-on or brush-on coatings that create a seamless, waterproof barrier. They are excellent for irregular surfaces and detailing areas where traditional membranes struggle. Consider acrylic or polyurethane-based options.
Beyond the Membrane: It's often recommended to incorporate a tapered roof design, even a slight slope, to encourage water runoff. This reduces standing water and minimizes stress on the membrane. Always use a primer specifically designed for your chosen membrane to ensure proper adhesion. Remember, a properly installed waterproofing system is your first line of defense - protecting your investment and your peace of mind.
6. Decking Material Selection: Choosing the Perfect Look & Feel
Choosing the right decking material is about more than just aesthetics; it's about balancing beauty, durability, and budget. Here's a breakdown of popular options to help you make an informed decision:
1. Pressure-Treated Lumber:
- Pros: Most affordable upfront, readily available, familiar look and feel.
- Cons: Requires regular staining/sealing to prevent rot and insect damage, prone to warping and cracking, shorter lifespan than other options.
- Cost: $3 - $8 per square foot (material only)
- Lifespan: 10-15 years (with proper maintenance)
2. Cedar & Redwood (Natural Wood):
- Pros: Beautiful natural grain, naturally resistant to insects and decay (though not rot-proof), pleasant aroma.
- Cons: Softer than other decking materials, prone to scratches and dents, requires regular sealing/staining to maintain appearance, can be more expensive than pressure-treated lumber.
- Cost: $5 - $15 per square foot (material only)
- Lifespan: 15-25 years (with proper maintenance)
3. Composite Decking:
- Pros: Low maintenance (no staining or sealing), resistant to rot, insects, and fading, longer lifespan, often made from recycled materials.
- Cons: Can be more expensive upfront, can get hotter in direct sunlight than wood, some older composite options have faced issues with staining (newer formulations have largely addressed this).
- Cost: $8 - $20+ per square foot (material only)
- Lifespan: 25-50+ years
4. PVC Decking:
- Pros: Highly durable, waterproof, resistant to staining and fading, lightweight, often includes a 25-year warranty.
- Cons: Most expensive option upfront, can look less natural than wood, may require special fasteners.
- Cost: $12 - $25+ per square foot (material only)
- Lifespan: 50+ years
Things to Consider Beyond Cost:
- Sun Exposure: Darker decking materials will absorb more heat.
- Foot Traffic: High-traffic areas will benefit from more durable materials.
- Local Climate: Consider the impact of rain, snow, and extreme temperatures.
- Aesthetics: Choose a material that complements your home's style and personal preferences.
Don't hesitate to get samples of each material to see and feel the difference before making a final decision!
7. Framing & Layout: Building the Structure
This stage transforms your waterproofing layer into a functional, beautiful deck. Precise measurements and careful execution are paramount here; a slight error can compromise the deck's stability and longevity.
Following the Engineer's Plans is Non-Negotiable: Your structural engineer's plans are your blueprint. Deviating from these instructions, even slightly, can impact the deck's load-bearing capacity and safety. Ensure all dimensions, beam spacing, and joist placement are followed meticulously.
Material Selection and Fasteners: Use pressure-treated lumber suitable for outdoor construction. Employ galvanized or stainless-steel fasteners designed for resisting corrosion. Avoid using regular screws, as they can weaken over time.
Leveling and Squareness: Double and triple-check that the frame is perfectly level and square. Use a level and square to ensure accuracy at every stage. An unlevel deck not only looks unprofessional but can also create drainage problems and make furniture placement awkward.
Joist Hangers & Beam Connections: Properly secure joists to the beams using approved joist hangers. Follow the manufacturer's instructions for proper installation and fastener size. Incorrectly installed hangers are a major structural weakness. Ensure all beam connections are robust and capable of supporting the anticipated load.
Consider Future Access: Think about how you're going to access the framing for future repairs or modifications. Leave access panels where appropriate.
Ongoing Checks: As you build, continuously check for level, square, and alignment. It's far easier to correct small errors as you go than to try and fix major problems later. Don't rush - careful, methodical work is key to a safe and durable deck.
8. Drainage Considerations: Water Management
Effective drainage is more than just preventing puddles; it's crucial for the longevity of your roof deck and the structural integrity of your home. Standing water can lead to rot, mold growth, and premature failure of your decking materials and waterproofing membrane. Here's a breakdown of how to ensure proper water management on your rooftop oasis:
1. Slope is Your Friend: Ideally, your roof deck should be constructed with a slight slope (typically ¼ inch per foot) away from the building. This encourages natural water runoff and prevents pooling. If your existing roof has a significant slope, factor that into your deck design and ensure the drainage is directed away from vulnerable areas like entry points or overhangs.
2. Gutter Solutions: Evaluate your existing gutter system. Is it adequate for the increased water flow from the deck's surface? You may need to extend existing downspouts or install additional gutters specifically for the deck area. Regularly clean gutters to prevent blockages that can cause overflows.
3. Decking Material Considerations: Some decking materials are naturally more water-resistant than others. While all decking needs protection, choosing a material with inherent water-repelling properties (like certain composite decking options) can reduce maintenance and extend its lifespan.
4. Gap Spacing & Ventilation: Proper spacing between deck boards allows for ventilation and prevents moisture buildup. Ensure adequate airflow beneath the deck surface to promote drying and prevent mold or mildew.
5. Surface Coatings & Sealants: Applying a high-quality sealant or water repellent coating can provide an extra layer of protection against water damage. Reapply these coatings regularly according to the manufacturer's recommendations.
6. Addressing Low Spots: Carefully inspect the deck surface for any low spots where water might accumulate. Small adjustments during construction or the addition of a self-leveling compound can remedy these areas.
7. Regular Cleaning: Routine cleaning is vital to remove debris like leaves, twigs, and dirt that can obstruct drainage pathways and contribute to moisture buildup. A quick sweep or occasional power wash (at a safe pressure) can keep your deck clear and functioning properly.
9. Safety and Fall Protection: Prioritizing Well-being
A roof deck offers breathtaking views, but it also presents unique fall risks. Prioritizing safety is absolutely non-negotiable - not just for your family and friends, but also for anyone who might access your rooftop space. Here's a breakdown of essential fall protection measures:
Railing Requirements: Meeting Local Codes
Your railings aren't just aesthetic elements; they're critical safety barriers. Local building codes dictate minimum railing heights (typically 36-42 inches) and maximum spacing between vertical members (usually no more than 4 inches to prevent a child from slipping through). Thoroughly research your local requirements and ensure your railing design adheres to these standards. Don't guess - verify!
Beyond the Basics: Enhanced Protection
While code compliance is essential, consider going above and beyond for added safety:
- Strength & Stability: Railings should be robust and securely fastened to the deck framing, capable of withstanding a significant lateral force. Use high-quality hardware and professional installation techniques.
- Non-Slip Surfaces: Incorporate non-slip decking materials or apply a non-slip coating to the deck surface to minimize the risk of slips and falls, especially when wet.
- Gate Security: If your roof deck is accessible from a higher level (e.g., a bedroom balcony), ensure any gates are self-closing and equipped with secure latches. Consider child-proof latches for added peace of mind.
- Lighting: Adequate lighting is crucial, especially at night. Install weatherproof deck lighting to illuminate walkways and potential hazards.
- Regular Inspections: Regularly inspect your railings, decking, and lighting for any signs of wear, damage, or loose connections. Promptly address any issues to prevent accidents.
Remember, a proactive approach to safety is the best way to enjoy your roof deck worry-free.
10. Railing Selection & Installation
Railings aren't just a safety feature; they're a key design element for your roof deck. Choosing the right style and ensuring proper installation is crucial for both aesthetics and functionality. Here's a breakdown to guide you through the process.
Style Considerations:
- Cable Railing: Offers unobstructed views and a modern, minimalist look. Requires precise tensioning and professional installation to ensure safety and stability.
- Glass Railing: Provides even clearer views than cable, creating a seamless connection with the surrounding cityscape. Safety glass is a must, and the framework needs to be incredibly robust.
- Wood Railing: Offers a classic, warm aesthetic. Pressure-treated lumber or naturally rot-resistant wood (like cedar or redwood) are good choices.
- Metal Railing (Aluminum or Steel): Durable, low-maintenance, and offers a sleek, contemporary feel.
- Combination Railing: Mixing materials, like wood and metal, can create a unique and personalized look.
Code Compliance is Key:
Your railings must meet local building codes, which typically dictate:
- Minimum Height: Generally, railings must be at least 36 inches high, but this can vary.
- Spindle/Baluster Spacing: The space between balusters or spindles must be small enough to prevent a 4-inch sphere from passing through.
- Load Requirements: Railings must be able to withstand a specific amount of lateral force.
Installation Best Practices:
- Professional Installation Recommended: Especially for cable and glass railings, professional installation is highly recommended. Improper installation can compromise safety and void warranties.
- Secure Fastening: Ensure all railing components are securely fastened to the deck frame using appropriate hardware.
- Level and Plumb: Railings should be perfectly level and plumb for a professional appearance and to meet code requirements.
- Regular Inspections: Periodically inspect your railings for any signs of wear, loose hardware, or damage, and make repairs as needed.
11. Final Inspection & Code Compliance
The excitement of finishing your roof deck is palpable, but don't rush into enjoying it just yet! A thorough final inspection is a crucial, legally required step, ensuring your new space is safe, structurally sound, and fully compliant with local codes. This isn't just about ticking a box; it's about protecting your investment and the safety of everyone who uses the deck.
Scheduling the Inspection: Contact your local building department to schedule a final inspection. They will send a qualified inspector to assess your completed project. Be prepared to provide them with copies of your approved plans and permit.
What the Inspector Will Look For: The inspector will meticulously review various aspects of your deck, including:
- Structural Integrity: Ensuring proper framing, joist spacing, and beam connections.
- Waterproofing: Confirming the waterproofing membrane is correctly installed and free of defects.
- Railing Safety: Verifying railing height, spacing, and secure attachment to the deck.
- Decking Material Compliance: Ensuring the materials used meet the specifications outlined in your permit.
- Overall Code Adherence: Assessing compliance with all applicable building codes and regulations.
Addressing Deficiency Notices: If the inspector identifies any deficiencies (areas needing correction), you'll receive a written notice outlining the required changes. Address these issues promptly and schedule a follow-up inspection to demonstrate compliance. Don't begin using the deck until all deficiencies are resolved and a Certificate of Occupancy or final approval is issued. This ensures you're operating legally and safely.
12. Post-Construction Cleanup & Maintenance
The excitement of a finished roof deck is fantastic, but the work doesn't entirely stop there. Proper cleanup and ongoing maintenance are crucial for preserving the beauty, safety, and longevity of your investment.
Immediate Post-Construction:
- Debris Removal: Thoroughly remove all construction debris, leftover materials, and tools from the deck surface and surrounding area. Don't overlook corners and drainages.
- Surface Cleaning: Give the deck a deep cleaning to remove dust, dirt, and construction residue. Use a specialized deck cleaner appropriate for your decking material (wood, composite, etc.). Pressure washing is an option, but use caution with wood to avoid damage - a lower pressure setting is often best.
- Inspection for Imperfections: While cleaning, take a close look for any minor imperfections that may have been overlooked during construction, such as loose screws or uneven boards. Address these promptly.
Ongoing Maintenance (Annual or as Needed):
- Regular Sweeping/Blowing: Keep the deck surface clear of leaves, dirt, and debris to prevent staining and promote drainage.
- Cleaning: Clean the deck at least annually, or more frequently in areas with heavy tree cover. Follow cleaning guidelines specific to your decking material.
- Staining/Sealing (for wood decks): Reapply stain or sealant as needed to protect the wood from weathering and UV damage. Frequency depends on the product used and the severity of sun exposure.
- Composite Decking Care: While low maintenance, composite decks still benefit from occasional cleaning with a specialized cleaner to remove mold or mildew.
- Hardware Inspection: Annually inspect all screws, bolts, and fasteners. Tighten or replace as needed to maintain structural integrity.
- Railings & Safety Features: Regularly inspect railings, stairs, and other safety features for any signs of wear or damage. Address any issues immediately.
- Drainage Checks: Periodically check drainage areas for blockages and clear any debris to ensure proper water flow.
- Professional Inspection (Optional): Consider a professional deck inspection every few years to identify potential issues before they become major problems.
13. Enjoying Your New Roof Deck Oasis
So, you've navigated the planning, permits, and construction - congratulations! Now comes the truly rewarding part: enjoying your new roof deck. But it's more than just stepping outside; it's about crafting a space that's both functional and a reflection of your personal style.
Beyond Furniture: Think beyond basic seating. Create zones for different activities. A cozy corner with plush cushions and a fire pit for chilly evenings? An outdoor dining area perfect for entertaining? A dedicated space for gardening, complete with planters and herbs?
Lighting is Key: Strategic lighting transforms the ambiance. String lights add a magical glow, while uplighting highlights architectural features or greenery. Consider solar-powered options for energy efficiency and ease of installation.
Greenery and Decor: Bring life to your deck with plants! Whether you prefer a lush vertical garden, potted herbs, or vibrant flower boxes, greenery adds color and freshness. Don't forget to incorporate personal touches with outdoor rugs, artwork, and decorative accents that reflect your taste.
Weather Protection: Invest in shade solutions to maximize comfort. A retractable awning, pergola with climbing plants, or strategically placed umbrellas can provide relief from the sun's intensity.
Regular Maintenance: Protect your investment with consistent care. Sweep regularly, clean spills promptly, and reapply sealant or stain as needed. A little effort goes a long way in preserving the beauty and longevity of your rooftop sanctuary.
Your roof deck is more than just an extension of your home; it's a personal retreat, a place to unwind, entertain, and soak in the breathtaking views. Savor every moment in your newly created rooftop paradise!
Resources & Links
- Local Code Compliance : Provides resources and information on building codes and regulations, crucial for roof deck permits and inspections. Navigate local ordinances and ensure your project adheres to all requirements.
- International Code Council (ICC) : The ICC develops the International Building Code (IBC) and other model building codes widely adopted across the US. Useful for understanding general building standards relevant to structural integrity and safety.
- ASHI - American Society of Home Inspectors : Offers information about roof inspections, potential structural issues, and professional advice from certified home inspectors. Can help with existing roof assessment.
- State Building Codes (Example: Ohio) : This is just an example; replace with your specific state's building code website. Essential for confirming state-specific regulations and permit processes.
- Metal Roofing Information : While not exclusively roof decks, provides information about roofing materials, particularly metal, which can be relevant for existing roof assessment and waterproofing considerations.
- Trex - Decking Materials : Provides detailed information and inspiration for decking material selection, focusing on composite decking options. Good for exploring aesthetics and maintenance.
- Cedar Decking Association : Provides information on using cedar as a decking material, including its properties, installation guidelines, and maintenance requirements. Great for natural wood options.
- DuPont - Building Materials : Provides information about a wide range of building materials, including waterproofing membranes and structural reinforcements. Useful for the technical aspects of roof deck construction.
- Simpson Strong-Tie : Provides details about structural connectors, fasteners, and hardware essential for secure roof deck framing and reinforcement. Critical for structural integrity.
- Home Depot : A general resource for finding building materials, tools, and supplies needed for roof deck construction. Useful for pricing and availability checks.
- Menards : Similar to Home Depot, offers a wide selection of building materials and supplies. Compare pricing and availability for your project.
- This Old House : Offers a wealth of DIY and home improvement information, including articles and videos on deck construction and outdoor living spaces. Can provide practical tips and inspiration.
- Proremodeler : Offers articles and resources on home improvement projects, including decks and outdoor living spaces. Good for planning and design inspiration.
- American Railings : Provides a range of railing options and information regarding railing codes and safety standards for roof decks. Important for safety and code compliance.
- National Roofing Contractors Association (NRCA) : Resources and information on roofing and waterproofing, which is highly relevant to the waterproofing and membrane installation section. While geared towards professionals, offers valuable insights.
Frequently Asked Questions
What is a roof deck and why would I want one?
A roof deck is a recreational space built on top of a building's roof. They offer stunning views, outdoor living space, and a unique entertainment area. People often choose roof decks to maximize usable space, especially in urban environments or areas with limited yard space.
What's included in the 'Ultimate Roof Deck Preparation Checklist Template'?
The checklist template covers all essential steps, including structural assessment, waterproofing, safety considerations (like railings and load capacity), permitting, material selection (decking, railing, lighting), and finishing touches. It's designed to ensure a safe, durable, and enjoyable roof deck.
Do I need a permit to build a roof deck?
Generally, yes. Building a roof deck almost always requires a building permit. The requirements vary widely based on your location (city, county, and state regulations). The checklist template includes a reminder to research and obtain necessary permits; it's crucial to comply with all local codes before starting construction.
What structural assessment should I have done before building a roof deck?
A structural engineer should assess your roof's ability to support the added weight of the deck, furniture, and occupants. The assessment will consider the existing roof structure, its condition, and the anticipated load. The checklist template emphasizes this vital safety step.
What are some common waterproofing considerations for a roof deck?
Waterproofing is critical to prevent leaks into the building below. This typically involves a robust roofing membrane system specifically designed for roof deck applications. The checklist outlines different waterproofing options and considerations for drainage.
What railing height is typically required for a roof deck?
Most building codes require railings to be at least 36 inches (91 cm) high. However, this can vary depending on your location and the deck's proximity to a sloped surface. Check local building codes for specific requirements. The checklist provides a reminder to verify these requirements.
How do I calculate the load capacity I need for my roof deck?
The structural engineer's assessment will determine the load capacity. It's expressed in pounds per square foot (psf). This calculation considers the weight of the decking, railing, furniture, and the maximum number of people anticipated to be on the deck. The checklist template prompts you to obtain this information from the engineer.
What types of decking materials are suitable for roof decks?
Common decking materials include composite decking (often preferred for its durability and low maintenance), pressure-treated wood, cedar, and hardwoods like ipe. Each material has different pros and cons regarding cost, maintenance, and longevity. The checklist includes a section for material selection and considerations.
What are some important safety features I should consider for my roof deck?
Beyond railings, safety features include proper lighting, non-slip decking surfaces, adequate ventilation, and a clear evacuation plan. Regular inspections and maintenance are also important to ensure long-term safety. The checklist highlights these crucial safety aspects.
How often should I inspect and maintain my roof deck?
Regular inspections (at least annually, or more frequently in harsh climates) are essential. Maintenance includes cleaning, checking for damage (loose boards, corrosion), and re-applying protective coatings as needed. The checklist provides a reminder to schedule regular maintenance checks.
Found this Article helpful?
Construction Management Solution Demo
Build smarter, not harder! ChecklistGuro streamlines construction projects from planning to closeout. Manage tasks, inspections, safety protocols & more - all in one place. Reduce delays, improve communication, and deliver projects on time & on budget.
Related Articles

The Ultimate Concrete Vibration Checklist Template

Unlock Value: Your Free Value Engineering Checklist Template

The Ultimate HVAC Ductwork Installation Checklist Template

The Ultimate Rebar Placement Checklist Template

Your Concrete Mix Design Verification Checklist: A Step-by-Step Guide

Backfilling & Compaction Checklist: A Foundation's Best Friend

The Ultimate Concrete Delivery & Placement Checklist Template

Your Ultimate Stakeholder Communication Plan Checklist Template
We can do it Together
Need help with
Construction?
Have a question? We're here to help. Please submit your inquiry, and we'll respond promptly.