The Ultimate Roofing Membrane Installation Checklist Template
Published: 09/02/2025 Updated: 12/13/2025
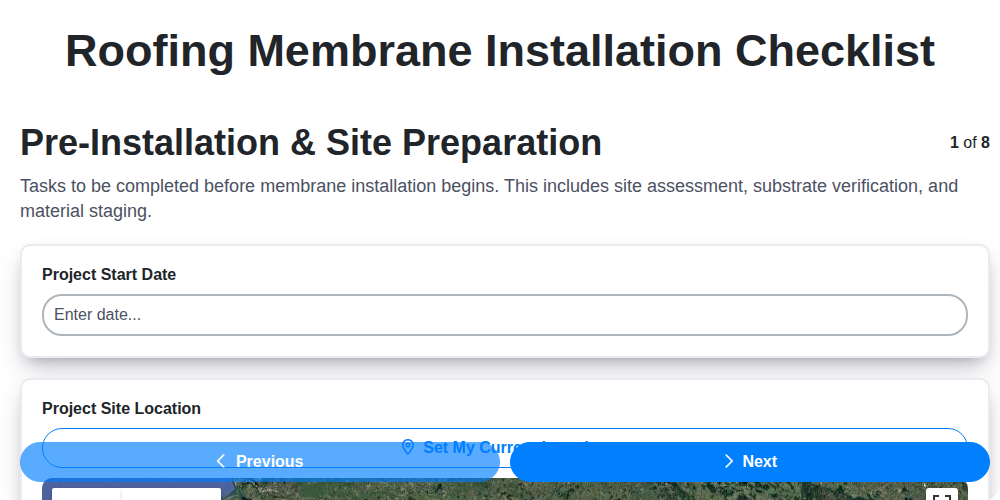
Table of Contents
- Introduction: Why a Roofing Membrane Installation Checklist Matters
- Pre-Installation Planning & Site Assessment
- Substrate Preparation: The Foundation for Success
- Membrane Material Handling and Storage - Protecting Your Investment
- Precise Membrane Unrolling and Positioning
- Secure Seaming and Adhering Techniques
- Critical Penetration and Detail Flashing
- Quality Control & Inspection: Ensuring a Flawless Result
- Post-Installation Cleanup and Documentation
- Template Download: Your Roofing Membrane Installation Checklist
- Resources & Links
TLDR: Download our free Roofing Membrane Installation Checklist template - it's your go-to guide for flawless roof installs! It covers every step, from prep to cleanup, minimizing errors, ensuring quality, and protecting your warranty. Easy to use and customizable for any project!
Introduction: Why a Roofing Membrane Installation Checklist Matters
A roofing membrane is the unsung hero protecting your building from the elements. While aesthetics are important, a compromised membrane can lead to leaks, structural damage, and costly repairs-far outweighing the initial investment. That's why a meticulous installation process is absolutely crucial. But how do you ensure that process is consistently followed, minimizing errors and maximizing the lifespan of your roof? The answer is a detailed, actionable checklist. This isn't just about ticking boxes; it's about creating a system that guarantees quality, reduces risk, and protects your building's integrity. A well-executed checklist fosters accountability, provides a roadmap for success, and ultimately contributes to a roofing system that performs as intended for years to come.
Pre-Installation Planning & Site Assessment
Before a single roll of membrane touches the roof, a thorough planning and assessment phase is absolutely critical. Rushing into installation without proper preparation is a recipe for costly mistakes, potential leaks, and a compromised roof lifespan. This initial stage isn't just about checking boxes; it's about proactively identifying and mitigating risks.
1. Detailed Blueprint Review & Specification Alignment:
Begin with a meticulous review of the architectural drawings, project specifications, and manufacturer's technical data sheets. Ensure every aspect of the planned installation - from slope requirements and drainage details to material selection and fastening methods - aligns perfectly with the documented plan. Discrepancies should be addressed before any work begins, with written clarification from the architect or project manager.
2. Comprehensive Site Assessment - Identifying Potential Challenges:
A physical site assessment goes beyond a visual inspection. This should include:
- Structural Integrity Evaluation: Assess the existing roof structure's load-bearing capacity. Is it sufficient to support the new membrane system and any anticipated snow or wind loads? Consult with a structural engineer if necessary.
- Ponding Water Analysis: Identify areas prone to ponding water. These areas require special attention, potentially including slope adjustments or waterproofing treatments.
- Existing Damage Documentation: Thoroughly document any existing damage or deterioration - cracks, leaks, rot, or loose fasteners. This creates a baseline for comparison and provides a record of pre-existing conditions.
- Obstruction Mapping: Identify all obstructions on the roof - vents, skylights, pipes, HVAC units. Plan for proper flashing and detailing around these penetrations.
- Environmental Considerations: Note prevailing wind direction and potential exposure to extreme weather conditions. This informs fastening patterns and edge detailing.
3. Permitting & Regulatory Compliance:
Confirm all necessary permits have been obtained and ensure the planned installation complies with local building codes, fire safety regulations, and environmental guidelines. Don't underestimate the importance of this step - non-compliance can lead to delays and costly rework.
Substrate Preparation: The Foundation for Success
Think of your roofing membrane as a beautifully crafted tile - it can't perform its best if the underlying surface is uneven, contaminated, or unstable. Substrate preparation isn't just a step; it's the critical foundation upon which the entire roofing system's longevity and performance rests. A poorly prepared substrate will inevitably lead to premature membrane failure, leaks, and costly repairs down the line.
What Does Proper Substrate Preparation Entail?
It's more than just sweeping! Here's a breakdown of the essential steps:
- Cleaning is Key: We're talking a thorough cleaning. This means removing all loose debris - gravel, dust, dirt, vegetation, and any other foreign materials. A power washer is often a valuable tool for this purpose, but ensure proper drying time afterward.
- Smoothness Verification: The substrate must be relatively smooth and level. Uneven surfaces create stress points on the membrane, increasing the risk of cracks and leaks. Minor imperfections can often be addressed with leveling compounds, but significant irregularities might require more extensive repairs.
- Slope Assessment: Confirm that the roof slope meets the manufacturer's specifications for proper water drainage. Corrective measures, like shimming or re-grading, may be necessary.
- Moisture Check: Any existing moisture trapped beneath the substrate must be addressed. Moisture can compromise adhesion and accelerate deterioration. This often involves addressing leaks in the existing roof deck or allowing the substrate to dry thoroughly.
- Primer Application (If Required): Some membrane systems require a primer to promote adhesion. Always consult the manufacturer's specifications to determine if a primer is needed and apply it according to their instructions.
- Inspection for Damage: Carefully inspect the substrate for any signs of damage, such as rot, cracks, or loose fasteners. Repair any damage before proceeding with the membrane installation.
Ignoring these steps might save time and effort upfront, but it's a gamble that rarely pays off. Investing in proper substrate preparation is an investment in the long-term performance and reliability of your roofing system.
Membrane Material Handling and Storage - Protecting Your Investment
Membrane materials are a significant investment, and improper handling and storage can compromise their quality and performance before installation even begins. Exposure to the elements, physical damage, and incorrect storage practices can lead to premature degradation, adhesion issues, and costly replacements. Here's how to safeguard your membrane material:
Upon Delivery: A Thorough Inspection
The moment your membrane rolls arrive, don't assume everything is perfect. Conduct a meticulous inspection for any signs of damage incurred during transit. Look for:
- Tears and Punctures: Carefully examine the exterior of each roll for any holes or tears in the membrane.
- Creases and Wrinkles: Significant creases or wrinkles can affect adhesion and require special handling.
- Moisture Intrusion: Look for signs of moisture inside the rolls, which can lead to mildew and degradation.
- Packaging Integrity: Check if the original packaging is intact and adequately protects the membrane.
Document any observed damage with photos and file a claim with the carrier immediately if necessary.
Ideal Storage Conditions
- Dry Environment: Moisture is the enemy. Store rolls in a dry, well-ventilated area away from rain, snow, and standing water.
- Shaded Location: Direct sunlight causes UV degradation, which can stiffen the membrane and compromise its flexibility. Keep rolls shaded and protected from the sun.
- Temperature Control: Extreme temperatures - both hot and cold - can negatively impact membrane properties. Ideally, store rolls within a temperature range recommended by the manufacturer.
- Vertical Orientation: Store rolls vertically to prevent deformation and maintain their shape. This also allows for easier inspection.
- Protection from Physical Hazards: Keep the storage area clear of obstacles and equipment that could potentially damage the rolls.
Short-Term vs. Long-Term Storage
- Short-Term (Less Than 1 Week): A covered, dry area is generally sufficient. Ensure adequate ventilation.
- Long-Term (More Than 1 Week): A dedicated, climate-controlled storage space is highly recommended. Regularly inspect the rolls for any signs of deterioration.
Remember: Always refer to the manufacturer's specific storage guidelines for the most accurate recommendations. Proper material handling and storage are crucial for ensuring a successful and long-lasting roofing system.
Precise Membrane Unrolling and Positioning
Accurate membrane unrolling and positioning are cornerstones of a leak-free, durable roof. This phase demands meticulous planning and execution. Begin by establishing a clear layout plan, considering roof slopes, obstructions, and minimizing waste. Utilize layout lines drawn directly onto the substrate as visual guides - these act as your roadmap for precise placement.
When unrolling the membrane, do so with care. Avoid stretching or twisting, as these actions can compromise the material's integrity and lead to future stress points. Work in manageable sections, typically no larger than a single person can comfortably handle. Temporary fasteners or weights are crucial at this stage; they secure the membrane and prevent it from shifting due to wind or movement.
Pay close attention to alignment. Ensuring consistent overlaps and setbacks according to the manufacturer's specifications is paramount. Regularly double-check your work against the layout plan and adjust as needed. Remember, small discrepancies at this stage can cascade into larger problems during the seaming and adhering phases. A level and consistent approach here will significantly contribute to the overall quality and longevity of your roofing system.
Secure Seaming and Adhering Techniques
The success of your roofing membrane installation hinges on flawlessly executed seaming and adhering. This isn't just about placing the membrane; it's about creating a robust, watertight bond that withstands years of exposure to the elements. Here's a deeper dive into the critical techniques that separate a good roof from a failing one.
Understanding Your Adhesion Method
Different membrane types (TPO, EPDM, PVC) and project requirements dictate the best adhesion method:
- Fully Adhered: This system utilizes adhesives to bond the membrane directly to the substrate. Proper primer application is absolutely crucial for optimal adhesion. Always follow the manufacturer's specified adhesive type, application rate, and open time. Consider environmental factors like temperature and humidity, as they can significantly impact adhesive performance. Roller application ensures uniform pressure and complete contact.
- Mechanically Attached: This method involves securing the membrane using mechanical fasteners. Pay meticulous attention to fastener spacing and pattern, as dictated by wind uplift calculations. Ensure proper penetration depth and fastener compatibility with the substrate.
- Self-Adhered: These membranes rely on their inherent adhesive properties. Cleanliness of the substrate is paramount. Prime only if explicitly recommended by the manufacturer. Roll uniformly and ensure proper contact pressure.
Key Techniques for Robust Seams:
- Consistent Overlap: Maintain the manufacturer's specified seam overlap dimensions. Deviations compromise the system's integrity.
- Pre-Heating (PVC and some TPO): Pre-heating seams before welding or heat bonding improves adhesion and eliminates air pockets.
- Proper Welding Technique (where applicable): Temperature, speed, and pressure are critical for a strong, leak-proof weld. Practice and consistent technique are key.
- Roller Application is Key: After initial placement, use a heavy-duty roller to ensure uniform pressure and complete contact across the entire seam length. Avoid over-rolling, which can damage the membrane.
- Lap Sealant (for some systems): Some systems require a lap sealant applied at the seams for added protection against water intrusion. Apply evenly and according to manufacturer's instructions.
- Regular Inspection: During the seaming and adhering process, frequently inspect the work for inconsistencies, voids, or defects. Correct any issues immediately.
Don't Cut Corners: The Future of Your Roof Depends On It
Critical Penetration and Detail Flashing
Penetration and detail flashing often represent the Achilles' heel of a roofing membrane installation. It's where seemingly minor oversights can lead to significant leaks and costly repairs down the line. These areas - around vents, pipes, skylights, chimneys, parapet walls, and perimeter details - demand meticulous attention and precise execution.
Beyond the Basics: A Deep Dive into Critical Points
Simply applying flashing isn's enough; it's about understanding the complexities of each detail. Consider the following:
- Skylights and Vents: Proper lapping and sealant application are absolutely crucial. Always refer to the skylight/vent manufacturer's installation instructions and integrate them seamlessly with the membrane system. Pay close attention to drip edges and ensure they're securely fastened.
- Pipes and Vertical Penetrations: Use pipe boots that are compatible with the membrane type and properly sized for the pipe diameter. Secure them tightly to prevent movement and water ingress.
- Parapet Walls & Perimeter Details: These areas require complex flashing configurations to prevent water from wicking underneath the membrane. Ensure adequate termination bars and properly adhered coping details.
- Changes in Direction: Where the roof plane changes direction, detail flashing is essential to prevent water from being trapped and driven underneath the membrane.
- Chimneys: Chimney flashing is notoriously difficult. Proper step flashing, counter-flashing, and sealant are vital for a watertight seal.
- Expansion Joints: Ensure proper detailing around expansion joints to accommodate movement and prevent stress on the membrane.
Common Pitfalls and How to Avoid Them
- Incorrect Sealant Selection: Using incompatible sealants can lead to premature failure. Always verify sealant compatibility with both the membrane and the flashing material.
- Insufficient Overlap: Inadequate overlap of flashing can compromise its ability to shed water.
- Poor Adhesion: Ensure proper surface preparation and use appropriate primers to achieve optimal adhesion of the flashing.
- Ignoring Manufacturer's Instructions: As always, the manufacturer's specific recommendations for flashing details should take precedence.
Proactive Inspection is Key
During the quality control phase, meticulously inspect all penetration and detail flashing areas. Use a non-destructive testing method, such as a water test (if permitted by the manufacturer and project specifications) or a close visual inspection with a high-powered flashlight, to identify any potential leaks. Don't take shortcuts - your reputation, and your client's peace of mind, depends on it.
Quality Control & Inspection: Ensuring a Flawless Result
Quality control isn't just about looking good; it's about guaranteeing performance and longevity. This phase moves beyond the superficial, digging deep to verify that every detail meets the manufacturer's specifications and project requirements. A robust inspection process identifies potential issues before they become costly problems.
Visual Inspection: The First Line of Defense
Begin with a thorough visual inspection of the entire roof surface. Look for:
- Seam Integrity: Are all seams properly bonded, with consistent overlap and no gaps or wrinkles? Pay close attention to critical areas like corners and penetrations.
- Membrane Uniformity: Check for any signs of damage, punctures, discoloration, or excessive stretching.
- Alignment & Positioning: Verify that the membrane is accurately aligned and positioned, adhering to the design plan.
- Flashing Details: Closely examine the flashing around all penetrations and details, ensuring watertight seals and proper adhesion. Look for any signs of sealant failure.
Beyond the Eye: Performance Testing
While a visual inspection is essential, it's often not enough. Consider these performance tests:
- Seam Pull Testing: Conduct seam pull tests in representative areas to verify the bonding strength. These tests should adhere to manufacturer's specifications and industry standards.
- Water Finding Test (Ponding Test): If permitted and applicable, consider a water-finding test to identify any potential leak points. Ponding water should drain within a defined timeframe.
- Infrared Thermography: For complex installations or performance concerns, infrared thermography can reveal temperature differentials indicative of potential leaks or insulation issues.
Documentation is Key
Every inspection finding, regardless of severity, should be meticulously documented. This includes:
- Photos/Videos: Visual evidence is invaluable for tracking progress and identifying recurring issues.
- Detailed Notes: Clearly describe any deficiencies and the corrective actions taken.
- Sign-off: Obtain sign-off from relevant stakeholders (installer, project manager, client) to acknowledge the inspection and corrective actions.
Remember: Quality control is a continuous process, not just a final check. Consistent monitoring and attention to detail throughout the installation are essential for ensuring a truly flawless result.
Post-Installation Cleanup and Documentation
The work isn't truly complete until the site is meticulously cleaned and a comprehensive record of the installation is created. This phase focuses on leaving a professional impression and safeguarding your project for years to come.
Thorough Debris Removal: Begin by removing all construction debris - scrap membrane, adhesive containers, tools, and any stray materials - from the roof surface and surrounding areas. A clean roof not only looks better but also prevents premature degradation from trapped contaminants. Use magnets to collect any loose metallic debris that could damage future maintenance equipment.
Final Visual Inspection: Conduct a final walkthrough, not just for cleanliness but to visually reassess the entire roof. This is a chance to catch any minor imperfections overlooked during earlier inspections.
Documentation is Key: Meticulous documentation is vital for warranty validation, future maintenance, and potential dispute resolution. Include the following:
- Photographic Evidence: Take detailed photos of the completed roof from various angles, capturing overall appearance and highlighting key areas (e.g., perimeter details, flashing, penetrations).
- Inspection Reports: Compile all inspection reports from throughout the project, noting any corrective actions taken.
- Material Certificates: Gather and organize material certificates and datasheets for all roofing membrane and adhesive products used.
- Warranty Information: Provide the client with a clear and concise summary of the manufacturer's warranty, including registration procedures and coverage details. Retain a copy for your records.
- As-Built Drawings (if applicable): If required by the project specifications, create as-built drawings reflecting the final installed configuration of the roof.
- Client Sign-Off: Obtain a signed acknowledgement from the client confirming their satisfaction with the completed work and receipt of all relevant documentation.
Proper post-installation cleanup and thorough documentation are integral to demonstrating professionalism, preserving the integrity of the roof, and protecting your reputation.
Template Download: Your Roofing Membrane Installation Checklist
Ready to streamline your roofing membrane installation process? We've created a comprehensive, downloadable checklist, designed to guide your team through each critical step, minimize errors, and ensure a high-quality, long-lasting roof.
This isn't just a generic list - it's built upon best practices and industry expertise. You'll find detailed steps covering everything from pre-installation site preparation to post-installation cleanup, ensuring nothing is overlooked.
What You'll Get:
- A printable, step-by-step checklist: Perfect for on-site use by installers.
- Checkboxes for easy tracking: Visually monitor progress at each stage.
- Notes section: Space to record project-specific details and observations.
- A valuable resource for quality assurance: Ensure consistent results and minimize costly mistakes.
Download your free Roofing Membrane Installation Checklist now!
Please remember to always refer to the membrane manufacturer's specific installation guidelines as they supersede any general checklist.
Resources & Links
- Roofing Industry Association (RIA) : A leading resource for roofing industry information, standards, and best practices. Their website provides valuable data, educational materials, and potential code updates relevant to membrane installation.
- ULI Institute (Underwriters Laboratories Institute) : Provides comprehensive roofing training and certifications, covering material installation techniques, code compliance, and quality assurance. Their courses and resources are a significant asset for installers and contractors.
- National Ready Mixed Concrete Association (NRMCA) : While primarily focused on concrete, their resources on substrate preparation and moisture control are incredibly relevant for roofing membrane installation, particularly with concrete decks.
- Thermo-Dyne Specialties, Inc. : Provides technical bulletins and application guides for various roofing membrane systems. Often includes critical information on substrate moisture testing and temperature requirements - essential for successful adhesion.
- GAF Roofing : A major manufacturer of roofing materials. Their website offers technical documentation, installation guides, and frequently asked questions related to their membrane systems. Useful for understanding specific material properties and installation recommendations.
- Firestone Building Products : Another leading manufacturer. Their site contains detailed installation manuals, technical bulletins, and videos demonstrating proper techniques for their roofing membrane systems.
- SIPs Construction, Inc. : While SIPs are wall panels, their site contains substrate information that can be incredibly valuable to roof membrane installers - especially pertaining to vapor retarders and moisture barriers.
- American National Standards Institute (ANSI) : ANSI develops standards related to construction materials and methods. Checking for relevant ANSI standards regarding roofing installation is crucial for compliance and best practices.
- International Code Council (ICC) : Provides building codes, including those pertaining to roofing systems. Knowing and adhering to local building codes is essential for a legally compliant installation.
- Osmosis : Provides resources and products related to moisture management in building construction, which is a critical consideration for roofing membrane installations. They have articles and data useful for substrate testing.
Frequently Asked Questions
What is a roofing membrane and why is it important?
A roofing membrane is a waterproof barrier that protects your building from the elements. It's crucial for preventing leaks, damage from water intrusion, and maintaining structural integrity. Different types of membranes (EPDM, TPO, PVC, etc.) offer varying levels of durability and performance.
What is the purpose of this checklist template?
This checklist template is designed to guide roofing contractors and building owners through the proper installation process of roofing membranes, ensuring quality, minimizing errors, and maximizing the lifespan of the roof. It provides a step-by-step guide, covering everything from site preparation to final inspection.
Who is this checklist template for?
This template is primarily for roofing contractors, installers, and project managers involved in roofing membrane installation. It's also beneficial for building owners or project stakeholders who want to ensure a professional and compliant installation process.
What types of roofing membranes does this checklist cover?
The checklist is designed to be adaptable and can be used for most common roofing membrane types, including EPDM, TPO, PVC, and modified bitumen. Specific sections and considerations may need adjustments based on the chosen membrane type. Instructions for tailoring the checklist are included.
How do I customize the checklist template?
The template includes sections for adding project-specific information, such as contractor details, membrane manufacturer specifications, and local building codes. You can add or remove tasks based on your project's unique requirements. There are clearly marked areas for notes and revisions.
What does 'substrate' refer to in the checklist?
The 'substrate' is the underlying surface to which the roofing membrane is installed. This could be plywood, concrete, or another roofing layer. The checklist includes steps to ensure the substrate is clean, dry, and properly prepared to support the membrane.
What does 'adhesion' mean in the context of this checklist?
'Adhesion' refers to the bond between the roofing membrane and the substrate or other layers. The checklist includes checks to verify proper adhesion, typically through specific testing methods or visual inspection.
Are there sections on safety in the checklist?
Yes, the checklist includes dedicated sections for safety protocols and procedures. It emphasizes the importance of personal protective equipment (PPE), fall protection, and adherence to safety regulations during the entire installation process.
What should I do if I find a discrepancy between the checklist and the membrane manufacturer's specifications?
Always prioritize the manufacturer's specifications. If there's a conflict, consult the membrane manufacturer for clarification and adjust the installation process accordingly. Document any deviations from the checklist and the reasoning behind them.
Where can I find the necessary tools and equipment for roofing membrane installation?
The checklist outlines the typical tools and equipment required. Local building supply stores, roofing distributors, and rental companies are good resources for acquiring these items. Ensure all equipment is in good working order and operated by trained personnel.
Found this Article helpful?
Construction Management Solution Demo
Build smarter, not harder! ChecklistGuro streamlines construction projects from planning to closeout. Manage tasks, inspections, safety protocols & more - all in one place. Reduce delays, improve communication, and deliver projects on time & on budget.
Related Articles

The Ultimate Concrete Vibration Checklist Template

Unlock Value: Your Free Value Engineering Checklist Template

The Ultimate HVAC Ductwork Installation Checklist Template

The Ultimate Rebar Placement Checklist Template

Your Concrete Mix Design Verification Checklist: A Step-by-Step Guide

Backfilling & Compaction Checklist: A Foundation's Best Friend

The Ultimate Concrete Delivery & Placement Checklist Template

Your Ultimate Stakeholder Communication Plan Checklist Template
We can do it Together
Need help with
Construction?
Have a question? We're here to help. Please submit your inquiry, and we'll respond promptly.