Construction Project Checklist Template: Your Ultimate Guide
Published: 10/02/2025 Updated: 05/28/2026
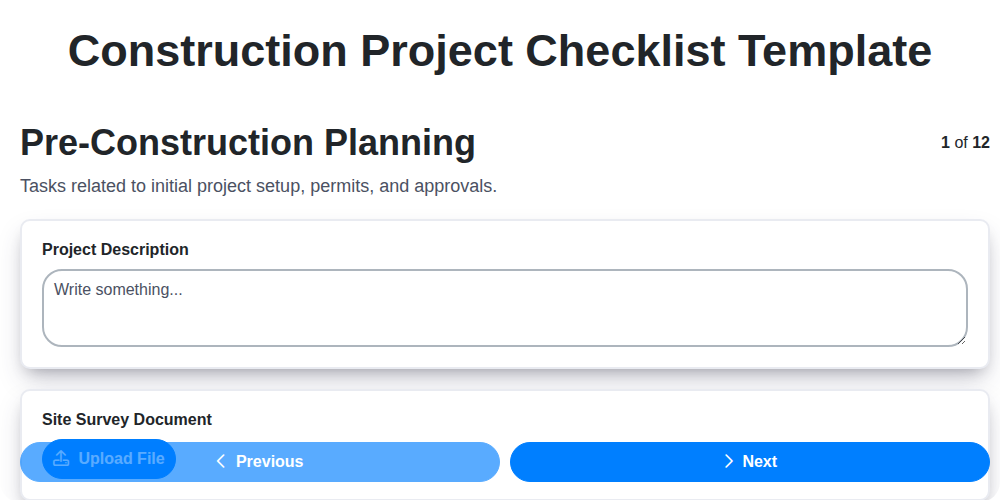
Table of Contents
- Why You Need a Construction Project Checklist
- Understanding the Phases of a Construction Project
- Phase 1: Pre-Construction Planning - Laying the Foundation
- Phase 2: Site Preparation - Clearing the Way
- Phase 3: Foundation & Substructure - Building on Solid Ground
- Phase 4: Framing & Structure - Erecting the Framework
- Phase 5: Rough-In Plumbing & Electrical - The Infrastructure Takes Shape
- Phase 6: Insulation & Drywall - Creating the Enclosure
- Phase 7: Interior Finishes - Adding Style and Functionality
- Phase 8: Exterior Finishes - Protecting and Beautifying
- Phase 9: Mechanical, Electrical, and Plumbing (MEP) Systems - Bringing Everything to Life
- Phase 10: Landscaping and Site Restoration - Completing the Picture
- Phase 11: Final Inspections and Approvals - Ensuring Compliance
- Phase 12: Project Closeout - From Construction to Completion
- Resources & Links
TLDR: Building something? This guide provides a comprehensive checklist template to manage your construction project, from planning and site prep to final inspections and closeout. It minimizes errors, keeps you on schedule & budget, and ensures quality control - your essential roadmap to building success!
Why You Need a Construction Project Checklist
Beyond simply ticking boxes, a construction project checklist acts as a powerful communication tool. It ensures everyone involved - from the project manager and contractors to subcontractors and even the client - is on the same page regarding expectations, timelines, and quality standards. This shared understanding minimizes misinterpretations, reduces costly rework stemming from assumptions, and fosters a more collaborative environment. Think of it as a proactive safeguard against those frustrating we didn't know that was supposed to be done moments that can derail a project and inflate costs. Furthermore, a well-maintained checklist provides a clear audit trail, demonstrating compliance with building codes, safety regulations, and contractual obligations - a vital asset for dispute resolution and ensuring project accountability.
Understanding the Phases of a Construction Project
Each construction project, regardless of size or complexity, generally unfolds through a series of distinct phases. Recognizing and understanding these phases is critical for effective planning, execution, and ultimately, project success. While the specifics might vary depending on the project type (residential, commercial, industrial), these core phases provide a valuable framework.
The initial Pre-Construction Planning phase is where the groundwork is laid. This involves everything from securing permits and finalizing designs to selecting contractors and establishing budgets. Without meticulous planning here, projects are far more likely to face delays and cost overruns.
Following planning, the Site Preparation phase focuses on getting the physical site ready. This includes clearing existing structures, grading the land, and installing erosion control measures. A poorly prepared site can significantly impact subsequent phases.
Next, Foundation & Substructure establishes the solid base of the project, including footings, foundation walls, and waterproofing. This phase is absolutely critical for long-term structural integrity.
The Framing & Structure phase builds the skeleton of the building, incorporating floor, wall, and roof framing. Precise framing is essential for ensuring squareness, stability, and ease of installation for future systems.
Rough-in Plumbing & Electrical and Rough-in HVAC follow, where essential utilities are installed within the framing. These systems are 'roughed in' before insulation and drywall, allowing for easy access for inspection and modification.
Then comes Insulation & Drywall, creating the enclosed building envelope and preparing the interior for finishing.
Following this is the Interior Finishes phase, which includes flooring, painting, cabinetry, and fixture installations - essentially bringing the interior spaces to life.
Exterior Finishes then transform the building's appearance, involving siding, roofing, windows, doors, and exterior painting.
The Mechanical, Electrical & Plumbing (MEP) Systems phase integrates and commissions the finalized utility systems, ensuring everything functions correctly.
Finally, Landscaping & Site Restoration creates the surrounding environment, and culminates in Final Inspections & Approvals followed by Project Closeout. Recognizing each phase's purpose and potential challenges allows for proactive management and a smoother construction journey.
Phase 1: Pre-Construction Planning - Laying the Foundation
The adage measure twice, cut once perfectly encapsulates the importance of meticulous pre-construction planning. This initial phase is arguably the most critical, directly influencing the project's success - or potential pitfalls. Skipping corners here can lead to costly rework, delays, and frustration down the line.
Think of this phase as the blueprint for your entire construction process. It's not just about securing permits (though that's a huge part of it!). It's about defining the scope, understanding the risks, and establishing clear communication channels before any shovels hit the ground.
Securing Permits & Navigating Regulations: This isn't just a bureaucratic hurdle; it's a legal requirement. Different jurisdictions have different codes and approvals needed. Failing to secure the right permits early can bring your project to a grinding halt. Engage with local authorities early on to understand the specific requirements.
Beyond the Blueprints: Risk Assessment & Contingency Planning: Design documents are important, but they don't account for everything. A thorough risk assessment should identify potential issues - soil instability, unexpected utility lines, material price fluctuations - and establish contingency plans to address them. Building a buffer into your schedule and budget is essential.
The Power of a Detailed Scope of Work: A clear, concise Scope of Work (SOW) is your project's North Star. It outlines exactly what is to be built, the materials to be used, the quality standards to be met, and the responsibilities of each party. Ambiguity in the SOW is a breeding ground for disputes.
Choosing the Right Team: Contractor Selection & Agreements: Your contractors are your partners in this venture. Thoroughly vet potential contractors - check references, review past work, and verify licenses and insurance. A solid contract is equally crucial, outlining scope, timeline, payment terms, and dispute resolution processes.
Communication is Key: Establishing a Project Communication Plan: How will information flow between the owner, architect, contractor, and subcontractors? A clear communication plan, including regular meetings and reporting procedures, fosters transparency and accountability.
Ultimately, the more time and effort invested in Phase 1, the smoother and more successful the rest of your construction project will be.
Phase 2: Site Preparation - Clearing the Way
Before any structure can rise, the groundwork - quite literally - must be laid. Site preparation is far more than just leveling the land; it's a crucial phase encompassing safety, environmental responsibility, and ensuring a stable foundation for the entire project.
This phase typically begins with site clearing, which involves removing existing vegetation, trees, and debris. Depending on the site's history, this might also include the demolition of any existing structures. Proper disposal of removed materials is essential, adhering to local regulations and prioritizing recycling whenever possible.
Following clearing, demolition, if needed, requires careful planning. Asbestos surveys are often mandatory prior to demolition to protect both the workforce and the surrounding environment. Controlled demolition techniques, sometimes involving specialized equipment, minimize noise, dust, and potential hazards.
Erosion and sediment control is a critical component of site preparation. Implementing measures like silt fences, hay bales, and sediment basins prevents soil from washing away, protecting nearby waterways and preventing environmental damage. These controls are not just about compliance; they've a direct impact on the project's budget by preventing delays and rework.
Next comes grading and excavation. This involves shaping the land to the desired contours, establishing proper drainage, and creating the necessary space for the foundation. Accurate surveying and precise earthmoving are key to achieving the correct elevations and ensuring the building's stability. Geotechnical reports, prepared earlier, guide these processes, informing decisions about soil compaction and any necessary stabilization techniques.
Finally, utility identification and relocation is paramount. Underground utilities - gas lines, water pipes, electrical cables - need to be identified, marked, and potentially relocated to avoid damage during construction. This is often a collaborative effort involving utility companies and specialized locating services. A thorough assessment upfront can save significant time and expense later in the project.
Phase 3: Foundation & Substructure - Building on Solid Ground
The foundation is arguably the most critical element of any construction project. It's the bedrock upon which the entire structure rests, directly influencing its stability, longevity, and resistance to environmental factors. A poorly constructed foundation can lead to significant problems down the line - cracks, settling, and costly repairs. This phase isn't just about pouring concrete; it's about meticulous planning, precise execution, and unwavering attention to detail.
Key Tasks & Considerations:
- Excavation & Footing Preparation: Accurate excavation is paramount. Ensure the excavation depth aligns perfectly with the design specifications and local building codes. The footing - the base of the foundation - must be properly compacted and leveled to provide a stable platform.
- Reinforcement & Concrete Pouring: Proper steel reinforcement (rebar) placement is essential for concrete strength and crack resistance. The concrete mix must meet the specified grade and be poured in layers to prevent air pockets and ensure uniform curing. Consider using concrete testing to verify its strength and quality.
- Waterproofing & Damp-proofing: Moisture intrusion is a major threat to foundations. Implementing robust waterproofing and damp-proofing systems - such as membranes, sealants, and drainage boards - is crucial for preventing water damage and protecting the structure from mold and corrosion. Consider the local soil conditions and groundwater table when selecting the appropriate waterproofing system.
- Curing Process: Proper concrete curing is vital for achieving its maximum strength and durability. Maintaining consistent moisture and temperature levels during the curing process - typically for at least 7 days - is essential. Methods like covering the concrete with plastic sheeting or applying a curing compound can help maintain optimal conditions.
- Backfilling & Compaction: Backfilling around the foundation walls must be done carefully, using appropriate materials and compacting in layers to prevent settling and ensure stability. Avoid using organic materials that can decompose and create voids.
Potential Challenges & Solutions:
- Unstable Soil: If the soil is unstable or contains a high water table, specialized foundation techniques like piling or slab-on-grade construction may be necessary.
- Weather Delays: Freezing temperatures or heavy rain can significantly impact concrete curing and backfilling. Plan accordingly and use protective measures to mitigate these risks.
- Unexpected Obstacles: During excavation, you may encounter buried utilities or other unforeseen obstacles. Have contingency plans in place to address these challenges efficiently.
Phase 4: Framing & Structure - Erecting the Framework
The framing and structure phase is where the building truly begins to take shape, transitioning from a collection of foundations and rough outlines to a recognizable form. This stage focuses on creating the skeletal system of the project, and meticulous planning and execution are paramount for structural integrity and future ease of work.
Key Tasks and Considerations:
- Floor Framing: This involves laying out and installing floor joists, beams, and subflooring. Ensuring precise measurements and proper fastener usage is critical for a level and stable base. Consider the span requirements and load-bearing capacity of the flooring system.
- Wall Framing: This includes constructing exterior and interior walls using studs, top plates, and bottom plates. Pay close attention to wall height, window and door openings, and the integration of structural elements like shear walls. Accurate layout and plumbness are vital.
- Roof Framing: The roof structure is arguably the most complex framing element. Whether employing traditional rafters, trusses, or engineered roof systems, proper design and installation are essential for weather resistance and overall stability. Wind and snow load calculations should guide this process.
- Sheathing & Bracing: Once the framing is complete, sheathing (typically plywood or OSB) is applied to walls and roofs to provide lateral stability and a surface for exterior finishes. Bracing elements, like diagonal bracing or hold-downs, are installed to resist racking forces and ensure the structure's ability to withstand lateral loads.
- Quality Control: Throughout the framing process, rigorous quality control measures are necessary. Regularly check for plumbness, squareness, and proper fastener placement. Correct any issues immediately to avoid costly rework later. A thorough inspection at the end of this phase is highly recommended.
Common Challenges & Solutions:
- Inaccurate Layout: Double-check all measurements before cutting and installing framing members. Utilize laser levels and string lines to ensure accuracy.
- Plumb and Square Issues: Regularly use a level and square to verify that walls and framing members are properly aligned. Make adjustments as needed.
- Fastener Problems: Ensure the correct type and size of fasteners are used for each application. Follow manufacturer's recommendations for spacing and installation.
Phase 5: Rough-In Plumbing & Electrical - The Infrastructure Takes Shape
This phase marks a critical point in your construction project. Before walls are closed up and finished, the foundational infrastructure - your plumbing, electrical, and HVAC systems - needs to be in place and inspected. It's essentially the skeleton of your building's functionality, and any errors now can be incredibly costly to fix later.
What's Involved?
Rough-in plumbing involves running all the necessary pipes for water supply (hot and cold) and drainage. This includes lines for sinks, toilets, showers, bathtubs, and any other fixtures planned for your project. Simultaneously, electricians are running wiring and conduit throughout the structure, preparing for outlets, switches, lighting fixtures, and appliances. HVAC ductwork is also installed at this time, ensuring proper ventilation and climate control.
Why Inspection is Paramount:
This isn't just about getting pipes and wires where they need to be. It's about ensuring they're properly sized, secured, and compliant with local building codes. Local inspectors will be scrutinizing the work, looking for things like:
- Correct Pipe Size & Material: Ensuring adequate water pressure and drainage capacity.
- Proper Slope for Drainage Lines: Preventing clogs and backups.
- Secure Conduit & Wiring: Protecting electrical components and preventing hazards.
- Adequate Grounding: Essential for electrical safety.
- Compliance with Codes: Adhering to all relevant plumbing and electrical codes.
Potential Issues & How to Avoid Them:
- Incorrect Pipe Routing: Carefully plan pipe routes to avoid obstacles and ensure accessibility for future maintenance.
- Improper Wire Gauge: Using wires that are too small for the load can create a fire hazard.
- Missed Connections: Double-check all connections to prevent leaks and electrical shorts.
- Lack of Support: Properly support pipes and wiring to prevent sagging and stress.
Pro Tip: Don't rush this phase! A thorough inspection now can save you time, money, and headaches down the road. Document everything with photos and notes for your records.
Phase 6: Insulation & Drywall - Creating the Enclosure
This phase represents a significant shift in the project - the transition from structural elements to creating the comfortable, enclosed space occupants will experience. Proper insulation and drywall installation are essential not only for aesthetics but also for energy efficiency, sound control, and overall building performance.
Why Insulation Matters:
Insulation's primary purpose is to resist heat flow. Correct installation, using the appropriate R-value for your climate zone and building type, minimizes energy loss in winter and heat gain in summer. This translates to lower utility bills and a more comfortable interior environment. Don't underestimate the importance of sealing air leaks concurrently with insulation; even the best insulation is ineffective if air can simply bypass it. Common insulation types include fiberglass batts, spray foam, cellulose, and rigid foam boards, each with its own advantages and installation requirements.
Drywall Installation: Beyond the Surface
Drywall (also known as gypsum board) provides a smooth, paintable surface and contributes to fire resistance. Accurate hanging, taping, and finishing are vital for a professional look and a durable wall system. Common issues to avoid include improper screw placement (causing popping and crumbling), inconsistent taping (resulting in cracks), and inadequate sanding (leaving visible imperfections). Ensure that all joints are properly mudded and sanded to create a seamless transition between sheets. Consider moisture-resistant drywall in areas prone to dampness, such as bathrooms and basements. Finally, don't forget about corner bead installation - it's crucial for protecting the edges of drywall and preventing damage.
Phase 7: Interior Finishes - Adding Style and Functionality
This phase is where your project truly begins to feel like a home or a functional space. Moving beyond the structural elements, interior finishes focus on aesthetics, comfort, and usability. Careful planning and precise execution are key, as errors in this stage can be costly and disruptive to correct.
Flooring: A Foundation of Style
The flooring you choose sets the tone for the entire interior. Consider durability, maintenance, and aesthetic compatibility with the overall design. Options range from classic hardwood and elegant tile to practical carpet and modern vinyl. Proper subfloor preparation is critical for a smooth and long-lasting installation.
Walls and Ceilings: More Than Just Paint
While a fresh coat of paint can dramatically transform a space, don't underestimate the impact of textured walls, wallpaper, or decorative finishes. Consider factors like lighting, room size, and the desired atmosphere. Proper priming and surface preparation are essential for a flawless finish.
Cabinetry and Millwork: Custom Touches
Cabinets in kitchens and bathrooms, along with trim and other millwork, add a layer of sophistication and functionality. Precise measurements and skilled installation are crucial for a professional result. Consider custom options to maximize storage and personalize the space.
Fixtures: The Finishing Details
Lighting fixtures, door hardware, and other fixtures are the "jewelry" of the interior. They contribute significantly to both aesthetics and usability. Ensure proper electrical connections and secure installation for optimal performance and safety.
Quality Control is Paramount: Throughout this phase, meticulous attention to detail and rigorous quality control are essential. Regular inspections should be conducted to ensure that all finishes are installed correctly and meet the specified standards. Don't hesitate to address any concerns promptly to avoid future problems.
Phase 8: Exterior Finishes - Protecting and Beautifying
The exterior finishes are more than just aesthetics; they've been meticulously planned to protect your investment from the elements and contribute to the curb appeal of the property. This phase involves a series of interconnected tasks, each crucial for ensuring longevity and visual appeal.
First, the installation of the chosen siding material - whether it's durable vinyl, classic wood, or elegant brick - is performed, adhering to manufacturer specifications and local building codes. This ensures a weather-tight seal and a professional finish. Next, windows and exterior doors are carefully fitted, ensuring proper alignment and energy efficiency. Attention to detail here prevents drafts and reduces energy costs down the line. The roofing installation follows, utilizing high-quality materials and professional techniques to create a watertight barrier against rain, snow, and wind. Finally, the exterior surfaces receive their finishing touches - whether it's a fresh coat of paint, a sealant, or another protective layer - ensuring a lasting and beautiful result that complements the overall design. Throughout this phase, regular inspections are conducted to verify quality and adherence to the project plans.
Phase 9: Mechanical, Electrical, and Plumbing (MEP) Systems - Bringing Everything to Life
The Mechanical, Electrical, and Plumbing (MEP) systems are the vital arteries and veins of any building. This phase isn't just about installing equipment; it's about integrating all the previously laid groundwork into a fully functional and efficient system. This is where the building truly begins to "come alive."
This phase includes the meticulous installation of key components like HVAC units (heating, ventilation, and air conditioning), electrical panels and wiring, water heaters, plumbing fixtures, and gas lines. Each installation must adhere to strict codes and regulations to ensure safety and performance.
Beyond installation, rigorous testing and commissioning are paramount. This involves systematically testing each component and the integrated system as a whole, verifying that they operate precisely as designed and according to specifications. Pressure tests for plumbing, electrical circuit testing, and HVAC system efficiency checks are all crucial steps.
Proper documentation and coordination are essential throughout this phase. As-built drawings are updated to reflect any changes made during installation, and close collaboration between the mechanical, electrical, and plumbing contractors is critical to avoid conflicts and ensure a seamless handover to the building owner. This phase demands precision, expertise, and a commitment to delivering a safe, reliable, and high-performing MEP system.
Phase 10: Landscaping and Site Restoration - Completing the Picture
Landscaping and site restoration aren't just about aesthetics; they's a critical component of a successful construction project. This phase focuses on transforming a construction site into a functional and attractive outdoor environment, while also addressing any environmental impact from the building process.
The process typically begins with careful grading and topsoil placement to ensure proper drainage and a stable base for planting. Selecting the right plants - considering climate, soil conditions, and desired aesthetic - is key to long-term success. Think beyond just pretty flowers; strategically placed trees offer shade, privacy, and enhance property value. Irrigation systems, whether automated or manual, ensure plants receive adequate moisture, particularly in drier climates.
Beyond planting, hardscaping elements like walkways, patios, driveways, and retaining walls contribute to the overall design and usability of the space. These should be constructed with durable materials that complement the building's style and withstand local weather conditions. Proper drainage is paramount - directing water away from the building's foundation and preventing erosion is non-negotiable.
Finally, this phase includes restoring any disturbed areas of the site. This may involve seeding bare ground, replacing topsoil, and ensuring proper erosion control measures are in place to protect the surrounding environment. A well-executed landscaping and site restoration plan not only enhances the property's curb appeal but also contributes to its long-term sustainability and value.
Phase 11: Final Inspections and Approvals - Ensuring Compliance
Reaching this phase signifies immense progress, but it's crucial to approach it with meticulous attention to detail. Final inspections aren't merely a formality; they're a vital safeguard ensuring your project adheres to all applicable codes, regulations, and safety standards. Failing to pass these inspections can lead to costly delays, rework, and even legal issues.
Understanding the Inspection Process
Typically, a series of inspections will be required, often involving multiple parties: local building inspectors, fire marshals, and sometimes specialized inspectors for specific systems (electrical, plumbing, HVAC). The exact sequence and required inspections will depend heavily on your project's scope and location. Your contractor should be fully aware of these requirements and guide you through the scheduling and preparation.
Key Areas of Focus During Final Inspections:
- Structural Integrity: Verifying the structural elements are sound and meet load requirements.
- Electrical Safety: Assessing wiring, grounding, and appliance connections for safety and code compliance.
- Plumbing Functionality: Ensuring water supply, drainage, and fixture operation are correct and leak-free.
- HVAC System Performance: Evaluating heating, ventilation, and air conditioning system efficiency and safety.
- Fire Safety: Confirming fire alarms, sprinkler systems (if applicable), and emergency exits meet code.
- Accessibility: (Where applicable) Ensuring compliance with accessibility guidelines for individuals with disabilities.
Addressing Deficiency Notices:
Inevitably, inspectors may identify deficiencies or areas requiring correction. Don't panic! This is a normal part of the process. Carefully review the deficiency notice, discuss it with your contractor, and promptly implement the necessary corrections. Be sure to request reinspection once the corrections are completed. Thorough documentation of all corrections is essential.
Securing Your Certificate of Occupancy (CO):
The ultimate goal is to obtain a Certificate of Occupancy (CO). This formal document signifies that the building is safe and suitable for its intended use. Without a CO, you cannot legally occupy or operate within the building. Your local building department will issue the CO once all inspections have passed and all necessary documentation is submitted. Treat this document as a critical asset and keep it readily accessible.
Phase 12: Project Closeout - From Construction to Completion
Project closeout isn't just about stepping back and admiring the finished product. It's a crucial, often overlooked, phase that formalizes the transition from construction to occupancy and ensures long-term success. This final stage encompasses a series of critical tasks, each contributing to a smooth handover and setting the foundation for future maintenance and operation.
Formal Handover and Documentation
The first step is formally handing over the project to the client or building owner. This involves a walkthrough to confirm all work meets the agreed-upon specifications and to address any outstanding items. A formal acceptance document should be signed, acknowledging the completion of the project and the client's satisfaction (pending resolution of any remaining punch list items). Organize and compile all project documentation, including:
- As-Built Drawings: These updated drawings reflect any changes made during construction and are essential for future maintenance and renovations.
- Operation and Maintenance Manuals: Detailed instructions for operating and maintaining all equipment and systems.
- Warranty Documentation: Complete records of warranties for materials, equipment, and workmanship. Ensure these are readily accessible to the client.
- Permit Closures: Verify all required inspections have been completed and permits officially closed out with the relevant authorities.
- Final Payment & Lien Releases: Process the final payment to contractors and subcontractors and obtain lien releases to protect the client from potential legal claims.
Beyond the Paperwork: Ensuring Long-Term Value
Project closeout isn't solely about paperwork. Consider these additional steps:
- Training: Provide training to building staff on the operation and maintenance of building systems.
- Post-Occupancy Evaluation: A few months after occupancy, conduct a brief evaluation to identify any unexpected issues or opportunities for improvement.
- Project Review & Lessons Learned: Hold a post-project review meeting with the project team to discuss successes, challenges, and areas for improvement on future projects. This fosters a culture of continuous improvement.
Effective project closeout demonstrates professionalism, protects your client's investment, and sets the stage for a positive long-term relationship. It's the final, and arguably most important, step in the construction journey.
Resources & Links
- Association of Project Management Professionals (APM) : A professional organization for project managers, offering resources, certifications, and templates that can be adapted for construction projects. Good for understanding PM methodologies.
- Constructability.com : Provides a wide range of construction project management software and resources, including checklists and best practices. Focuses on efficiency and risk mitigation.
- BuilderTrend : Construction management software with features like checklists, scheduling, and communication tools. Provides insights into how to organize project steps.
- Procore : Another leading construction management software platform that offers checklists, document management, and collaboration tools. Useful for understanding modern project workflows.
- Occupational Safety and Health Administration (OSHA) : Essential for understanding safety regulations and incorporating safety checklists into your construction project plan. Key to ensure legal compliance.
- Federal Emergency Management Agency (FEMA) : Provides information and resources on disaster preparedness and resilience, especially important for construction projects in areas prone to natural disasters. Useful for risk assessment.
- Associated General Contractors of America (AGC) : A leading construction trade association, offering resources, training, and advocacy for construction professionals. Provides industry insights and best practices.
- North American Construction Group (NABCG) : Provides construction management services and information, offering perspectives on different project phases and potential challenges. Provides unique perspectives on the construction phases.
- PlanRoom : Provides construction document management and bidding tools, offering insights into project documentation and communication processes. Helps understand document management in construction.
- Autodesk : Developer of popular construction software like AutoCAD and Revit. Provides insights into building information modeling (BIM) and digital construction workflows. Useful for understanding technological advancements.
- BidSketch : Software primarily used for construction bids, but it can offer insight into early phases of project planning and documentation.
- AEC Daily : An online platform for the architecture, engineering, and construction (AEC) industry. Provides articles, case studies, and product information related to construction projects.
- The Balance Small Business (Construction Project Checklist Example) : Provides a starting point checklist article, useful to gain insight on creating a simple checklist template. Not as comprehensive as a full PM approach.
Frequently Asked Questions
What is a construction project checklist and why do I need one?
A construction project checklist is a comprehensive list of tasks, milestones, and inspections needed to complete a construction project successfully. It ensures nothing is missed, promotes organization, minimizes errors, and helps keep the project on schedule and within budget. It's a vital tool for managing complexity and risk.
What sections are typically included in a construction project checklist template?
Common sections include pre-construction planning, site preparation, foundation work, framing, mechanical, electrical, and plumbing (MEP), finishes, inspections, permits, safety, and closeout. Our template covers these and more, offering customizable categories.
Is this checklist template customizable to fit different project types?
Absolutely! The template is designed to be highly adaptable. You can add, remove, or modify tasks to align with the specific requirements of your residential, commercial, or infrastructure project. We've included placeholders for you to add custom details.
What file format is the checklist template available in?
The template is available in both Microsoft Excel (.xlsx) and Google Sheets formats. This allows for easy editing and collaboration across your team regardless of their preferred software.
How can I use this checklist template to improve communication and collaboration?
Share the checklist with all stakeholders - project managers, subcontractors, inspectors - to ensure everyone is on the same page. Track progress, assign responsibilities, and document updates directly within the checklist for transparent communication. The shared format facilitates real-time collaboration.
What's the difference between a checklist and a Gantt chart?
A checklist is a sequential list of tasks to be completed. A Gantt chart is a visual representation of a project schedule, showing tasks, timelines, and dependencies. While checklists ensure tasks are done, Gantt charts show *when* they should be done and how they relate to each other. They're complementary tools; the checklist can be the foundation for your Gantt chart.
Does the checklist template include safety checks?
Yes, we've included a dedicated section for safety checks throughout the construction process. This includes hazard identification, PPE requirements, and compliance with safety regulations. Remember to tailor these checks to your specific site conditions and safety protocols.
How do I track progress using the checklist template?
The template includes columns for status updates, completion dates, and responsible parties. Utilize these fields to track progress, identify delays, and ensure accountability. You can also add notes to document any issues encountered and actions taken.
What kind of projects is this checklist template suitable for?
This template is suitable for a wide range of construction projects, from small residential renovations to large-scale commercial builds. It's adaptable enough to be useful regardless of project size or complexity.
Where can I find additional resources for construction project management?
We're glad you asked! We're constantly updating our resources. Check our website for articles, guides, and other templates related to construction project management. We also recommend exploring industry publications and online forums.
Found this Article helpful?
Project Management Solution Demo
Deliver projects on time & within budget! ChecklistGuro streamlines task management, collaboration, & progress tracking. Enhance visibility & boost team productivity. Manage it all with our Work OS.
Related Articles
Construction Material Inventory Tracking Checklist Template
The Ultimate Site Mobilization Readiness Checklist Template
Kanban System Review Checklist: A Template for Continuous Improvement
The Ultimate Project Kick-Off Meeting Checklist Template
Streamline Your Project: The Ultimate Utilities Coordination Checklist Template

Unlock Value: Your Free Value Engineering Checklist Template
Your Paving Project's Blueprint: A Free Checklist Template
The Ultimate Project Turnover Checklist Template
We can do it Together
Need help with
Project Management?
Have a question? We're here to help. Please submit your inquiry, and we'll respond promptly.